|
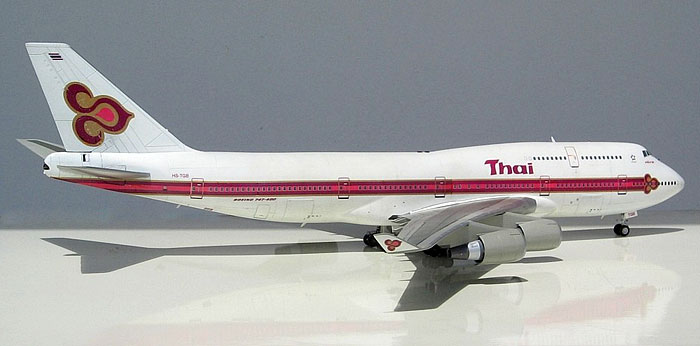
Revell's 1/144
scale
B747-400 Thai
Airways
by George Ting
|
 |
|
Boeing
747-400
Thai
Airways,
Tango
Golf
Bravo |

HyperScale is
proudly supported by Squadron
This is the
current offering
by Revell
(Germany) of
their airliner
series B747-400
in 1/144 scale.
The kit comes
with a sharp
printed
Lufthansa decal
set and detail
markings. It’s
really nice.
There are lots
of small decal
stencil markings
that are
included and
described in the
box as ‘super
decals’.
I opted to
choose another
airline livery
decal. I made
the decision to
create Thai
Airways. It’s
simple but
elegant livery.
So I ordered a
set from
F-Decals, an
Airliner decal
specialist in
1/144 scale.
I began
construction of
the kit by
filling up the
windows on each
halves of the
fuselage with
putty. Then a
suitable lead
weight was
placed forward
in the nose to
counter balance
the effect of
tail sitting
once the model
was done.
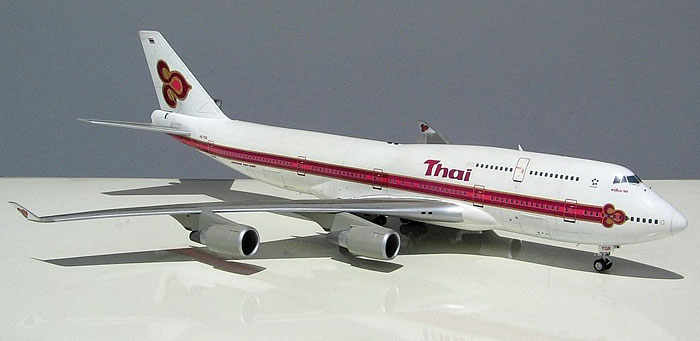
The main wings
was cut and
repositioned to
a correct angle
since the kit
has a totally
wrong angle of
incidence on the
main wings.
The fuselage
main wing box
was further
strengthened
with cross beams
made from scrape
plastic rods. I
discovered the
main and
horizontal wings
are way too
thick and I
sanded them down
to a thinner
profile.
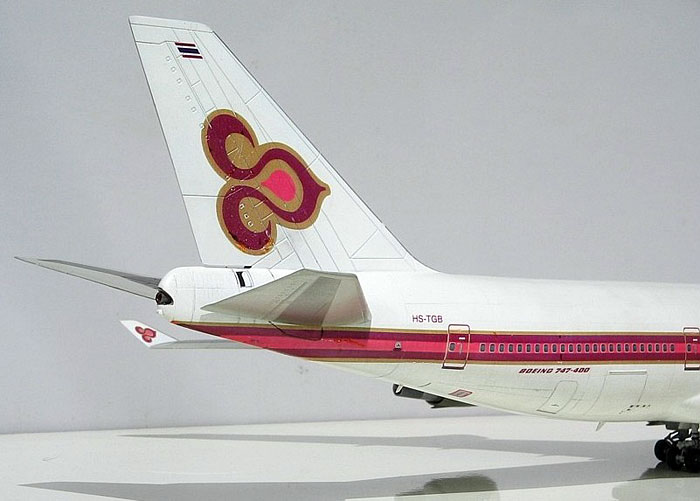
Extra missing
detail like
scuff plates on
the horizontal
tail wing was
added using
plastic card cut
in shape and
glue in
position.
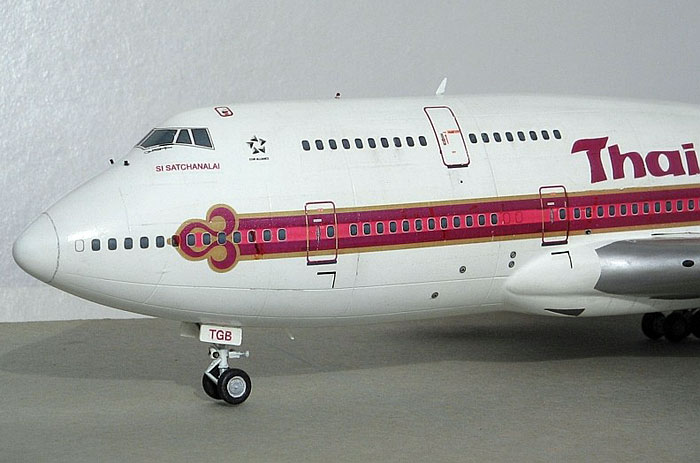
With the main
assembly of
fuselage/wing
was completed,
more sanding &
puttying
followed. The
Revell B747-400
has an incorrect
nose profile and
it took me more
time to correct
it. Plastic rods
was place in the
nose as drilled
for representing
tiny pitot tubes
sensors.
After months and
months of
preparation the
model was then
ready to paint.
Primer coat was
then airbrushed
and the model
inspected for
faults and
blemishes.
Once everything
is satisfactory,
I shot the base
coat of flat
white and sanded
them smooth for
decaling.
The application
of many tiny
decals is very
tedious and time
consuming. I had
to take a few
breaks to
complete the
model with
decals.
For me, it was a
test of patience
and careful
application that
makes a good
decaling job.
Final
Assembly
and
Finishing
Touches
|
Once the decals
are allowed to
dry for couple
of days, I seal
them with a coat
of clear gloss
lacquer and also
the other parts
like the four GE
engines.
Light sanding
was done again
to bring the
model to semi
gloss sheen,
then small
detail parts
like aerials,
gear doors etc
were aded to the
model.
Light weathering
was applied
using paste and
pencil. A final
light mist coat
of clear seals
everything
intact.
I did the
landing gears
and detailed
them during some
point then it
was glued firmly
to the model.
It took me a
year to get this
model finished,
but I’m happy
with the result
other than the
faults and
inaccuracies
that this kit is
known for.
Click the
thumbnails below
to view larger
images:
[../../photogallery/photo00013581/real.htm]
Model, Images &
Text Copyright
©
2007 by George
Ting
Page Created 26
March, 2007
Last Updated
24 December, 2007
Back to
HyperScale Main Page |
 Home
| What's New |
Features |
Gallery |
Reviews |
Reference |
Forum |
Home
| What's New |
Features |
Gallery |
Reviews |
Reference |
Forum |