|
Hasegawa's 1/48 scale
Messerschmitt Bf 109 G-10
by Brett Green
 |
Messerschmitt Bf 109 G-10
II/JG52, Neubiberg Germany, May 1945 |

Hasegawa's 1/48
scale Messerschmitt Bf 109 G-10 is available online from Squadron.com
This article was first published on HyperScale in
2001. This week, I decided to repair some of the paint damage incurred when the
model was transported back from the USA in 2001. I took some new photographs,
which appear here, and made some additional notes about the recent paint
refurbishment at the end of the article.
Late-War
Improvements to the Bf 109
The Messerschmitt Bf 109 G-10 was an attempt to improve the performance and
extend the service life of this crucial German fighter. Increasing weight and
the need for additional ordnance was taxing the capabilities of the standard
Daimler Benz DB 605 A engine in the Messerschmitt Bf 109 G-6.
The DB 605 D would supply up to 1,800HP to the Bf 109 G-10 (2,000HP using
emergency power), compared to 1,475HP available to the Bf 109 G-6 from the DB 605
A.
Externally, the new powerplant featured a larger supercharger, modified
engine mounts, a deep oil cooler and a larger crankcase. The forward fuselage
was redesigned to accommodate these changes. Large, streamlined bulges on both sides of the
engine cowl replaced the familiar cowl gun breech blisters of the Bf 109 G-5 and
G-6. A fairing was fixed to each fuselage side below the cockpit to improve
airflow. These combined to give the nose of the new variant a more streamlined
appearance. Two circular blisters were also added to the lower nose to permit
clearance for the larger crankcase and oil lines. A deeper housing for the new
oil cooler was another obvious change.
Detail photographs of these features may be seen in
“Late-War Bf
109 G/K in Detail - Cowl Bulges for DB 605AS series & D Powered Bf 109s”, Part
One and
Part Two, in HyperScale’s Reference Library.
Raw materials were desperately short by the time production of the Bf 109 G-10
commenced in October 1944. The G-10 was therefore produced using components from
earlier airframes. This led to many variations in production, including
alternate configurations for the tail wheel, aerial, cockpit air intakes, main
wheels, wing bulges and tail surfaces.
The Colours of "Rosemarie"
Non-standard paint finishes were also common due to a combination of these
hybrid production techniques, shortage of paint stocks, the increasing variety
of theatre markings and the introduction of new camouflage instructions from the
RLM.
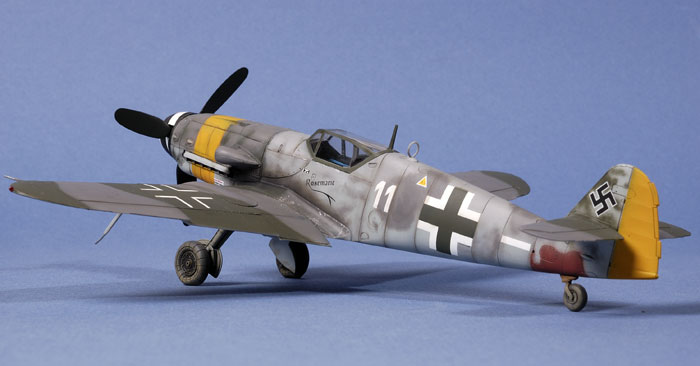
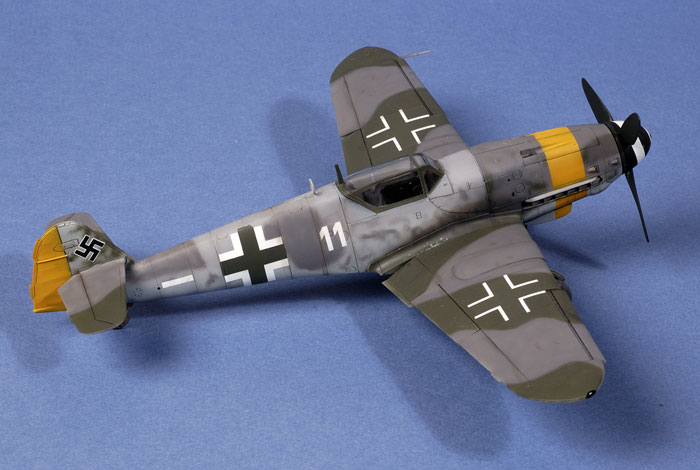
“White 11” was a Messerschmitt Bf 109 G-10 attached to II./JG 52. This
aircraft featured wide wheels, large wing bulges and the short tail wheel. It
was one of many Luftwaffe fighters that surrendered in a massed fly-in to
Neubiberg on 8 May 1945. Two photos of this aircraft were supplied by Charlie
Swank for my 2001 book, “Augsburg’s Last Eagles”, published by Eagle Editions.
The aircraft in the photos displays a range of fascinating colour
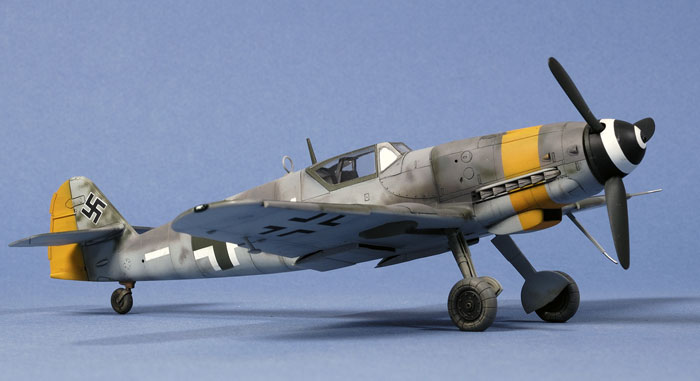
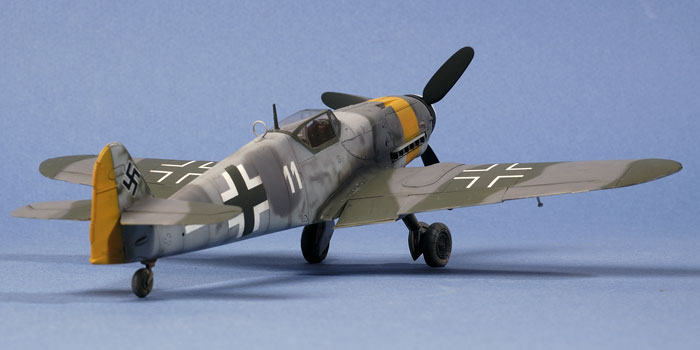
characteristics. It wears a yellow rudder and the wide yellow cowl band of
Luftflotte 4. The upper fuselage appears to be finished in a very pale colour in
combination with RLM 75 Grey-Violet and RLM 83 Dark Green. The upper cowl is a
dark solid colour with a darker mottle. This is possibly a replacement from
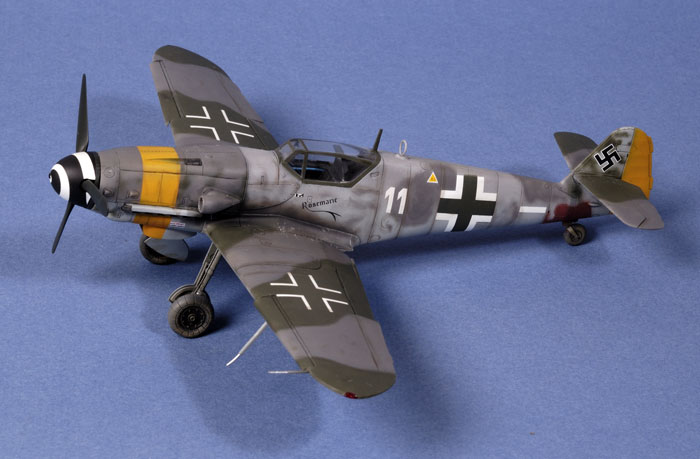
another machine. Upper wings seem to be a standard finish of RLM 75 and RLM 83.
To top this off, the aircraft wears the name “Rosemarie” in flowing script under
the port side of the cockpit.
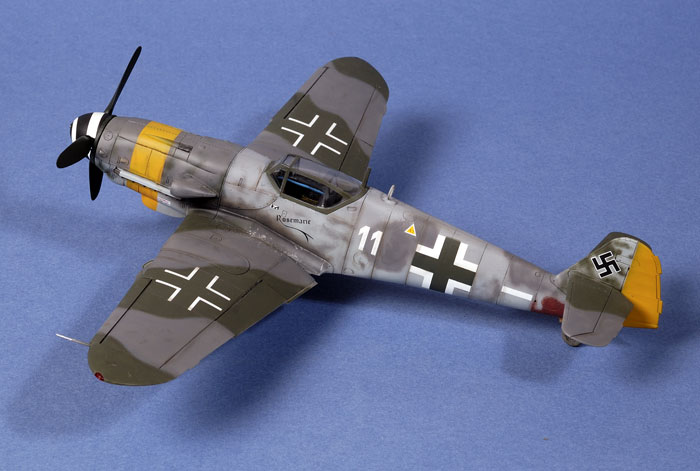
Despite staring at these photos for considerable time while preparing the
book, I noticed an additional peculiarity when I was preparing to build this
model. There is a large dark patch on the lower empennage, just above the
tail wheel. I assume that this is a result of a recent repair. The patch is
probably painted in red primer or a dark camouflage colour.
There are four options available to modellers wanting to build a 1/48 scale
Messerschmitt Bf 109 G-10 – Revell, Hobbycraft, Fujimi and Hasegawa. In my
opinion, Hasegawa’s kit is the best of the four.
Hasegawa’s 1/48 scale Messerschmitt Bf 109 G-10 is nicely detailed and
generally accurate. The asymmetrical cowl bulge looks good, and other
characteristics including the deep oil cooler, tall tail and big upper wing
bulges are also present. Options include the choice of short or long tailwheel
struts. The engineering of the kit also makes it a simple matter to swap small
wing bulges for the large version supplied in the kit.
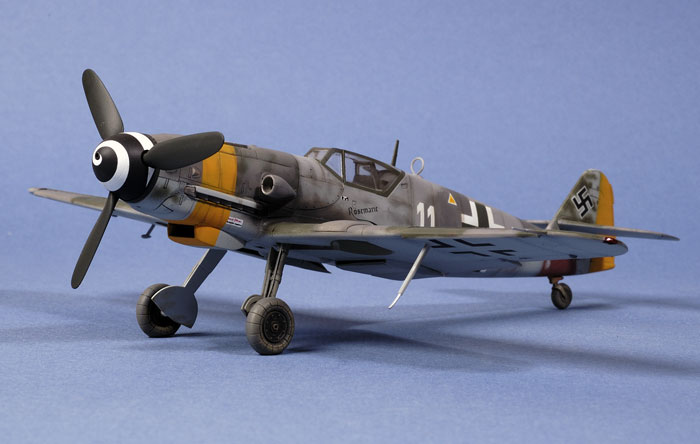
The only real shortcoming is the slightly peculiarly-shaped VDM9 propeller blades
and spinner.
I wanted to build this kit quickly so I did not spend too much time on extra
detailing. I added a few wires and some plumbing to the cockpit sidewalls, and
an Airwaves etched-brass harness to the seat.
Basic construction went frighteningly fast. The cockpit, wings, tail
surfaces and fuselage were assembled during a single session of less than 4
hours. Not a spot of putty was required, but I did smear a little “Mr Surfacer”
along the upper wing root to blend the join.
Slats and flaps are supplied separately. I depicted them slightly dropped.
I decided to substitute Ultracast’s VDM9 propeller blades for the kit parts.
These made a noticeable difference. I also used Ultracast’s Bf 109F/G/K resin
exhausts – another drop-fit replacement. These feature lovely weld-seam detail,
and each exhaust stack is hollowed out at the end. I attached a length of
fusewire to each main gear leg to represent hydraulic lines, and added “True
Details” resin wheels.
In preparation for painting I masked the canopy using a “Black Magic” mask
from Meteor Productions. I also painted the main wheel hubs gloss black before
masking them with Blu-Tack. I find this is a simple and effective method for
masking wheels.
As was usual back in 2001, I commenced the paint job by spraying panel lines in Tamiya German
Grey.
I then sprayed the centre of the nose and the whole rudder with Tamiya Flat
Yellow. Although Gunze produce a specific colour match for RLM 04 Yellow, I find
that their colour is quite translucent and takes forever to dry. In comparison,
Tamiya’s Flat Yellow provides good coverage using a few light coats, and dries
almost on contact with the surface of the model. I added a spot of Red to bring
the Tamiya Yellow closer to RLM 04. When dry, the rudder and nose band were
masked using strips of Tamiya tape.
Next, I sprayed the lower surfaces in Gunze H417 RLM 76 Light Blue. I
interpreted the pale upper fuselage colour as a light grey. I mixed a batch of
paint to match RLM 77 using Gunze acrylics and painted the fuselage spine.
The mid-fuselage was masked and I sprayed the upper cowl in Gunze H69 RLM 75.
I also used this colour to mottle the fuselage and paint the upper wings Gunze
H423 RLM 83 was then applied freehand for the upper wing disruptive pattern and
additional mottling on the fuselage and tail.
I assumed that the repaired patch above the tailwheel was painted in red
primer. I mixed a small batch of flat dull red for this job.
Eagle Editions released a decal sheet - EagleCals EC#26 - associated with my
book. I used the markings for Rosemarie from this sheet. Although the fuselage
crosses are supplied with a green centre, I decided to mask and spray the inside
of my crosses to achieve a perfect match with the RLM 83 Dark Green used
elsewhere on the model. This also permitted me to lightly feather the edges of
the green at the edges of the crosses.
The decals were otherwise applied per instruction. They performed very well –
even the potentially tricky spinner spiral.
I applied a light wash of thinned black oil paint to highlight panel lines,
followed by some “chipping” of walkways using Tamiya Chrome Silver enamel paint.
The exhaust stain was a thin, dirty mix of Tamiya Flat Black, Deck Tan and Flat
Base.
The model was finished off with a coat of Gunze Flat Clear.
This was one of two kits that I took to the IPMS Nationals in Chicago during
2001 as display models for the
Eagle Editions table. I packed the models carefully using foam chips and was
delighted that the models made it to the USA and back without any major damage.
However, closer examination on my return revealed that the paint had suffered
in transit. It seems that the foam chips reacted with the acrylic paint, leaving
a “crazing” effect in a number of places. In future, I will wrap the kit in
tissue paper before packing it in the chips!
I was also reminded of the dynamic nature of research and observation while I
was in Chicago. Somebody drew my attention to one of the photos of “Rosemarie”
and pointed out a shape under the fuselage. I had previously assumed that this
shape was probably the starboard-side radiator flap, but on closer examination
it seems possible that it is, in fact, an ETC50 bomb rack under the
mid-fuselage. Back to the drawing board again!
Regardless of late-breaking information and degrading paint, I enjoyed this
little project. It was real tonic to complete a model so quickly and
effortlessly. Hasegawa’s Bf 109 G-10 is a gem of a kit, and there are many
fascinating colour options available for these late-war Gustavs.
This was the first Hasegawa Bf 109 G-10 that I built, but it will certainly
not be the last!
Redux 2007...
I wrote the above article nearly six years ago. The model was immediately
consigned to a storage box to await eventual repairs to the paint damage.
I have just recently acquired a metal bodied Aztek airbrush, and I was
looking for some plastic to test its performance. "Rosemarie" seemed to be an
ideal candidate.
I sanded the crazed paint smooth first using the fine, light grey
Mastercaster sanding stick, then polished the surface with Micro Mesh 3600 grade
cloth. The surrounding decals were masked with Tamiya tape (the tack was reduced
first by applying it to my forehead and removing it), and the damaged paint area
was sprayed using Gunze RLM 75. This fresh coat was a little darker than the
six-year-old base colour, so I mottled the paint to obtain an irregular finish
on the entire patch of paint. I also decided to sharpen up the demarcation
between the RLM 75 and RLM 83 on the wing upper surfaces. Once again, a heavy
irregular mottle of the fresh 75 colour was applied to the grey areas of the
upper wings.
I mixed up a small batch of a thin red-brown colour to spray along control
surface hinge lines, and in a few spots and streaks on the wings and fuselage.
While the colour was in the paint cup, I also improved the exhaust stains on
both sides of the fuselage.
I was never particularly happy with the finishing coat on this model - it
looked too shiny from day one. The canopy was therefore masked with Tamiya tape
and the entire airframe was treated to two coats of Polly Scale Flat Clear. This
delivered exactly the result I had been hoping for way back in 2001. All good
things come to those that wait!
A few extra "paint chips" were applied to the wing walk areas using a
Prismacolour silver pencil, then a fresh coat of Clear Green and Clear Red was
applied to the wing tip navigation lights.
Finally, I applied Tamiya pastel chalks to the sides of the main wheel tyres
and the tail wheel.
The total time spent to refurbish this paint job would not have exceeded 45
minutes.
Time well spent, I say.
Model, Images and
Article Copyright © 2007 by Brett Green
Page Created 23 July 2001
Last updated 24 December 2007
Back to HyperScale Main Page
Back to Features Page |
 Home
| What's New |
Features |
Gallery |
Reviews |
Reference |
Forum |
Home
| What's New |
Features |
Gallery |
Reviews |
Reference |
Forum |