|
Monogram's 1/48 scale
C-47 Skytrain
by
Jeroen Veen
|
 |
|
Douglas C-47 Skytrain |

HyperScale is proudly supported by
Squadron
For years now I wanted to build Monograms 1:48 Skytrain, but by the time
I seriously started looking for the kit it was very hard to find. When I
finally got my hands on one (through the discussion forum on
Hyperscale!) I was very excited.
Although old, Monogram did such a wonderful job on this model and the
basics are very good. I always thought the Skytrain could be made into
something really special, and from the beginning I was quite sure I
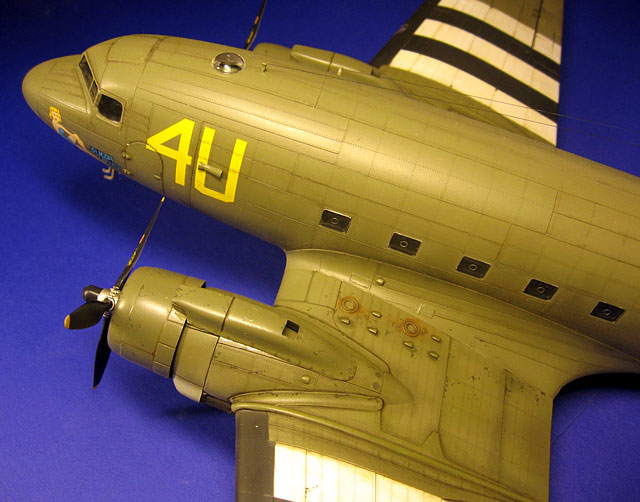
wanted to rescribe the entire kit. I know this is a bit of a
controversial decision: the panels of the Skytrain are overlapping, and
raised panel lines are as good as a representation of that as engraved
ones. But since engraved panel lines suit my painting style better and I
wanted to see if I could do it, I decided to give it a go. It was at
that time I got a couple of ‘Rosie the Riveters’ and yes… you’ve guessed
it… I wanted to use them too. I guess I just wanted to see how far I
could push this model, my patience and my luck…. and try to bring the
kit as close as I could get to modern day standards.
It’s not up to me to say if this has worked out, but I enjoyed the
whole experience tremendously.
Construction of the Skytrain starts with the cockpit, as usual. The
detail there is good, at least good enough for what is visible in the
end. Fit of the parts is good and all went along smoothly. Before I knew
it, I had the fuselage and wings ready as subassemblies. I started with
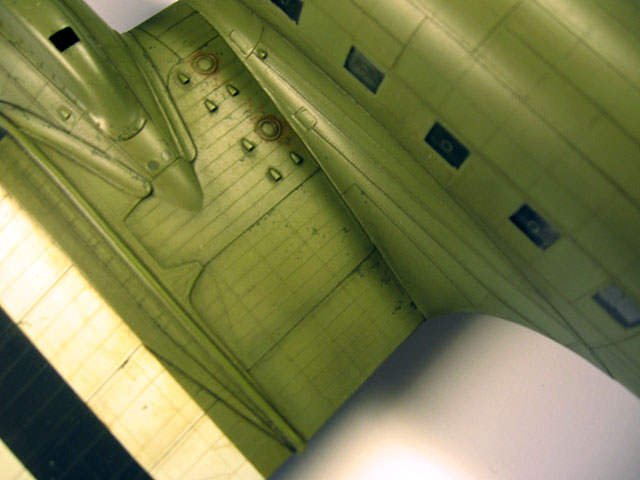
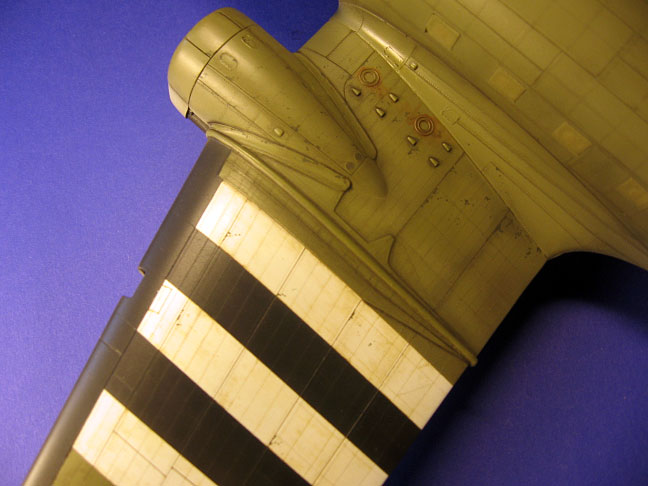
engraving the panel lines, small parts at a time. When you sand the
panel lines away carefully, you will be able to see the traces of where
they were and those can be used as a guide.
Using Dymo tape as a guide I started the engraving process, which
took me about two weeks, working on an average of two hours a day. The
results were pleasing to me, and I couldn’t wait for the next round of
riveting. I had found an article on the internet called ‘Pierre’s Gooney
Bird’. That was such a magnificent and well documented build that I
decided to use it as a guide for my riveting (and I had no other option,
because I couldn’t find any plans). Basically the same method was used:
Dymo taping the patterns and following them with “Rosie”….which leaves
you with sunken rivets, whereas the real thing has raised ones… oh well.
There went another two weeks of work… but the process was very rewarding
and satisfying, so I didn’t care to much.
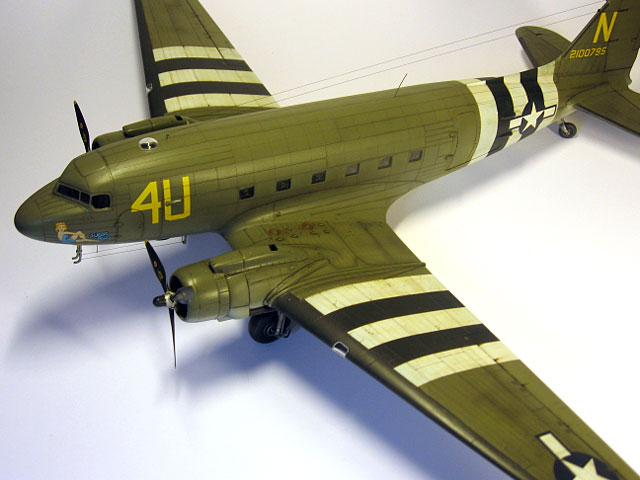
When all was done I added some details like engine wiring, a new
antenna system on the belly of the plane and some other small things.
The Skytrain was coated with Humbrol Primer and airbrushed with Faded
Olive Drab.
After that, the decals were put on (coming from an Eagle Strike set).
The whole airframe was varnished and then given a couple of washes,
lighter ones for the riveting lines and darker ones for the panel lines.
Some light drybrushing, some stains here and there and the end of this
built came in sight quickly.
I know for sure there are a couple of mistakes here and there, and
that the path I did choose with engraving and riveting is open for
discussion. But all the effort I put into this lady can only be
described as pleasurable and a lot of fun, and that’s what this hobby is
all about for me!
Click the thumbnails below to view larger
images:
[../../photogallery/photo00013512/real.htm]
Model, Images and Text Copyright © 2007
by Jeroen Veen
Page Created 19 April, 2007
Last Updated
24 December, 2007
Back to
HyperScale Main Page
|
 Home
| What's New |
Features |
Gallery |
Reviews |
Reference |
Forum |
Home
| What's New |
Features |
Gallery |
Reviews |
Reference |
Forum |