|
Revell-Monogram's 1/48
scale
Supermarine Spitfire
IIa
by
Doug Duthie
|
 |
|
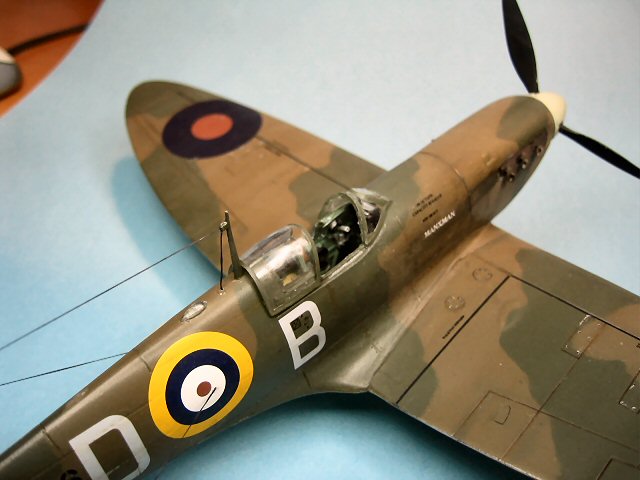
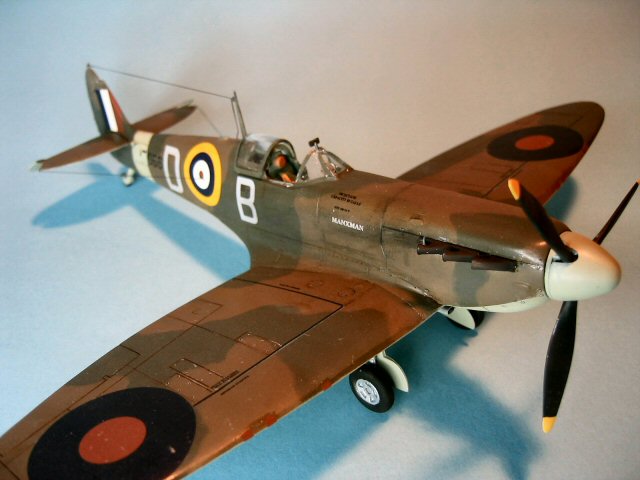
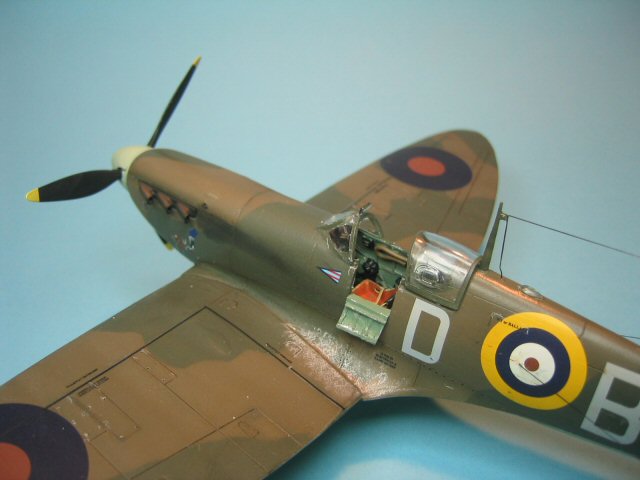
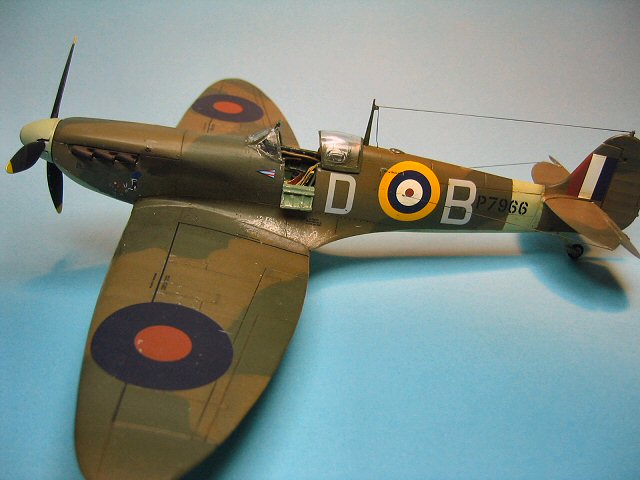
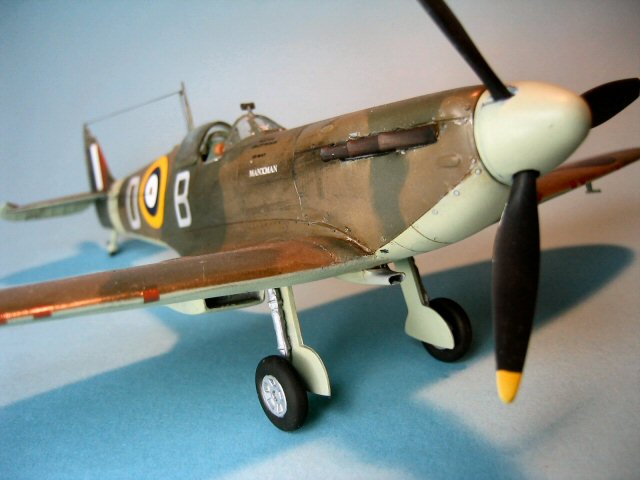
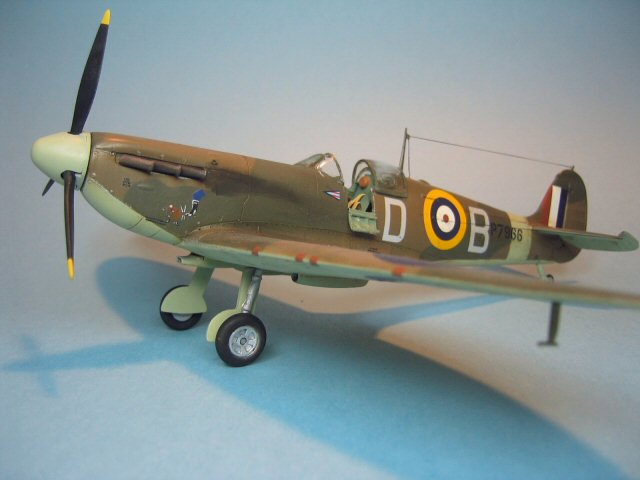
Supermarine Spitfire
Mk.IIa Wing
Commander Douglas Bader- 616 Squadron Tangmere 1941 |

Revell-Monogram's 1/48 scale
Spitfire Mk.II is available online from
Squadron
Amongst the plethora of build articles of
early Mark Spitfires, it is rare to see the venerable RevellMonogram kit
featured. To make a change from the more common Tamiya kit, I thought it
would be interesting to see how this compared.
The kit is described as a "Spitfire
11a" (i.e. "Eleven" rather than II). According to the SAM
Modeller's Datafile, this kit was first produced in 1979 (assuming this is
the same mould). The date on this particular kit, thoughtfully moulded
very visibly on the lower wing, is 1994.
The detail was probably quite good for its
time, but is now not up to the modern standards. The panel lines are
raised but crisply moulded. The only engraved details are the canopy
slider rail and the control surface hinges, all of which are heavily
overdone. There is some detail in the cockpit, but this is fairly crude.
The overall breakdown of the kit is fairly simple, with relatively few
parts. .
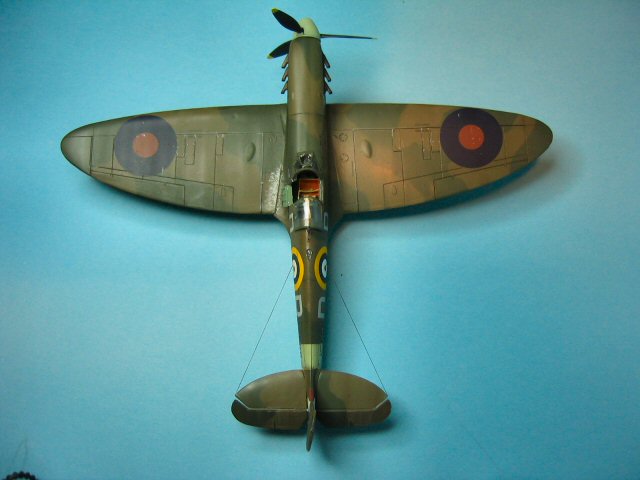
There is the inevitable "unforgivable sin"
of not representing the gull wing on the underside, which seems to be
common practice on many early Spitfire kits. However, ignoring this, the
kit gives a fair representation of a Spitfire. Comparing it against plans
from SAM and Clint, the kit comes out slightly short in all dimensions.
Before starting the description of the
construction, I should give a bit of background. After being out of
modelling for so long, I needed a cheap guinea pig to try some techniques
on, so I didn't ruin more prized kits later on. My main objective was to
tinker with washes to highlight panels. This means recessed panel lines,
and in turn this means rescribing (another first for me).
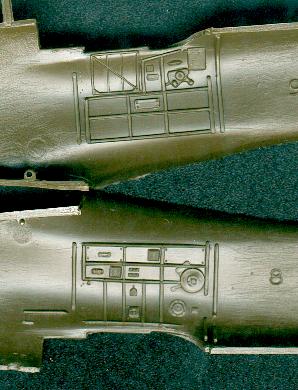
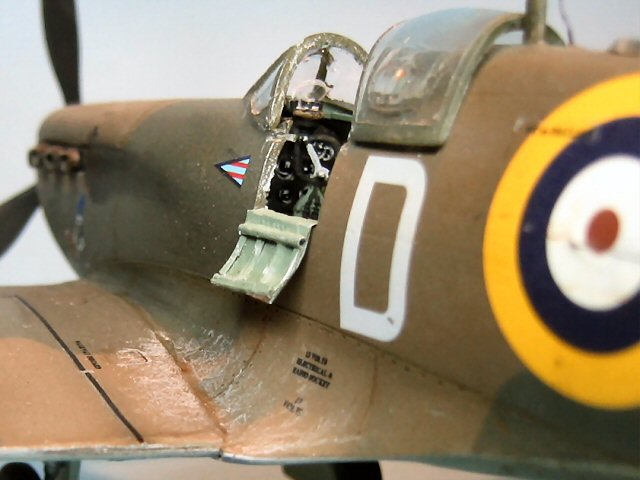
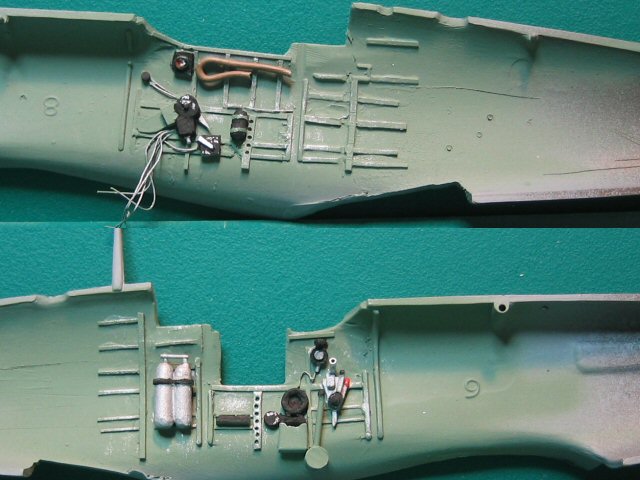
The sidewalls had quite crude and
inaccurate detailing. This was sanded off and replaced with formers made
from plastic strip. Gas bottles were made from stretched sprue, which
other components fashions from plastic card, brass sheet and wire
Click the thumbnails below
to view larger images:
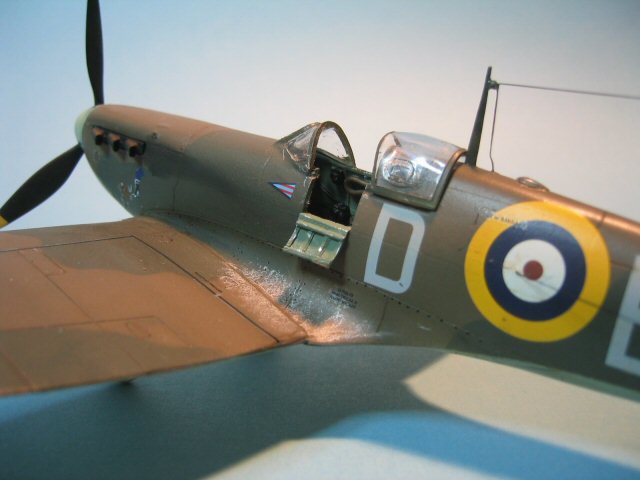
The sidewall was scratchbuilt using plastic card,
brass sheet, sprue and wire.
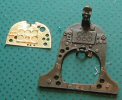
The detail on the instrument panel was spartan, so was
removed. A replacement fascia was made from punched brass sheets. The
backing for the instruments was made from white plastic card, painted
black and then scribed to give and impression of the instrument details.
The reflector side was not transparent, so this was removed and replaced
with a disc of clear acetate sheet.
Click
the thumbnails below to view larger images:
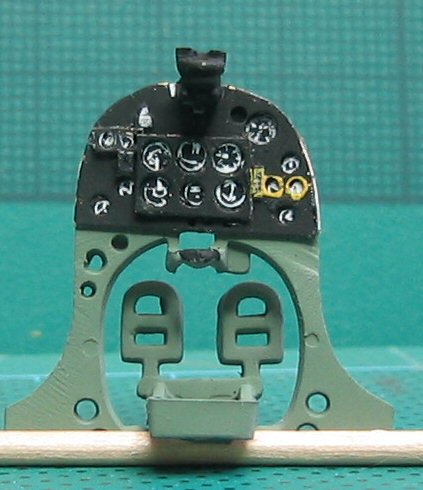
The instrument panel before the reflector sight was
added.
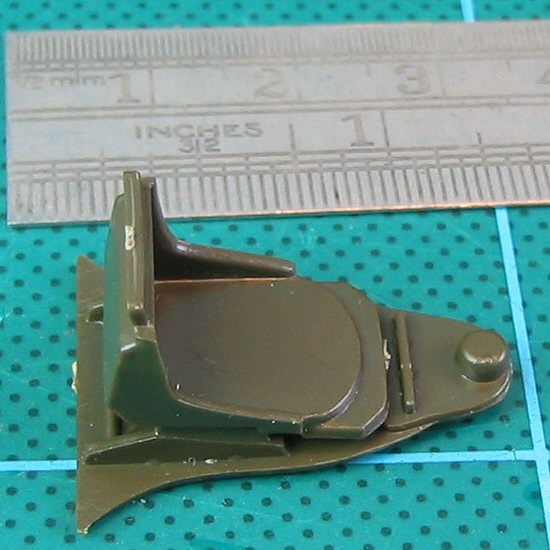
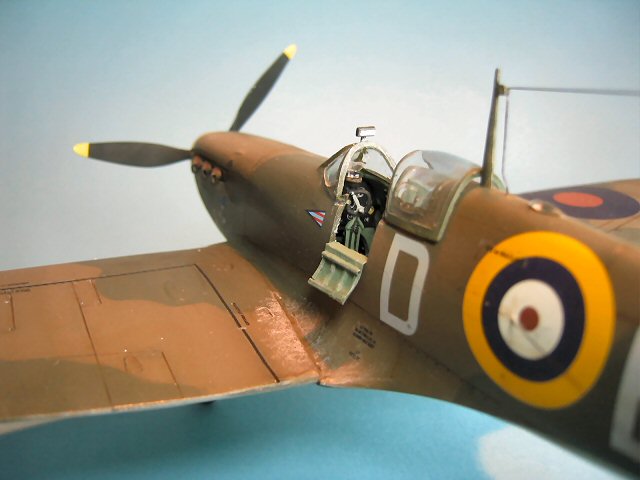
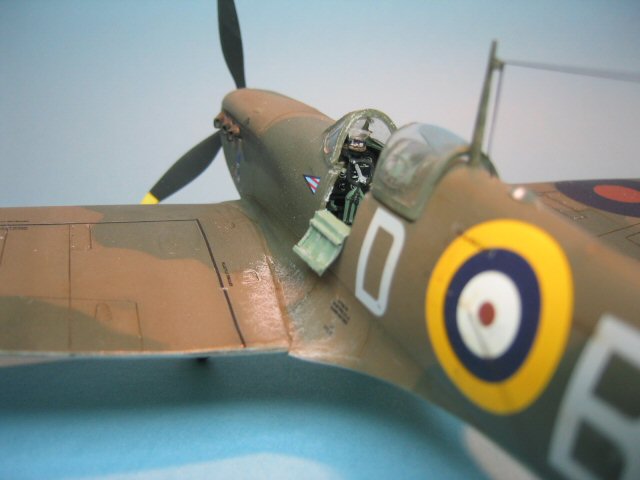
The kit seat is too large and the wrong
shape, and the mounting frame is over-simplified. An old Eduard PE set was
used as a template for the seat, and cut one from 10 thou styrene sheet.
The PE seat as is, would give a straight back with no detail. Once the
seat was bent to shape, the back was cut free and bent around the shaft of
a round file to give some shape and re-attached to the seat. Slots were
drilled in the seat side and back. Cushioning for the seat back was made
from 10 thou styrene card and scribed to give an impression of the
stitching. The side profile of the seat isn't strictly correct as the
depression for the parachute isn't represented.
For the seat truss, the side members were
cut from 20 thou stock, and drilled with lightening holes. The seat frame
was built from 20 thou and 1/16" brass rod.
The fuselage frame that the seat mounts to
presented a problem. The kit part is a flat slab, with a couple of
attachment points for the seat. The armour plate behind the seat should be
in front of the truss mounted at an angle, but it is represented behind
the truss mounted vertically. It wasn't possible to use the kit part as a
template for the frame as it was a poor fit and was not symmetrical. In
the end, A profile gauge was used instead to get the correct shape. The
two pieces of armour plate were cut from 10 thou stock. The headrest was
the only thing salvaged from the kit part. The end result is not perfect
but should be good enough taking into consideration how much of it will be
visible.
Click
the thumbnails below to view larger images:
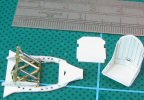
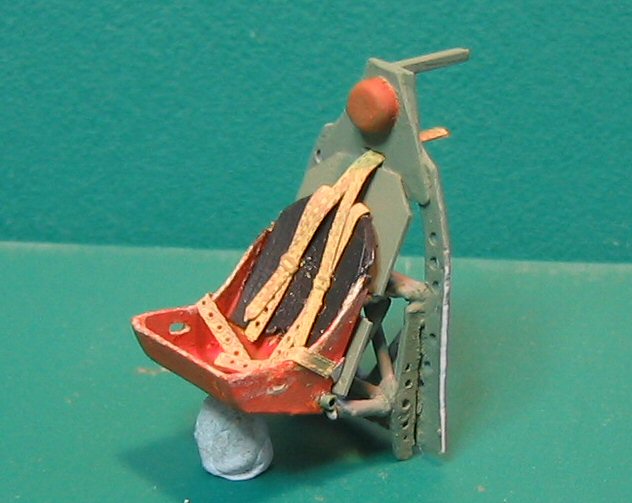
The final scratch built seat with PE belts added.
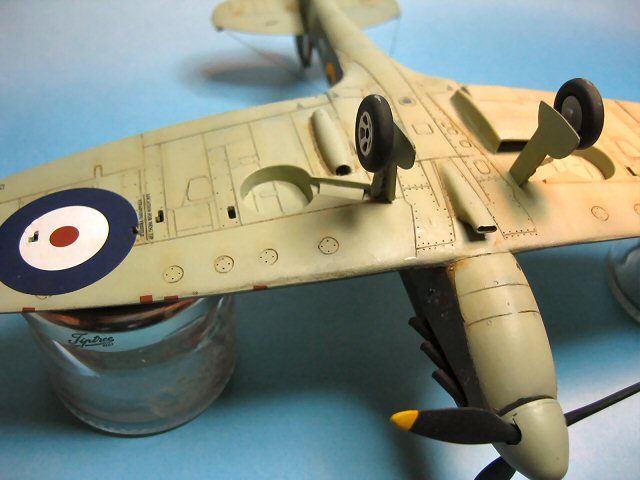
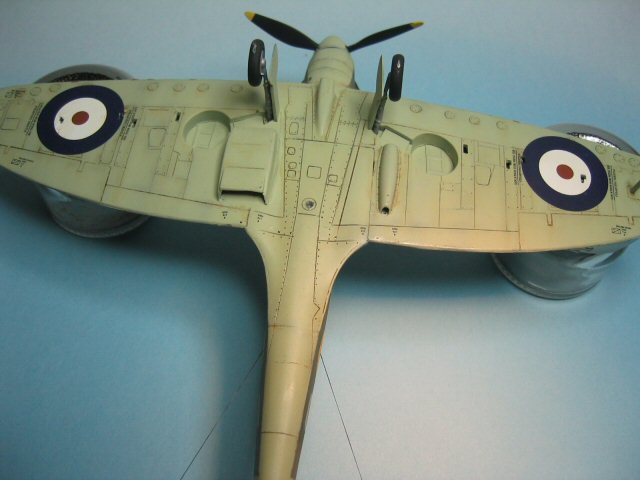
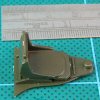
As the kit does not represent the gull
wing, a resin replacement section was obtained. The flat section of wing
was cut out, and the insert was a snug fit. This was backed with a large
area of plastic card to give some support and provide the wing floor for
the radiator recess. A section was cut out of the fuselage, to allow for
the insert. The insert appeared too flat to fit correctly, but dunking in
hot water allowed it to be manipulated to shape. It transpired to be too
thick, so plastic stock was used to fill gaps and blend with the fuselage
and wing fillets.
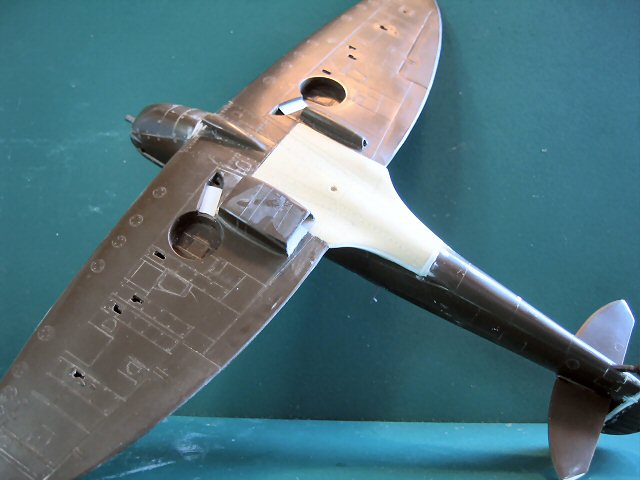
After re-scribing with the gull will insert added.
The wings and fuselage were re-scribed,
using the raised panel lines as a guide. The rudder and elevators were cut
free, and plastic rod added to repair the leading edges.
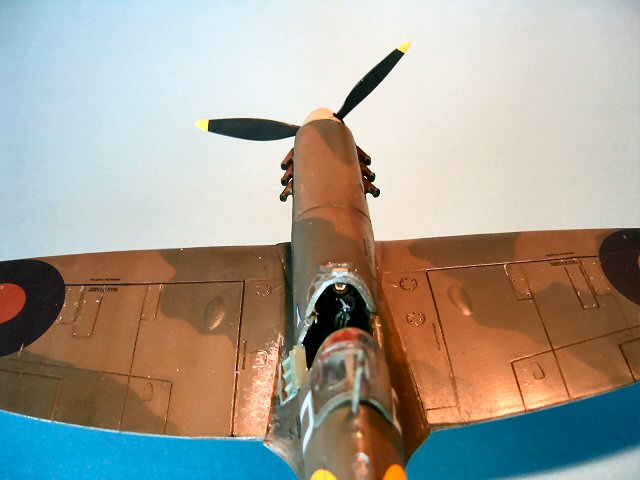
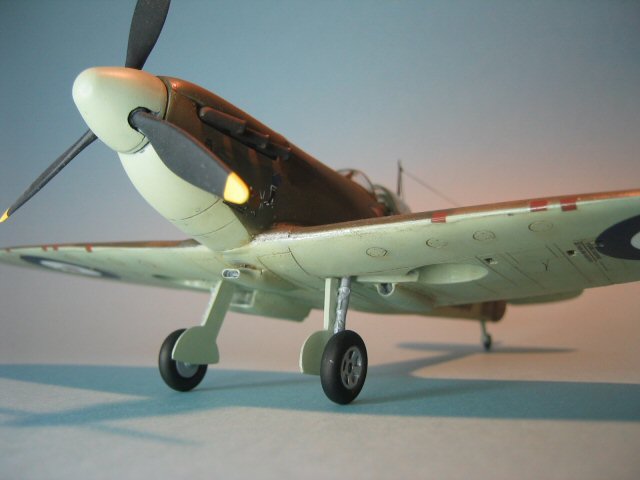
The solid exhausts were drilled out as was the carburettor intake. The
cockpit door was cut to display it in the open position. A replacement was
fashioned from an aluminium drinks can, which gives a better scale
thickness.
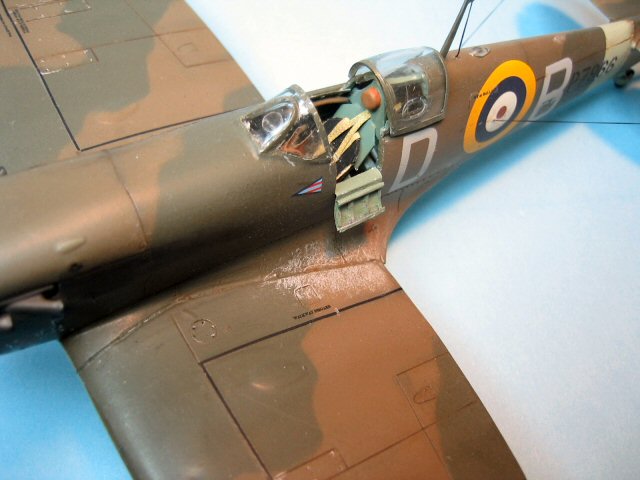
Markings for Douglas Bader's machine in early 1941 were chosen.
Xtracolor enamels were used for the Dark Green/Dark Earth over Sky scheme
with the help of Grant Elliot's excellent mask templates. While the kit has these
decals for these markings, the colours appear slightly off, so the
decals from the Victory Productions Spitfire Aces set were used.
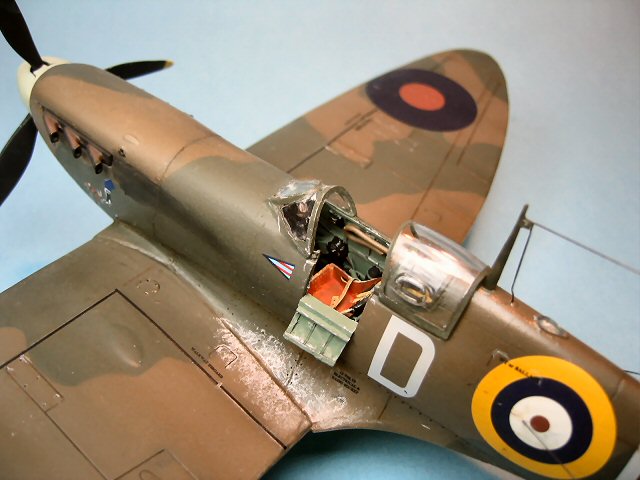
Once
sealed with Johnson's Klear, an oil wash of Burnt Sienna/Raw Umber was
used to highlight the panel lines. Humbrol Matt Coate was used for the
flat finish. The exhaust stain was added using pastels (unfortunately
this looks too overdone) and paint
chipping using a silver pencil.
Being inexpensive, this was an ideal kit on which to practice new
techniques. However, it was an awful lot of work to bring up to a standard
approaching more modern kits.
As there are quicker and easier ways of
creating a Spitfire MkII, I would hesitate to recommend this kit unless
you can't resist a challenge.
Click the
thumbnails below to view larger images:
Model, Images and Text Copyright © 2007 by Doug Duthie
Page Created 10 June, 2007
Last Updated
24 December, 2007
Back to
HyperScale Main Page |
 Home
| What's New |
Features |
Gallery |
Reviews |
Reference |
Forum |
Home
| What's New |
Features |
Gallery |
Reviews |
Reference |
Forum |