|
AMT/Ertl's
Darth Vader's
Tie Fighter
by
Tony Bell
|
 |
|
Darth Vader's Tie Fighter |

HyperScale is proudly supported by
Squadron
I am a geek.
I am a geek on many different
levels; a multi-layered geek, if you will. Obviously I am a model geek,
but aside from that I am a computer geek, an engineering geek, an
airplane geek, a space geek, and a Monty Python geek. The list goes on.
But before all of that, I was
- and still am - a Star Wars geek.
The summer of 1977 saw the
first Star Wars movie unleashed on an unsuspecting public. It was a
special effects tour de force (Ha ha! Get it? Force?) that presented
George Lucas’ fantasy universe with a realism and depth never before
seen on film. That summer I was a ten year old boy with paper route
money to dispose of and I became obsessed with the story of Luke, Leia
and Han, plunking down my $2 at least once a week to sit in an air
conditioned theatre and be transported to a galaxy a long time ago and
far, far away. To this day I still experience a little frisson of
anticipation whenever I hear the 20th Century Fox fanfare.
To stoke my obsession I bought
trading cards, action figures, comic books, the soundtrack LP, pyjamas,
baseball hats, Pez dispensers, and any other spin-off merchandise I
could get my hands on. Strangely enough, model kits were the one thing I
didn’t buy. I think I was afraid that I wouldn’t be able to do them
justice, given my limited modelling skills at the time.
Fast forward nearly three
decades later to December 2006. My seven-year-old son, a fellow fan and
well aware of my love for Star Wars (“No, no, no Alec! Han won the
Falcon in a game of sabbacc from Lando, not Jabba! Sheesh, get it
right…”), decides that a model of Darth Vader’s Advanced TIE Fighter
would make the perfect Christmas gift for me…
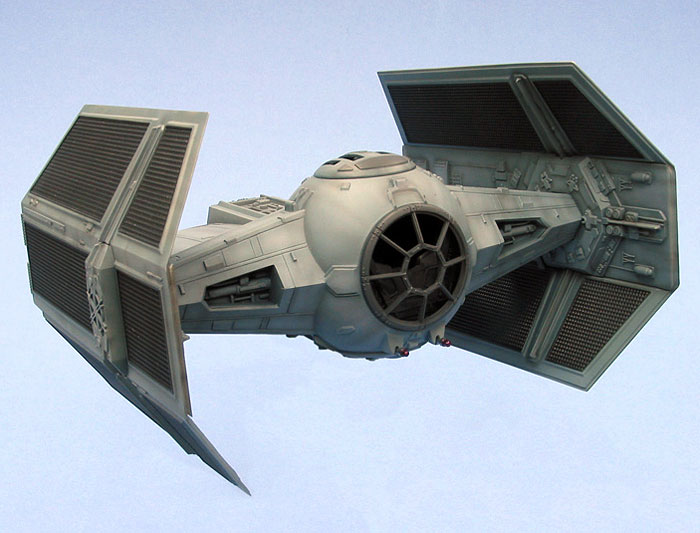
AMT Ertl’s
Darth Vader’s TIE Fighter
MPC
first issued this kit back in about 1980, and in recent years it has
been reissued by AMT/Ertl. Rattling around inside a cavernous box are
some 50-ish parts, including four transparent parts, two for the model
and two for the base. The breakdown is fairly simple, consisting of
upper and lower fuselage halves, two-piece solar wings, cockpit bits,
landing gear, various surface details and of course Darth Vader himself.
The
detail on the parts is crisp and well defined. Compared to pictures in
Sculpting A Galaxy; Inside the Star Wars Model Shop by ILM model
maker Lorne Peterson, there are a few panel lines missing from the
cockpit ball, and some of the detail has been simplified somewhat.
Overall though, the kit captures the sinister, impersonal techno look of
the movie ship very well.
The
parts exhibited copious amounts of flash and some absolutely enormous
sprue attachment points (e.g. 1 cm for the fuselage halves). My
handy-dandy JLC Razor saw was the weapon of choice for removing the
parts from the runners, and a piece of 400 grit wet & dry sand paper
taped to my desk was used to sand the mating surfaces flat.
The
cockpit builds up into a neat little unit that is trapped between the
upper and lower fuselage halves. I painted the cockpit black and left it
at that, not bothering to paint any of the details since I figured
they’d be next to invisible anyway. Darth Vader comes in two pieces,
front and back, that fit…well, let’s just say they fit where they touch.
When assembled, he looks disturbingly like he’s having a poop. I suppose
even a Dark Lord of the Sith needs a good BM every now and then (Use the
Force!).
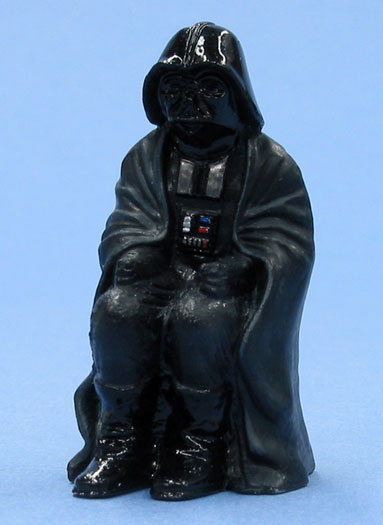
I
glued Vader together with gel superglue and cleaned up the seam with
files and sandpaper. I painted him with various blacks, ranging from
high gloss pure black for the helmet and boots to dead flat very dark
grey for the cape, with a couple of shades and sheens in between for
other bits and a touch of silver, red and blue on his breastplate.
I
painted the insides of the fuselage semi-gloss black and used sheet
styrene to blank off some of the insides visible through the gaps in the
cockpit. The fuselage halves were joined with liquid cement, clamped
together and left to dry whereupon I cleaned up the seams with files, X-acto
knives and sandpaper. Some of the scribed detail that was lost during
the cleanup was restored with a razor saw.
The
solar wings were also assembled with liquid cement, but left separate
from the fuselage to facilitate painting.
Any Colour You Like, So Long
As It’s Grey
Did I mention that I’m a geek?
Okay, so I actually researched the correct colour for the TIE
Fighter…
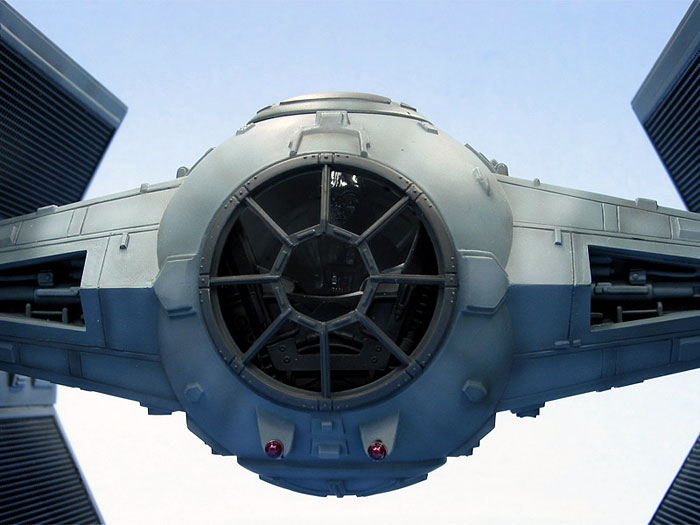
Consulting my copy of
Sculpting a Galaxy, I learned that the original studio models were
painted Pactra “Stormy Sea Blue”, a colour that has been long out of
production. As a substitute, I used Tamiya XF-66 “Light Grey” with a
touch of XF-8 Blue added. I pre-shaded the model with semi-gloss black
and airbrushed the grey, thinning it about 60% with rubbing alcohol and
applying it in light coats to build up the colour depth to the point
where the pre-shading was just barely visible.
I then mixed some white in
with the grey and thinned it about 90% with alcohol in order to airbrush
some highlights. I sprayed this mixture in a pseudo-random manner,
concentrating on the centres of the shapes and panels, trying to create
an evenly uneven appearance, if you catch my drift. Next I mixed a
heavily thinned darker version of the grey and airbrushed the nooks and
crannies and panel lines to give more depth to the finish. I gave some
of the details a light drybrushing with light grey oil paints, sealed it
all in with a coat of Polly Scale flat, thinned with distilled water and
then masked and sprayed the black solar panels.
I attached the solar wings
with five minute epoxy, which gave me enough time to get them aligned as
best I could before it set. The cockpit transparencies are pretty thick,
so I left them off rationalizing it by telling myself that the studio
models didn’t have them either (apparently in order to avoid reflections
from the blue screen backgrounds).
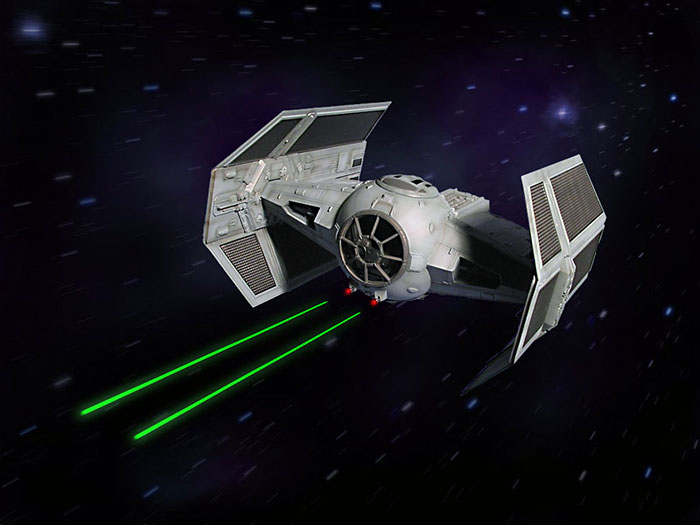
The final step was to attach
the laser cannon muzzles which were painted Humbrol Metal Cote steel,
buffed to a shine and over painted with Gunze clear red.
I
managed to finish this model inside of the week between Christmas and
New Years, and had a blast doing it. My son was chuffed that I built it
so quickly (he knows how slow I usually am) and graciously offered to
store it on his bedroom bookshelf. I, of course, happily took him took
him up on his offer…
Click the thumbnails below to view larger
images:
[../../photogallery/photo00000908/real.htm]
Model, Images and Text Copyright © 2007
by Tony Bell
Page Created 11 April, 2007
Last Updated
24 December, 2007
Back to
HyperScale Main Page
|
 Home
| What's New |
Features |
Gallery |
Reviews |
Reference |
Forum |
Home
| What's New |
Features |
Gallery |
Reviews |
Reference |
Forum |