|
Messerschmitt Me 262 A
Eduard
Dual Combo, 1/144 scale
S
u m m a r y
|
| Catalogue Number: |
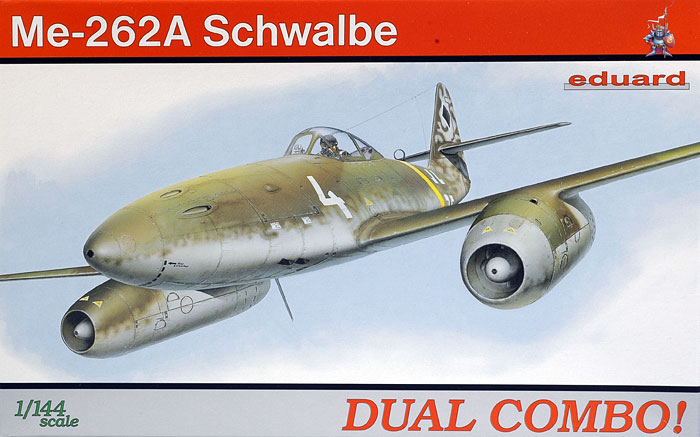
Eduard Kit No. 4420 - Messerschmitt
Me 262 A Dual Combo (two kits in one box) |
| Scale: |
1/144 |
| Contents and Media: |
42 parts in olive coloured plastic;
2 parts in clear; markings for four aircraft. |
| Price: |
USD$9.95 available online from Eduard's website. |
| Review Type: |
FirstLook |
| Advantages: |
Great detail for this tiny scale;
two complete kits in the one box; accurate outline; high quality
plastic; narrow sprue attachments; excellent instructions and packaging;
four great decal options; almost perfect fit. |
| Disadvantages: |
Good eyesight required! |
| Recommendation: |
Highly Recommended |
Reviewed by Brett Green

Eduard's 1/144 scale Messerschmitt Me 262 A will
be available online from Squadron.com
Modelers are fortunate to have very good models
of the Messerschmitt Me 262 to choose from in 1/32, 1/48 and 1/72
scales.
Eduard added 1/144 scale to that list in February
with their two-seater Me 262 B-1a. Now they have released the
single-seat day fighter, the Messerschmitt Me 262 A-1a.
This "Dual Combo" boxing supplies two entire kits.
Eduard's new Me 262 A comprises 42 parts in olive coloured plastic and
2 parts in clear; plus a decal sheet
with markings for four aircraft..
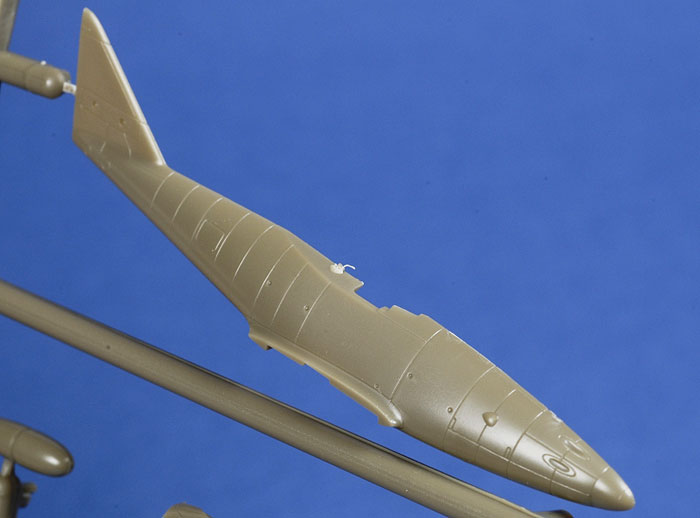
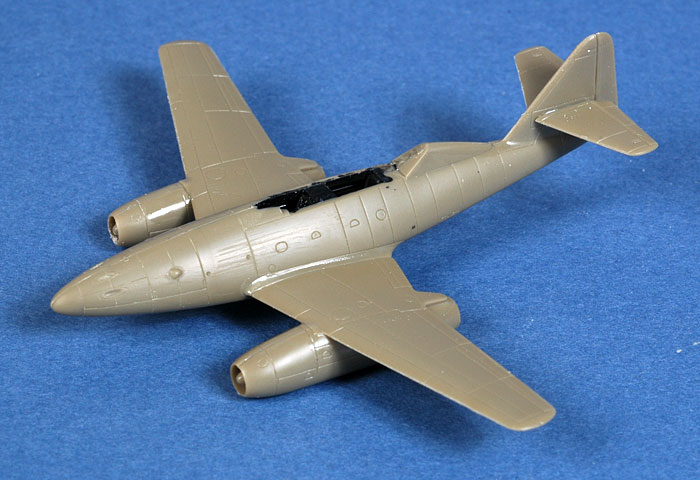
Surface detail is truly remarkable. It is fine
and crisply recessed and, as seen here, easily stands the test of high
levels of photographic magnification. The plastic itself is gorgeous
too, being very smooth and almost completely free of imperfections. The
only issues are a couple of sink marks in the seat backrests, which will
be well and truly hidden by the rear cockpit bulkhead.
Click
the thumbnails below to view larger images:
[../../../photogallery/photo00018452/real.htm]
Despite its diminutive dimensions, the kit offers locating pins and
holes in key areas such as the fuselage halves, horizontal stabilisers
and the landing gear.
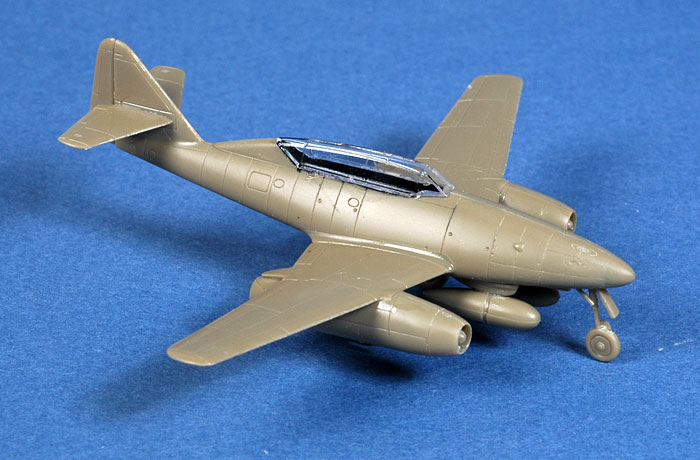
Detail is barely compromised by the size of the model. The cockpit
has seats and sidewalls, the wheels look great, the big main wheel well
is laid out just like the real thing, with the bottom of the cockpit tub
visible through the open doors, separate intake and exhaust bullets are
supplied and some of the smaller details include retraction struts for
all three gear legs.
Unlike the earlier Me 262 B, this kit does not include a photo-etched
fret. However, the photo-etched frets in the aforementioned Me 262 B kit
have six spare DF loops and two spare Morane masts, some of which could
be used on these kits.
Bomb bodies and drop tanks are supplied, but there are no bomb fins.
I presume that Eduard will be releasing a dedicated Me 262 A-2a Jabo kit
in the future with photo-etched fins.
Instructions are supplied in an A-5 size 6 page loose
leaf booklet. This is accompanied by four pages of marking
guides, each with a four-view illustration.
Markings are provided for four interesting aircraft.
-
Me 262 A-1a of Kommando
Nowotny, finished in 81 and 82 with a narrow yellow fuselage band
-
Me 262 A-1a of III./EJG
2, finished in 74/75 greys
-
Me 262 A-1a of JV 44, in
81/82 upper surfaces with a green/blue checked fuselage band
-
Me 262 A-1a of JG 7, in
a striking finish of 82/83 greens with a white nose and red/blue KG
7 RV bands
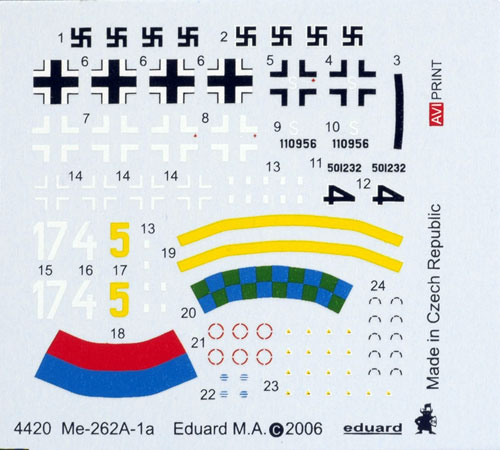
Decals look to be very
thin, in perfect register and of high quality. Even tiny details such as
stencils and perfectly legible Werknummern are included. Swastikas are
not shown on the box, but they are supplied (whole and in one piece
each) on the decal sheet.
Construction of this model is identical to the earlier
Me 262 B with the exception of the rear cockpit and the fuselage, so I
will repeat the description of the two-seater build that I built back in
February:
I started by cutting the parts from the sprue. The sprue
attachments are very fine and, with care, will leave very little waste
to clean up with a sharp hobby knife.
Engineering is quite clever, with two parts installed
inside the nose to create a wheel bay and a positive locating hole for
the nose gear leg.
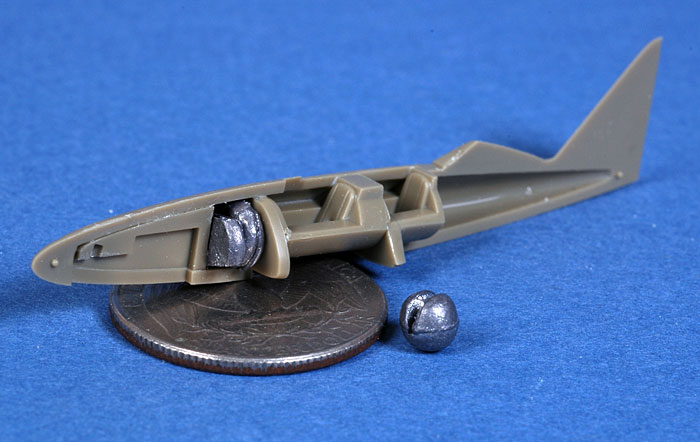
The cockpit tubs went together in seconds, and fitted
perfectly inside the fuselage. The cavity between the nose wheel well
and the forward cockpit bulkhead is reserved for weights. I used the
smallest fishing sinkers that I had, then squashed them flat with a pair
of pliers. I managed to fit one entire weight in at the rear of the
cavity, and a second weight, trimmed at the sides using a pair of
pliers, directly forward of the first.
The nose weight did not interfere with the fit of the
fuselage halves. After painting the cockpit Flat Black, I applied super
glue to the inside of the tail surfaces, then brushed Tamiya Extra Thin
Liquid Cement along the other join lines.
Next, the horizontal tail surfaces were glued to the
empennage. These are keyed to differently spaced locating holes on each
side of the fuselage, so you won't be able to mix them up.
The completed fuselage was now offered to the one-piece
wing. Once again, the fit was perfect so I brushed cement along the join
lines at the wing roots and the bottom of the fuselage.
Each engine nacelle comprises four parts - the nacelle
halves plus an exhaust and intake bullet. I glued the bullets to one
half of each nacelle using super glue then, before the super glue had
set, brought the nacelle halves together and made sure that the bullets
were properly centered. Liquid glue was used again to secure these
parts. After a few minutes they were glued to the wings.
The landing gear parts and the auxiliary tank assemblies
were glued together then left for a few hours to set before adding them
to the model. This is quite important, as the very fine axles, doors and
rack attachments remain soft for some time.
The fit of the main gear legs in their locating holes
was quite tight, but they were secured with a very sparing application
of Liquid Glue in the holes.
To my great relief, the model sat on its nose wheel
without any problem.
Click
the thumbnails below to view larger images:
[../../../photogallery/photo00026995/real.htm]
The installation of the miniscule gear retraction struts
was actually easier than I expected. A drop of glue locked these in
place. Notwithstanding their small size, these really do add rigidity to
the gear legs.
The canopy was the last part to be fitted. Test fitting
suggested that there would be a small gap along the bottom of one side,
so I trimmed a little material from the fuselage near the coaming. This
did the trick.
Total time for assembly was probably around 60 to 90
minutes over two short sessions today. I really do think that it is
essential to let the undercarriage parts set thoroughly before final
assembly, but construction otherwise posed no risks or challenges -
except perhaps to the eyesight!
After examining the parts in the new single-seater Me
262 A kit, I believe that construction should be just as fast and
satisfying.
1/144 scale modelling has come a long way.
Eduard's 1/144 scale Me 262 A-1a is surprisingly well detailed, very
authentic and easy to build.
At USD$9.95 for two complete kits, this package is really a bargain.
Eduard's Stormbird will be a welcome addition to any Luftwaffe
collection, and 1/144 scale fans should be dancing in the streets!
Highly Recommended.
Thanks to Eduard for the sample
Review Text Copyright © 2007 by
Brett Green
Page Created 20 April, 2007
Last updated 24 December, 2007
Back to HyperScale Main Page
Back to Reviews Page
|
 Home
| What's New |
Features |
Gallery |
Reviews |
Reference |
Forum |
Home
| What's New |
Features |
Gallery |
Reviews |
Reference |
Forum |