|
Hasegawa's 1/48 scale A-4E
Hawaiian Scooter
by David W. Aungst

|
A-4E Skyhawk |

Hasegawa's 1/48 scale A-4E Skyhawk is available online from Squadron.com
Background
Is the A-4 Skyhawk my favorite aircraft? To say something is a "favorite" is such a subjective thing. My "favorites" are shifted regularly by whatever mood I am in on a given day. I guess the best way to put it is this -- if I listed my top five favorite aircraft on any given day, the A-4 Skyhawk would most certainly be in that short list.
I decided recently that it had been too long since I last built an A-4 Skyhawk. To fix the problem, I started a "one man group build" and built eight Skyhawks all at the same time. This VC-1 aircraft was one of them.
The Kit
This is one of the releases of the fabulous 1/48th scale A-4 Skyhawk kit family from Hasegawa. There are many reviews of these kits, some even written by me, scattered about the Internet to tell you all the great things about these kits, so I am not going to get long-winded here describing the kit. This model kit family would get my vote for being one of the finest 1/48th scale modern jet models ever kitted.
The exact kit I used for this project is actually the ProModeler release of the A-4E/F Skyhawk (stock#85-5976), which is just a re-boxing of the Hasegawa A-4E/F Skyhawk. Squadron Shop had a great sale on these kits after they were released. I guess no one understood the great kit they were. I picked up about ten of them for only $15.00 each. That is only about half the cost of the Hasegawa boxing of the kit. Since all I was building is a stock A-4E airframe, this kit provided in the box most everything I needed to make the Skyhawk in this project.
The only change I made to the kit over what comes in the box is that I replaced the ejection seat with a Cutting Edge resin ejection seat. The rest of the model was built using the parts already in the kit. I did some minor mixing and matching of kit parts to get the right antenna fit on the airframe, but the kit gives you all the needed pieces in the box. All I needed to know is which pieces to put in what places.
There are a couple simple accuracy point to watch for as you build these Hasegawa kits. When Hasegawa molded the kits, they molded in some details that need to be shaved off, depending on the exact version of the Skyhawk you are building.
The first thing to watch for is the static point on the right side of the nose. Depending on the type of refueling probe fitted on the aircraft, the static point is moved to different locations. Hasegawa molded both locations on the model, so you need to remove the extra one. I have to snicker when I see all the decal company placement diagrams that show both points because they used the Hasegawa kit for reference and did not understand the difference. See the image below.
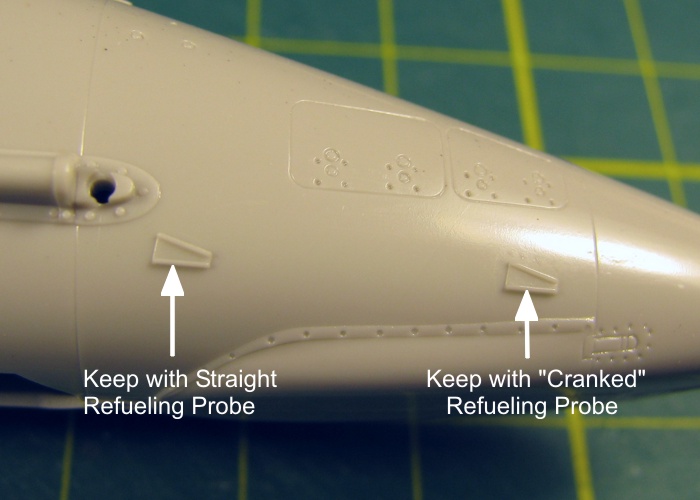
Right Side Static Points
The second point to watch is the reinforcing panel on the intake sides. This six-sided panel was only present on some early Skyhawks. It was not present on the vast majority of Skyhawks. Check your references and shave off this panel if the Skyhawk you are building does not have it. Because of the way Hasegawa molds this pane as a raised panel, you will lose the small round panel found in the middle of the bigger one. All Skyhawks have this small round panel. But there is no way to keep it and lose the raised big panel. You can always re-scribing it back in place (or just ignore it like I do).
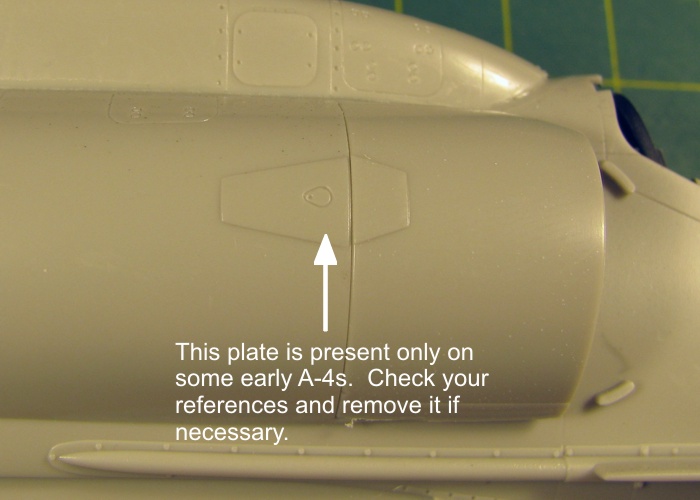
Intake Reinforcing Plate
In very little time, I had the cockpit and other internal pieces painted and sealed up the fuselage. With very little sanding needed on the fuselage, I assembled and attached the wings. Again, there was very little sanding needed, so I attached a bunch of the "little bits" (antennae, dumps, weapons pylons, etc...) and was ready for major painting.
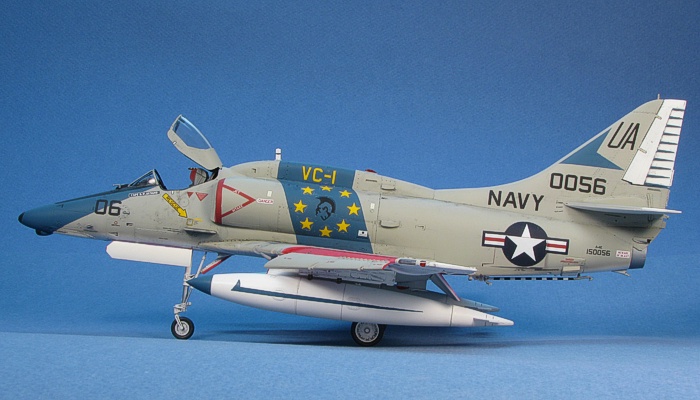
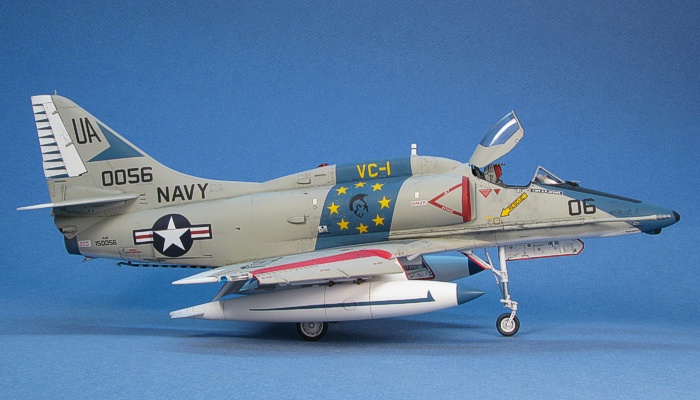
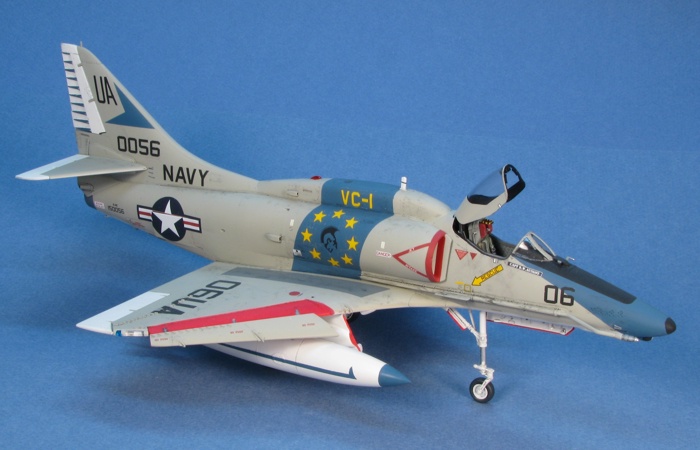
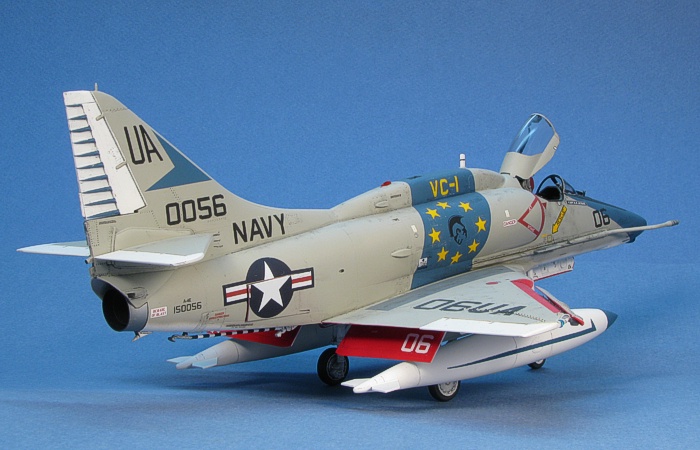
 I used all Testors Model Master enamel paints to build this model. The model is finished in the standard Light Gull Gray (F.S.36440) over White camouflage scheme. When it comes to non-aggressor A-4E/F Skyhawks from the active duty US Navy, this camouflage scheme is about the only show in town. I used all Testors Model Master enamel paints to build this model. The model is finished in the standard Light Gull Gray (F.S.36440) over White camouflage scheme. When it comes to non-aggressor A-4E/F Skyhawks from the active duty US Navy, this camouflage scheme is about the only show in town.
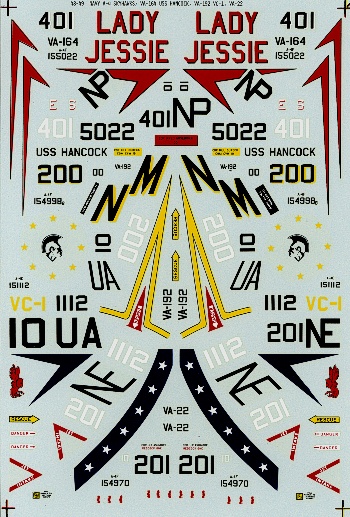
One of my many favorite markings schemes for the Skyhawk is that of an A-4E of VC-1 "Unique Antiquers", flying out of NAS Barbers Point, Hawaii. Decals for this unit were available from MicroScale (before they changed their name to SuperScale) on sheet number 48-049. This is an older decal sheet that I had squirreled away a few copies in my model stock-pile since the early 1980s. Before using the decals, I coated them with SuperFilm to guarantee they would not self-destruct when I used them. While I do have multiple copies of this decal sheet, I doubted I would be able to find any more copies if I squandered the ones I have.

MicroScale 48-049
The majority of VC-1 aircraft, from what I find in pictures, were TA-4F/J Skyhawks. These were a mixed bag of all white and Gull Gray and White machines. All of them seemed to feature a large rainbow pattern draped down the vertical tail. Joining these two-seaters were a few single seat A-4Es.
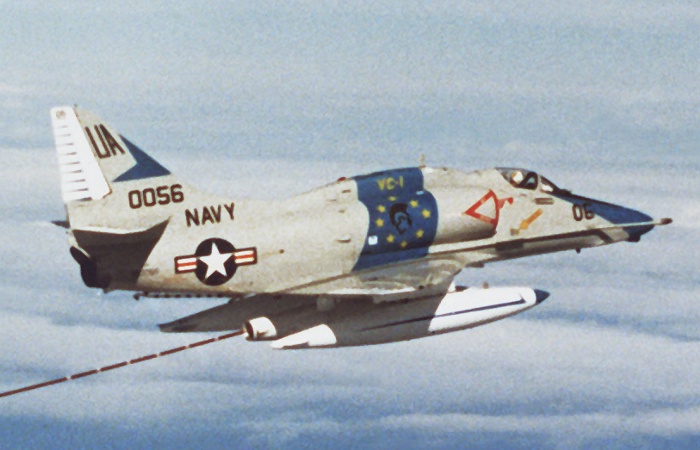
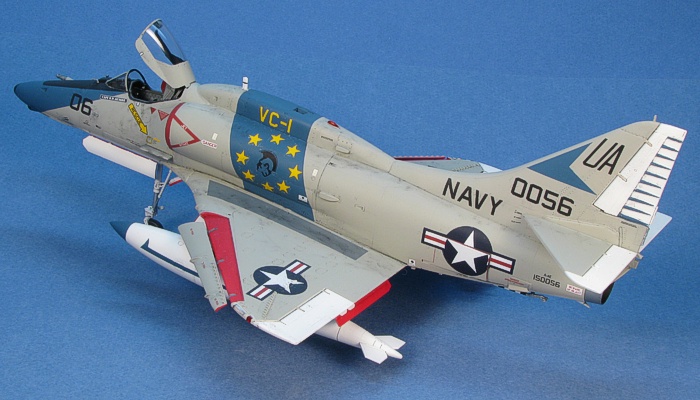
The single seat aircraft were all painted in Gull Gray and White and replaced the rainbow on the tail with a simple blue chevron.
 After a search through various books and magazines, I found a few of the single seat A-4Es were given the blue nose trim to match the two-seat TA-4s. I decided I liked the balancing of the colors on the aircraft that the blue nose panel made. I decided I wanted this nose trim color on the model I would build. This, of course, was not present on the BuNo that the MicroScale decal sheet provided, so I created some simple artwork on my PC and custom printed new BuNo and Modex numbers to supplement the MicroScale decals and give me the right numbers for a VC-1 aircraft that did have the blue nose trim. The artwork is to the right (reduced in size to save space). After a search through various books and magazines, I found a few of the single seat A-4Es were given the blue nose trim to match the two-seat TA-4s. I decided I liked the balancing of the colors on the aircraft that the blue nose panel made. I decided I wanted this nose trim color on the model I would build. This, of course, was not present on the BuNo that the MicroScale decal sheet provided, so I created some simple artwork on my PC and custom printed new BuNo and Modex numbers to supplement the MicroScale decals and give me the right numbers for a VC-1 aircraft that did have the blue nose trim. The artwork is to the right (reduced in size to save space).
To guarantee the blue colors matched for all the various markings, I masked and painted all the blue. This includes the fuselage band, nose trim, tail chevron, rudder trim, and fuel tank trim. MicroScale provided the tail chevron in their decals, but the blue they used for printing was way too dark. I used the decals to assist me in getting the painted chevron to be the correct size on the tail. I used Aggressor Blue (F.S.35109) for the blue color. The old Squadron A-4 Skyhawk in Action book (aircraft #11) had a mention of this color for VC-1 Skyhawks, and it looked about right on the model.
The most prominent marking on the aircraft is the blue sash on the fuselage. After applying the MicroScale decals for the Hawaiian Head emblem and the yellow ring of stars, I found MicroScale got the sizing of these markings wrong. The Hawaiian head is a bit smaller than it should be and the stars in the ring of stars are way smaller than they should be. I decided the the size of the head emblem was close enough for me. But I had to fix the stars.
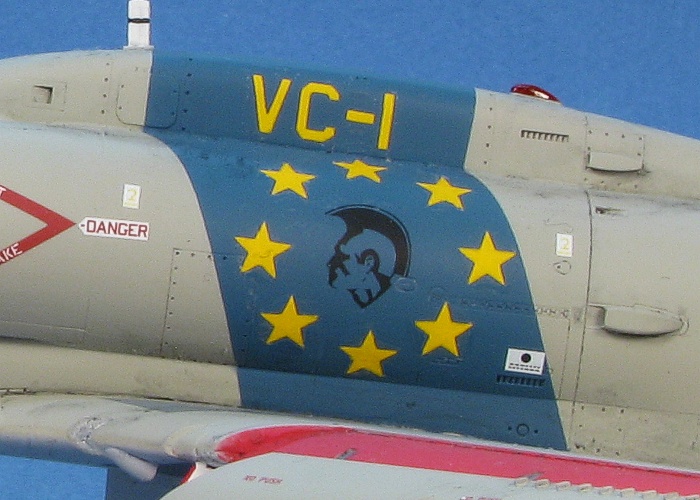
In my decal stash, I have some other really old decal sheets. I have a sheet from ScaleMaster that is nothing but a bunch of yellow stars. I think this sheet has been in my stash longer than the MicroScale A-4 Skyhawk decal sheet that gave me the VC-1 markings. I coated these stars with SuperFilm to prevent them from exploding in water, than applied them over the tiny yellow stars in the ring of stars. They were a bit large, but looked better on the model than the tiny ones did.
The ScaleMaster yellow stars were not quite opaque enough to totally hide the tiny MicroScale stars that were under them, so I needed to apply a second set of ScaleMaster stars over top of the first set to make them totally cover the tiny stars. That made for 32 decals on the model, just to apply these stars (rings of eight stars, applied double, on each side of the fuselage). The end result justified the effort in my mind. In similar fashion, the "VC-1" text on the sides of the avionics hump needed to be double applied to brighten the yellow printing (good thing I had multiple MicroScale decal sheets).
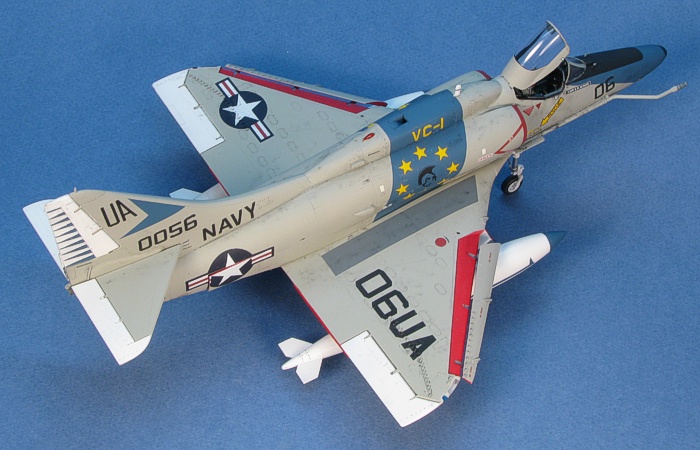
For weathering, I used my typical style of thinned down enamel paint washes and air brush shading. I finished the weathering with some dry brushing to pop out the surface details. I kept the weathering light as all the VC-1 aircraft seemed to stay quite clean in appearance. For a more complete discussion of what I do to weather my models, see my posting on "Weathering Aircraft".
Final Assembly
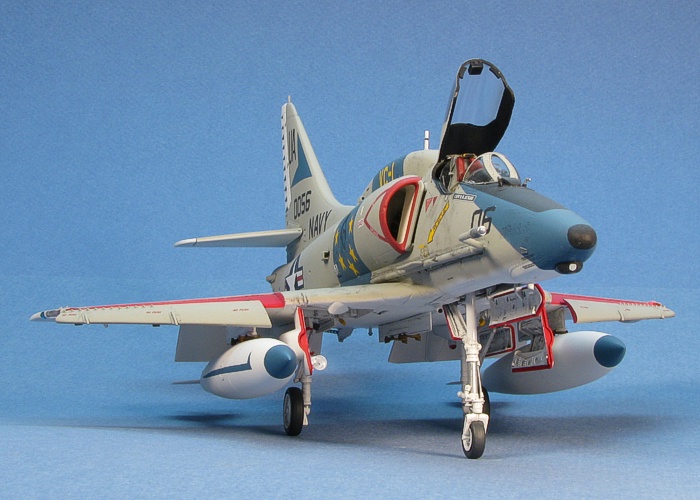
One of the things I have grown to dislike in building the Hasegawa Skyhawk kits are the navigation and position lights. As separate clear pieces, they look really nice on the model, but they are a pain in the butt to attach and paint. I start by painting the model silver in all the places the lights go. This makes the lights look bright when viewed on the completed model. Then, I attach the lights. Once attached, I get out the clear Tamiya paints and paint the red and green (I actually use blue) navigation lights and beacons. It is not overly difficult work, but I hate dealing with the Tamiya jars. Painting the frames on the wing tip lights is also a pain in the butt, but they look really nice when done.
This brought me up to the home stretch. I had a completed airframe, including the weathering. I had a bunch of painted and completed parts and sub-assemblies. See the following picture. All I needed to do was attach everything.
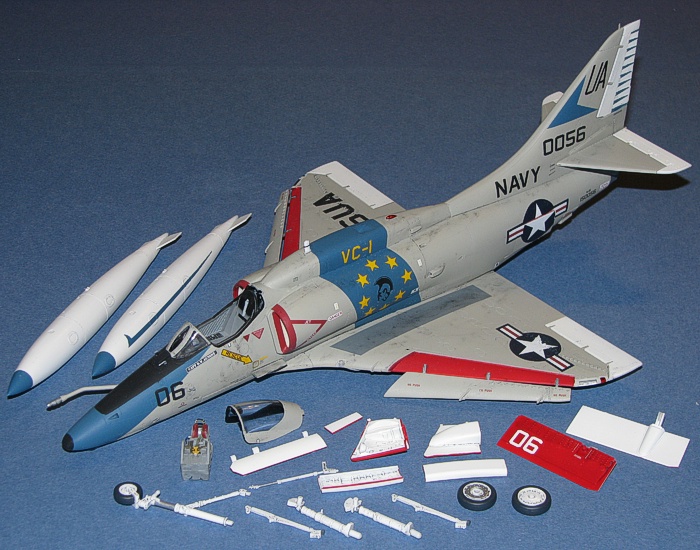
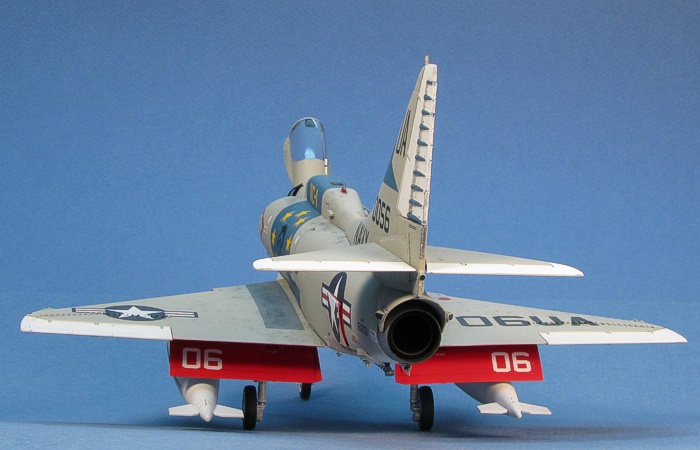
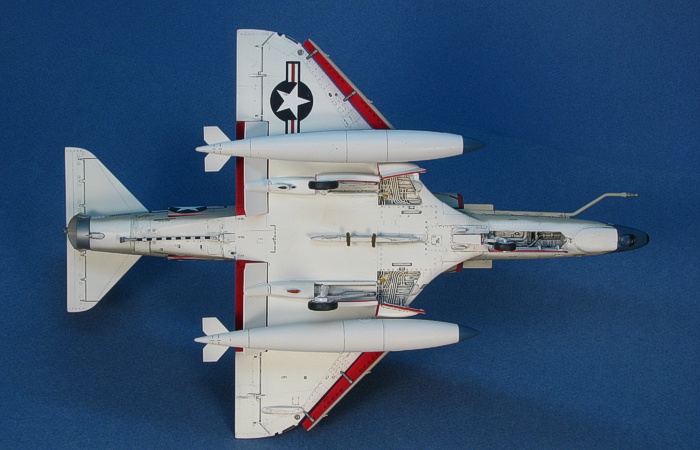
The landing gear was also painted while I was painting the rest of the model, so I just slipped the landing gear struts and bracing into the locator holes and added glue. I really hate doing the red edges on the wheel well doors of US Navy aircraft, but I have developed a system that works for me (a 10/0 paint brush and a little patience). I added the red edges on the doors, then attached them.
My favorite Skyhawk load-out is two fuel tanks with nothing else, so this is what I attached to the model. I flirted with adding a D-704 "buddy pack" refueling pod on the centerline station, but I was not happy with the details of the few after-market D-704 "buddy packs" I found. I got bogged down trying to fix the details of a refueling pod and in the end just ommitted it from the completed model. I can alway finish and add one later...
With the model sitting on its landing gear with its full load of fuel tanks, I unmasked the canopy and attached it in the open position, then declared the project complete.
As I said at the beginning of this article, this VC-1 Skyhawk was one of eight Skyhawks I built all at the same time in a "one man group build". With as easy as the Hasegawa Skyhawk kits build, I am sure I have not built my last one, yet. In fact, I already am thinking of another eight-Skyhawk group I would like to build -- soon.
Project Statistics
Completion Date: |
27 September, 2008 |
Total Building Time: |
38.7 |
Research |
1.3 |
Painting: |
16.5 |
Decals / Markings: |
9.9 |
Extra Detailing / Conversion: |
2.7 |
Model,
Text Copyright © 2008 by David W. Aungst
Page Created 8 October, 2008
Last Updated 8 October, 2008
Back to HyperScale
Main Page |
 Home
| What's New |
Features |
Gallery |
Reviews |
Reference |
Forum |
Search
Home
| What's New |
Features |
Gallery |
Reviews |
Reference |
Forum |
Search