|
Hasegawa's 1/48 scale A-4E
Training Command Hack
by David W. Aungst
|
A-4E Skyhawk |

Hasegawa's 1/48 scale A-4E Skyhawk is available online from Squadron.com
Background
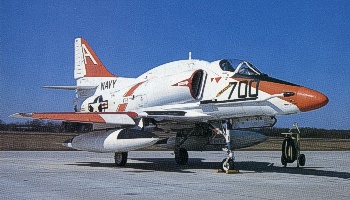
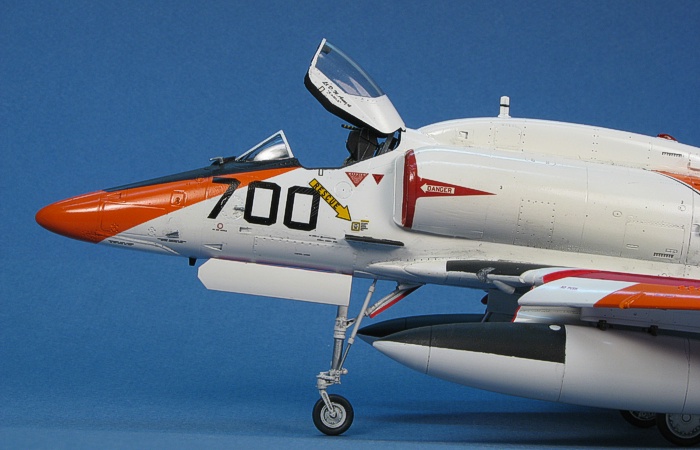
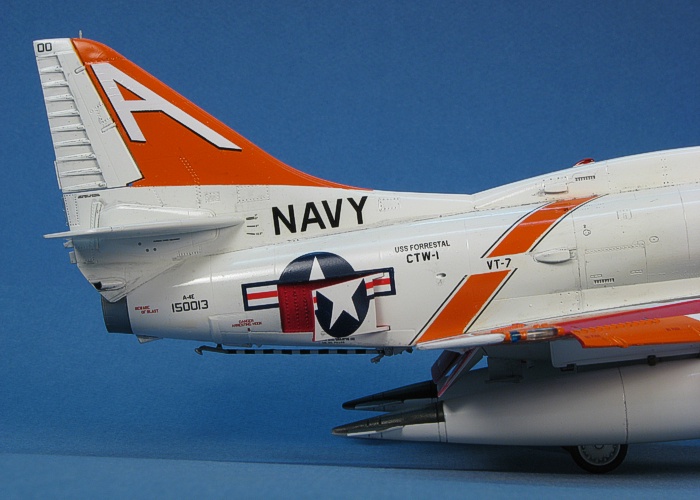
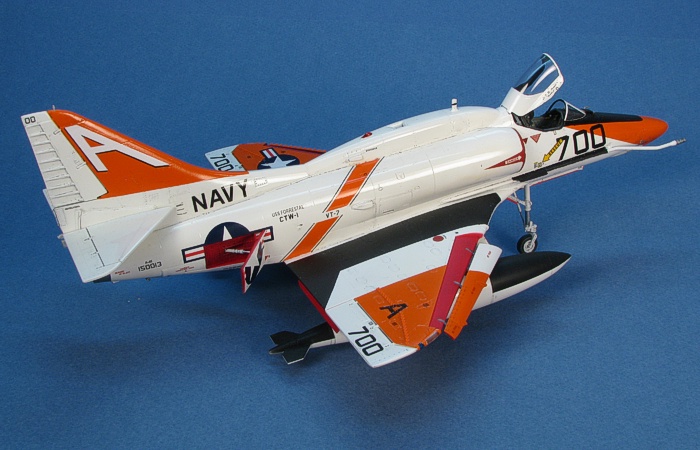
It is amazing how you can look at something many times and not actually see it. I have this really old issue of AirPower magazine. In it is an image of the following aircraft. I must have paged through this magazine special issue about a dozen times and just dismissed this aircraft as a Training Command TA-4. Then, one day, a friend told me to look a little closer at the image. Holy smokes! It was not a TA-4, but instead was really a single-seat A-4E in the markings of VT-7!
Apparently, VT-7 was assigned a few single-seat aircraft to provide advanced training. Eventually, I found images of a couple other single-seat A-4Es in VT-7 markings, too. Considering the uniqueness of finding these training markings on a single-seat aircraft, I just had to build a model of one.
The Kit
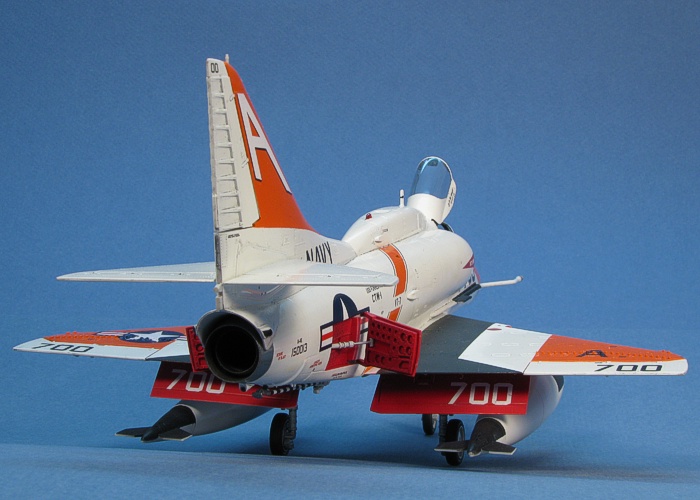
This is the fabulous 1/48th scale A-4E/F kit from Hasegawa. There are many reviews, some even written by me, scattered about the Internet to tell you all the great things about this kit. This model kit would get my vote for being one of the finest modern jet models ever kitted.
The point to the project was the markings, so I wasted very little time on extra detailing. The only extra items I added to the kit were a new resin ejection seat (from Cutting Edge) and 400 gallon wing fuel tanks (robbed from a Monogram Skyhawk kit).
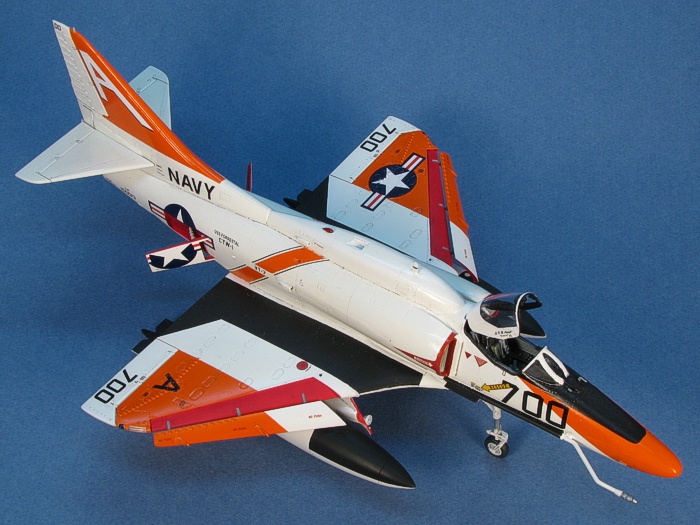
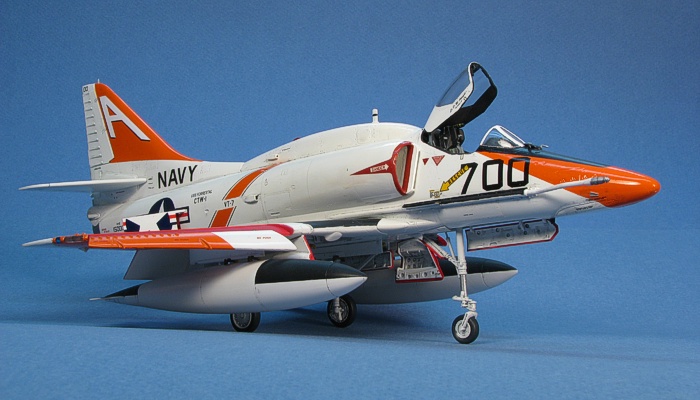
 GLOSS WHITE! I can hear all the groans already. Almost as bad as natural metal, gloss white is one of those finishes that nobody likes to apply. I have never really been too plagued with applying this finish, though. I keep the paint mixture a little thicker than my normal paint and slightly bump up the air pressure to match. Getting enough coverage seems to take care of itself. GLOSS WHITE! I can hear all the groans already. Almost as bad as natural metal, gloss white is one of those finishes that nobody likes to apply. I have never really been too plagued with applying this finish, though. I keep the paint mixture a little thicker than my normal paint and slightly bump up the air pressure to match. Getting enough coverage seems to take care of itself.
The key is to trust the mind's eye of the viewing audience. The coverage does not have to make the model one uniform snow white color. It only has to significantly lighten the gray styrene and not leave any obvious uneven coverage areas. People looking at the model will realize that it is an all-white subject and simply accept this. A close look at this model would reveal that the white is not totally and completely snow white.
Trust me -- nobody notices this without specifically looking for it. Really.
The same principle applies to modelers that do pre-shading. Obviously, these modelers are not getting complete paint coverage on their models. Otherwise, the pre-shaded areas would get covered and not be seen any more. I saw a beautifully finished, pre-shaded Strike Eagle model once that on close inspection had bare plastic showing through some areas. Without a direct inspection looking specifically at the paint coverage, this lack of coverage was totally lost on the completed model.
I used Testors Model Master Insignia White (F.S.17875). This particular paint has the advantage of already being a gloss color. My only issue was figuring out how to handle the model while I painted. I accomplished this by painting half the model at a time. I painted the bottom areas first and laid the model on its back to dry. The next day I painted the top areas and set the model right-side-up to dry. Once dry, I could paint the other colors.
While the process of applying the white paint might not present much trouble to me, keeping it clean is another story. Any minor dirt on my fingers turns into finger prints and/or smudges. And then, I needed to mask and paint trim colors using two of the most notorious colors for causing overspray -- red and orange. I used lots of tape and was actually successful (to my surprise) at keeping the overspray off the model.
Decal Instructions
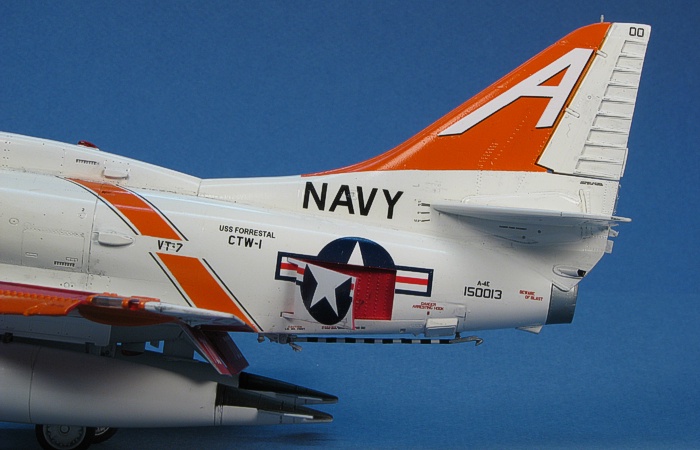
Nobody anywhere makes decals for a standard VT-7 aircraft. I had made a set some time back for a guy that was doing a 1/48th scale TA-4 conversion. Since the markings are mostly the same, I started with this artwork and changed the modex and BuNo numbers to match the single-seater that I was building. An image of my final decal artwork is to below (reduced in size to save space). The gray markings print as white in the decals.
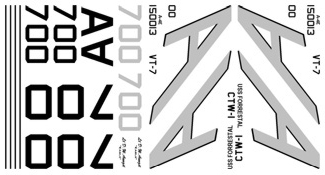
For anyone interested, I have been selling copies of these decals. Contact me at my e-mail address for details. Because I was selling the decals, I decided to whip up an instruction sheet, too. An image of the decal instructions is also displayed below.
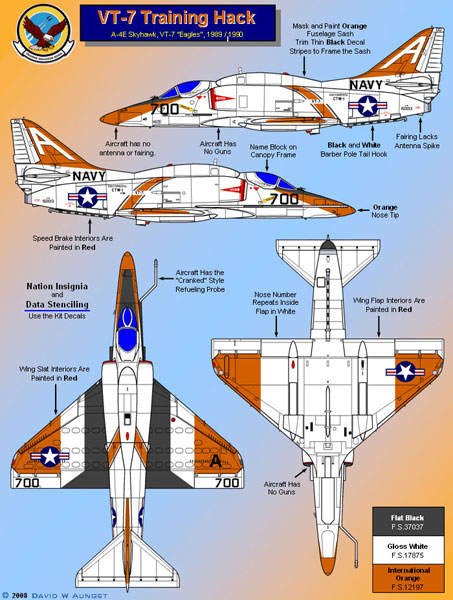
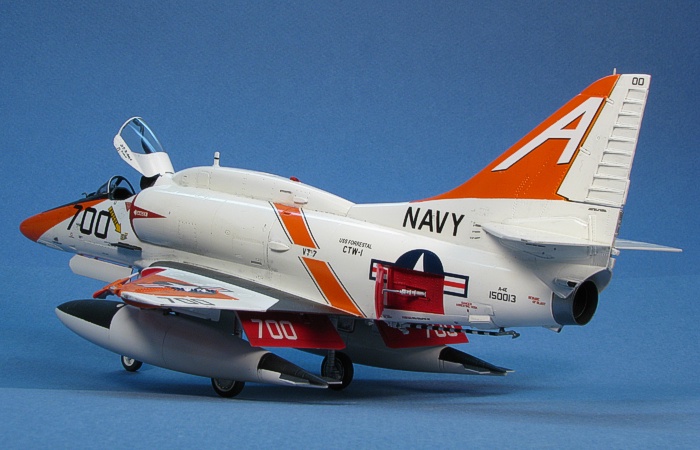
Fot the national insignia and airframe data, I used the Hasegawa kit decals. The wing national insignia were not quite opaque enough to cover the orange panels, so I applied two national insignia, one on top of the other. The first one made the areas very light orange. The second one was then just white.
For weathering, I used my typical style of thinned down enamel paint washes and air brush shading. I kept the weathering light since the aircraft in the picture looked to be pretty clean. I finished the weathering with some dry brushing to pop out the surface details. For a more complete discussion of what I do to weather my models, see my posting on "Weathering Aircraft".
Final Assembly
One of the things I have grown to dislike in building the Hasegawa Skyhawk kits are the navigation and position lights. As separate clear pieces, they look really nice on the model, but they are a pain in the butt to attach and paint. I start by painting the model silver in all the places the lights go. This makes the lights look bright when viewed on the completed model. Then, I attach the lights. Once attached, I get out the clear Tamiya paints and paint the red and green (I actually use blue) navigation lights and beacons. It is not overly difficult work, but I hate dealing with the Tamiya jars. Painting the frames on the wing tip lights is also a pain in the butt, but they look really nice when done.
This brought me up to the home stretch. I had a completed airframe, including the weathering. I had a bunch of painted and completed parts and sub-assemblies. See the following picture. All I needed to do was attach everything.
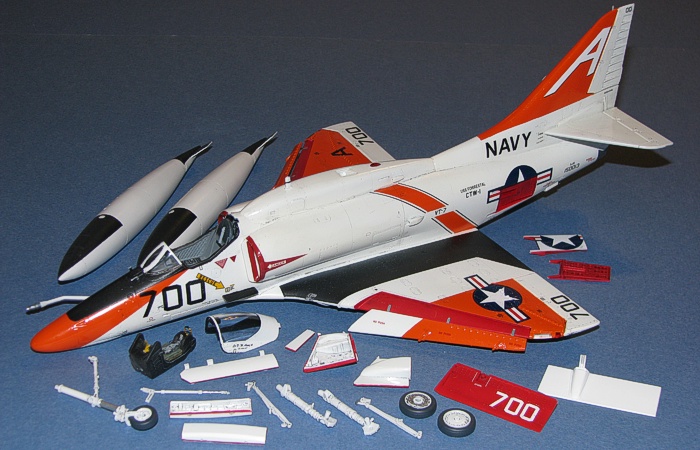
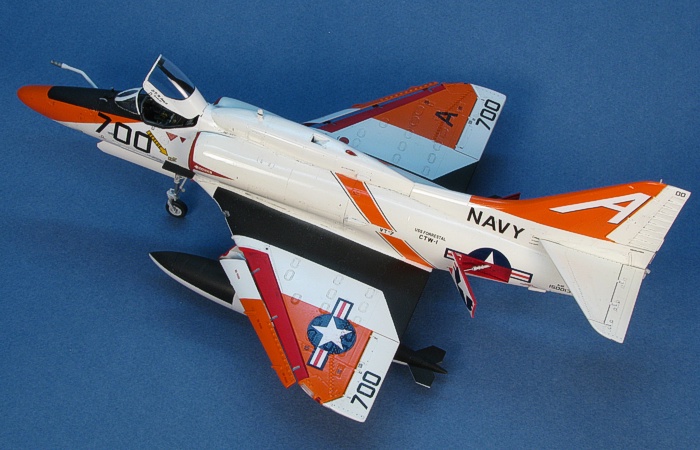
Following the attachment of the lights and weathering, I plugged in the landing gear and attached the wheel well doors. My favorite Skyhawk weapons load is two fuel tanks, but the aircraft in the images I saw appeared to have the larger 400 US gallon tanks. I needed to whip up a pair of these.

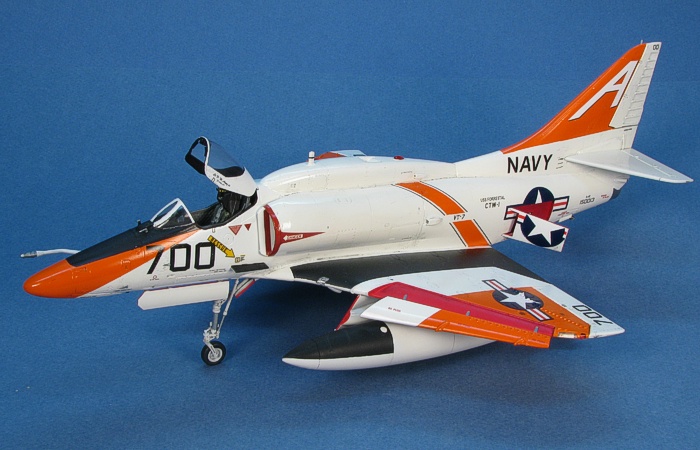
400 US Gallon Fuel Tanks
The image above shows my work to create 400 gallon wing fuel tanks. The tanks provided by Hasegawa are the 300 gallon size. While these are correct for use on any Skyhawk version, the VT-7 Skyhawk in the images I had seemed to be using the larger 400 gallon type.
The 400 gallon tanks were constructed using the tail fin assemblies from the Hasegawa kit (the lighter gray plastic), mated onto the Monogram A-4 Skyhawk wing tanks (the darker gray plastic). While I have no actual dimensions for the size of a 400 gallon tank, the observed size difference between the Hasegawa and Monogram tanks seems about right for what I have seen in pictures. I chose to use the Hasegawa fin assembly because I liked its shape and details better than the Monogram provided fins.
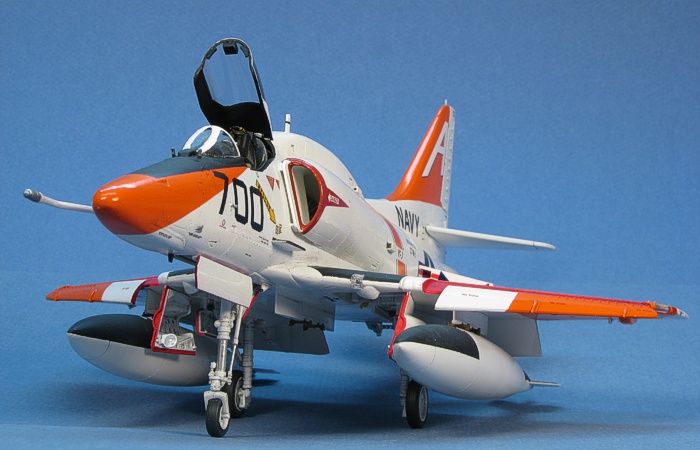
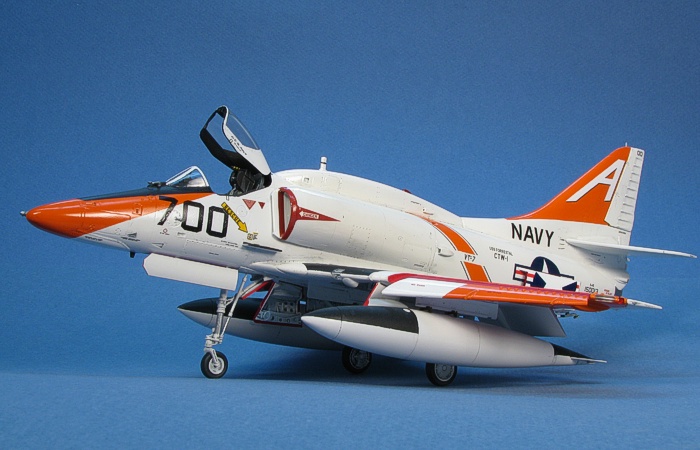
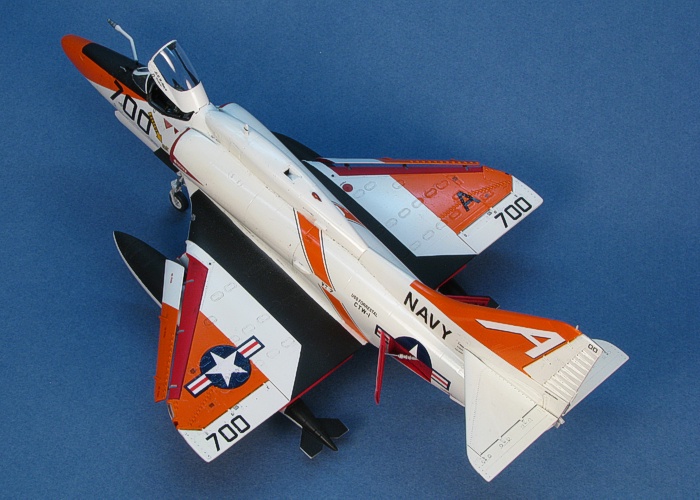
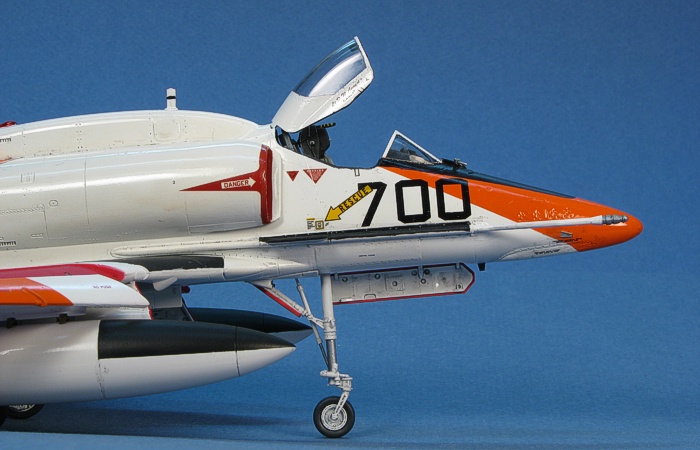
With the model sitting on its landing gear with its full load of fuel tanks, I unmasked the canopy, slipped in the already painted ejection seat, and attached the canopy in the open position. Then, I declared the project complete.
There you have it, another A-4 Skyhawk model. You can never have too many. This one makes a nice splash of color on my display shelves.
Anyone wanting a set of these markings can contact me. I am selling these decals to anyone interested. I can even customize the artwork to place your name, rank, and call-sign on the canopy.
Project Statistics
Completion Date: |
27 September, 2008 |
Total Building Time: |
38.6 |
Research: |
0.3 |
Construction: |
9.4 |
Painting: |
15.8 |
Decals / Markings: |
12.3 |
Extra Detailing / Conversion: |
0.8 |
Model,
Text Copyright © 2008 by David W. Aungst
Page Created 13 October, 2008
Last Updated 13 October, 2008
Back to HyperScale
Main Page |
 Home
| What's New |
Features |
Gallery |
Reviews |
Reference |
Forum |
Search
Home
| What's New |
Features |
Gallery |
Reviews |
Reference |
Forum |
Search