|
Hasegawa's 1/48 scale A-4F Super Fox
SIOP Mongoose
by David W. Aungst
|
A-4F Super Fox Skyhawk |

Hasegawa's 1/48 scale A-4E/F Skyhawk is available online from Squadron.com
Background
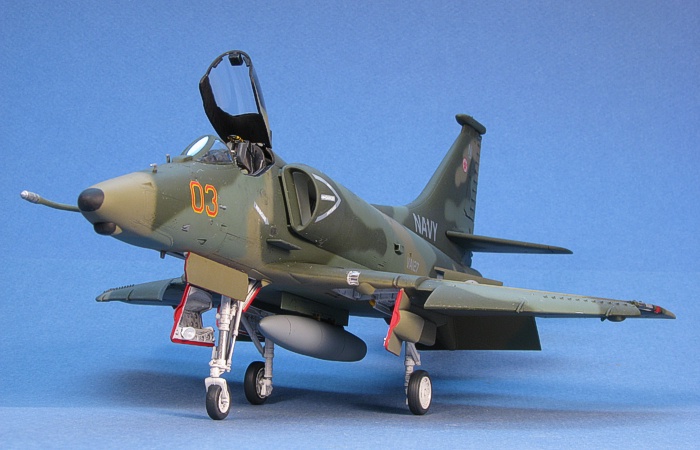
This is a "What If..." adversary Skyhawk model. You can chalk this up to me just being weird. With all the varied and unique A-4 Skyhawks in adversary camouflages, why in the world would I create a "What If..." adversary Skyhawk model? The simple answer is that I like "What If..." modeling. I find it to be a challenge to make a "What If..." model that does not actually look like a "What If..." model. I also have a few camouflage color combinations I would like to see on the aircraft that never seemed to get used by any of the adversary units.
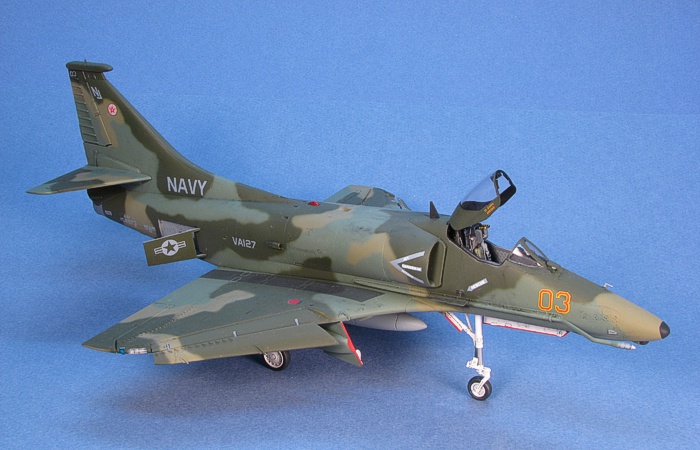
I really like the SIOP colors on the early B-52 and the FB-111 aircraft. I have always considered it a shame that no other aircraft types got these colors applied. I figured that if anyone were to have played with these colors, it would have been the adversary community. So, I drew up a diagram on my PC to try out the colors on the Skyhawk shape. I liked what I saw enough that I was willing to put time into actually building a model in the scheme.
The Kit
This is one of the releases of the fabulous 1/48th scale A-4 Skyhawk kit family from Hasegawa. There are many reviews of these kits, some even written by me, scattered about the Internet to tell you all the great things about these kits, so I am not going to get long-winded here describing the kit. This model kit family would get my vote for being one of the finest 1/48th scale modern jet models ever kitted.
The exact kit I used for this project is the A-4F "Super Fox" Skyhawk (stock#09660). This kit provided in the box most everything I needed to make the adversary "Super Fox" Skyhawk in this project. The only change in the box from the stock A-4E/F kit is the replacement of the sprue with the engine intake pieces. They took out the sprue with the standard A-4E/F intakes and replaced it with a sprue providing the minimally bulged engine intakes as found on the A-4Ms, A-4Ns, A-4KUs, and upgraded A-4Fs that were referred to as "Super Fox" aircraft.
The point to the project was the camouflage, so I wasted very little time on extra detailing. I built the kit pretty much as instructed in the kit instructions. The only changes I made to the kit were to replace the kit ejection seat with a resin ejection seat (from Cutting Edge, stock#CEC48281), add a 150 US gallon fuel tank (swiped from a Monogram A-1H Skyraider kit), and the "hotdog" antenna on top of the tail (swiped in from a Hasegawa A-4N kit).
 I used Testors Model Master enamel paints for most of this project. Any color references here that do not explicitly state the manufacture are Testors Model Master enamel paints. I used Testors Model Master enamel paints for most of this project. Any color references here that do not explicitly state the manufacture are Testors Model Master enamel paints.
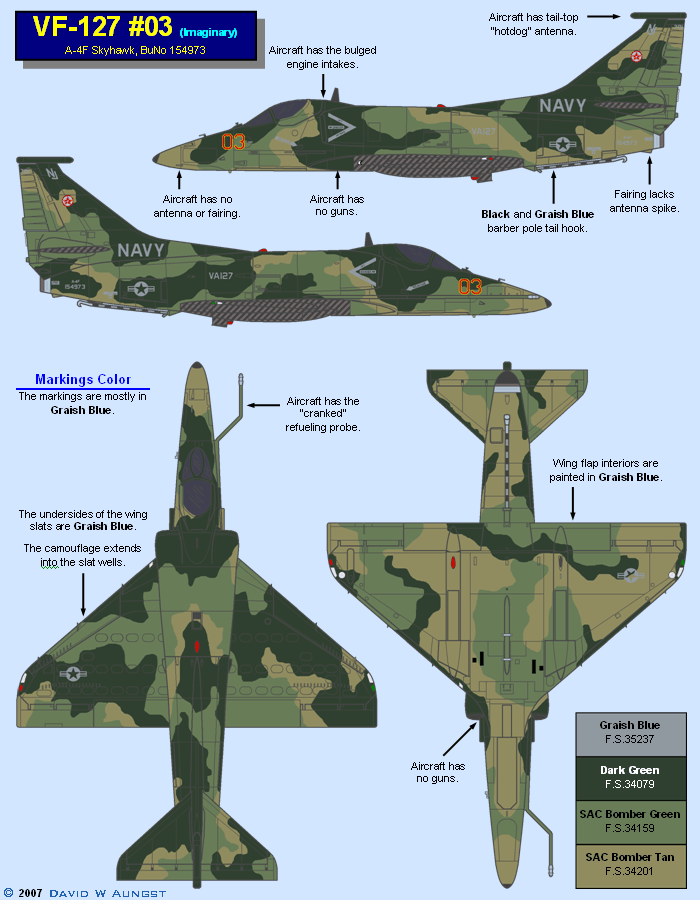
The three colors in the SIOP camouflage are SAC Bomber Green (F.S.34159), SAC Bomber Tan (F.S.34201), and Dark Green (F.S.34079). In the true SIOP scheme, the bottom areas would be Camouflage Gray (F.S.36622), but I chose to have a wrap-around scheme on the model, so I did not need this fourth color.
The camouflage diagram I created is shown below. I designed the pattern to keep the darker colors more on top and the lighter colors more on the bottom.
Decals for the model are taken from the SuperScale sheet 48-317. These specific decals go to a blue and gray A-4F "Super Fox" aggressor. So that the BuNo provided in the decals would still be appropriate, I needed to build the model as a "Super Fox" Skyhawk (hence my kit choice). I chose to make the airframe a little more different from the blue-gray aircraft in the decals by including the "hotdog" tail-top antenna.
To supplement the SuperScale decals, I printed up a couple custom decals in the form of the wing walkways. I had already done the artwork of the walkways for other Skyhawks I had built, so I just changed the color of the decals for the walkways and printed them. The effect I was looking for on the walkways was a shading change that would still show the camouflage colors. Printing the custom decals in light gray on my laser printer made the decals translucent. This see-through quality captured the look I was aiming for.
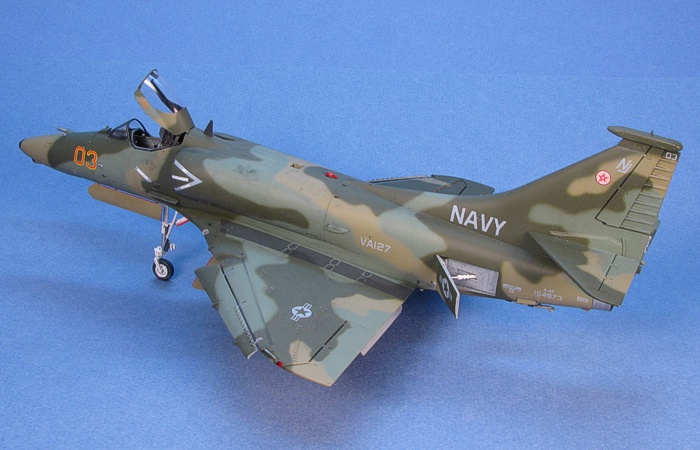
For weathering, I used my typical style of thinned down enamel paint washes and air brush shading. I finished the weathering with some dry brushing to pop out the surface details. For a more complete discussion of what I do to weather my models, see my posting on "Weathering Aircraft".
Construction Continues
One of the things I have grown to dislike in building the Hasegawa Skyhawk kits are the navigation and position lights. As separate clear pieces, they look really nice on the model, but they are a pain in the butt to attach and paint. I start by painting the model silver in all the places the lights go. This makes the lights look bright when viewed on the completed model. Then, I attach the lights. Once attached, I get out the clear Tamiya paints and paint the red and green (I actually use blue) navigation lights and beacons. It is not overly difficult work, but I hate dealing with the Tamiya jars. Painting the frames on the wing tip lights is also a pain in the butt, but they look really nice when done.
This brought me up to the home stretch. I had a completed airframe, including the weathering. I had a bunch of painted and completed parts and sub-assemblies. See the following picture. All I needed to do was attach everything.
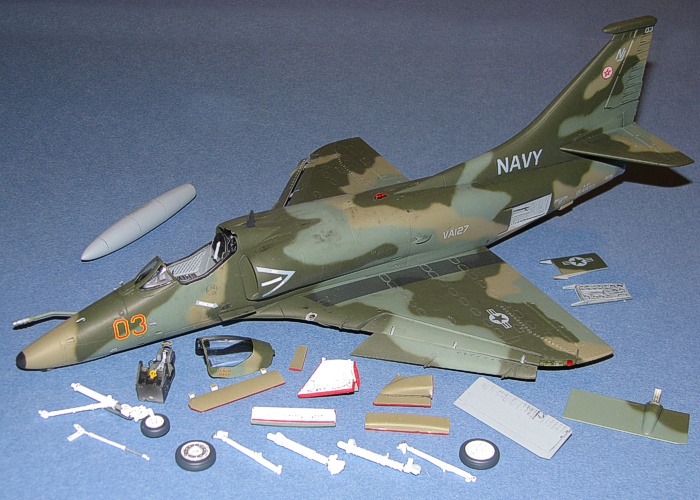
Having minimal under-wing stores made the final assembly process pretty quick.
To help keep the weight of the aircraft down, the adversary units were partial to using only a 150 US gallon centerline fuel tank (if any tank at all was carried). No kits provide this tank, though, so I went on a quest to find something that would work. What I ended up with was a napalm tank from the Monogram A-1H Skyraider kit. While this tank was not quite big enough and way too pointy, I was able to adjust its shape enough to make it work as a 150 US gallon fuel tank.
The landing gear was painted while I was painting the rest of the model, so I just slipped the landing gear struts and bracing into the locator holes and added glue. I really hate doing the red edges on the wheel well doors of US Navy aircraft, but I have developed a system that works for me (a 10/0 paint brush and nerves of steel). I added the red edges on the doors, then attached them.
Finally, I unmasked the canopy and touched up the painting of the cockpit sills. I had already painted the Cutting Edge ejection seat during the time I was painting the rest of the airframe, so now I just inserted it into the cockpit. Attaching the canopy in the open position completed the project.
"What If..." models are a lot of fun for me. I have a few other color combinations I want to try out on the Skyhawk, so expect more of these in the future (sometime).
Project Statistics
Completion Date: |
27 Sepetmber, 2008 |
Total Building Time: |
35.5 |
Research: |
8.5 |
Construction: |
8.5 |
Painting: |
15.3 |
Decals / Markings: |
2.3 |
Extra Detailing / Conversion: |
1.0 |
Model,
Text Copyright © 2008 by David W. Aungst
Page Created 21 October, 2008
Last Updated 21 October, 2008
Back to HyperScale
Main Page |
Home
| What's New |
Features |
Gallery |
Reviews |
Reference |
Forum |
Search