|
Hasegawa's 1/48 scale A-4F
Super Fox Aggressor
by David W. Aungst
|
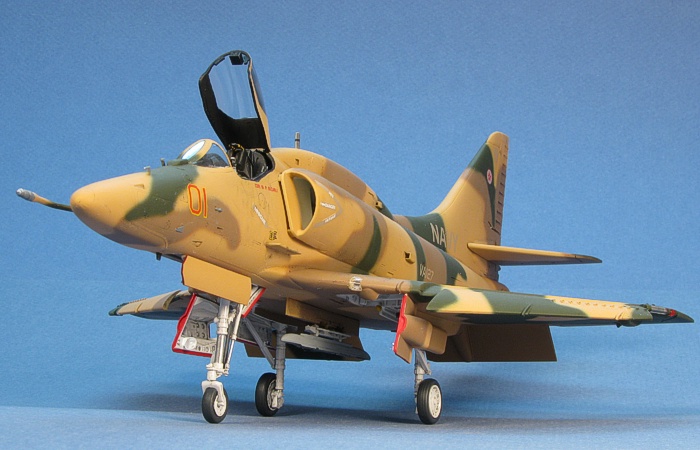
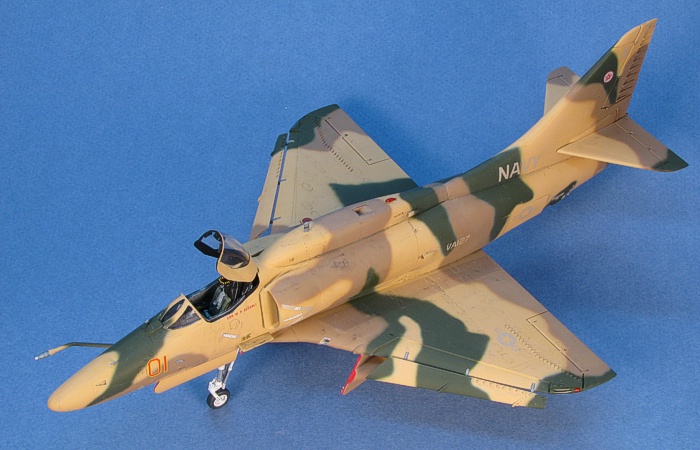
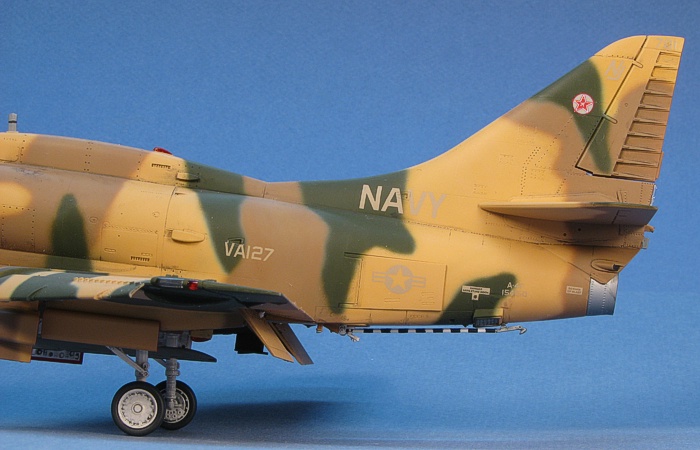
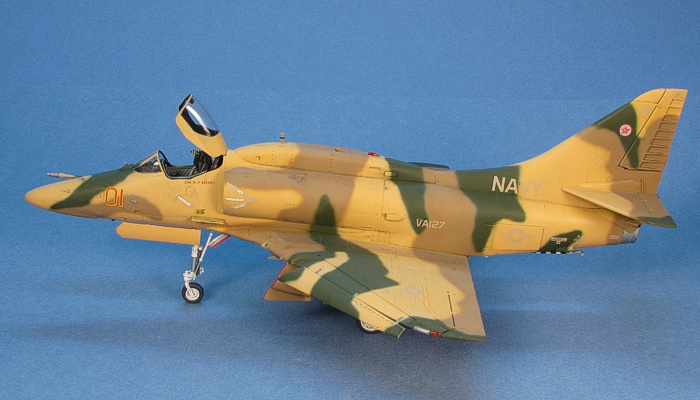
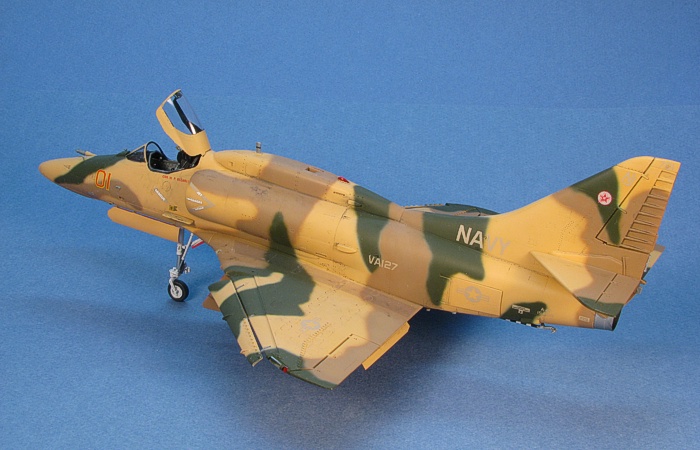
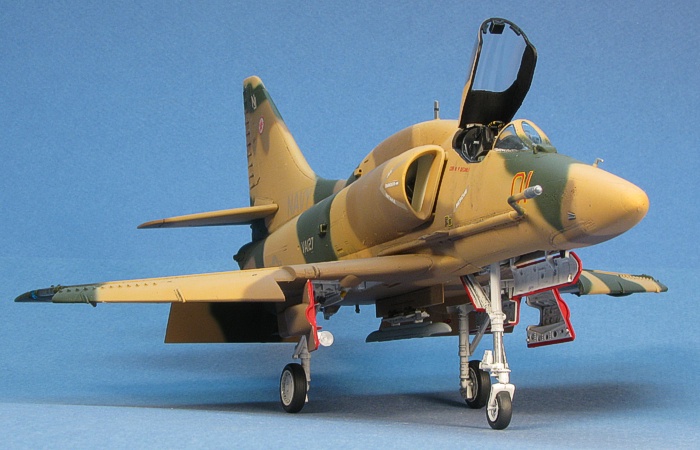
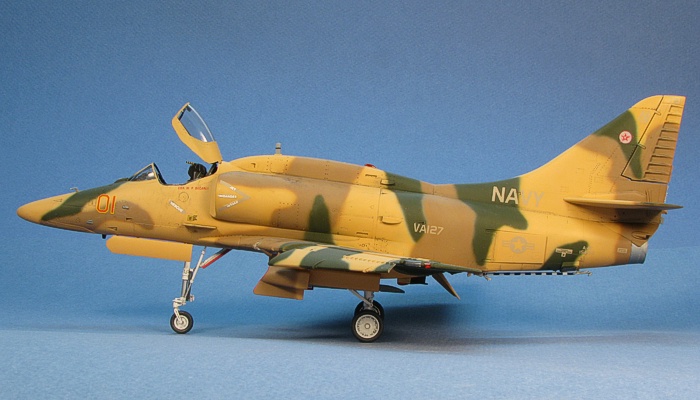
A-4F Super Fox Aggressor Skyhawk |

Hasegawa's 1/48 scale A-4E/F Skyhawk is available online from Squadron.com
Background
This is one of the Skyhawks from my eight Skyhawk "one man group build".
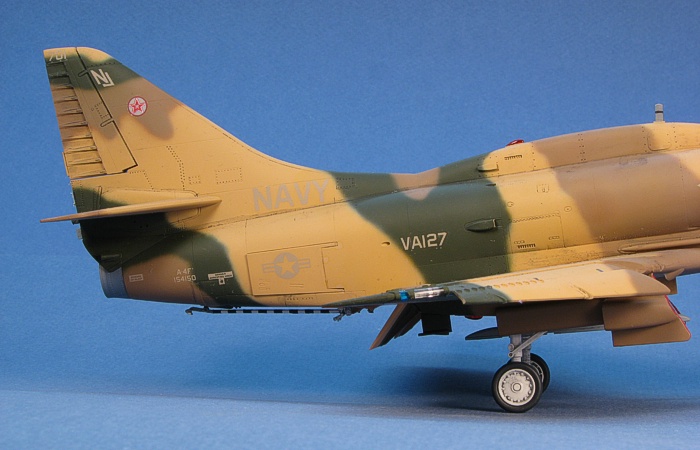
This particular Skyhawk has always been a favorite of mine. It is one of the few single-seat adversary Skyhawks that retained its avionics hump (at least for a little while). To save weight, most all other single-seat adversary Skyhawks had the hump removed. In time, this aircraft had the hump removed, too.
Add to having the hump the fact that the camouflage on the aircraft is one of the tan desert schemes, which tend to be some of my favorite adversary schemes. These attributes both kept this aircraft near the top of my "Skyhawks to build" list. When the "one man group build" kicked off, it was a natural to have this Skyhawk in the mix.
The Kit
This is one of the releases of the 1/48th scale A-4 Skyhawk kit family from Hasegawa. It is a great kit with good fit and well executed details. There are plenty of reviews of these kits on the Internet (some even written by me), so I will not waste space here re-hashing these other reviews. For more detail on the kit, itself, check out the other reviews.
The exact kit I used for this project is the A-4F "Super Fox" Skyhawk (stock#09660). This kit provided in the box most everything I needed to make the adversary "Super Fox" Skyhawk in this project. The only change in the box from the stock A-4E/F kit is the replacement of the sprue with the engine intake pieces. They took out the sprue with the standard A-4E/F intakes and replaced it with a sprue providing the minimally bulged engine intakes as found on the A-4Ms, A-4Ns, A-4KUs, and upgraded A-4Fs that were referred to as "Super Fox" aircraft.
The point to the project was the camouflage, so I wasted very little time on extra detailing. The kit is built primarily out-of-the-box. The only extra item I did was to replace the kit ejection seat with a resin ejection seat (from Cutting Edge, stock#CEC48281).
 I used Testors Model Master enamel paints for most of this project. Any color references here that do not explicitly state the manufacture are Testors Model Master enamel paints. I used Testors Model Master enamel paints for most of this project. Any color references here that do not explicitly state the manufacture are Testors Model Master enamel paints.
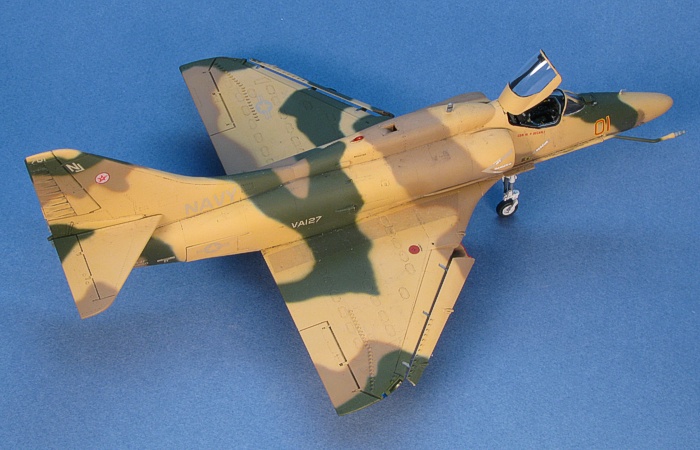
The camouflage colors are up for discussion. All that is available on this aircraft are pictures that introduce all sorts of variations based on the lighting, the film type, the printing process, etc... After studying pictures and applying some educated gueses, I came up with the colors being Dark Tan (F.S.30219), Tan Special (F.S.30400), and Dark Green (F.S.34079).
It is possible that the Dark Tan color could really be a faded Brown Special (F.S.30140). Using Brown Special would bring the camouflage colors in line with being the accepted "Flogger" colors which were widely used in the adversary communittee. But, I was not convinced of this after looking closely at the pictures.
During my study of the camouflage, I created the online diagram seen to the left. Some areas of the diagram are still just conjecture as I did not have pictures of all the airframe. This is as close as I could get after looking through all the images I could find.
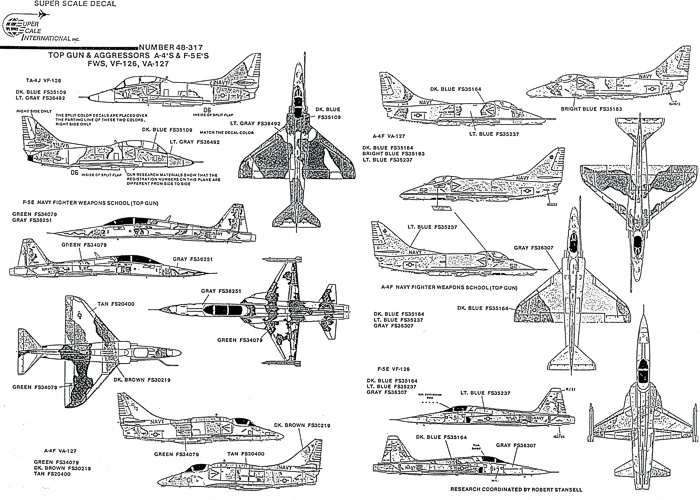
Decals for this aircraft were released by SuperScale on decal sheet 48-317. The instructions for this decal sheet are terrible, being nothing more than a badly washed-out photo copy, but the decals themselves are pure gold because they provide markings in colors that are just not found anywhere else. Note that this sheet was re-printed and re-released at least once and the re-printed sheet used varied colors from the original release version. I have both original and later release copies of this decal sheet. The color of the decals for this specific aircraft are printed in a better color on the original release of the sheet. They are substancially darker in the re-release version of the sheet.
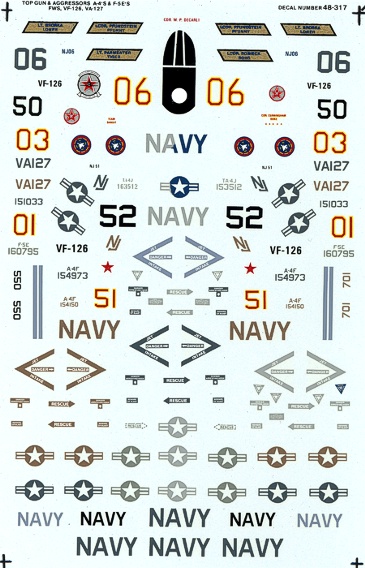
To supplement the SuperScale decals, I printed up a couple custom decals in the form of the wing walkways. I had already done the artwork of the walkways for other Skyhawks in my "group build", so I just changed the color of the decals for the walkways and printed them. The effect I was looking for on the walkways was a very light shading change that would still show the camouflage colors. Printing the custom decals in light gray on my laser printer made the decals translucent. This see-through quality captured the look I was aiming for.
For weathering, I used my typical style of thinned down enamel paint washes and air brush shading. I finished the weathering with some dry brushing to pop out the surface details. For a more complete discussion of what I do to weather my models, see my posting on "Weathering Aircraft".
Construction Continues
One of the things I have grown to dislike in building the Hasegawa Skyhawk kits are the navigation and position lights. As separate clear pieces, they look really nice on the model, but they are a pain in the butt to attach and paint. I start by painting the model silver in all the places the lights go. This makes the lights look bright when viewed on the completed model. Then, I attach the lights. Once attached, I get out the clear Tamiya paints and paint the red and green (I actually use blue) navigation lights and beacons. It is not overly difficult work, but I hate dealing with the Tamiya jars. Painting the frames on the wingtip lights is also a pain in the butt, but they look really nice when done.
This brought me up to the home stretch. I had a completed airframe, including the weathering. I had a bunch of painted and completed parts and sub-assemblies. See the following picture. All I needed to do was attach everything.
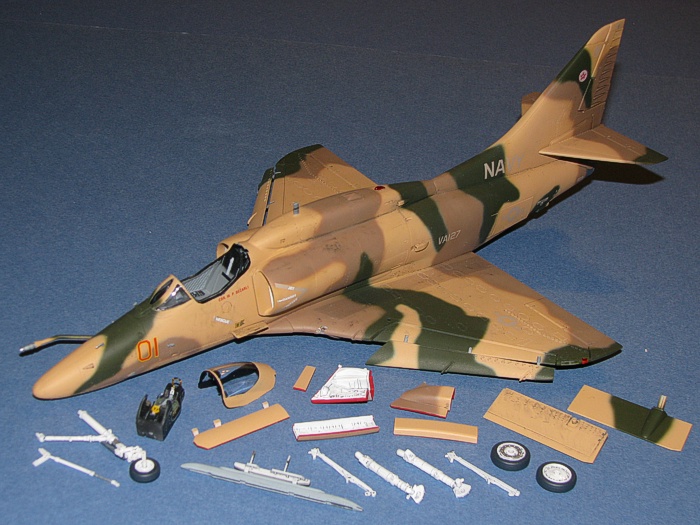
Since the model has no weapons or stores, the final assembly after addressing the lights was a quick one.
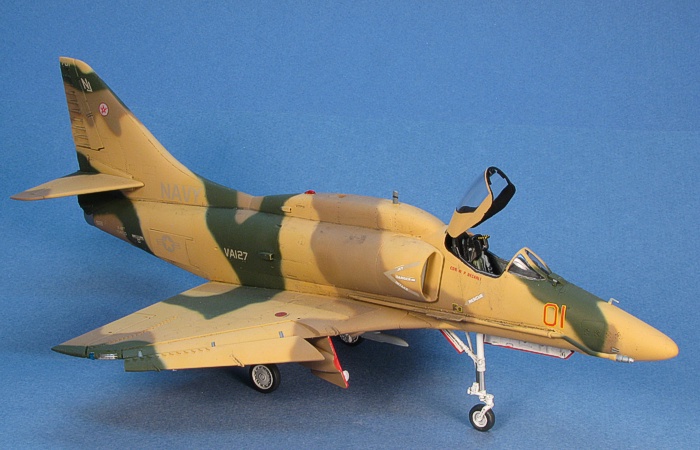
I unmasked the canopy and touched up the painting of the cockpit sills. I had already painted the Cutting Edge ejection seat during the time I was painting the rest of the airframe, so now I just inserted it into the cockpit.
The landing gear was also painted while I was painting the rest of the model, so I just slipped the landing gear struts and bracing into the locator holes and added glue. I really hate doing the red edges on the wheel well doors of US Navy aircraft, but I have developed a system that works for me (a 10/0 paint brush and nerves of steel). I added the red edges on the doors, then attached them.
Most adversary aircraft have a Sidewinder missile rail installed on one of the weapons pyons so that they can carry an Air Combat Maneuvering Instrumentation (ACMI) pod. Even when the pod is not carried, the missile rail is left in place awaiting the next time the pod is loaded. I chose to include an empty Sidewinder missile rail on my model on the centerline weapons station. Since the missile rail pieces are provided in the basic Hasegawa Skyhawk kits, it is a no-brainer to just use one.
Attaching the canopy in the open position completed the project.
"What If..." models are a lot of fun for me. I have aI have built enough Hasegawa A-4 Skyhawks that I am running out of witty conclusions to write in my postings. It is a great kit in any of its release versions. Buy one and build it!
With seemingly endless camouflages worn on the adversary aircraft (A-4Es, A-4Fs, and TA-4Js), there is no real end to the number of Skyhawks I can build. Expect more in the future...
Project Statistics
Completion Date: |
27 Sepetmber, 2008 |
Total Building Time: |
27.6 |
Research: |
0.2 |
Construction: |
7.7 |
Painting: |
16.2 |
Decals / Markings: |
3.3 |
Extra Detailing / Conversion: |
0.2 |
Model,
Text Copyright © 2008 by David W. Aungst
Page Created 22 October, 2008
Last Updated 22 October, 2008
Back to HyperScale
Main Page |
 Home
| What's New |
Features |
Gallery |
Reviews |
Reference |
Forum |
Search
Home
| What's New |
Features |
Gallery |
Reviews |
Reference |
Forum |
Search