|
Hasegawa's 1/48 scale A-4M Skyhawk
Aggressor Mike
by David W. Aungst
|
A-4M Skyhawk |

Hasegawa's 1/48 scale A-4M Skyhawk is available online from Squadron.com
Background
A-4Ms were all delivered in the standard Gull Gray and White camouflage scheme. By the time they were retired, this had changed to a tactical low-vis camouflage of light grays. If you want to build an A-4M model, these are mostly the only shows in town.
There were a small group of A-4Ms that were sent to the adversary units of Topgun and VF-126 (four aircraft to each). In time, these aircraft saw the same aggressor camouflages as did the rest of the Skyhawks in adversary service. This makes these aircraft big candidates in my book for model building.
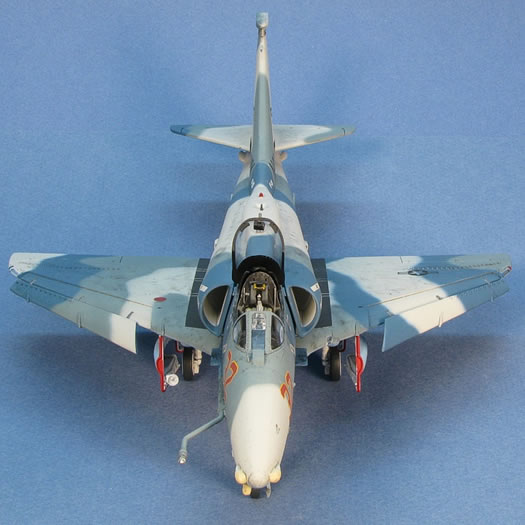
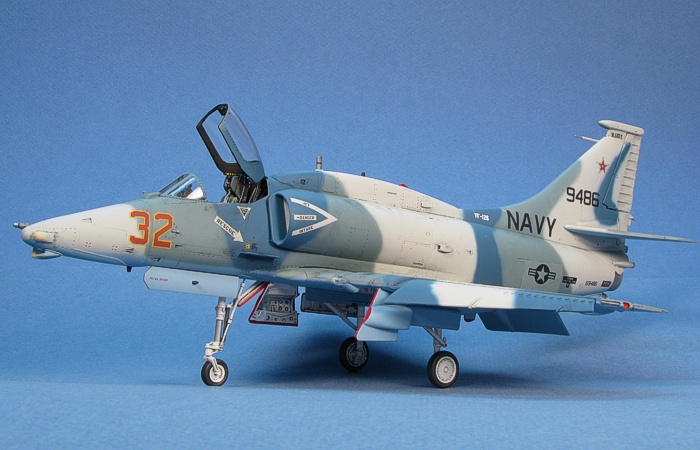
My favorites of these aircraft are the ones in VF-126 that got a camouflage of blue and gray applied to their tops and light blue on their bottoms. It was only a matter of time until I built one of these aircraft.
The Kit
This is the Hasegawa 1/48 scale A-4M Skyhawk (item #07233), one of the releases in the fabulous 1/48th scale A-4 Skyhawk kit family from Hasegawa. See my Diamondbacks Skyhawk posting for a full description of what the Hasegawa Skyhawk kits are like. This posting only highlights the changes done to the A-4E Skyhawk kit to make the A-4M version.
The A-4M kit is more than 90% the same as the original A-4E/F kit. This makes perfect sense because the A-4M is just an upgraded A-4E/F. To modify the A-4E into an A-4M, Hasegawa made the following revisions to the A-4E kit:
They revised the main fuselage pieces to provide the proper canopy shape. They also made it so the forward nose section was separate pieces. This provided them the ability to swap in alternate nose pieces for early and late A-4M versions.
They provided an alternate sprue for the engine intakes. This alternate sprue has the pieces for the minimally bulged engine intakes found on the A-4M (and A-4KUs, A-4Ns, and upgraded A-4Fs). It also includes the matching minimally enlarged engine exhaust for the upgraded J57-P408 engine.
They included a new sprue with all the rest of the parts unique to the A-4M Skyhawk. These parts include the ECM antennae for the nose and engine exhaust, a revised avionics hump (yes, the A-4M has a minimally different hump from the A-4E/F), a new main instrument panel for in the cockpit, and the "hot dog" antenna for the top of the vertical tail. I wish they had placed the "hot dog" antenna on the sprue with the bulged intakes so it would be available in the A-4F "Super Fox" kits, but beggars can not always be choosers.
Most everything else you would need for an A-4M was already in the original A-4E release of the kit.
Updated instructions for an A-4M and decals appropriate to A-4Ms round out the revised release.
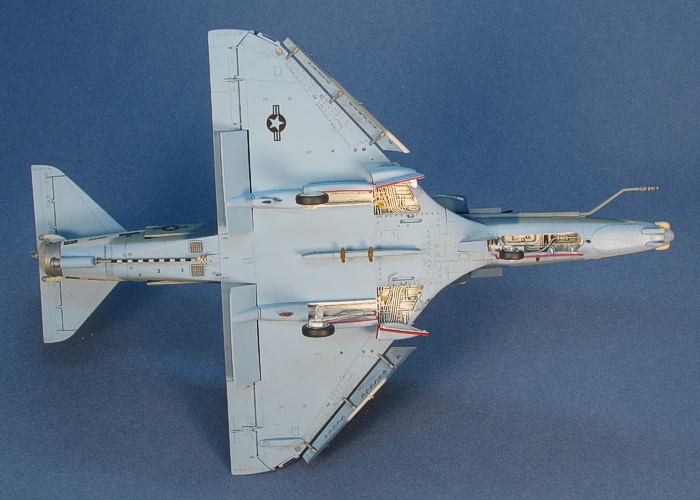
The only change I made to the kit over what comes in the box is that I replaced the ejection seat with a Cutting Edge resin ejection seat. The rest of the model was built using the parts already in the kit. I did some minor mixing and matching of kit parts to get the right antenna fit on the airframe, but the kit gives you all the needed pieces in the box. All I needed to know is which pieces to put in what places.
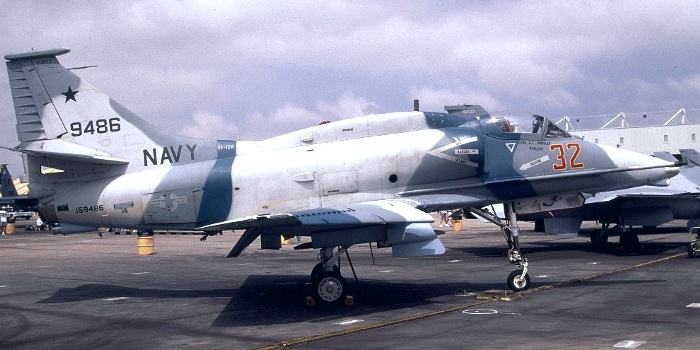
September 1993
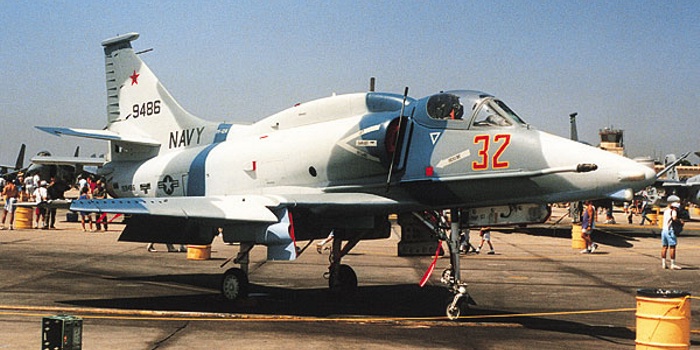
Date Unknown
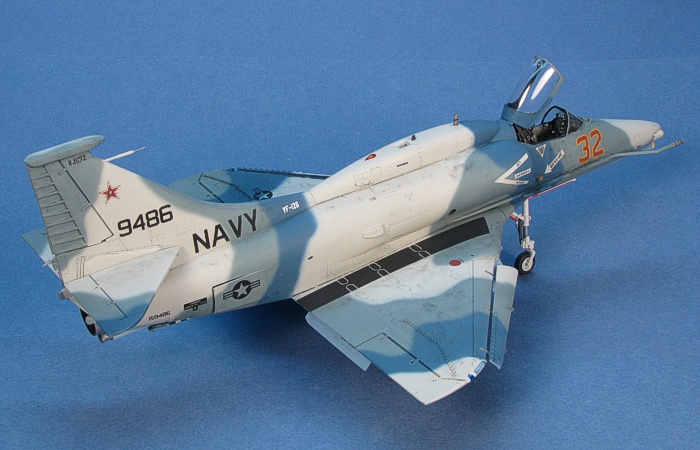
 I found the above two images on the Internet of the specific aircraft I wanted to build. Using these images and some others I have in various books, I created the camouflage and markings diagram to the left. This diagram then drove my process to finishing the model. I found the above two images on the Internet of the specific aircraft I wanted to build. Using these images and some others I have in various books, I created the camouflage and markings diagram to the left. This diagram then drove my process to finishing the model.
I used all Testors Model Master enamel paints to build this model.
As the diagram shows, the colors I used for this model are Aggressor Blue (F.S.35109), Graish Blue (F.S.35237), and L.Gray (F.S.36495) in the topside camouflage and Air Superiority Blue (F.S.35450) on the bottom. All the topside colors are available as bottle colors in the Model Master paint line. As no manufacture seems to make Air Superiority Blue, I needed to do some custom mixing to achieve this color. I found Flanker Medium Blue in the Model Master line (stock#2131) was close, but it was a little too light, so I used Bright Blue (F.S.35183) to make it richer. I used a mixing ratio of 6:1. That is six parts Flanker Medium Blue with one part Bright Blue.
Originally, I planned to custom print my own decals for this project. Since most of the markings are just black, it would not have been overly difficult. Then, TwoBobs decals released a set of decals that included this exact aircraft. Who was I to argue? The TwoBobs sheet was not without issues, though.
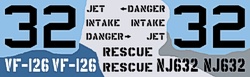 The biggest error in the TwoBobs decals is the color of the warning markings for the engine intake, the rescue arrows, and the ejection triangles. After some study, I decided I could paint the backgrounds for these markings, then create some custom decals to provide the writing. The image to the right shows the decal artwork (reduced in size to save space). The biggest error in the TwoBobs decals is the color of the warning markings for the engine intake, the rescue arrows, and the ejection triangles. After some study, I decided I could paint the backgrounds for these markings, then create some custom decals to provide the writing. The image to the right shows the decal artwork (reduced in size to save space).
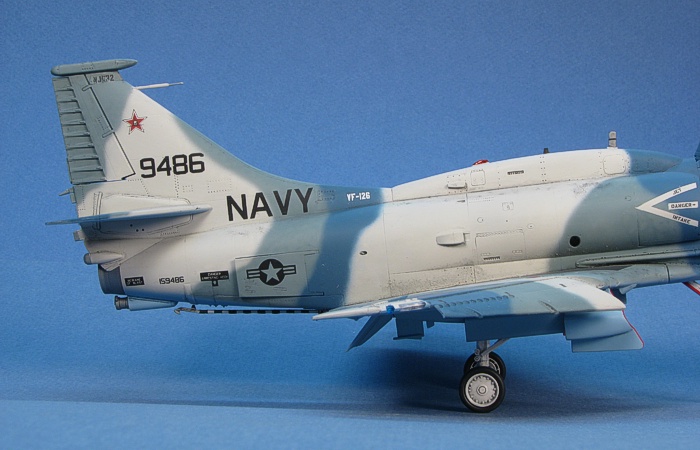
Since the markings only needed simple masking for some stripes, a triangle, and arrow, I was able to paint these without much trouble. I painted the needed areas in the color of the markings (L.Gray) and masked the markings. Then I painted the camouflage. When I removed the masks, I had the backgrounds for the markings. All I needed to do was add the writing using black text decals. I got the black ejection triangles from an F-15 decal sheet.
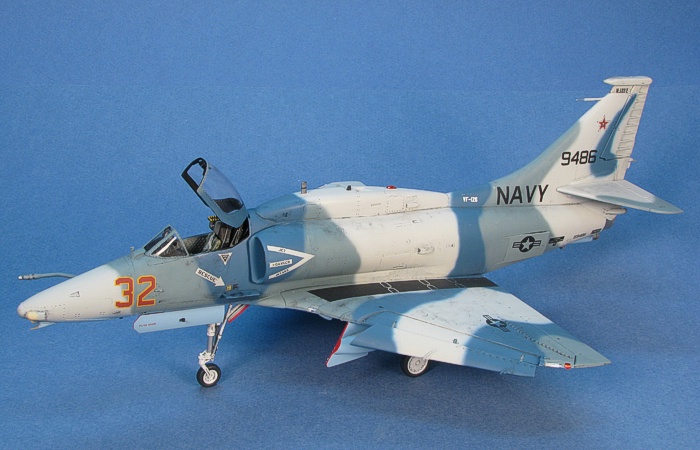
I was able to use most all the black decals from the TwoBobs decals. I also used the VF-126 unit badges on the vertical tail and "32" on the nose from TwoBobs. The "VF-126" and "NJ632" decals seemed too small, so I replaced them with custom decals.
The last custom decals I used were the wing walkways. I scanned in one of the Hasegawa wing tops to get the sizing of the kit's scribing. Then I created the walkway artwork to include the open sections for where the wing fuel cell ovals intersect with the walkway panel. It took about eight test prints until I adjusted the open sections to exactly line up with the wing panel lines. It was worth it when I applied the final decal on the model. The open panel lines in the walkway add a lot of interest to the walkway markings. By changing the colors to various grays, I was also able to use these walkway decals on my other Skyhawk models, too.
For weathering, I used my typical style of thinned down enamel paint washes and air brush shading. I finished the weathering with some dry brushing to pop out the surface details. For a more complete discussion of what I do to weather my models, see my posting on "Weathering Aircraft".
Construction Continues
One of the things I have grown to dislike in building the Hasegawa Skyhawk kits are the navigation and position lights. As separate clear pieces, they look really nice on the model, but they are a pain in the butt to attach and paint. I start by painting the model silver in all the places the lights go. This makes the lights look bright when viewed on the completed model. Then, I attach the lights. Once attached, I get out the clear Tamiya paints and paint the red and green (I actually use blue) navigation lights and beacons. It is not overly difficult work, but I hate dealing with the Tamiya jars. Painting the frames on the wing tip lights is also a pain in the butt, but they look really nice when done.
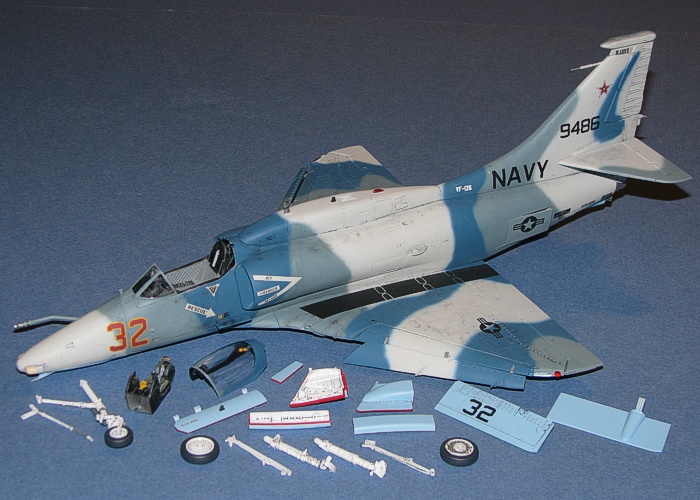
This brought me up to the home stretch. I had a completed airframe, including the weathering. I had a bunch of painted and completed parts and sub-assemblies. See the following picture. All I needed to do was attach everything.
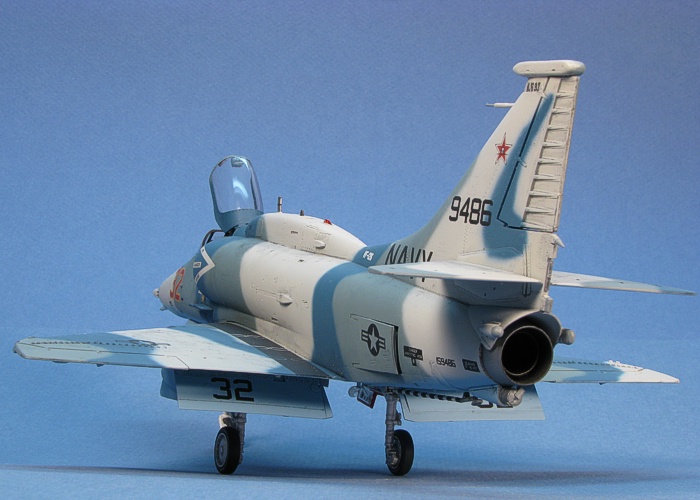
The wing flaps were first, followed quickly by the landing gear. I had painted these items while doing the rest of the airframe painting. I did a little detail painting before attaching the landing gear. I dislike doing the red edges on the wheel well doors of US Navy aircraft, but I have gotten used to it. It does not take me too long to whip them out with a 10/0 brush and a little patience. A gentle scrape with a new X-acto blade will remove any red paint from slip ups usually without hurting the underlying paint.
There are not many weapons options on adversary Skyhawks. The kit provides Sidewinder rails and adapters to hang these on the Skyhawk's weapons pylons. Adversary Skyhawks frequently have these rails on the centerline pylon for use with ACMI (Air Combat Maneuvering Instrumentation) pods. I decided, however, to leave the aircraft empty with no missile rails or anything else. I just drilled and pined the sway braces to the centerline weapons pylon without any ordnance of any kind.
With the landing gear and weapons load finished, I popped off the canopy and unmasked it. I slipped the Cutting Edge ejection seat (painted earlier) into the cockpit. Then, I attached the canopy in the open position and declared the project "done".
Another Skyhawk -- what can I say? It is a great kit and fun to build.
This is a member of my "one man group build" where I built eight Skyhawks all together at one time. Look for the other Skyhawks in their own articles.
Project Statistics
Completion Date: |
27 Sepetmber, 2008 |
Total Building Time: |
33.1 |
Research: |
1.3 |
Construction: |
10.2 |
Painting: |
17.2 |
Decals / Markings: |
4.2 |
Extra Detailing / Conversion: |
0.2 |
Model,
Text Copyright © 2008 by David W. Aungst
Page Created 28 October, 2008
Last Updated 28 October, 2008
Back to HyperScale
Main Page |
 Home
| What's New |
Features |
Gallery |
Reviews |
Reference |
Forum |
Search
Home
| What's New |
Features |
Gallery |
Reviews |
Reference |
Forum |
Search