|
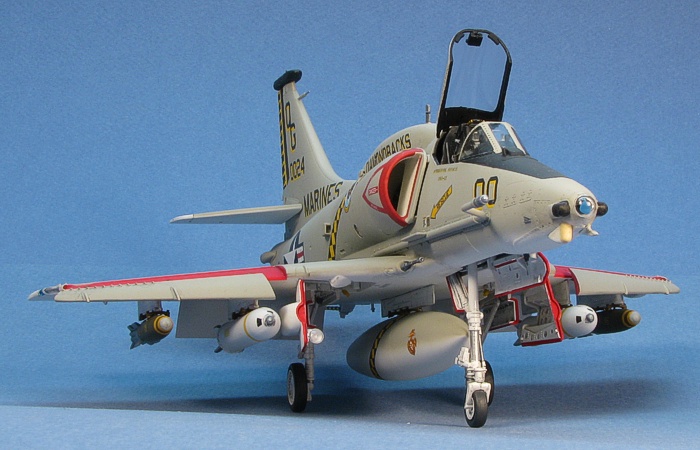
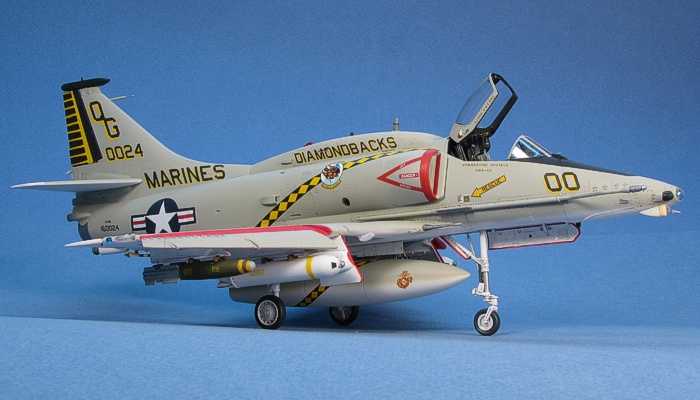
Hasegawa's 1/48 scale A-4M Skyhawk
Last Marine Scooter
by David W. Aungst

|
A-4M Skyhawk |

Hasegawa's 1/48 scale A-4M Skyhawk is available online from Squadron.com
Background
Having a personal connection with an aircraft makes building a model of it a special thing. This A-4M Skyhawk is one of those special things for me.
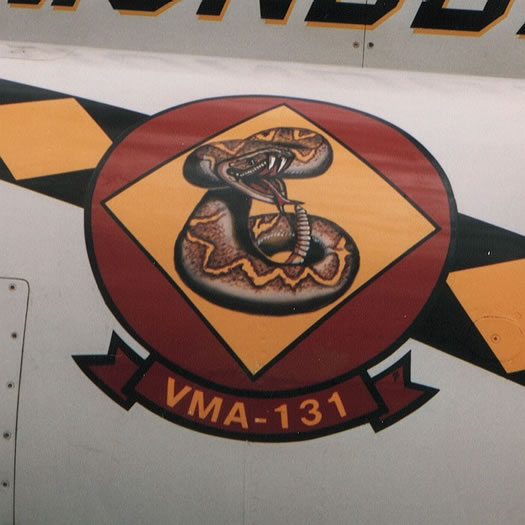
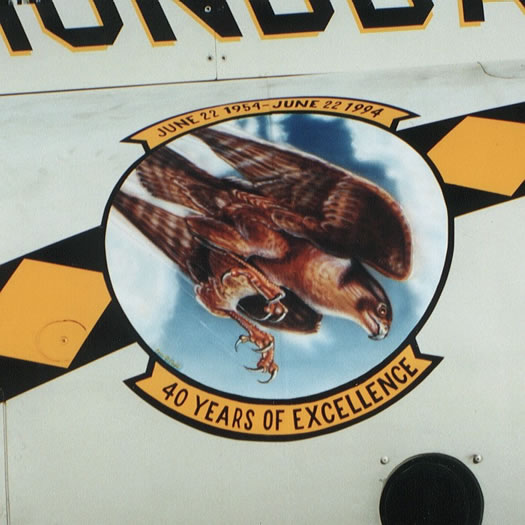
In late 1993, VMA-131 (an A-4M unit that used to live at a base near my house) was preparing to retire their Skyhawks the following year. A good friend that worked as a civilian contractor with the unit (a career Marine who himself had over a decade of service working on Skyhawks in the Corps) decided to get one of the Skyhawks painted up "right" for the occasion. He got the necessary approvals and they singled out BuNo 160024 to be the aircraft. This aircraft had been the command aircraft (nose number "00") for some time before it got chosen for this honor.
I visited the base with my friend in November of 1993 and took pictures of the aircraft during the re-painting. It was a bitter-sweet time, knowing the reason for the repainting was to retire the aircraft from service. The temperature in the hanger was downright cold (as you might expect in Pennsylvania in November). They were using portable heating units to try and help the newly-applied paint to dry.
I continued to visit the base periodically after the heavy duty re-painting was completed. They were always fussing over the details of the aircraft. Another friend (an artist by trade) who had helped in the overall painting of the aircraft was constantly adding little touches to the markings. Names and little artworks started appearing at various locations around the airframe.
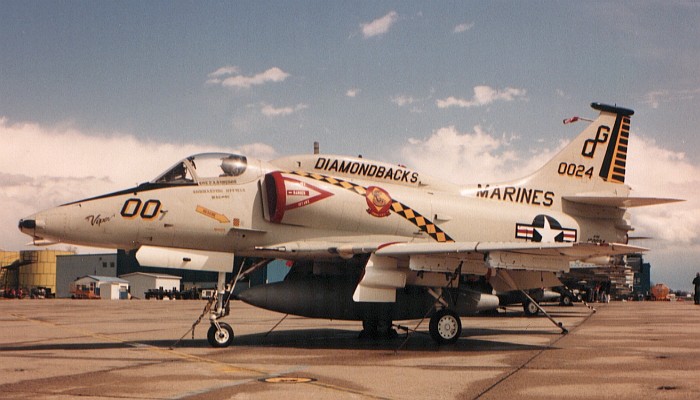
In June of 1994, I got a big opportunity and traveled to Arizona when the unit deployment to MCAS Yuma on their final deployment. I got to spend a weekend at MCAS Yuma on the flight line with the Skyhawks. The high point of the stay happened when I got to go to the arming pits and photograph the Skyhawks with live ordnance, including 160024. The model I have created here represents 160024 as seen in the image below, the way she looked that June day with live ordnance hanging as she taxied out for a training mission.
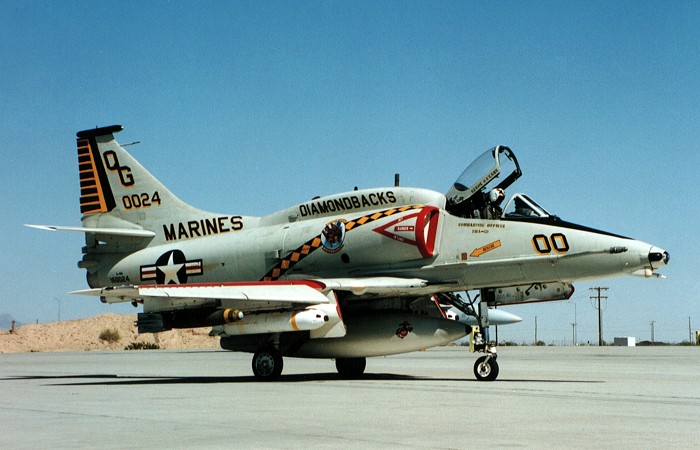
Reference Image of Double Nuts
I had to work the day 160024 made her last official flight and retired from USMC service. I heard about the ceremony from friends that attended and even the Marines in the crowd could not keep from shedding a few tears that day.
Today, 160024 lives as an outdoor display in the town of Havelock, North Carolina near MCAS Cherry Point. She still wears most of her distinctive markings as applied in 1994 by my friends.
The Kit
This is one of the fabulous 1/48th scale A-4 Skyhawk kits from Hasegawa. There are many reviews, some even written by me, scattered about the Internet to tell you all the great things about this kit. This model kit would get my vote for being one of the finest modern jet models ever kitted.
Hasegawa did their homework on this family of Skyhawk kits. Each one I have purchased (and I have purchase most of them) is true to the version that is pictured on the box top. The base kit has a lot of latitude built in with most all the standard antennae and airframe options already present in the kit pieces. By knowing what to mix and match in the kit pieces, you can do a lot with the kits. But if there are any specific detail on the box version that are not in the base kit, Hasegawa is good about providing these in white metal or resin.
I used kit number 09752 for this project. This is a special release from Hasegawa that is specifically the high-vis version of 160024. In fact, the box top image shows 160024 in flight for the exact mission where I was present in the arming pit to take my pictures. It was totally cool to see this image on the box top and realize what it was when they released the kit.
What comes in this special issue A-4M kit is the exact same plastic that comes in the standard issue A-4M kit. After all, 160024 is not anything special beyond its paint scheme. All that separates this kit from the standard issue A-4M kit is the instruction sheet (printed specific for this kit) and the decal sheet.
 Other than replacing the ejection seat with a Cutting Edge resin seat and adding weapons, I build the kit out-of-the-box. The Hasegawa Skyhawks leave little to desire for building a basic, well-detailed model of a Skyhawk. Most anything you might need is in the kit already. Other than replacing the ejection seat with a Cutting Edge resin seat and adding weapons, I build the kit out-of-the-box. The Hasegawa Skyhawks leave little to desire for building a basic, well-detailed model of a Skyhawk. Most anything you might need is in the kit already.
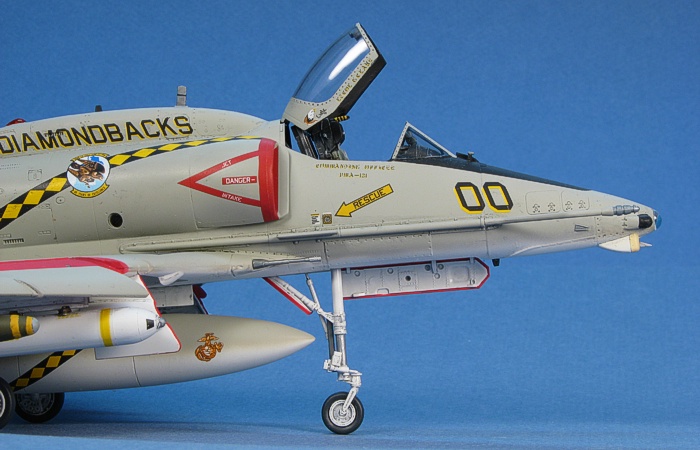
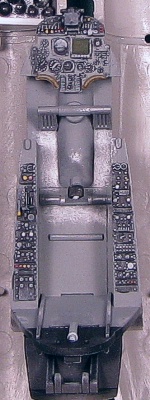
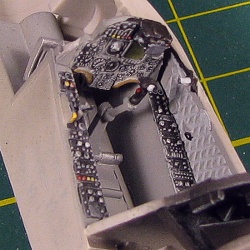 I painted up the cockpit in my usual style. The overall color is D.Gull Gray (F.S.36231). I painted the instruments with Interior Black, dry-brushed with L.Ghost Gray (F.S.36375) for highlighting details, and picked off specific details in red, yellow, Gunship Gray (F.S.36118), D.Ghost Gray (F.S.36320), and silver. I painted up the cockpit in my usual style. The overall color is D.Gull Gray (F.S.36231). I painted the instruments with Interior Black, dry-brushed with L.Ghost Gray (F.S.36375) for highlighting details, and picked off specific details in red, yellow, Gunship Gray (F.S.36118), D.Ghost Gray (F.S.36320), and silver.
I painted the intake ducts in Gloss White and the engine face in Steel metalizer. I also painted the engine tail pipe in Burnt Iron.
With all these painting tasks completed, I sealed up the fuselage. I took time to attach the nose fuselage pieces to their respective halves before assembling the fuselage. There was very little filling required. Next was the avionics hump. This required some minor adjustments to get a perfect fit, then I added glue and made it permanent.
The wings assembled quickly with no issues. Attaching the wings to the fuselage was actually a better fit than in the Hasegawa A-4E/F kits. Finally, I attached the "millions" of detail parts to prepare for starting to paint the exterior of the model. Having them on the model prior to painting helps to make it so they look like they are part of the aircraft, not add-on pieces.
 The whole model is painted in Testors Model Master enamel paints, unless otherwise stated. The whole model is painted in Testors Model Master enamel paints, unless otherwise stated.
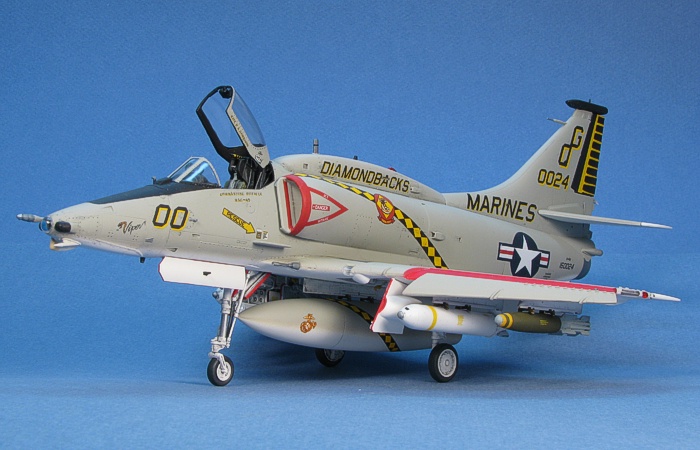
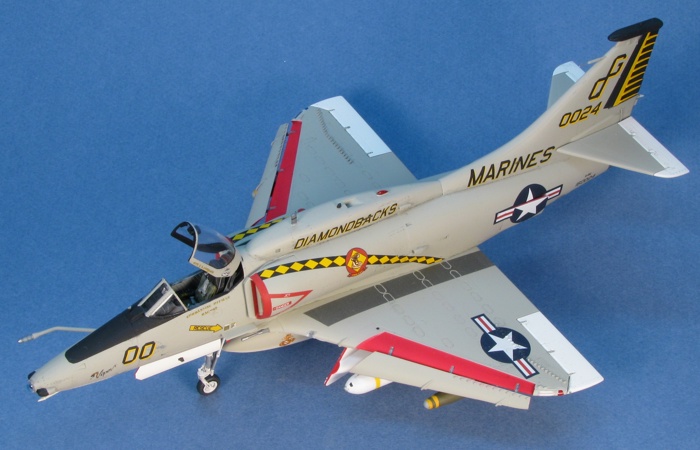
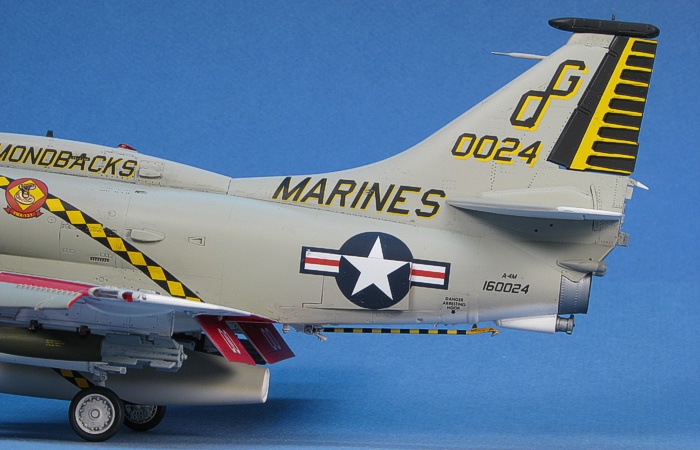
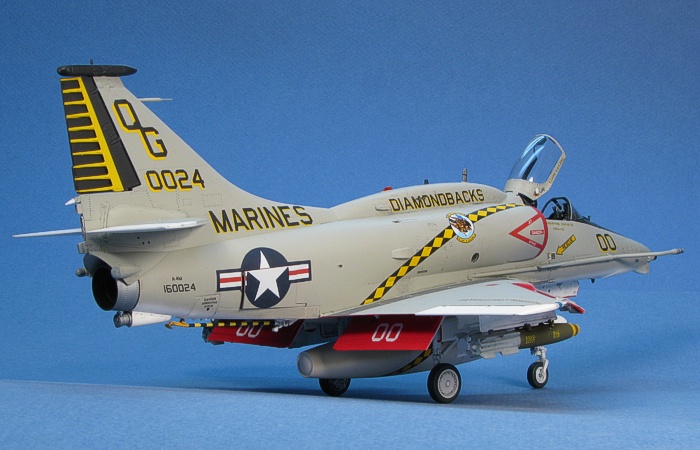
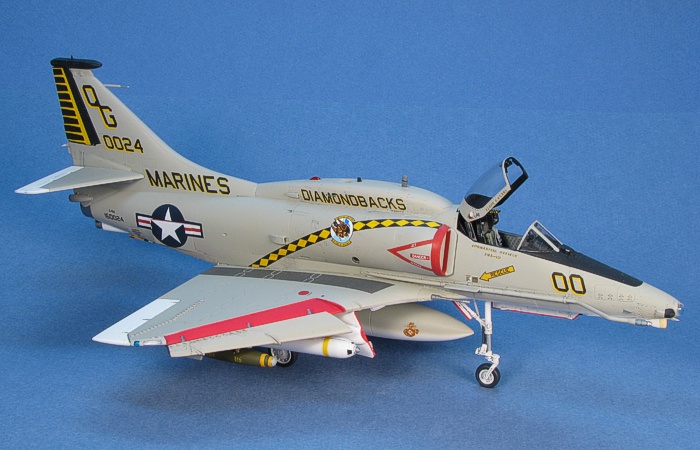
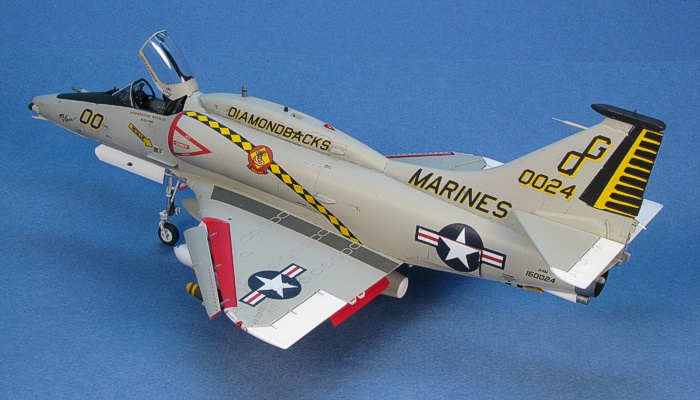
The aircraft is painted in the old standard of L.Gull Gray (F.S.16440) over Insignia White (F.S.17875). My friend took pains to make sure the old specifications were followed with the upper flight control surfaces also painted in Insignia White. Some A-4Ms had the white wrap up over the front of the nose, but my friend did not like that look when he worked on those A-4Ms, so it was not done this way on 160024.
Painting the model was a simple matter of painting all the white areas, then masking off the places that stayed white and painting all the gray areas. The decals I was using provide the yellow rudder ribs as decals and expect the rudder to be painted in black. So, I also painted the rudder (and "hot dog" tail-top antenna) black and masked them off before the gray paint was applied.
I had two sources for decals on this project. The first source was the Hasegawa kit decals. The second source was a Cutting Edge decal sheet (stock#CED48193). Neither of these sheets is totally 100% correct, but by combining the two sheets, a better version of the aircraft can be built than with using either sheet alone.
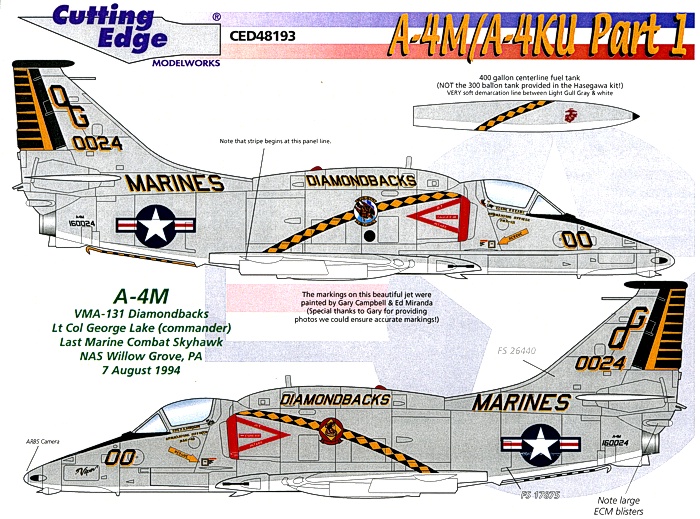
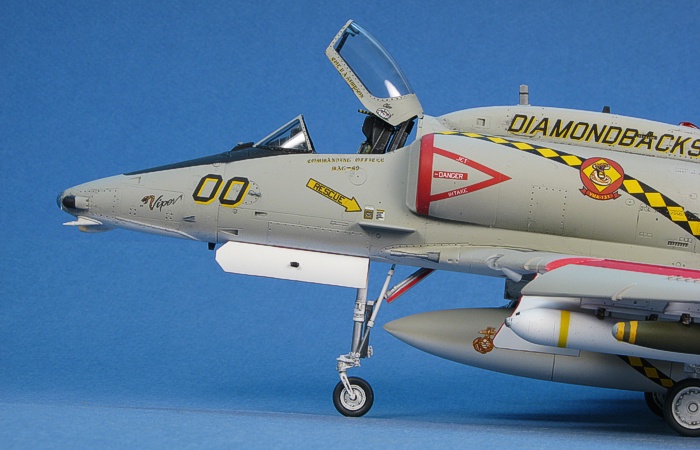
Of the two sheets, Cutting Edge definitely has a better representation of the major markings. I am unsure what pictures Hasegawa used for their reference, but they missed on very obvious points like the number of diamonds in the fuselage sash. It should be 13.5 (6 before the badge and 7.5 after), but Hasegawa prints with 15 diamonds (7 before the badge and 8 after). I also was not happy with the shade of yellow that Hasegawa used in their decals. It was too pale. For these reasons, I stayed with the Cutting Edge decals for most of the markings.
One item I was not happy about on the Cutting Edge decal sheet was the choice of red that Cutting Edge used for the decals. Hasegawa has what I feel is a better red color. For that reason, I used the Hasegawa decals for the intake warning and the national insignia.
Hasegawa provides full airframe data in their decals and the instruction sheet points out all the right places to apply the data markings. The trouble is that the aircraft actually had almost no data markings. All the markings on the real 160024 are painted on. My friends wanted the markings to last if/when the aircraft was put in a museum. The large self-adhesive decals used for many data markings on real aircraft can weather poorly and peal off in time. Thus, none got applied on the real 160024. Only the most major ones like the RESCUE arrows on the sides of the nose and the intake warning bands were applied, and these were painted on, not decaled. So, I saved the data markings from the Hasegawa decal sheet and used them on a different A-4 Skyhawk model.
For weathering, I used my typical style of thinned down enamel paint washes and air brush shading. I kept the weathering very light because the aircraft was really well cared for by the unit in the last months before retirement. I finished the weathering with some dry brushing to pop out a few surface details. The real 160024 was kept in gloss paint overall, but I used a flat finish on the model because I feel this looks nicer in scale than gloss. For a more complete discussion of what I do to weather my models, see my posting on "Weathering Aircraft".
Construction Continues
One of the things I have grown to dislike in building the Hasegawa Skyhawk kits are the navigation and position lights. As separate clear pieces, they look really nice on the model, but they are a pain in the butt to attach and paint. I start by painting the model silver in all the places the lights go. This makes the lights look bright when viewed on the completed model. Then, I attach the lights. Once attached, I get out the clear Tamiya paints and paint the red and green (I actually use blue) navigation lights and beacons. It is not overly difficult work, but I hate dealing with the Tamiya jars. Painting the frames on the wing tip lights is also a pain in the butt, but they look really nice when done.
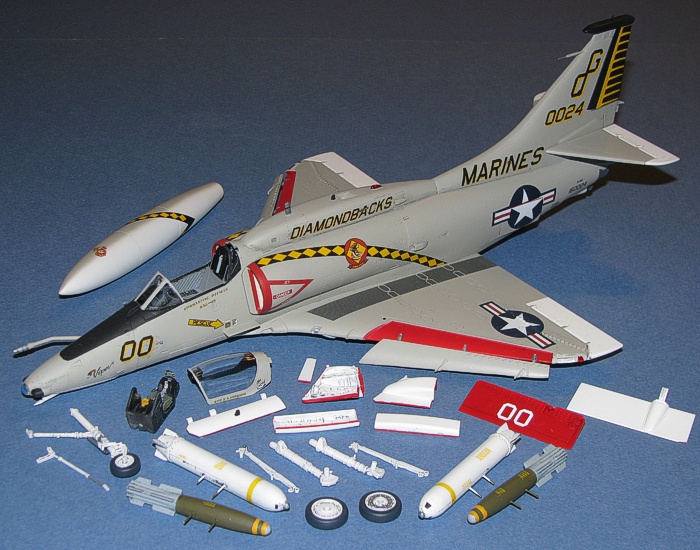
This brought me up to the home stretch. I had a completed airframe, including the weathering. I had a bunch of painted and completed parts and sub-assemblies. See the following picture. All I needed to do was attach everything.
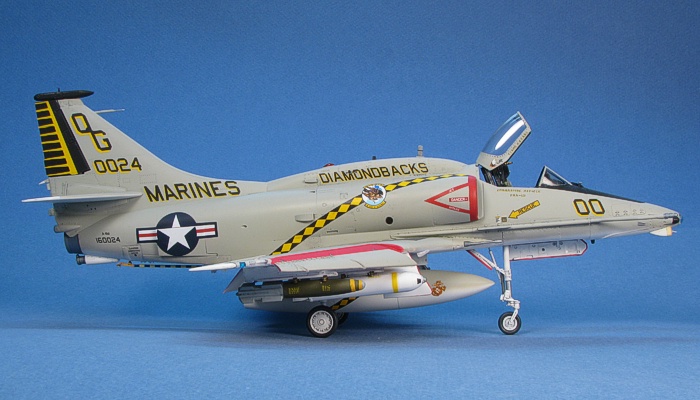
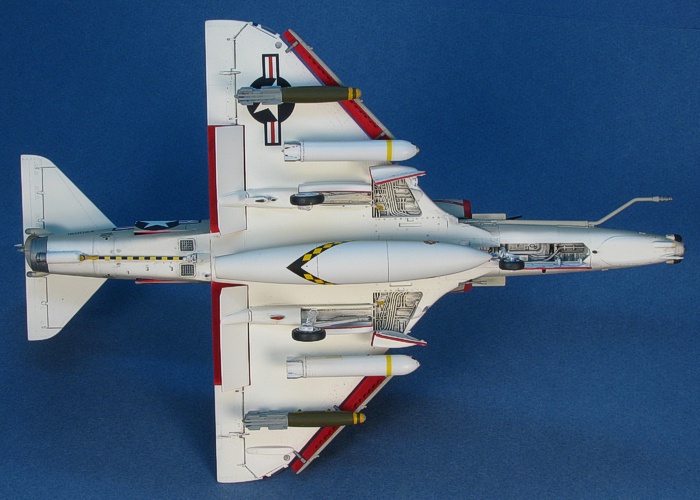
The landing gear came next. I had painted them while doing the rest of the airframe in white. I did a little detail painting and attached the landing gear. I dislike doing the red edges on the wheel well doors of US Navy aircraft, but I have gotten used to it, and it does not take me too long to whip them out with a 10/0 brush and a little patience.
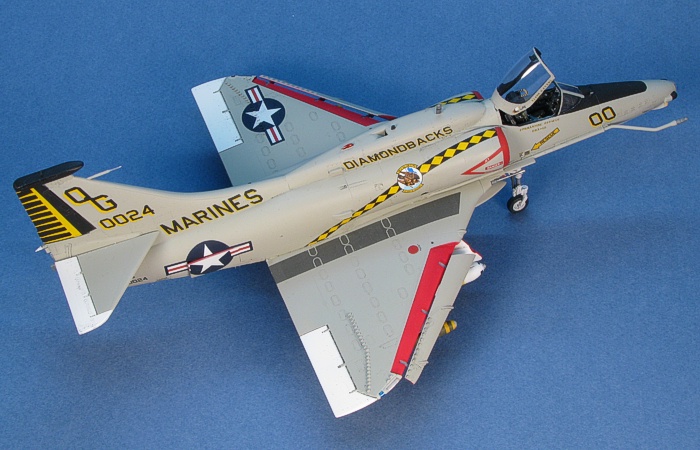
This brought me up to the weapons load. As I wrote at the top of this posting, I wanted to build the model to represent the aircraft on that early June afternoon when I was in the arming pits at MCAS Yuma taking pictures. So, I pulled out a couple Rockeyes and a couple Snakeyes from the Hasegawa weapons sets and painted them up in live colors (yellow stripes) to match what I had in my pictures.
The centerline fuel tank is a Monogram Skyhawk wing tank with its fins bobbed off. The Monogram tanks are closer to the right size for being 400 US gallon tanks, which were standard on the centerlines for the A-4Ms of VMA-131.
My friend insisted when they were painting 160024 that Skyhawk centerline tanks were always gray on top and white on the bottom. We (his modeling buddies) could not convince him otherwise. So, the tank was painted with L.Gull Gray on top and white on the bottom. The tank was then trimmed with the same black and yellow diamond sash that was on the side of the aircraft.
There is a big difference between Cutting Edge and Hasegawa on the size of the sash on the centerline fuel tank. In actuality, I do not think either is really right, but I think the Cutting Edge version is closer. So, that is the one I used on my model's centerline fuel tank.
There is also a USMC globe-n-anchor emblem on either side of the fuel tank. Again, Cutting Edge and Hasegawa are rather different in their printing of this detail. I liked the look of the Hasegawa version and opted to use it for this detail because they looked closer to being the right size and style.
Inserting the ejection seat in the cockpit and attaching the open canopy completed the project.
Still another Skyhawk -- what more can I say? It is a great kit with great markings. It was also a really fun build of an aircraft with which I have some personal connection.
Project Statistics
Completion Date: |
27 Sepetmber, 2008 |
Total Building Time: |
35.2 |
Research: |
0.7 |
Construction: |
11.8 |
Painting: |
13.9 |
Decals / Markings: |
8.1 |
Extra Detailing / Conversion: |
0.7 |
Model,
Text Copyright © 2008 by David W. Aungst
Page Created 31 October, 2008
Last Updated 31 October, 2008
Back to HyperScale
Main Page |
 Home
| What's New |
Features |
Gallery |
Reviews |
Reference |
Forum |
Search
Home
| What's New |
Features |
Gallery |
Reviews |
Reference |
Forum |
Search