Tamiya's 1/48 scale
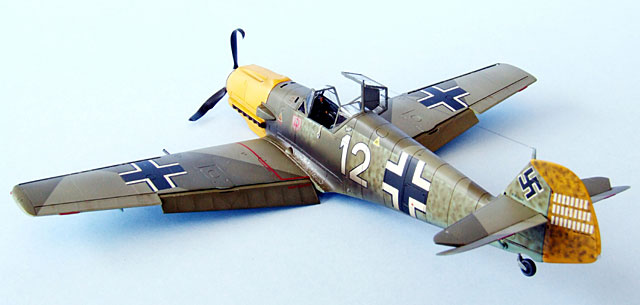
Messerschmitt Bf 109 E-4
by Bruce Salmon
|
Messerschmitt Bf 109 E-4 |

Tamiya's 1/48 scale Messerschmitt Bf 109 E-4/7 Trop is available online from Squadron.com
The Emil is the first aircraft I have purposely wrecked.
I think broken planes always have an extra air of intrigue about them so I started off with an easy project with a view to building bigger more heinous wrecks in the future. To do it properly though and not make the model look like it has endured a Guy Fawkes night requires thought an lots of extra work.
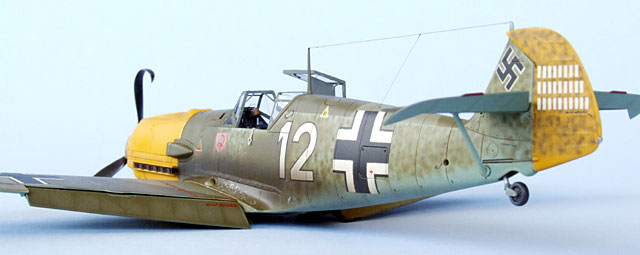
My crashed Emil E-4 met its match in the Battle of Britain (based on no particular incident) and represents an aircraft from JG 2.
Kit and Aftermarket Parts Used
1/48 scale Tamiya Messerschmitt Bf 109 E-4/7 Trop
Eduard Colour Zoom PE set (FE220) Bf-109E4/7
Ultracast (48077) Messerschmitt Bf 109-E Exhausts
Cockpit / Fuselage
My first task was to add all that Eduard PE – the entire Zoom set is devoted to the cockpit. I also added extra details such as oxygen hose, spurious wiring and canopy hinge.
The interior was painted Tamiya XF 63 German Grey, given an oil wash and drybrushed to pop out the details.
The rudder and elevators were cut out and repositioned to indicate the pilot’s struggle to land. Lead weight was also added in the nose to give the aircraft a natural tail-high attitude.
Wings
The wheel wells are not deep enough and need to be squeezed hard to mate with the upper wing half. This can warp the top surface if you’re not careful so it may be better to add plastic to the well edges. Strengthening rods from brass wire were also added to the radiator inlets but these will be hardly noticed with the aircraft sitting on its belly.
There was a bit of a gap at the underside join with the fuselage - this was easily fixed with some 10 thou plastic card.
Engine and Cowl
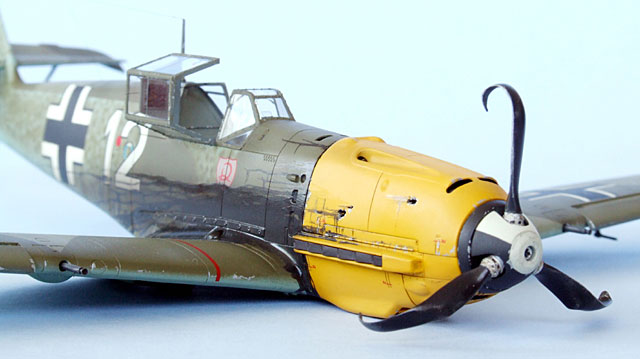
Upper cowl section had bullet holes added by first grinding out the inside till it was paper-thin and then pushing the tip of a sharp knife through from the outside. Try not to go overboard with this or the damage will look ridiculous.
Detail Parts
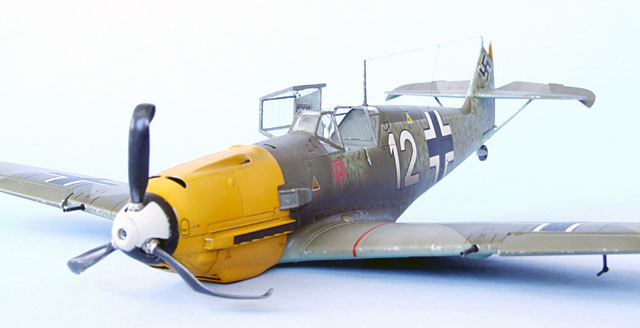
Propeller tips were heated over a candle and bent over with my fingertips - actual crashes were used as a reference. They were then reshaped with a knife and sandpaper to restore their sharp edges.
Canopy armour plate was thinned from behind, machine gun barrels hollowed out at their tips with the point of a sharp knife and landing gear painted and glued in the retracted position. The canopy was also masked with Bare Metal Foil and set aside for later painting.
This was to be my first model sprayed with acrylics using my Aztek 470 airbrush. I never really seemed to get the hang of it – the results being a gummed up airbrush accompanied by lots of magic words. The whole lot excepting the cowl paint was removed with window cleaner and I reverted to tried and true enamels.
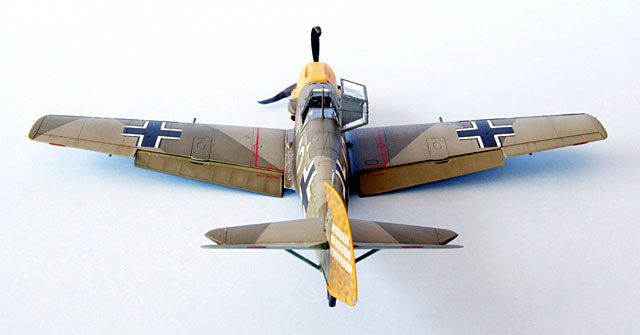
First sprayed is the underside blue which was then post shaded to lighten the panel work. After masking up, the upper RLM 02 was sprayed and p-shaded. Once dry the splinter pattern was masked with Tamiya tape and sprayed olive drab - again post shading on a lightened paint mix followed.
Next the fuselage stipple pattern was airbrushed on freehand – yep it took ages! Then the crosses and swastikas were masked with an Eduard set and sprayed. Finally gloss varnish was sprayed only where the decals would be positioned.
Undersides: 18 – Tamiya XF23 Light Blue / 1 – Tamiya XF71 Japanese Interior Green / 2 – Tamiya XF2 White
Topsides RLM 02: 5 – Tamiya XF49 Khaki / 5 Tamiya XF22 RLM 02 / 1 – Tamiya XF2 White
Topsides Olive Drab: 5 – Tamiya XF62 Olive Drab / 5 – Tamiya XF49 Khaki / 1 – Tamiya XF2 White
Cowl: Aeromaster RLM 04 Gelb (Acrylic).
Decals
Those used (numbering and stencils) were thickish and took a while to settle in using Mr Mark Softer. There were no silvering problems.
Weathering
After a coat of satin varnish the model was given an overall wash with raw umber oil with some panel lines darkened with further washes. A few oil stains were drybrushed on and some restrained chipping with Tamiya XF16 Flat Aluminium applied with a fine brush.
Now comes the tricky bit – the oil streak! This was done with a mix of raw umber and black oil paints slightly thinned and brushed on with a fine brush. Streaking had to show the effects of air flow as well as gravity once the plane was on the ground. I initially had too much coming out of the bullet holes so put the model aside for a few months to think about a fix. Eventually I remembered that I had painted the cowl in acrylic so a quick wipe with turps solved my dilemma. Now it more realistically seeps from under the edges of the cowling.
Exhaust and gun staining was made with Tamiya X19 Smoke mixed with a tad of black. A matt-ish varnish was then sprayed to finish the job.
Final Assembly
The final touches are now added: Ultracast exhausts, propeller, machine guns, canopy, aerial mast and wire.
Everything turned out very well in the end even though a few new methods failed to work. It will however need a diorama at some stage to achieve the best effect. If you haven’t wrecked a model before - Have a go!
Model, Images and
Text Copyright © 2008 by Bruce Salmon
Page Created 21 February, 2008
Last Updated 21 February, 2008
Back to HyperScale
Main Page |
 Home
| What's New |
Features |
Gallery |
Reviews |
Reference |
Forum |
Search
Home
| What's New |
Features |
Gallery |
Reviews |
Reference |
Forum |
Search