21st Century Toys' 1/32 scale
Messerschmitt Bf 109 F-2
by
Tony Bell
 |
Messerschmitt Bf 109 F-2 |

HyperScale is proudly supported by Squadron.com
Fast, cheap and fun.
No, I’m not referring to my ex-girlfriends, I’m referring to the paradigm that 21st Century Toys appears to have adopted when it comes to scale models.
At a time when ever-increasingly complex large scale über-models from the likes of Tamiya and Trumpeter are being released with triple-digit price tags, 21st Century Toys have started marketing kits in 1/32 that offer simple construction, accurate outlines, well researched markings and decent (if slightly heavy) detail, all for a bargain-basement price.
Whilst on a business trip to the United States, I picked up my 21st Century Toys Messerschmitt Bf 109 F-2 on a whim at a Walmart. I had heard good things about these kits and at $10 it was too good a deal to pass up.
Inside the box we are presented with several heat sealed bags of parts that have already been removed from their sprues, an excellent sheet of decals with markings for three different options, clear and concise instructions and a beautifully moulded seated pilot figure. Some of the parts exhibited a bit of damage where they had been removed from their sprues at the factory, but nothing that a drop of superglue and a touch of sanding wasn’t able to fix during construction. Speaking of which…
I decided to approach this project strictly out-of-the-box and concentrate on getting some practice at painting and weathering.
Not surprisingly, I started off by painting and assembling the cockpit. I painted it overall Tamiya XF24 Dark Grey and applied a sort-of wash consisting of a mixture of Polly Scale clear flat and India ink. I highlighted the raised bits with a light drybrushing of medium grey artists’ oils and brush painted the details with Citadel acrylics. Paint chipping was drawn on with a Prismacolor silver coloured pencil and dust & dirt in the recesses was simulated with MiG pigments. I painted strips Tamiya masking tape light beige and used them as a simple seat harness.
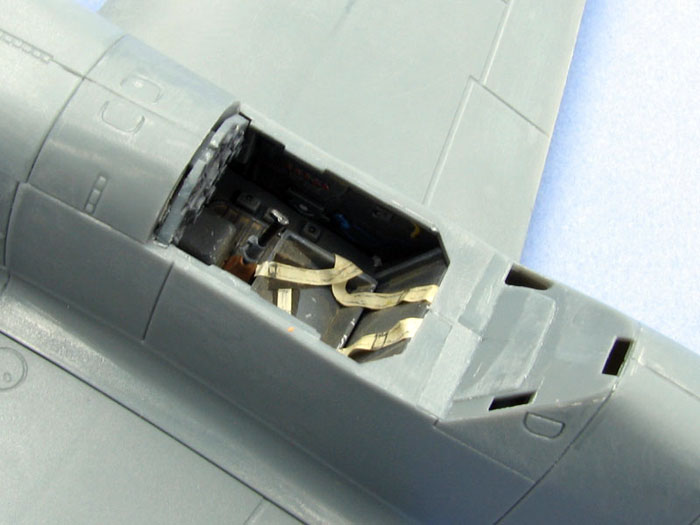
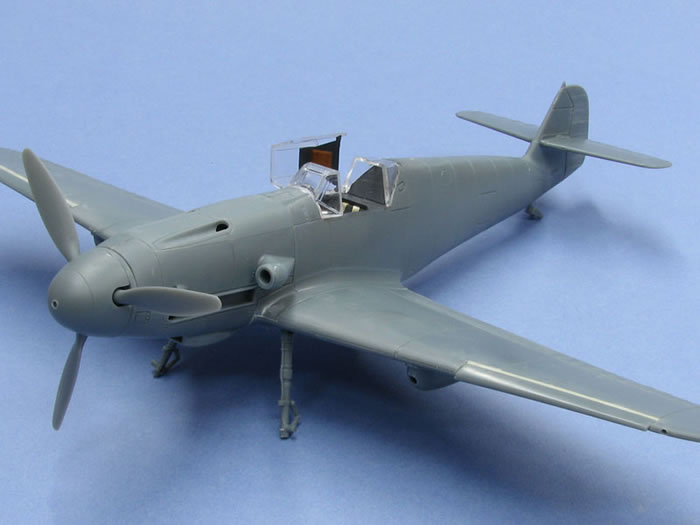
Before assembling the fuselage halves, I “eased” the edges by gently sanding them at a 45° angle so that the top and bottom fuselage seam panel lines would be consistent with the rest of the panel lines. I trapped the cockpit between the fuselage halves and ran liquid cement along the join. The plastic was a bit slow to react to the cement so it was necessary to keep the pressure applied for a few minutes and allow the glue to do its job. I didn’t bother to use the screws provided, but did use the plugs for the screw holes. In my enthusiasm I mixed the plugs up and had to spend some time sorting out which one went in which hole. Even so, the fit of the plugs isn’t the greatest and they nonetheless required filling. For this task I used brushed them with some superglue accelerator, let it dry and then filled the gaps with superglue, sanding it all flush once it had set. All told, it took me about 15 minutes total to fill and sand the plug holes. The seams between the gun troughs and the engine cowl were also filled with superglue and sanded smooth.
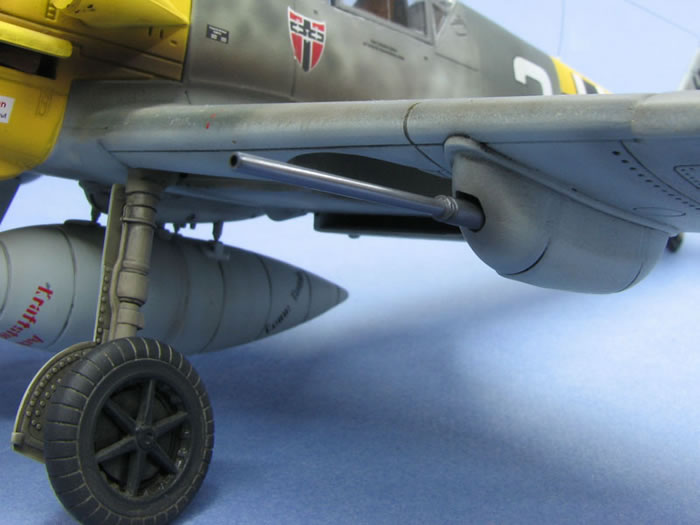
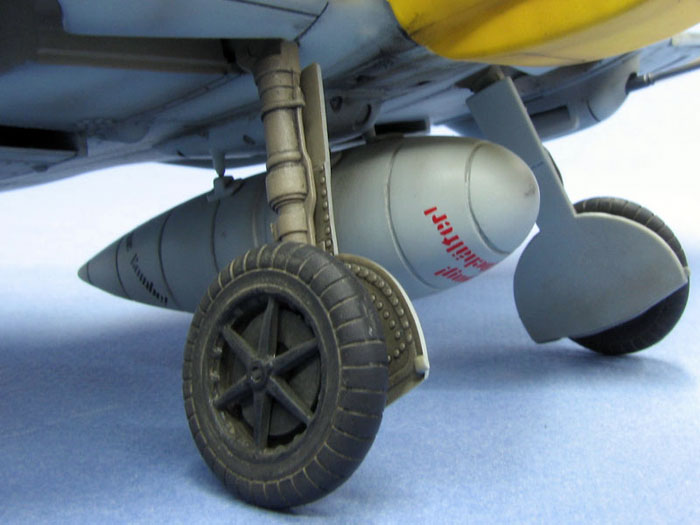
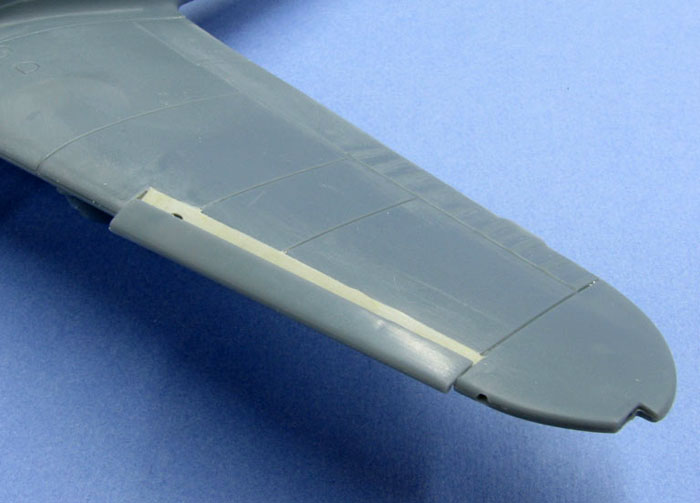
Moving on to the wings, the bottom piece had a pronounced warp to it which I resolved by simply dipping each wing in boiling water, holding the heated wing against a flat surface (a kitchen cutting board) and quenching it under cold running water. The upper and lower wing pieces had a slight raised bead running along the inside of the trailing edge (something to do with the pre-assembled models, perhaps?) which I carved away and sanded flush before joining them with liquid cement. The landing gear legs are trapped in place by a screwed in retaining piece, and are absolutely impossible to misalign.
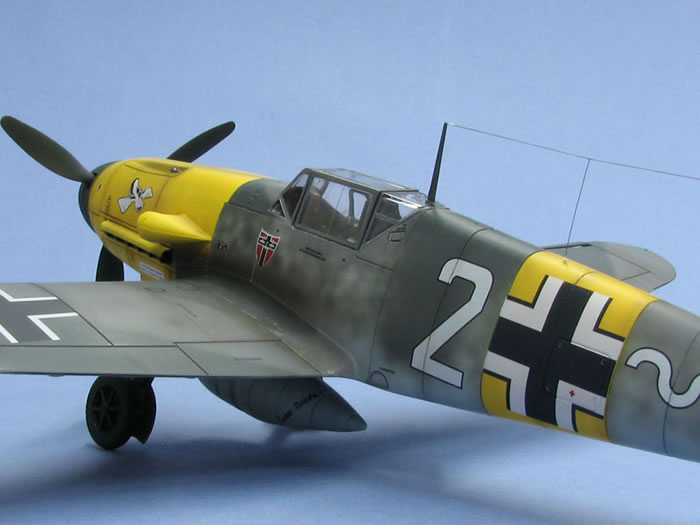
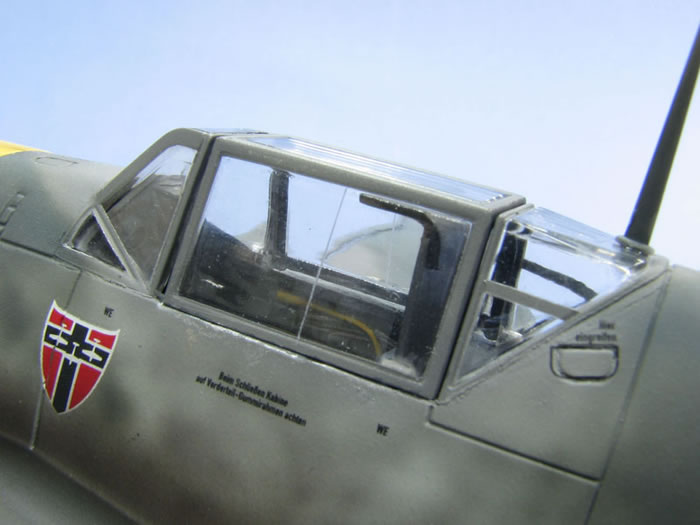
The fit of the wings to the fuselage was very good, requiring only a little bit of filler at the front and rear. Likewise, the fit of the tail planes was also excellent. The canopy has several prominent lugs molded on the interior intended to hold them in place without any glue. They are quite visible through the clear bits so I carefully filed them away and polished the canopy back to clarity using successively finer grades of sandpaper, finishing off with Tamiya rubbing compound. I attached the front and rear canopy pieces with liquid cement, leaving the hinged hood operable.
After masking the canopy with Tamiya tape, I washed the entire model with dish detergent, rinsed and left to dry for a day.
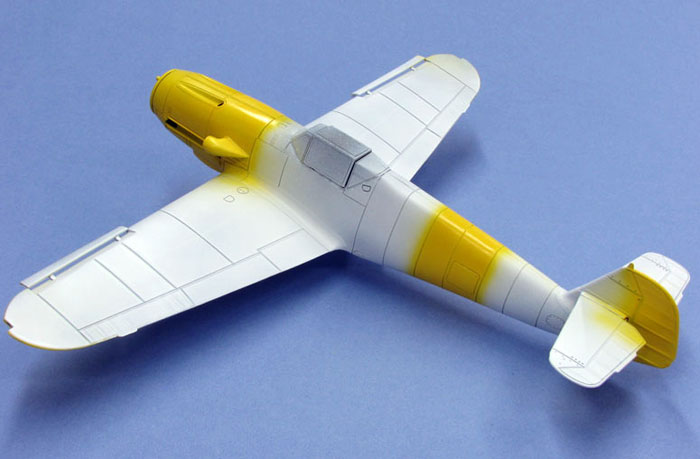
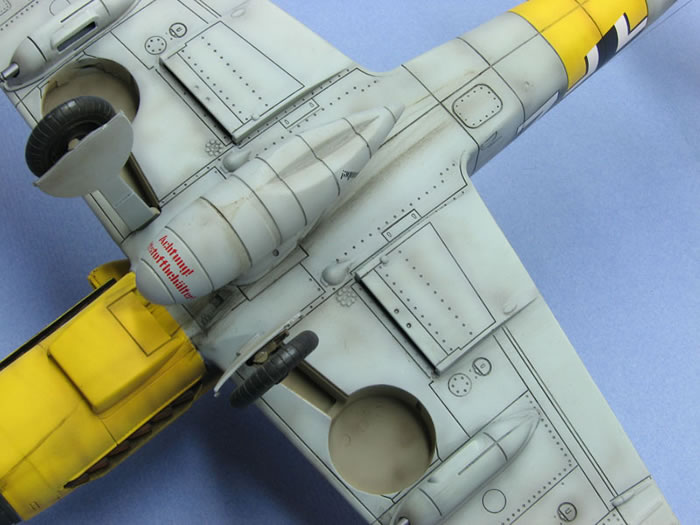
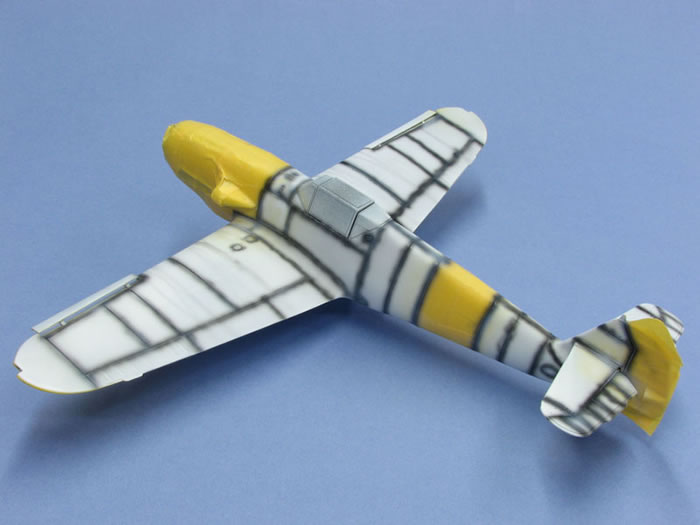
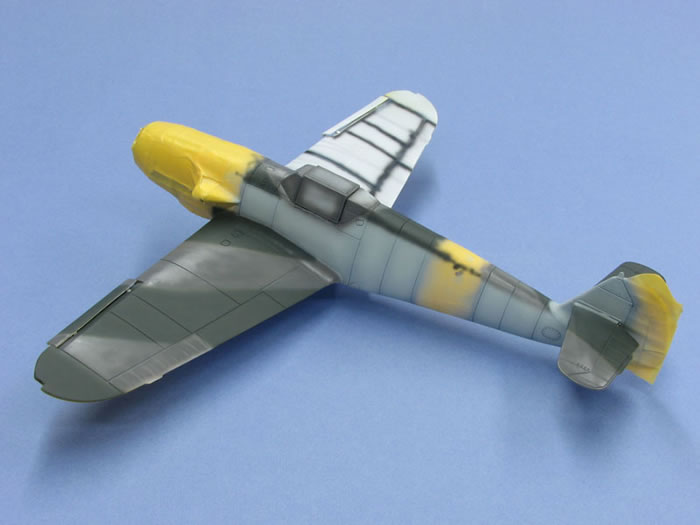
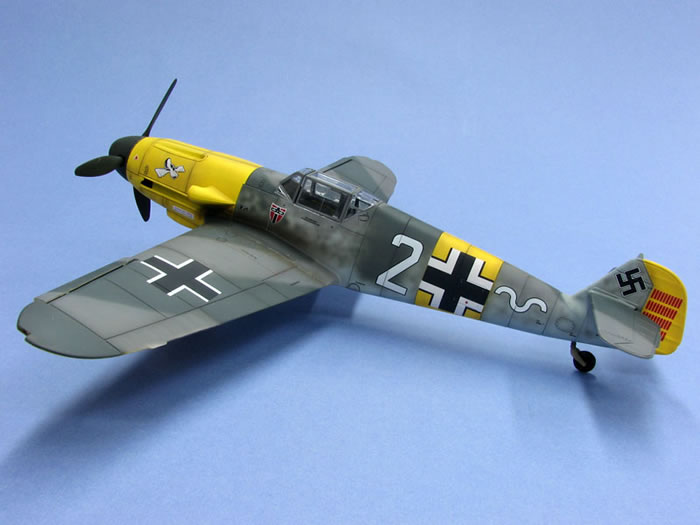
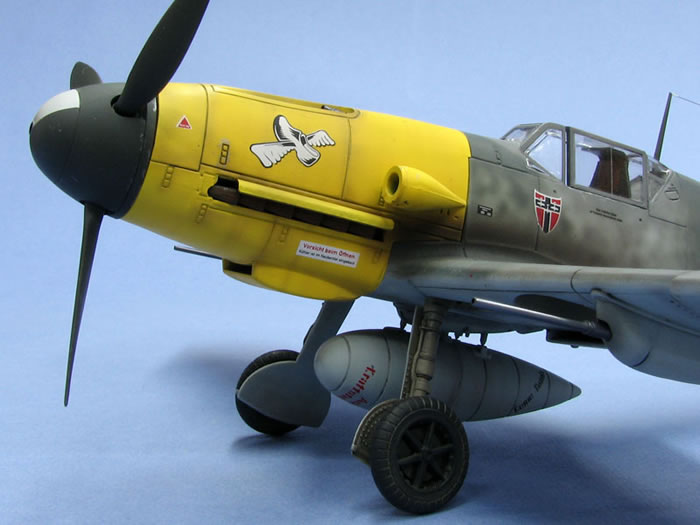
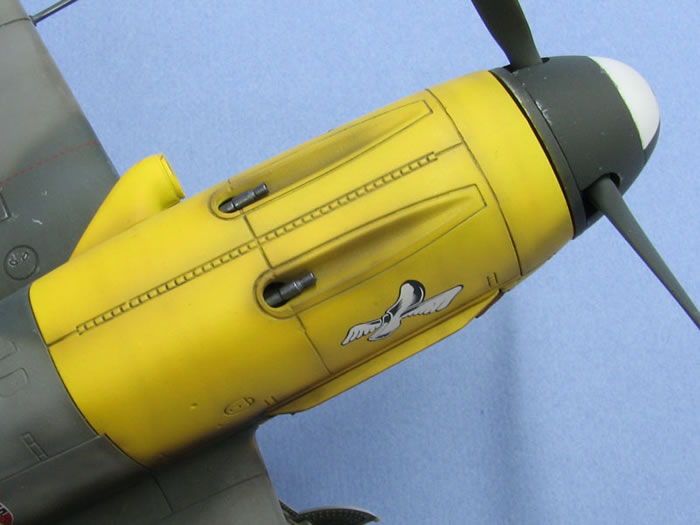
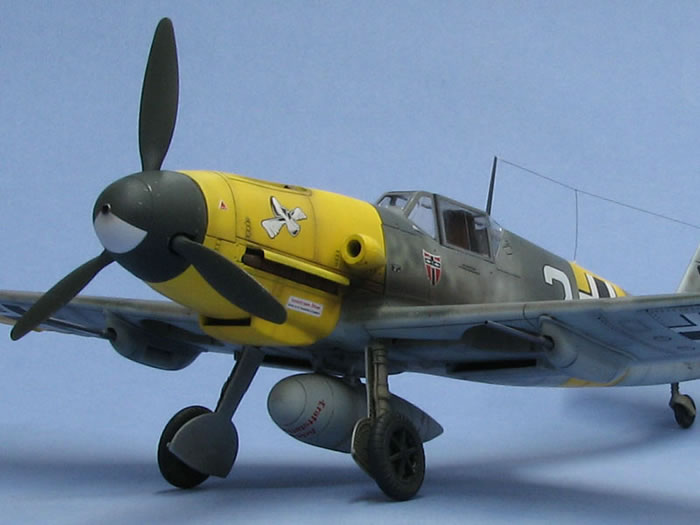
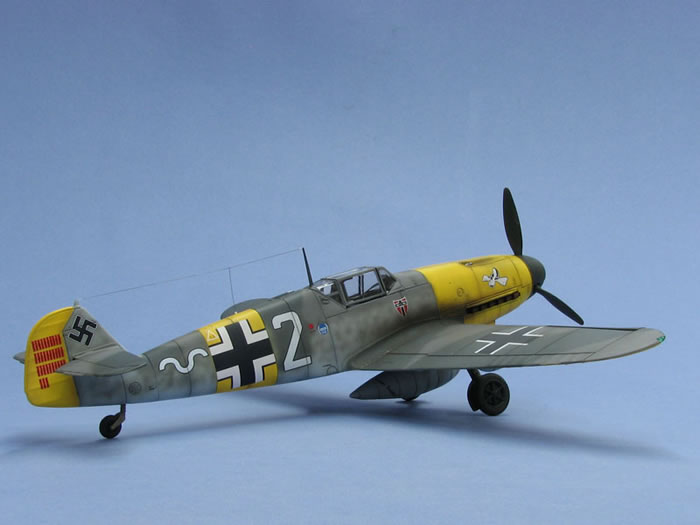
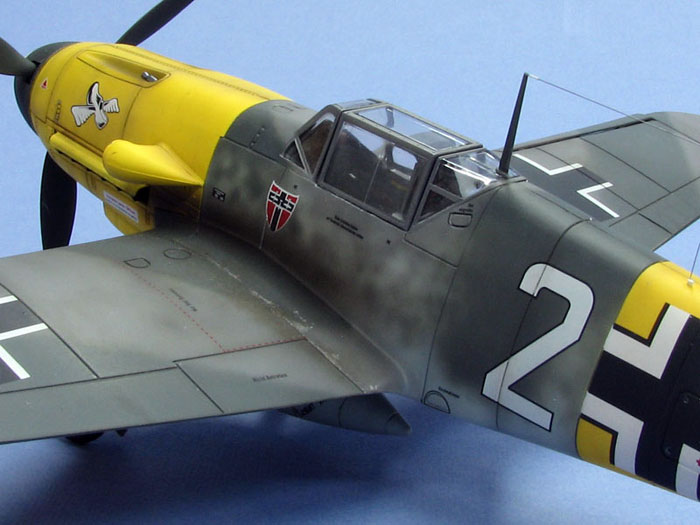
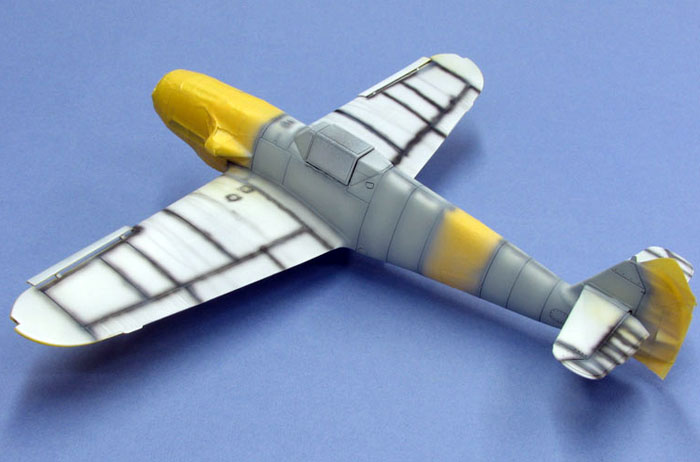
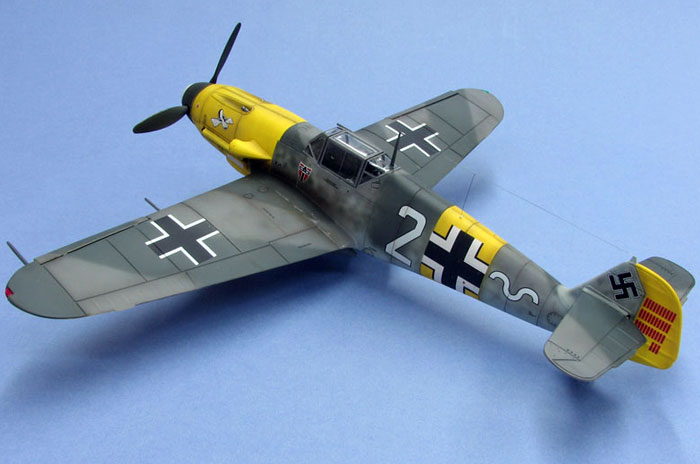
I primed it with Tamiya Fine White Primer straight from the rattle can and then painted the yellow areas with Tamiya Chrome Yellow, which I decanted and airbrushed on. These areas were them masked off and the rest of the model pre-shaded with gloss black. I mixed up my own version of RLM76 “Lichtblau” from Tamiya paints (I’ve forgotten which ones, sorry), thinned it with rubbing alcohol and misted it on in light coats, allowing the pre-shading to barely peek through. The upper surface colours, RLM74 “Graugrun” and RLM75 “Grauviolett”, were also mixed from Tamiya paints and applied in a similar fashion, the camouflage pattern being airbrushed freehand. The mottling was done by thinning the paint about 80% with pure rubbing alcohol and carefully airbrushing each spot at about 12 psi. To unify the camouflage colours, I misted the model with a heavily thinned (10:1) coat of RLM75.
I airbrushed a coat of Future prior to applying the kit decals, which went on flawlessly and conformed well to the surface details with judicious applications of Solvaset. After sealing the decals with another coat of Future, I mixed a dark brownish grey using Windsor and Newton artists’ oil paints (burnt umber, Payne’s grey and titanium white), thinned it with Naphtha and applied it to the panel lines. Once dry, the excess was cleaned up using mineral spirits and a cotton swab.
A similar dark brownish grey colour mixed from Tamiya paints and thinned 90% with alcohol was then airbrushed in a random, streaky manner over the entire model followed by a coat of Polly Scale flat and some light chipping around the high wear areas was simulated by gently tapping with a silver coloured pencil.
I concocted yet another mix of the same dark grey/brown colour, this time from MiG pigments (Soot Black, Ashes White and European Dust), which I applied to the wing roots and undercarriage and fixed in place by brushing on clean turpentine. Finally, the exhaust stains were airbrushed with a mixture of Tamiya black and brown, thinned 90% with alcohol. The exhaust stubs themselves were painted Tamiya flat black and dusted with several shades of brown and orange MiG pigments, finished off with a very light highlight of powdered pencil lead applied with my fingertip.
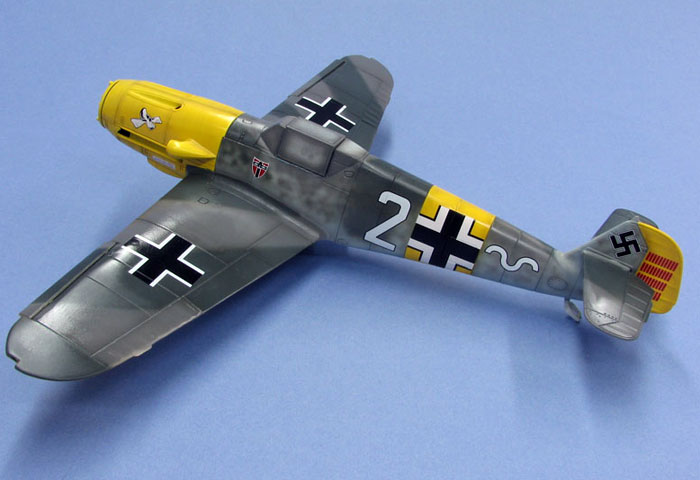
Lastly, I added the oil streaks and stains to the underbelly by applying small tabs of straight oil paint (burnt umber, raw umber and ivory black), and drawing them back into streaks with a clean paintbrush slightly moistened with mineral spirits.
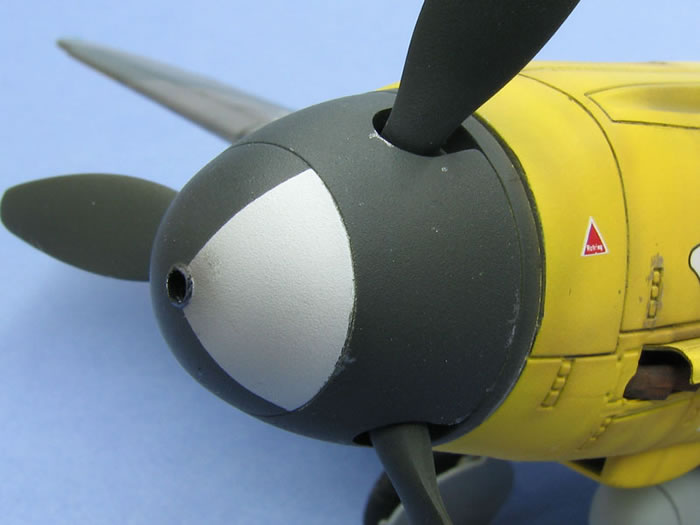
The pitot probe and canon barrels were painted Humbrol Metalcote Steel, buffed with a cotton swab and attached with epoxy cement.
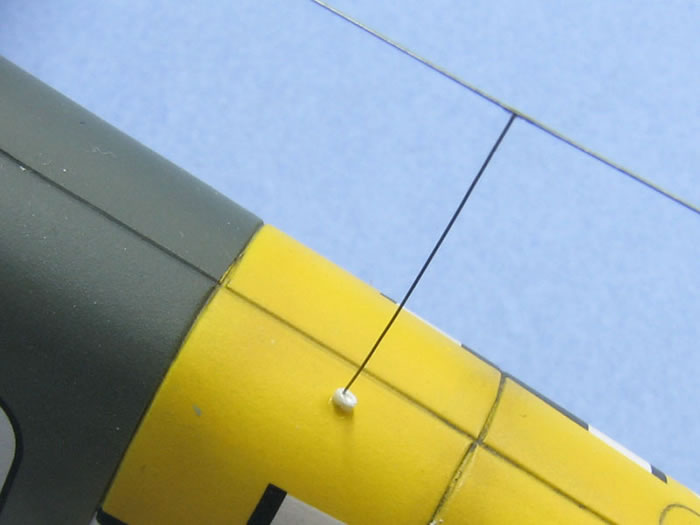
The radio antenna was nylon thread painted Humbrol steel, with insulators made from sections of stretched Evergreen styrene tube. To make the insulators, I heated the tube over a candle and stretched it thin, after which I cut the insulators to length with a new X-acto blade. These were then carefully threaded onto the antenna which was then superglued into grooves cut into the antenna mast and tail stub using my ultra-fine JLC razor saw. After tightening the antenna up with hot air from a paint stripping gun, the insulators were fixed in place with a small amount of Future brushed on.
Ta Daa!
The 21st Century Toys Bf 109 F-2 is proof that “cheap” does not necessarily equate to “poor quality”. Well engineered with nice, albeit somewhat simplified, detail, it builds up into a fine looking replica. It was a quick and fun project that looks good sitting on the shelf next to my other, more expensive, large-scale models.
Model, Images and
Text Copyright © 2008 by Tony Bell
Page Created 10 November, 2008
Last Updated
10 November, 2008
Back to HyperScale
Main Page
|
 Home
| What's New |
Features |
Gallery |
Reviews |
Reference |
Forum |
Search
Home
| What's New |
Features |
Gallery |
Reviews |
Reference |
Forum |
Search