|
AModel's 1/72 scale
Messerschmitt Bf 109 F-4
by Glen Porter
|
Messerschmitt Bf 109 F-4 |

AModel's 1/72 scale Bf 109 F-4 is available online from Squadron.com
Small Scale Bf 109 F kits
A couple of years ago, Fine Molds from Japan released a series of 1/72 scale Messerschmitt kits which turned the hobby on its ear.
The range of kits, from the F-2 through to the K-4 were of very high quality and accuracy that we had never seen before in this scale.
Like the 109 Es from Tamiya and ICM, they made the 109 kits from other manufacturers redundant. Of course, no kit is perfect but these were the closest anyone had come with these aircraft, only lacking in interior detail compared to their 1/48th scale brethren.
The Amodel kit
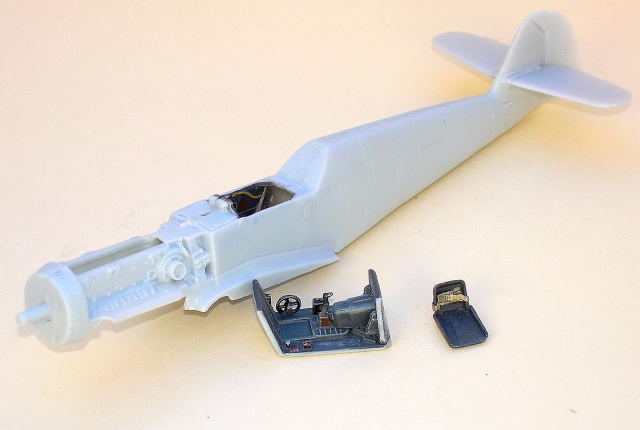
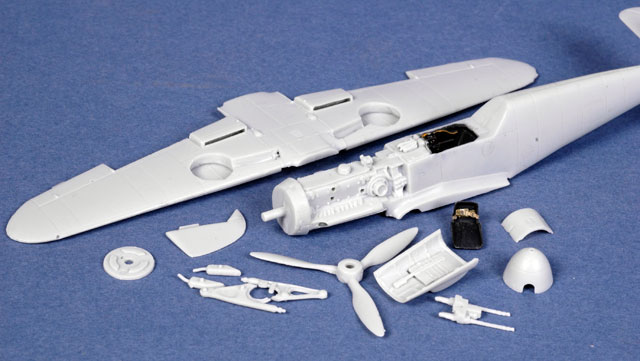
Amodel from Ukraine has released quite a few Messerschmitt Bf 109 kits of various marks but none were anything special until their latest. Kit no. 72125 is a Bf 109 F-4 and being short-run technology, it looks a bit rough on the sprue. A closer inspection reveals however, a very similar shape of parts to the Fine Molds kits but an even higher level of detail.
Both the cockpit and the engine have had extra detail added and although some is a little soft, with careful painting it will look very good. The only part missing from the cockpit is seat belts so a set of PE will have to suffice. They even give you a separate engine mounted 20mm canon and separate breach cover if you want to go to that much trouble. Oddly, there is also an engine mounted 30mm canon but as no Fs had this weapon I assume this is for a later kit using these moulds, possibly a G or a K.
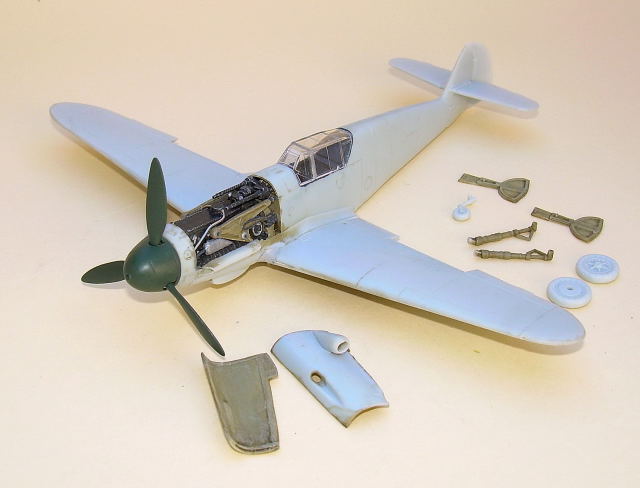
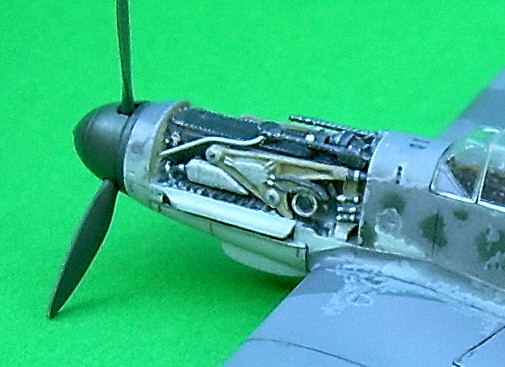
Although the engine itself is moulded into the fuselage, the three covers are separate and all the ancillaries and accessories such as engine mounts, coolant header tanks and machine guns are separate parts, nicely moulded and detailed.
All parts require some clean-up but not a lot, however there were a few small ones that were un-usable due to damage or only partially being moulded such as control column, radio mast and pitot tube. The biggest of these was the exhausts and they give you two different types which is odd because, as far as I know, the 109 used only one from the F onwards. Most of these replacement parts were taken from a spare Academy 109 G kit that I had but in the case of the control column, this was a mistake as the Academy column is nothing like the real thing. Amodel also give you optional prop (paddle blade), deep and shallow oil cooler and intakes for both the F-0 and F-2.
Clear parts were not bad but showed their short-run origins in being a bit thick and slightly cloudy but at least the canopy was in three pieces. I chamfered the inner edges to make them look a little thinner, knowing some of this would be hidden by the canopy framing and dipped them in Future, with help from Brett Green, to get rid of the opacity but just in case this didn't work, I noted that both the ICM 109E and Fine Molds’ F canopies were almost a perfect fit and could be used if necessary.
On all 109 kits I build these days, I like to drop the flaps as almost all photos show them down but no 1/72nd kits are moulded that way, however it's not a hard job, just time consuming. In some kits, Fine Molds, Tamiya/ICM and Hasegawa, the outer flaps are moulded onto the upper wing half only and this makes it slightly harder as the cut has to be made at an angle. In this, and the Academy kits, both upper and lower have the flaps moulded on and you simply cut them out, glue them together and put them back later where you want them. In some cases you have to scratch build a leading edge.
A bigger problem was the lack of dihedral in the one-piece lower wing. It was almost flat. After gluing the upper wing halves to the lower, I test fitted it to the completed fuselage and even with the correct dihedral applied it still had a gap on either side wing root. Plastic card was glued to the upper wing halves at the root and trimmed to shape. The completed wing was then glued onto the fuselage but only at the front and back contact points.
I have never been happy with the “tape from tip to tip across the top of the fuselage to set dihedral” method so the plan was to try some thing different. A resin block was placed on a small board and the model placed on top of that with the resin block immediately below the cockpit. A second resin block was put across the cockpit sills and the whole lot was clamped lightly with a small G clamp. I could then slide two more blocks under the wings to increase the dihedral while ensuring it was the same on both sides of the fuselage.
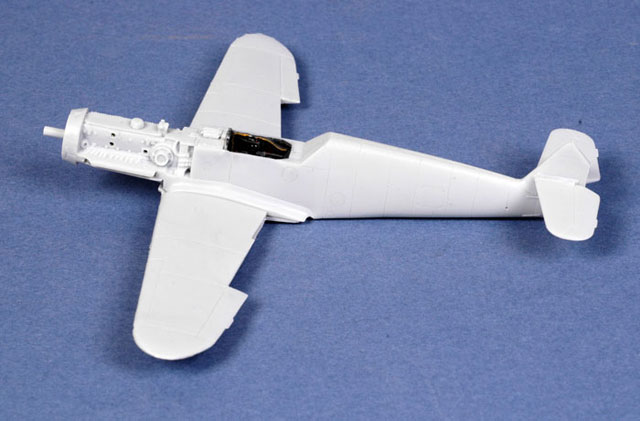
Liquid glue was then applied to each wing root and allowed to dry. This worked very well except that I got a small dent in the centre of the lower wing from the lower resin block. I disguised this with a drop tank mount which I hadn't originally intended to fit. If I use this method again, I will omit the lower black and suspend the model on the two wing blocks, adjusting the dihedral by tightening or loosening the G clamp.
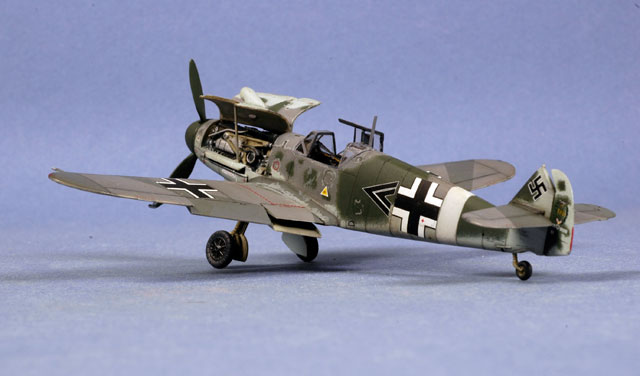
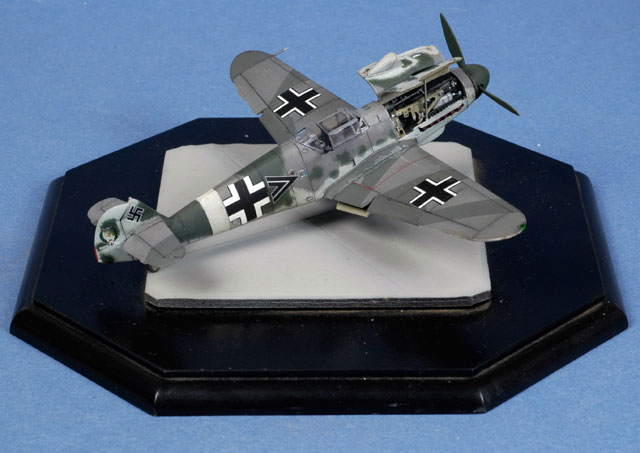
I have had some 109 F-2/4 decals from the Polish decal manufacturer Techmod for a number of years and having used their 109 E-3/4 decals many times I was looking for a subject to use these on. Here was the perfect model as Amodel's decals, although extensive, are not much chop. Two of the marking options are of Heinz Bar's F2 and F4, the F4 being the aircraft he moved from Russia to Sicily with in June 1942.
The problem with this is that although the aircraft in question was probably originally painted in the Luftwaffe three greys, the Dark Grey (RLM 74) on the fuselage had been oversprayed with Black Green (RLM 70). Now, several people have expressed an opinion that they didn't think RLM 70 would have still been in use by the Luftwaffe at that time. I sent E-mails to several people who I thought may be able and willing to clear this up but got no reply and so decided to go with the decals as most rules with regard to Luftwaffe colours are designed to be broken.
I use, in most cases, MM Enamels but their RLM 70 and 71 are, in my opinion, way too light so added some white to Tamiya's Black Green and used it.
The rest of the main camouflage colours are MM Enamels. The mistake I made here was painting and detailing the engine first and then found it very hard to mask it to paint the exterior of the model.
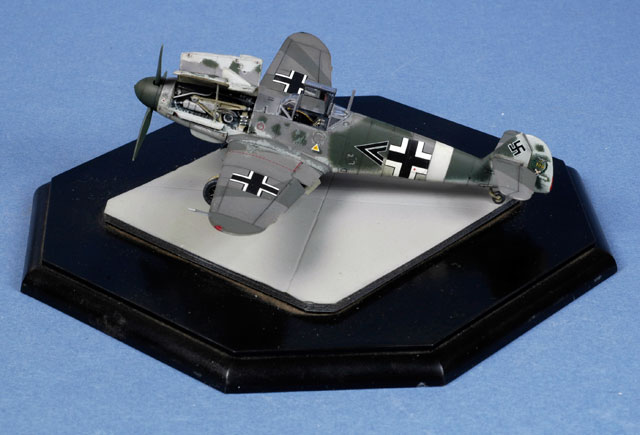
Cockpits are easy, I just plonk a canopy on and cover it with Maskol. Although I gave the model a good over-all coat of Tamiya Clear Acrylic, some of the Techmod decals took quite some time and lots of Supersol/Mr. Softener to settle down and I ended up with a little bit of silvering on small decals on the tailplane. I'm not sure why this happened as I'd had no trouble with their 109E decals.
After glossing over all of the decals to seal them in, a good coat of MM Flat Clear was added to matt it down and all the extra bit glued on.
A Fine Molds kit will set you back about $30.00 in Australia and even more for a resin cockpit so I was surprised when I opened the Amodel box which was half the cost and had even more detail and similar accuracy.
Sure, the Fine Molds will go together quicker but this kit is not hard to build, just time consuming.
I look forward to buying one of their Bf 109 F-4/F-6s when it arrives.
Model
Text Copyright © 2008 by Glen Porter
Page Created 27 November, 2008
Last Updated 27 November, 2008
Back to HyperScale
Main Page |
 Home
| What's New |
Features |
Gallery |
Reviews |
Reference |
Forum |
Search
Home
| What's New |
Features |
Gallery |
Reviews |
Reference |
Forum |
Search