|
Eduard's 1/48 scale
Messerschmitt Bf 110 E
by
Ron Petrosky
|
Messerschmitt Bf 110 E |

Eduard's 1/48 scale Bf 110 Royal Class is available online from Squadron.com
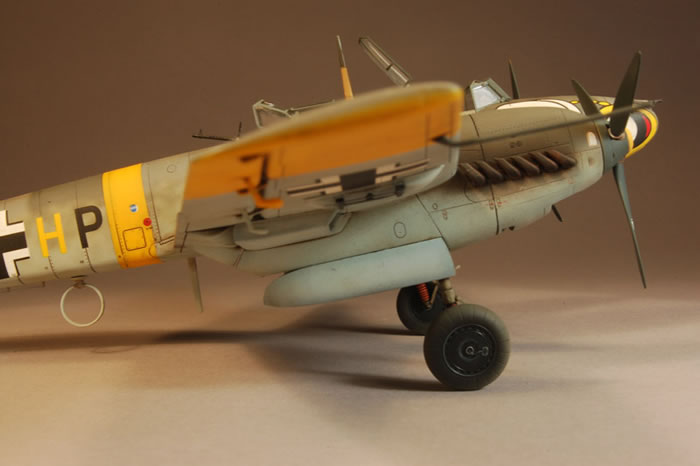
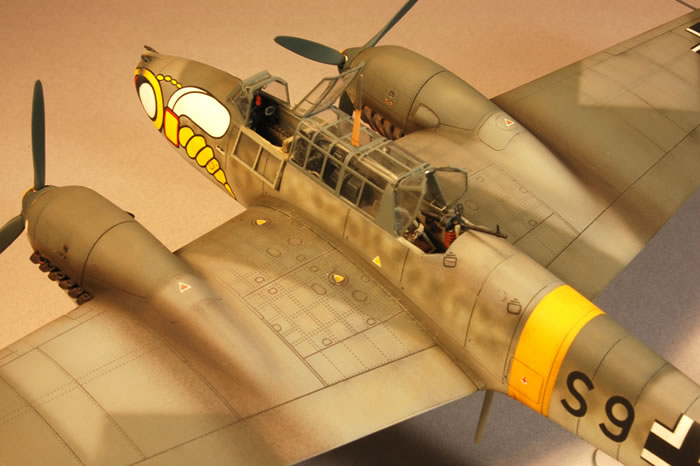
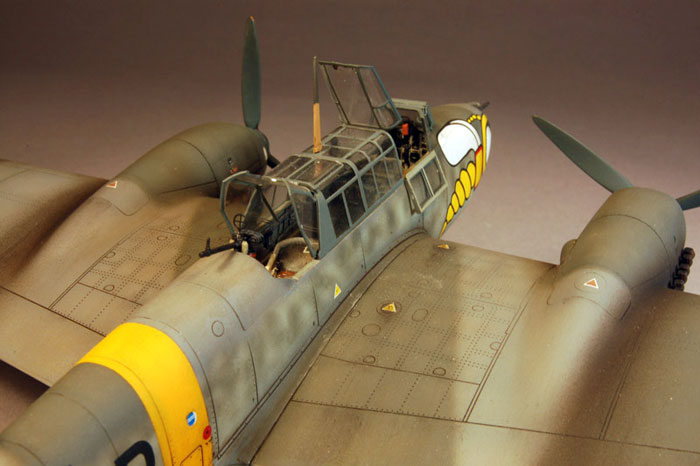
This is the Eduard Messerschmitt Bf 110 E in 1/48 scale.
Much had been written about this kit before I started my build, in particular Brett Green’s excellent build article in the Bf 110 Hyperscale Resource Guide and Steve Evan’s article in the February issue of Model Airplane International. Both Brett and Steve built the model in the same markings I eventually chose.
I referred to both of these articles as well as the comments in Hyperscale’s forums as a guide while working on the Eduard kit.
Eduard's kit:
First the good news.
I’d like to start off on a positive note as overall this is a magnificent kit. Everything you would need to create a masterpiece is in the box as it comes from Eduard with the exception of the exhausts, which we’ll discuss later. The color photo-etch parts are amazing in their realism and the Kabuki Tape canopy masks work a treat (as our British counterparts would say!) as they fit the panes in the canopy parts flawlessly in almost every case. The detail in each of the plastic parts such as engraving and attention to detail is unrivaled (I haven’t seen the new Tamiya 1/48th Zero yet!) and the parts count in areas like the cockpit and the main wheel wells insure that these areas will look as busy and as delicate as the prototype A/C. No short cuts here! As an example, I always find the attachment of the Landing gear on Eduard’s latest kits something of a miracle. No posts in a hole for Eduard! The landing gear attachment is almost prototypical and I always look at this and say “this is not going to work, it’s not strong enough, too many fine parts and no positive locations”. Then, after I get everything together you could stand on it (an exaggeration, DO NOT STAND ON YOUR MODELS).
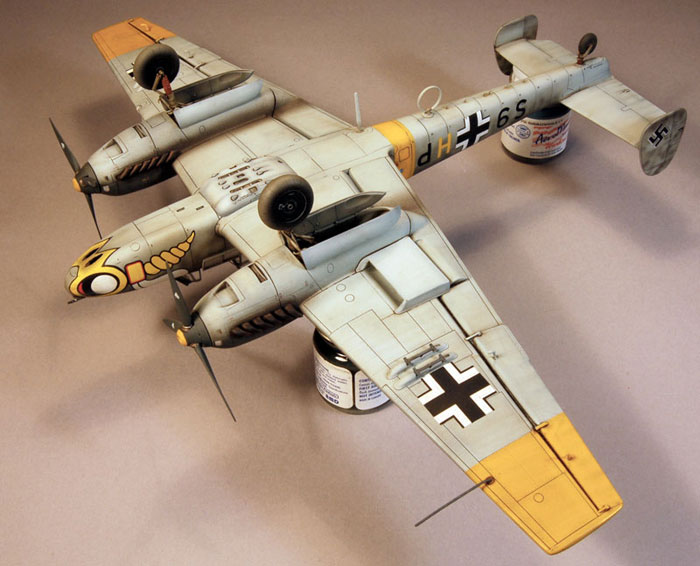
Now, the not-so-good news… because of the part count in plastic and metal this is no easy kit to assemble in a weekend or a week. It takes a great deal of patience so the key is to work on each subassembly like it is a model unto itself and take a break often. To make things a bit more difficult the forward gun bay is to be displayed open and needs some selective deletion of interior parts, seam attention (read filling and sanding) and re-scribing of panel lines if you are going to close it up. The fit of some parts are a bit off or not clear in positioning in the instructions. There is a much discussed, nasty gap between the engine nacelles and the wings that has to be filled but runs along a panel line so is hard to fill without using instant glue (don’t let this cure completely before sanding as it will be harder than the plastic) so it can be re-scribed later. There are parts for a pitot tube; however, I didn’t find any mention of them in the instructions. There are lots of little frustrations like this during the build but nothing that would stop someone with a modicum of experience and basic references. This is not a kit for your 10 year old or your first build or if you have eye/hand co-ordination problems (having had an operation on my retina last year and a cataract removed and lens replaced this year I can tell you Eduard didn’t create this kit with people with depth perception problems in mind!).
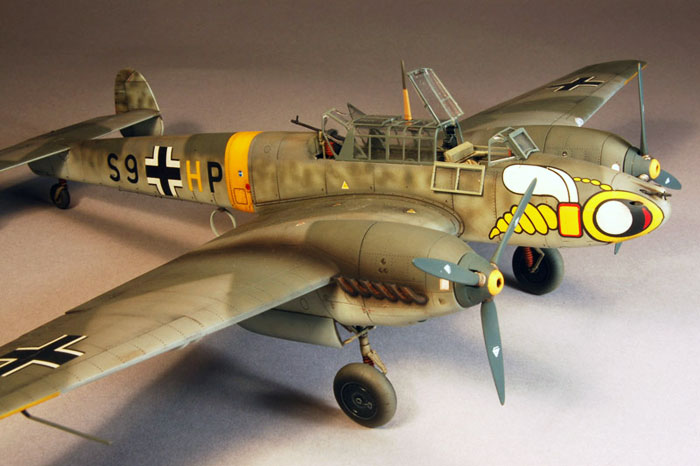
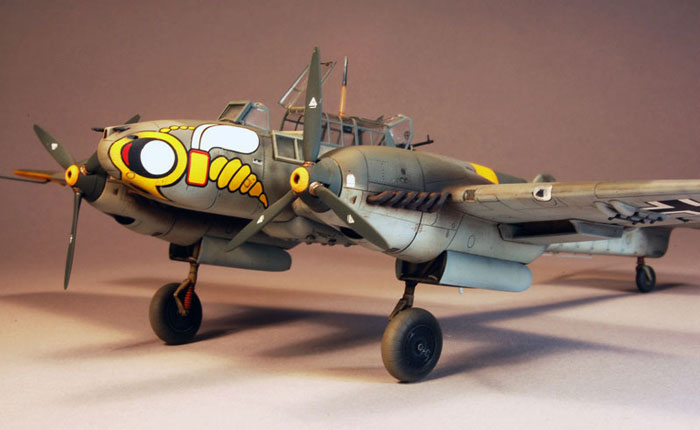
There is nothing I can add to the above that Brett or Steve haven’t said better so read their articles before building. The one thing I can say is order Quickboost’s exhausts for these kits. The solid exhausts look ludicrous, especially the ones facing up.
I drilled one set out and needed two Spaten Optimators afterwards; the wife pulled the third from my hands before I could get it open.
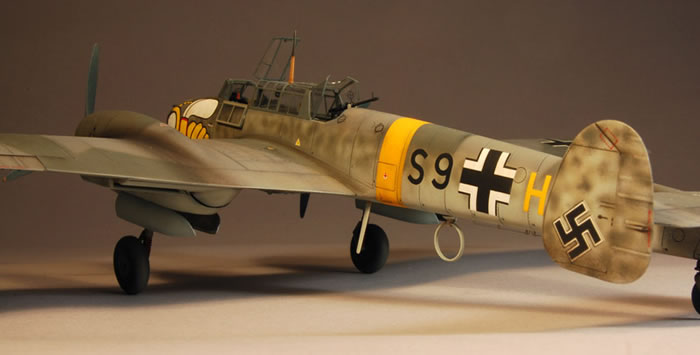
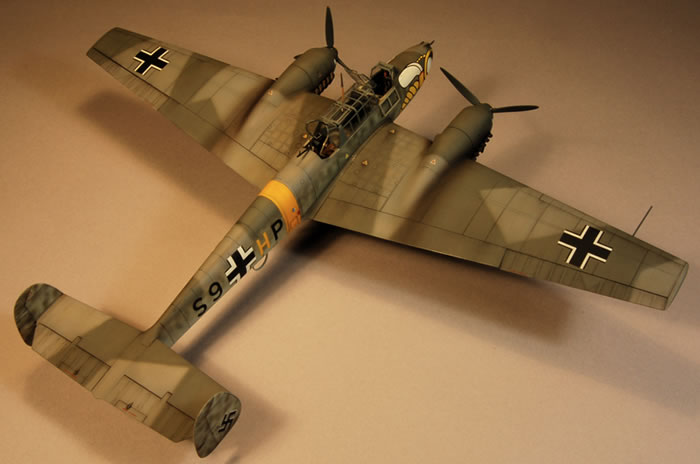
 Okay, here’s where I’m going to raise some peoples’ blood pressure and cause them to bang away at their keyboards and generally cause a great ruckus. I chose the 74-75-76 color scheme on this eastern front A/C on purpose. I think Eduard got this right. The Russian campaign started in June of 1941. My ME110E was in combat some time after this date. As all of us Luftwaffe geeks know the L Dv and field units were experimenting with various camo schemes that worked better than the old 70-71-65 schemes in air-to-air combat during the Battle of Britain in the spring and summer of 1940. During this time the 70/71-02-65 (later officially adopted but sometimes ignored in favor of the grey schemes) and 74-75-76 schemes were field applied and later as factory schemes. The L Dv 521/1 did officially prescribe the 74-75-76 scheme in November of 1941 and Bf 109E-4Bs were produced in this scheme at Wiener-Neustadt. Also, “The all grey scheme was applied to three special ME109Fs supplied to JG51 in October, 1940, to be tested under operational conditions”1. There are also references I have read and color pictures I have seen of ME 109Cs and Ds operational in Scandinavia and in the Flugfliegerschules being repainted in 74-75-76 in 1940-1941! Okay, here’s where I’m going to raise some peoples’ blood pressure and cause them to bang away at their keyboards and generally cause a great ruckus. I chose the 74-75-76 color scheme on this eastern front A/C on purpose. I think Eduard got this right. The Russian campaign started in June of 1941. My ME110E was in combat some time after this date. As all of us Luftwaffe geeks know the L Dv and field units were experimenting with various camo schemes that worked better than the old 70-71-65 schemes in air-to-air combat during the Battle of Britain in the spring and summer of 1940. During this time the 70/71-02-65 (later officially adopted but sometimes ignored in favor of the grey schemes) and 74-75-76 schemes were field applied and later as factory schemes. The L Dv 521/1 did officially prescribe the 74-75-76 scheme in November of 1941 and Bf 109E-4Bs were produced in this scheme at Wiener-Neustadt. Also, “The all grey scheme was applied to three special ME109Fs supplied to JG51 in October, 1940, to be tested under operational conditions”1. There are also references I have read and color pictures I have seen of ME 109Cs and Ds operational in Scandinavia and in the Flugfliegerschules being repainted in 74-75-76 in 1940-1941!
In the US Air Force we had a process called IRAN (Inspect and Repair as Necessary) which were major overhauls of aircraft at the depot level (Japan or the Philippines for the Pacific theater if I recall) during which A/C were repainted. This happened even in heavy combat venues like Korat, Thailand during the Vietnam thing. You would see 105s in fresh paint right next to War-weary faded paint 105s in their revetments ( “Ds” weren’t being manufactured any more at that time). Same thing at RAF Bentwaters with our F4Cs. We’d practice load F4s with nasty faded paint and a few months later the same plane would sport a new paint job.
I think that the 74-75-76 scheme was pretty much it by the start of the Russian campaign. I have a color Video of a Whermacht PzKpfw IVG during the Kursk campaign coming into a front FIELD repair depot under some trees after running over a mine and losing a bogie and before it rolled back to the front they repainted the whole tank! The Germans were pretty busy at Kursk but they took care of their equipment. Even if the 110 I built was in a 70/71-02-65 scheme at the factory I believe that by the Russian campaign it must have been repainted in the official scheme (L Dv 521/1). So there you have it, just my intuition and some supporting evidence and I like the 74-75-76 schemes. Like Mike Meyers says, “feel free to talk amongst your selves”.
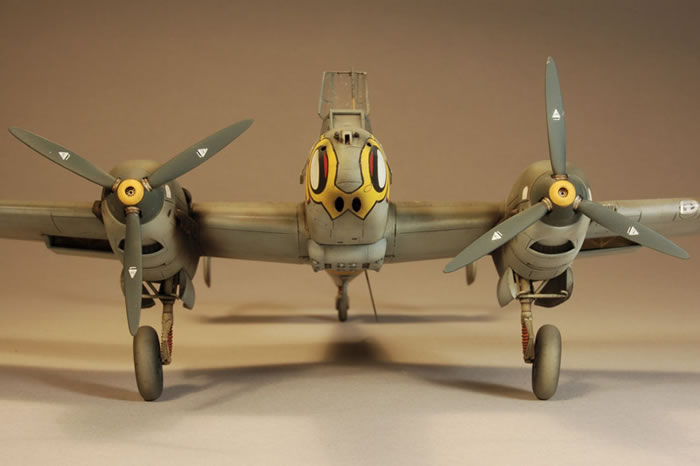
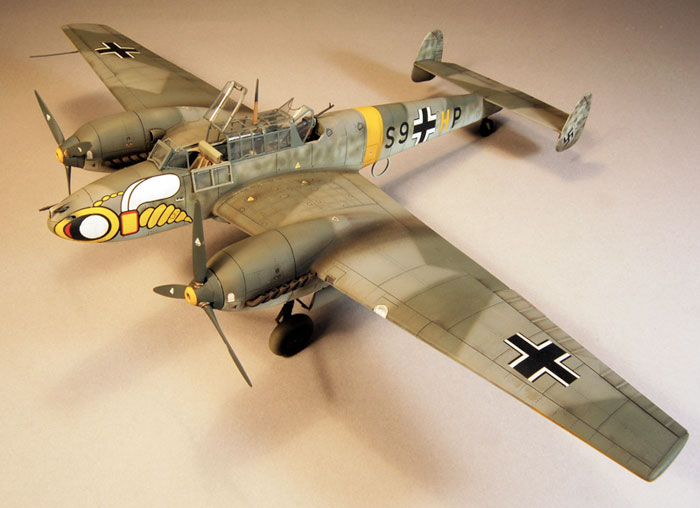
My painting method is this, all airbrushed with my cheap Paasche H-1:
-
Paint the base color, for example 76.
-
Go over the panel lines with dark grey, black or dark brown.
-
Sometimes lighten the center of the panels with a lighter base color (76 + white)
-
Over spray all that with a diluted coat of the base color until it all blends together.
-
Future coat everything except the cockpit and canopy (done separately most of the time)
-
Apply decals
-
Future coat everything again.
-
Apply a coat of Testor’s Dullcoat.
-
Apply a wash of black and burnt umber oil paint to the panel lines and after 15 minutes wipe off in the direction of the airflow with a rag and a bit of thinner.
-
Apply a light coat of Dullcoat to unify the surface again.
-
Apply any exhausts stains with the airbrush
-
Highlight selected panel lines, control surfaces, etc with Tamiya masking tape applied to the edge and pastel dust applied against this then remove the tape and wipe the pastel dust with the finger in the direction of the airflow. Use a clean finger each time!
-
Add Prismacolor silver pencil wear marks where appropriate and earth/grey color pastel dust over this and other high traffic areas. I never cleaned my shoes when crawling on and over an aircraft. Most of this will disappear under the next coat.
-
After this and all the detail goodies are on apply one final coat of Testor’s dullcoat, buff with clean rag in high traffic areas if desired.
-
Of course all coats dry for at least a day before proceeding to the next.
-
Obviously, I don’t get a lot of kits done in a year unless I’m building three at a time!
As I have said what would this beautiful kit cost coming from Japan or through some of our distributors who seem to want to make a fortune on markups of Chinese kits that probably cost a buck-two-ninety-eight US to manufacture there? In this kit you even get a model of a doggie!
Thank you Eduard. I can’t wait for the G-4 as it’s supposed to be even more complicated!
Luftwaffe Camouflage 1935-1940, Alain Fleuret, Kookaburra Technical Publications Pty Ltd., Melbourne, © 1981
The Modeller’s Luftwaffe Painting Guide, J.R. Smith, G.G, Pentland and R.P. Lutz, Kookaburra Technical Publications Pty Ltd., Melbourne, © 1979
Messerschmitt Bf 110 Vol.1, Marek J. Murawski, Wydanie pierwsze, Lublin © 2005
Model, Movie, Images and
Text Copyright © 2008 by Ron Petrosky
Page Created 3 September, 2008
Last Updated 3 September, 2008
Back to HyperScale
Main Page |
 Home
| What's New |
Features |
Gallery |
Reviews |
Reference |
Forum |
Search
Home
| What's New |
Features |
Gallery |
Reviews |
Reference |
Forum |
Search