|
Classic Airframes' 1/48 scale
Bristol Blenheim Mk.I
by David Valinsky
|
Bristol Blenheim Mk.I |

HyperScale is proudly supported by Squadron.com
I became aware of the existence of Classic Airframes' 1:48 Blenheim far too late to get hold of one of the original issues without paying through the nose, so I was delighted to hear that it was being re-issued (with improvements!) and snapped one up immediately.
The kit went together very smoothly, the new one-piece resin wheel-wells were a joy and it was altogether a very enjoyable build. There are however a couple of things that you may feel need upgrading a little.
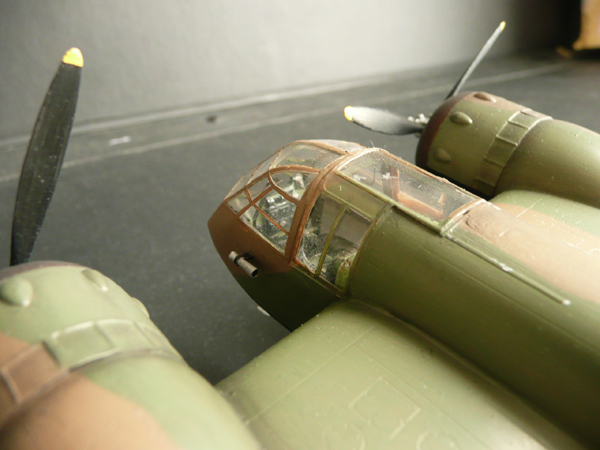
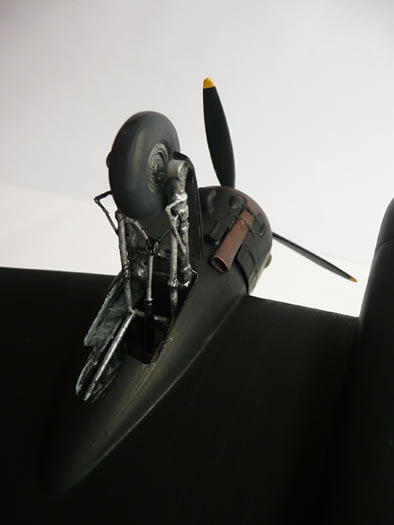
I had read elsewhere that the cockpit sidewalls and floor were a little short and indeed they were, by about 5mm in the floor and 10mm at the 'point' at the side of the cockpit. After placing the sidewalls in approximately the correct position within the nose halves, scrap plasti-card was used to continue the framing in to the nose. The floor was also extended. In addition, some very thin card was cut into narrow strips, painted British Interior green and used to construct an internal frame to the nose. Each piece was stuck with Krystal Klear which worked very well. In retrospect it would have been a very good idea to give these nose parts a bath of Future before and after all the handling involved but as I didn't have any at the time...
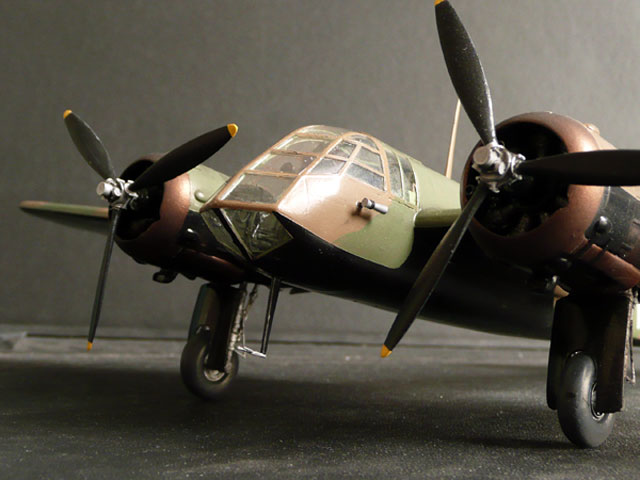
The engine cowlings also need a little bit of work. The lip of the opening has two small cut-aways which are easy to reproduce with a sharp scalpel and a little sanding. The exhausts can be easily drilled out and should be well blended in to the front ring with filler. It is also worth removing the moulded-on 'straps' from these exhausts and the cowling. Once they are in place, the straps can be replaced with a piece of card which looks a lot more like the real thing! The only other problem with the cowling I had was a moment of stupidity on my part. Three of the small bumps over the engine cylinders are supplied as separate pieces for each cowling as the cowling is supplied in two halves and it would not be possible to mould these bumps on like the others. In discarding what I thought to be empty sprues I inadvertently chucked these pieces and had to create the bumps from putty, sandpaper and a steady hand.
Not moving far from the engine, the undercarriage legs were far too wide to hold the wheel as intended and so it is a good idea to drill right through the legs and the wheel and provide an axle from either plastic or metal rod. The ends can be tidied up afterwards.
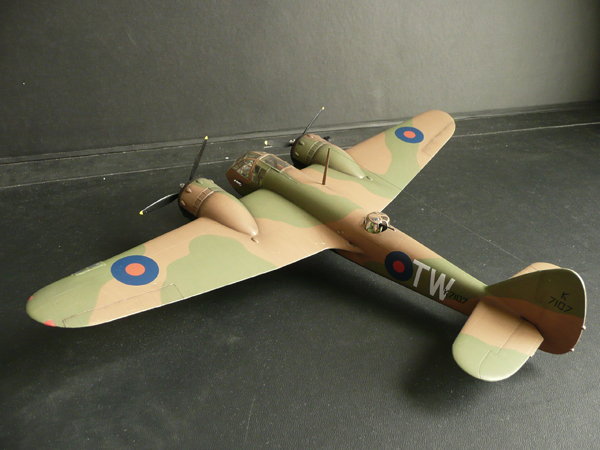
The landing lights in the leading edge of the wing are very prominent and it is certainly worth cutting this area out. I drilled some holes in the inner faces of this compartment to give an impression of an airframe and created the landing lights from lumps of Krystal Klear left to dry on a flat surface.
One problem with this kit which I failed to correct is the over-long propeller blades. These could all do with having a good few millimetres shaved off the end and I may go back to this on a particularly grey afternoon!
Painting (with a brush of course!) was done with Misterkit acrylics for the dark earth and dark green and Xtracrylics "night" beneath. The latter however seems to have a bizarre tendency to get slightly blue and shows up fingerprints with flair. Having run out of Humbrol matt varnish I used the Xtracrylics Flat which this time worked well — I used it at exactly the same time on another job with the same paint underneath and got the usual slightly glossy result. If anyone can suggest a consistent Matt acrylic varnish that I could brush on I would be most grateful!
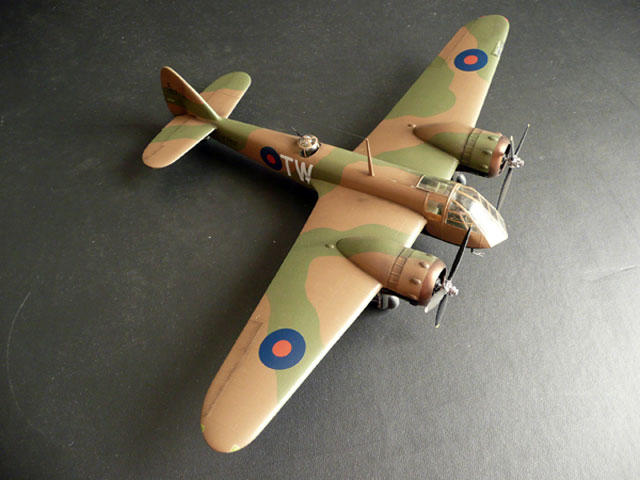
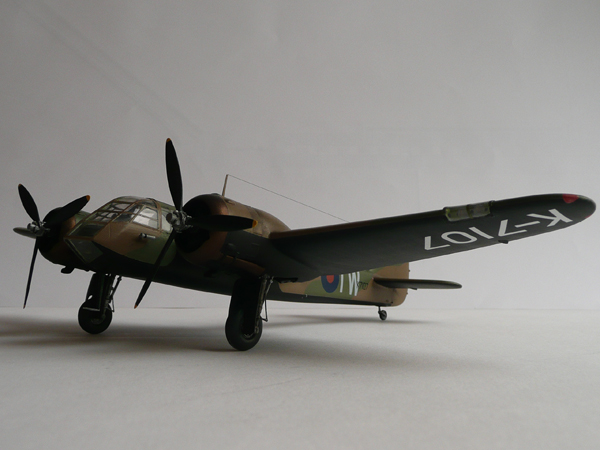
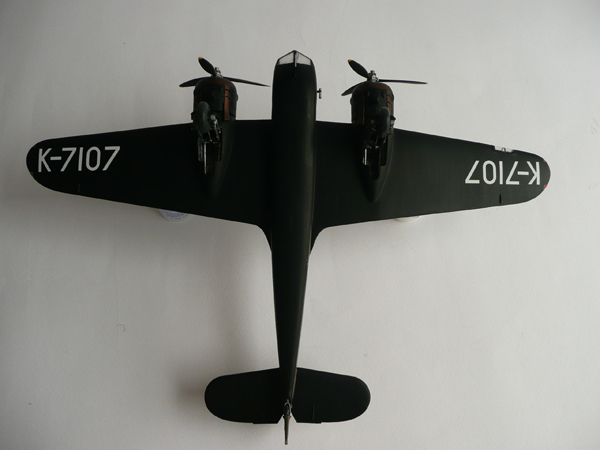
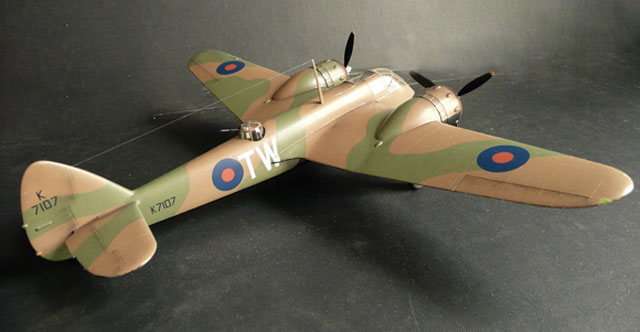
I really like the pre-war markings with B-type roundels in all positions and having seen a photograph of this particular aircraft new it had to be done. The roundels and squadron codes were from various Xtradecals sheets, the serial numbers on the fuselage from a Fantasy Printshop sheet and the underwing white serials from a Carpena sheet. The style of these underwing codes could be debated for all the photos of Blenheims I have seen show them to be square rather than round letters and numbers. However, no-one seems to make square letters and numbers in white and so, knowing that numerous other aircraft did have round underwing codes I thought I would take a chance. In actual fact, I couldn't find a photo of the undersides of this particular aircraft allowing me a certain amount of artistic license.
A little shading was done with some pastels and that was about it.
Classic Airframes 1/48 scale Bristol Blenheim Mk.I is an excellent kit of a beautiful aircraft that can be highly recommended!
Model,
Text Copyright © 2008 by David Valinsky
Page Created 11 September, 2008
Last Updated 11 September, 2008
Back to HyperScale
Main Page |
 Home
| What's New |
Features |
Gallery |
Reviews |
Reference |
Forum |
Search
Home
| What's New |
Features |
Gallery |
Reviews |
Reference |
Forum |
Search