|
Czech Model's 1/32 scale
Brewster F2A-3 Buffalo
by
Ian Robertson
|
Brewster F2A-3 Buffalo |

Czech Model's 1/32 scale F2A3 Buffalo is available online from Squadron.com
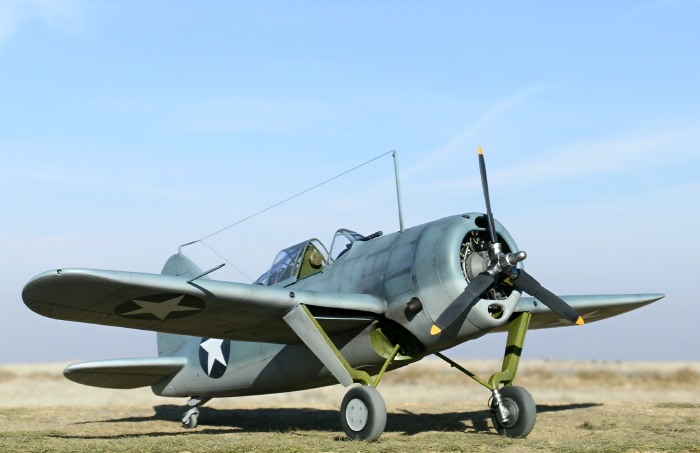
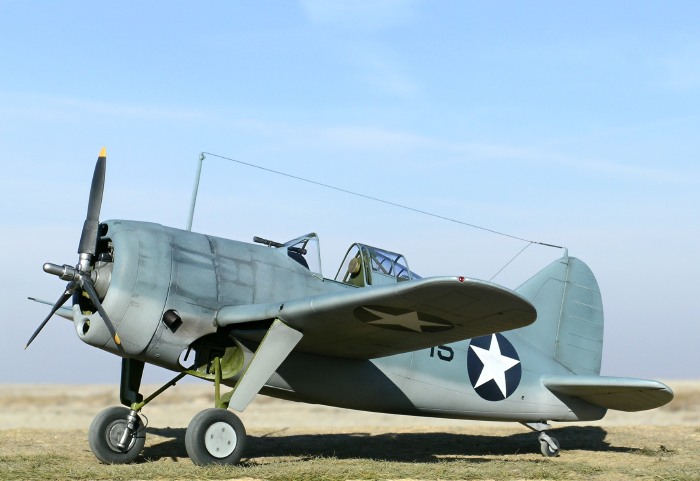
The Brewster Buffalo was conceived in the late 1930’s as a state-of-the-art monoplane carrier fighter for the US Navy. However, production problems at the Brewster factory, along with politics and persistent controversy surrounding the aircraft’s performance, marginalized the Buffalo from the outset. Ironically, the Buffalo’s greatest successes in combat came at the hands of Finland, a co-belligerent of Germany. Among the Allies the Buffalo was used in limited numbers by the US, British, Belgians, Dutch, and Australians. However, as far as the US Navy was concerned, the Buffalo never lived up to expectations and it was therefore quickly relegated to the role of advanced trainer. A number of Navy F2A-3 Buffalos were transferred to the Marine Corps, including VMF-221 stationed at Midway. The Battle of Midway in June 1942 was the first and last major action for the Buffalo as a front-line US aircraft.
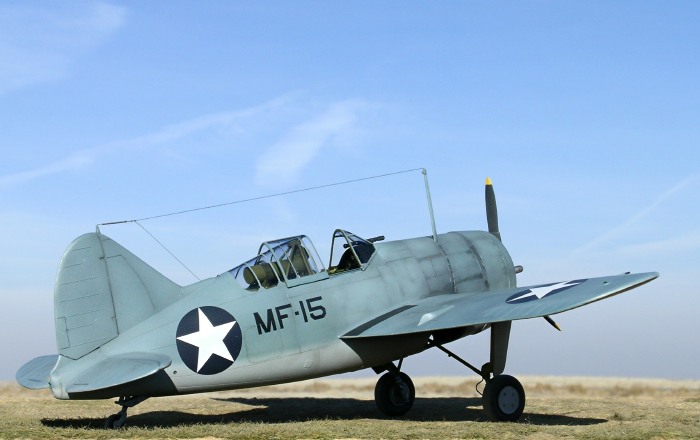
My model represents an F2A-3 from VMF-221 piloted by Capt. William Humberd during the Battle of Midway. On June 4, 1942, Capt. Humberd shot down an A6M2 Zeke and a B5N2 Kate. For his actions he was awarded the Navy Cross. Of the 25 Buffalos that engaged the enemy on June 4, 12 were lost to the enemy (source - http://www.warbirdforum.com/midwayx.htm).
Czech Model’s Kit
The Czech Model 1/32 F2A-3 is a limited run multi-media kit, and as such it is intended for modelers with some experience. Having built a number of limited run 1/32 kits from Azur/Special Hobby/Czech Model, I found the Buffalo to be the best one to date. The level of detail is excellent, the engineering logical and straightforward, and the parts fit with little difficulty. Upon opening the box I found that most of the clear parts had broken off their sprue and were floating loose among the other parts (a common occurrence for this kit), but luckily none suffered damage.
The Czech Model F2A-3 kit shares most of parts with the Special Hobby F2A-2 kit. Differences specific to each version are represented within their respective kits. The F2A-3 kit comes with parts for the F2A-3 and Model 339-23 (Australian export version).
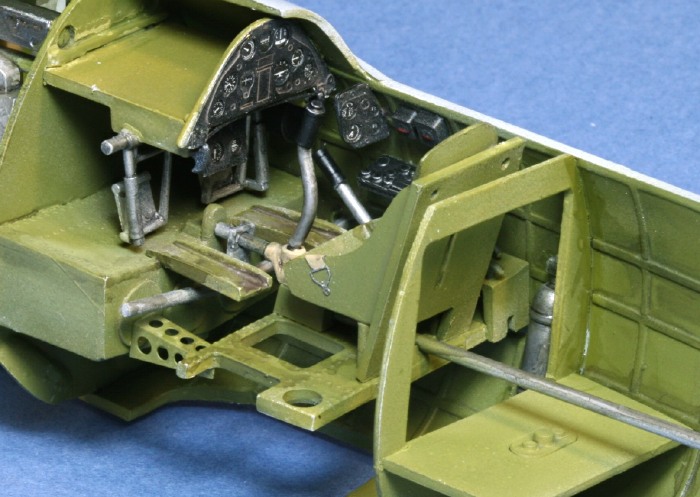
Construction begins with the cockpit. Apart from thinning the edges of the seat and scratch-building a new headrest and armor plate, I assembled the cockpit with little modification. Following the color callouts in the instructions, I painted the cockpit interior green, the control panels (scale) black, and the rudder pedals and control stick aluminum. Washes of black and burnt umber/raw sienna were added to help pick out the details. The cockpit assembly, along with the forward firewall and cowl gun assembly, fit snuggly within the fuselage.
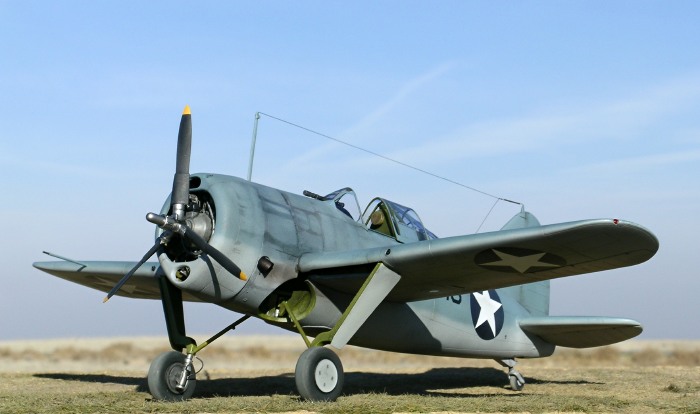
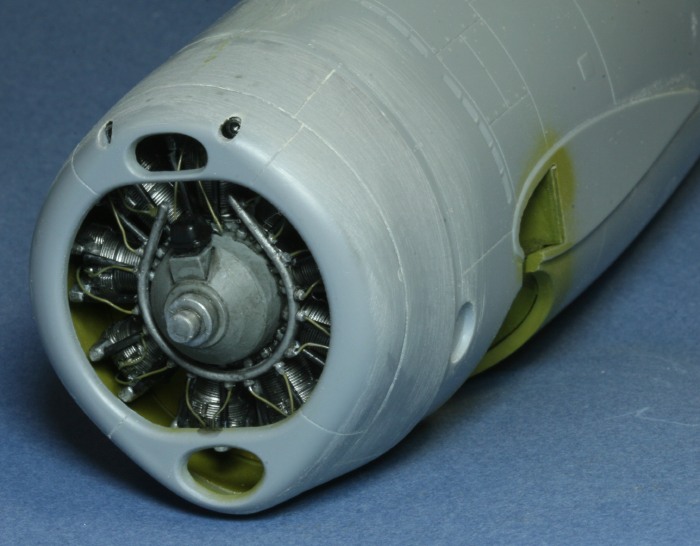
The engine was the next major step in construction. I painted the engine cylinders Alclad II duraluminum, the crank case neutral gray, and the governor and push rods black. A wash of Tamiya black acrylic was added to the cylinders and crank case. I then added ignition wires made from fine solder wire and painted them brown.
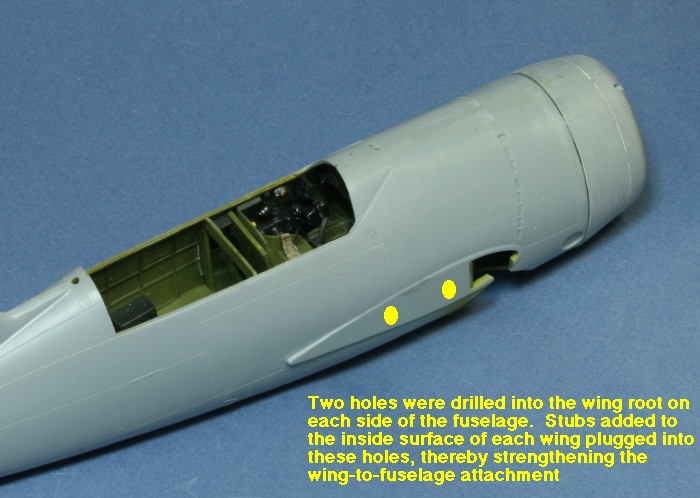
Common to many limited run kits, the wings on the Czech Model kit lack alignment pins or a main wing spar to aid with attachment to the fuselage. Therefore, to strengthen the wing-fuselage connection and assure proper alignment and dihedral, I added plugs to the inside edge of each wing, and then drilled holes in the fuselage to accept the plugs. I used Testors tube glue to attach the wings to the fuselage, and followed it up with gap-filling CA glue. Filler was needed at the wing-fuselage joint, and some rescribing was necessary to recover details lost by sanding.
I replaced the kit’s wing guns and pitot tube with syringe tubing, and I reshaped pieces of clear sprue for the wingtip lights. The port and starboard lights were painted Tamiya clear red and clear green, respectively.
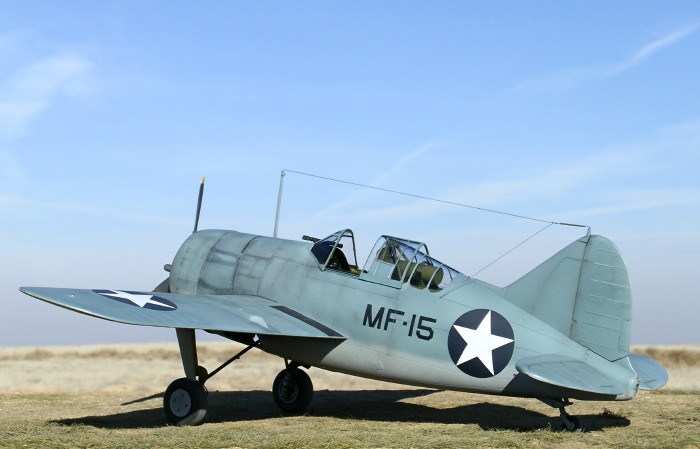
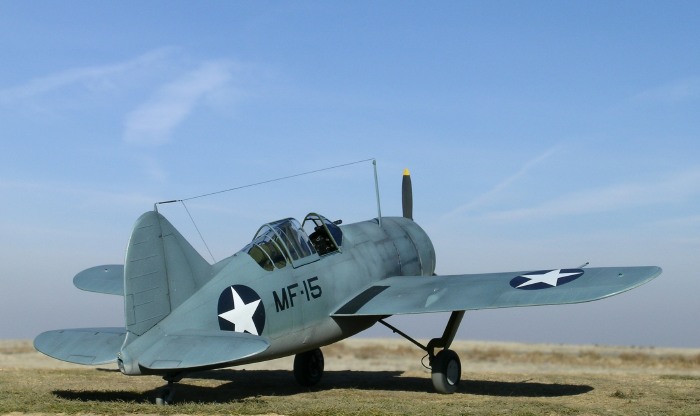
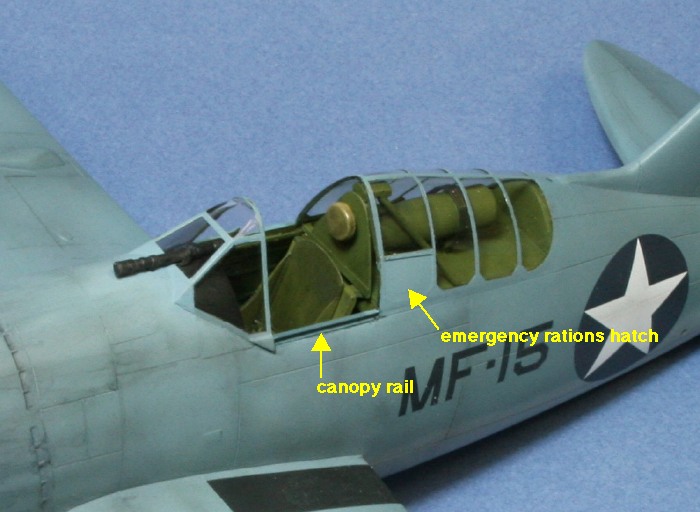
The canopy was an area of the kit that benefited from careful attention because of its prominence on the model. The clear parts are excellent quality and fit well to the fuselage. Nevertheless, care should be taken to ensure that the windscreen and rear canopy are properly faired to conceal unwanted gaps and seams. In the F2A-3, the metal framing on the sliding part of the canopy was deleted in favor of plexiglas panels that were butted together and sealed. Therefore, these center frames should be left unpainted. A small rations container hatch, another characteristic of the F2A-3, was added to the forward frame of the port side rear canopy. Lastly, a canopy rail was made from strips of styrene.
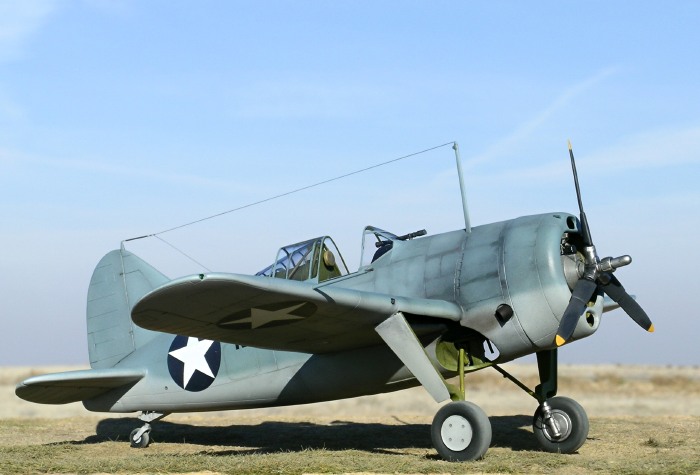
The main undercarriage was relatively hassle free, although care was needs to ensure proper alignment and rake. I used 5-minute epoxy to attach the main struts because it provides sufficient time to make final adjustments before the glue hardens permanently. I painted the undercarriage and gear bays zinc chromate as per the instructions. Brake lines were added using fine wire.
According to Jim Maas, F2A-3 Buffalos at Midway had the carrier-style tail wheel (the hard rubber disc) replaced with a pneumatic tire that was better suited to island conditions (see pages 46 and 48 in Squadron’s “F2A Buffalo In Action”).
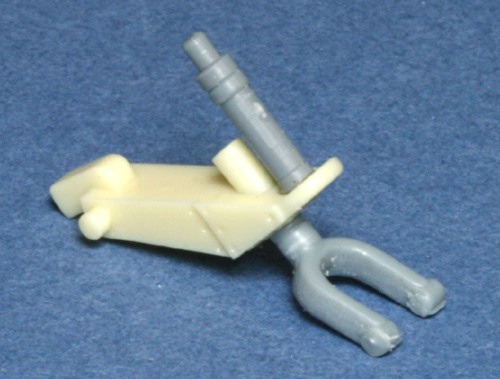
The gear structure that housed the wheel remained unchanged. Therefore, I modified the kit parts by combining the gear structure of the carrier-style wheel with the yolk and pneumatic tire specified for the Model 339-23 export version.
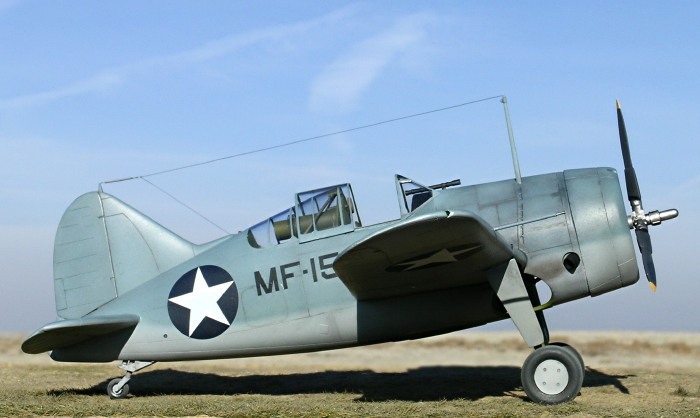
The camouflage consisted of Polly Scale USN blue-gray over US Light Ghost Grey. I painted the ventral window the undersurface color. According to Jim Maas the F2A-3 did not have a ventral window because an extra gas tank was installed beneath the pilot’s seat which would have made the window useless. The ‘window’ continued to serve as an access panel to the interior.
Postshading was used to break up the uniformity of the camouflage scheme. I applied thinned Tamiya black sparingly on the cowl to simulate stains from the engine.
The kit decals were applied over a clear gloss coat of Future floor wax. I then applied a 50/50 mixture of Polly Scale clear satin and clear flat.
A wooden cutting board was used as the base for the model. Celluclay was used to make the basic ground cover. The celluclay powder was mixed into a paste with water and white glue, tinted with brown acrylic paint, and then spread thinly over the cutting board. Note that the cutting board had previously been treated with several coats of clear lacquer to prevent warping while the celluclay dried. While the celluclay was still wet I added pieces of Heki grass mat (item # 1574 - Wild Grass Savanna) and fine sand. Heki products are available for purchase in the United States from “Scenic Express”.
Outdoor images were taken with a Nikon Coolpix 5400 digital camera. The “unsharp mask” tool of Adobe Photoshop was used to restore some of the clarity and crispness lost during image compression. The “blur” tool was used to help merge the base with the natural background. Indoor construction shots were taken using a tripod with a Canon EOS 30D fitted with a macro lens.
Model, Images and
Text Copyright © 2008 by Ian Robertson
Page Created 17 January, 2008
Last Updated 17 January, 2008
Back to HyperScale
Main Page |
 Home
| What's New |
Features |
Gallery |
Reviews |
Reference |
Forum |
Search
Home
| What's New |
Features |
Gallery |
Reviews |
Reference |
Forum |
Search