|
Italeri's 1/48 scale
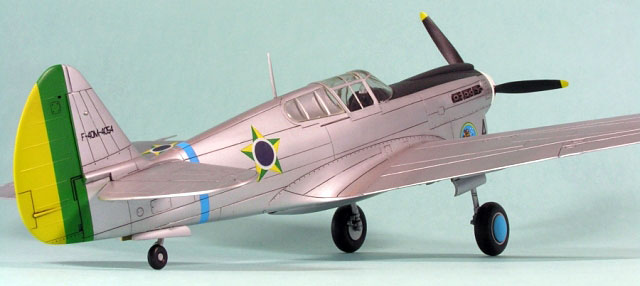
Curtiss F-40M Warhawk
by Jon Bryon
|
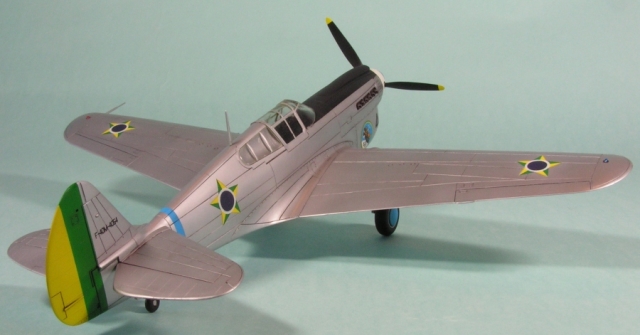
Curtiss F-40M Warhawk
Brazil 1954 |

HyperScale is proudly supported by Squadron.com
This is a model I never thought I would build. It was only relatively recently that I became aware that various versions of the P-40 Warhawk were used post-war, perhaps most prominently by the Brazilian Air Force. It was therefore with great interest that I noted Italeri re-released the AMT/Esci P-40M/N with Brazilian markings last year in 1/48, and I subsequently managed to pick it up dirt cheap on a trip to Hong Kong. It then sat in my stash for all of a year until it found itself as an ideal 'filler build' during my last five weeks in China.
Italeri's 1/48 scale P-40M/N In the Box
Reviews of the Italeri's 1/48 scale P-40M/N seem to be generally favourable.
I noted that in Brett Green's review of this boxing on HyperScale that the kit is missing some of the finer details (like the sights on the nose), but was given a general thumbs up in the accuracy department. The mouldings themselves are a strange mix of high quality in some areas, but quite crude in others. The recessed detail on the wings, for example, is very well done, but the fuselage much less so. The rear fuselage seems to be an insert mould meaning there is quite a nasty transition from behind the windows to the tail. The surface detail here is lumpy, inconsistent and indistinct, needing a fair amount of cleaning up and rescribing.
The fuselage also has other moulding defects in some areas with little blobs of excess plastic obscuring some of the recessed lines, especially around the wing roots and the lower nose cowling.
First order of the day, therefore, was to tidy up all the parts, smoothing the fuselage halves and rescribing the detail, and removing the flash. The plastic is extremely soft, which is both a blessing and a curse. It makes clean-up easier, but I found it very difficult to scribe accurately. Even when using various photo-etched guides or Dymo tape, the scriber (be it an Olfa P-cutter or a needle in a pin vise) had an alarming tendancy to wander. As I was trying to build this model fast, this was quite frustrating and there are many small errors in the rescribing that I didn't have time to fix.
Once the parts were cleaned up I got started on the cockpit. Lacking any references (and the time to find out any answers) I followed Italeri's instructions and painted it all Interior Green (using Gunze Mr Color lacquer). The cockpit detail is adequate (even the moulded seatbelts, considering I was going to close the canopy) and my only change was to remove the solid plastic gunsight glass and replace it with a piece of transparent plastic.
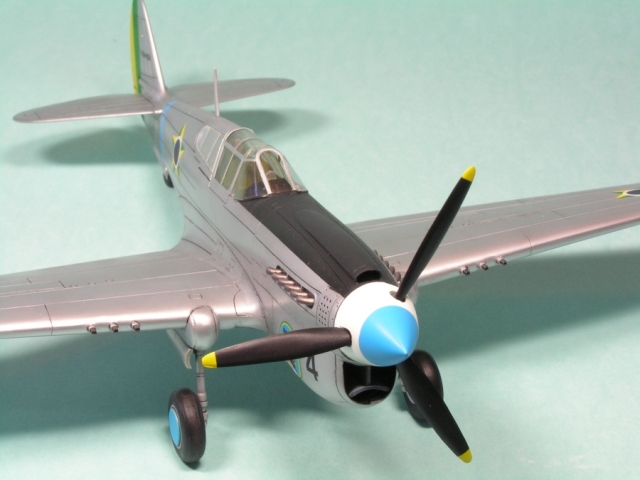
The upper nose cowling panels were added to the fuselage halves, and these are the worst fitting parts in the kit. I attached them in stages using a combination of super glue and polystyrene cement, attempting to minimise the steps and gaps. The exhausts were drilled out and added now, since they can't be attached once the fuselage halves are together. The fuselage goes together nicely and I just used super glue for this. The cockpit module can then be inserted through the lower fuselage, and was a very good fit.
The wings were next. To minimise gaps at the wing root, I glued the upper wing halves to the fuselage, using the one-piece lower wing to set the dihedral. The fit was fine. Once dry, the lower wing was attached. This fitted well for the most part, except where it met the rear fuselage. The plastic is extremely thin, making fixing the seam difficult without making a hole. If I were to build this kit again I would explore the possibility of attaching some plastic card or Milliput on the inner face of the lower wing to prevent this. With lots of super glue and sanding, I ended up with a semi-presentable joint. The other significant problem for me was cleaning up the joint between the wing halves around the machine guns. I couldn't make a good job of this, and I removed too much plastic. The guns were drilled out and then the tailplanes were added; they are not a great fit but time precluded me from sorting them out properly.
The 'knuckles' (for want of a better word) that form the forward part of the undercarriage bays were attached. These were a very odd fit and took a lot of fairing in. I also added the small inner undercarriage doors at this time, following the instructions, but subsequent examination of photos reveal that Italeri may have got this wrong; it's hard to tell. Photos also showed that a Brazilian F-40 with no pylons under the wings or fuselage was entirely plausible, so in the interest of saving time, the holes for these were filled. As will most of my models, the pitot was replaced with brass tube and wire and, with that, the airframe was basically complete.
The next tasks were to deal with all the smaller parts. The one-piece prop was sandwiched between the spinner halves. There are pretty huge gaps along this join, so I took the time to fill them with super glue. The undercarriage was cleaned up; the landing gear on the P-40 seems to be a (thankfully) simple affair. I went with Italeri's suggestion of Interior Green for the wheel wells, but I have no idea if it's correct. For the struts I used aluminium, as that seemed more likely on these silver aircraft than the light grey indicated in the instructions.
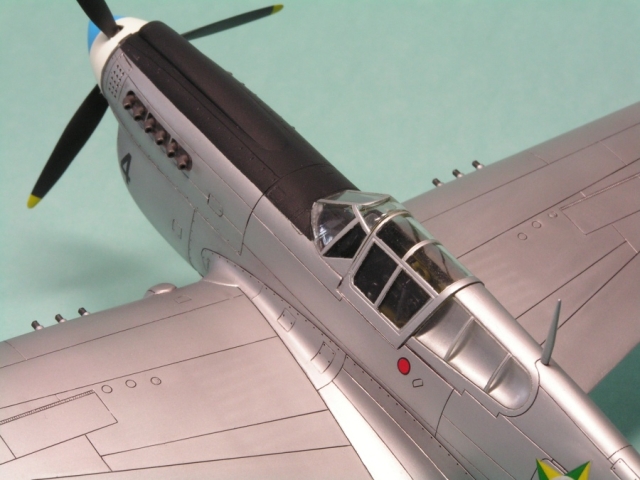
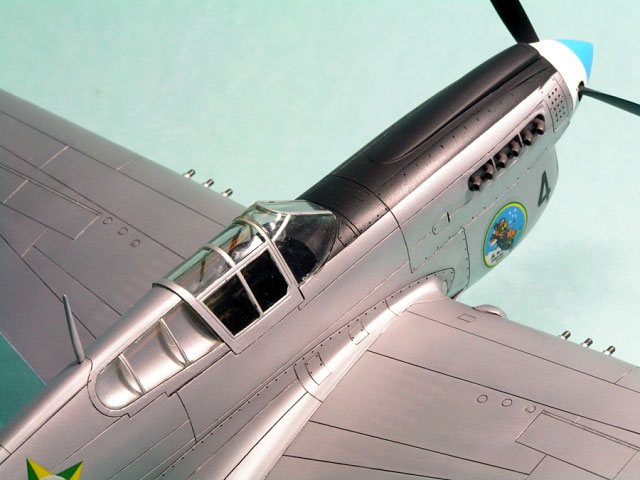
The final addition to the airframe before painting was the canopy. This was simply buffed up and attached using liquid cement. Unfortunately, the sprue attachment points are right on the glass in some areas, rather than the framing, and the resultant scaring is all too evident on the final model. On the positive side, the fit is very good. Not being familiar with WWII era aircraft, the framing was a real pain to mask! I also think Italeri may have made a mistake in the instructions and indicate that the alternative windscreen should be used (although I may have misread them). In any case, for the P-40M, the windscreen with the extra frame on the left side is the correct part to use.
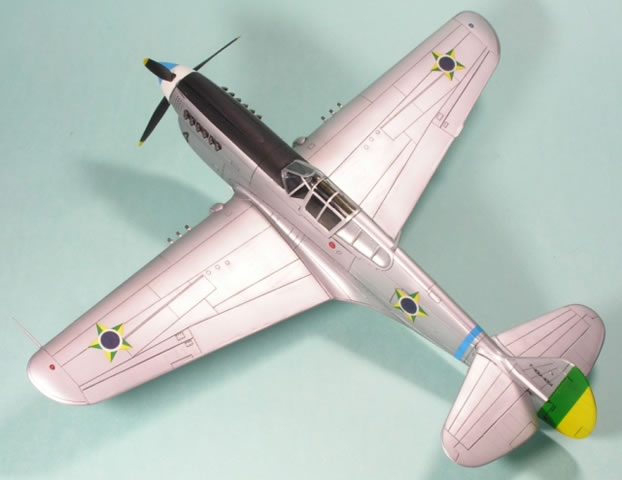
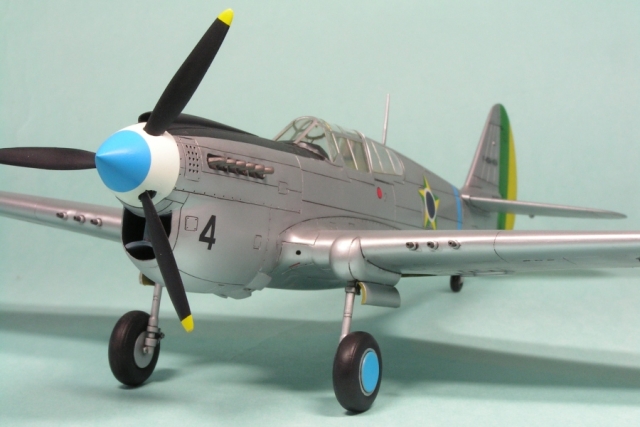
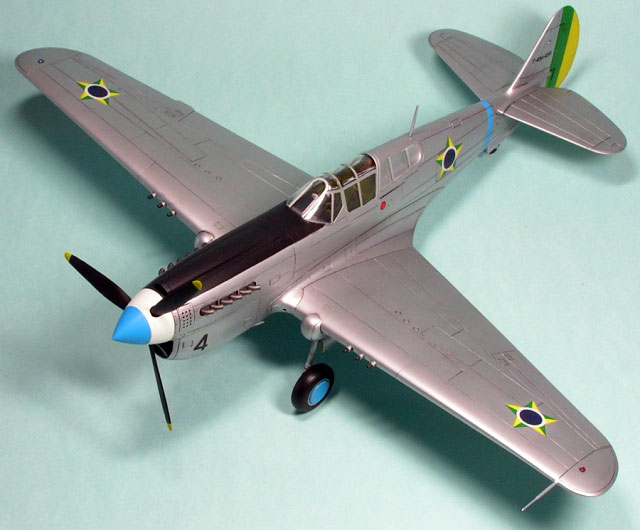
Onto the paint shop. After the canopy framing was given an undercoat of Interior Green, I used Gunze Mr Surfacer 1200 for the primer coat. Various colours were then added: first the blue (Mr Color) for the spinner, wheel hubs and the rear fuselage stripe. The white was then added to the spinner. Yellow (again, Mr Color) was airbrushed onto the tail and prop tips. The whole spinner was then masked and the prop blades airbrushed black (along with the anti-glare panel). Green (Mr Color) was the final colour sprayed to complete the tail markings. Once all these areas were masked, I airbrushed Mr Color silver over the rest of the airframe.
It was here that my hasty seam work came to light. The seams were basically okay - no gaps or steps or ghost seams - but I had not taken the time to polish out the sanding scratches. On close examination, the lower wing to fuselage join is less than satisfactory in this regard... I didn't have time to polish it all out and repaint, so it is what it is.
After a quick coat of Johnson's Klear, and an oil wash (black oil paint thinned with Zippo lighter fluid), it was time for the decals. I had been considering the markings for several weeks before commencing work on the model. I was wary of Italeri's research, so made some inquiries as to the accuracy of the kit-supplied markings. I made contact with a couple of knowledgeable Brazilian historians and modellers, who sent me some very useful pictures and information. In short, Italeri did a good job, but it's not quite right (at least as far as I can make out).
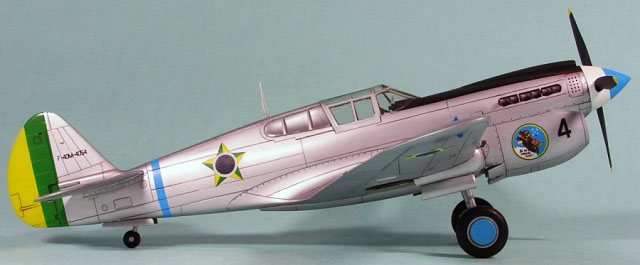
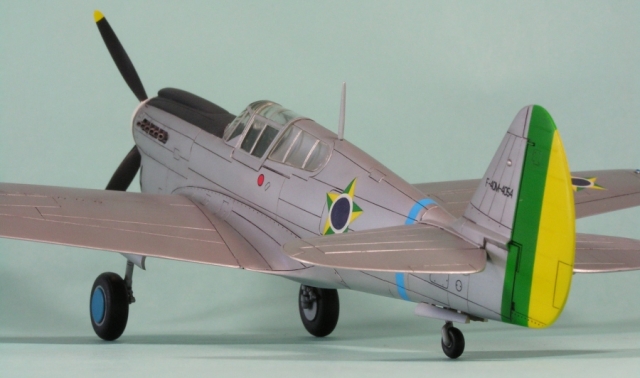
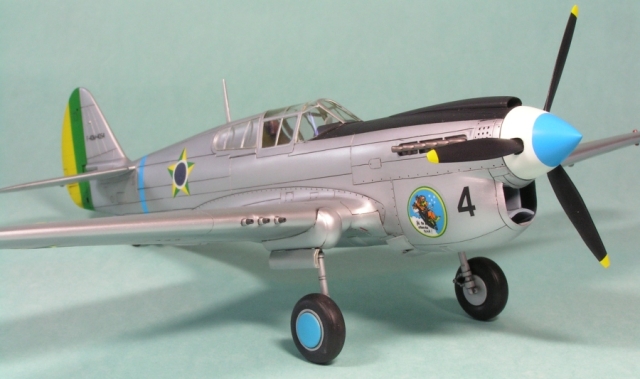
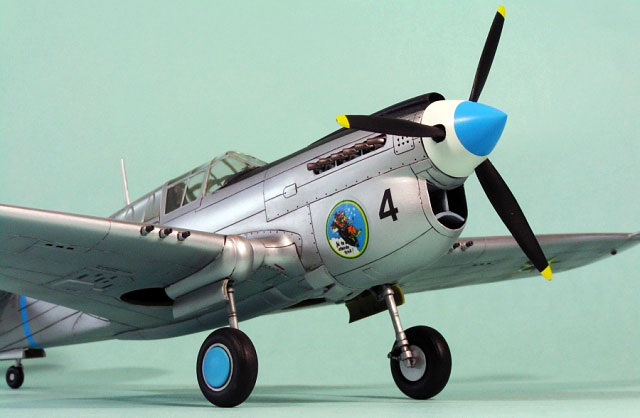
Brazilian P-40s that were painted silver (although there appears to be a little debate as to whether they were painted or natural metal) most often had black anti-glare panels on the nose; all the photos I've seen have this feature. Italeri neglect to show this on their diagrams, so I made sure to add it. Furthermore, Italeri instruct the modeller to add the nose art to both sides of the nose, whereas it should only be on the right side. Nevertheless, the Italeri decals are extremely nice to use (I used some of them for the nose and tail numbers), but out of register. This is especially noticable on the blue circles in the centre of the national markings (basically rendering them unusable) and the green and yellow rings around the nose art (which were only present, I believe, in 1954; earlier versions have no green and yellow surround). These deficiences caused me to seek out replacement decals from FCM, a Brazilian company. A sheet containing markings for an F-40M (erroneously marked as an F-40K on their instruction sheet) were sourced from Hannants; this is for the same plane that Italeri provide markings for (Blue 4).
The decals duly arrived and were a disappointment. The nose art was also out of register, making them no better than that supplied in the kit, and the decals were the thickest I have ever seen. Furthermore, the decal adhesive is extremely uneven and blobby. In the end I only used the national markings (since the separate centres allowed me to get them lined up properly, although I think the colour is too dark) and the nose art decal. I attempted to use some of the stencils on the underside, but soon abandoned these owing to the very thick film and the fact that some of the decal art did not seem to be fixed by the adhesive. The stencils provided by FCM and Italeri didn't seem to match what I could see on photos anyway. By trimming the national insignia, I obtained an acceptable result, but I wouldn't recommend the decals. Unfortunately I purchased another set at the same time (so I can now build an F-40E, K and N in Brazilian markings) and they are exactly the same. The observant amongst you will notice I used paint for the wheel hubs, fuselage stripe and tail markings rather than decals. Of note is that Italeri supply national insignia of two styles, with a less 'fat' star used on the wings. This design was definitely used on some F-40s, but FCM just supply the star with the bigger centre circle. I have no idea which is correct for Blue 4, since photos show both are possible, but I went with the FCM insignia because it looked better.
Once decalling was done, all the little bits and pieces were added and the whole lot sprayed with Pollyscale Matt Varnish. Photos of Brazilian P-40s show them to be very weathered, sometimes extremely so, and mine is much cleaner than they often appear. Final touches were the wingtip lights, underwing light and the removal of the canopy masking.
Overall, this was an okay build.
I was in a rush and so the final result doesn't hold up well under close inspection. I also knew that the model probably wouldn't survive long; it's now in a box somewhere in a friend's house halfway round the world and I doubt I'll see it again. But it is a nice addition to my 'virtual' collection and I love adding a model I thought would never form part of a post-WWII collection. I have already bought a Hasegawa P-40E that I will make in Brazilian markings, and maybe I'll get a K or an N one day too!
Many thanks to Rudnei Dias da Cunha, Bill and Mario Serelle for enthustiastically answering my questions, providing extra information, and most importantly, photos. I recommend the website http://www.rudnei.cunha.nom.br/FAB/en/ for more information on Brazilian P-40s.
Model, Images and
Text Copyright © 2008 by Jon Bryon
Page Created 31 July, 2008
Last Updated 31 July, 2008
Back to HyperScale
Main Page |
 Home
| What's New |
Features |
Gallery |
Reviews |
Reference |
Forum |
Search
Home
| What's New |
Features |
Gallery |
Reviews |
Reference |
Forum |
Search