|
Academy 1/48 scale
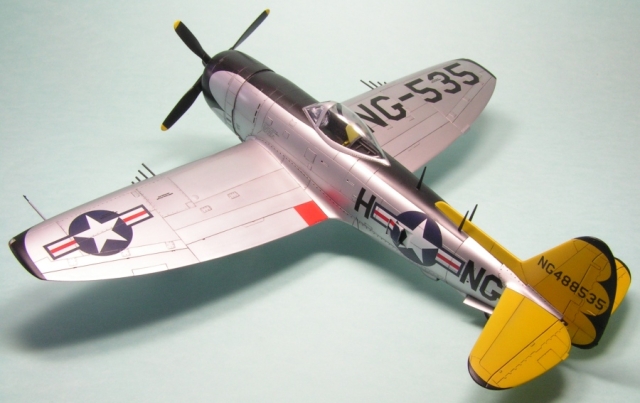
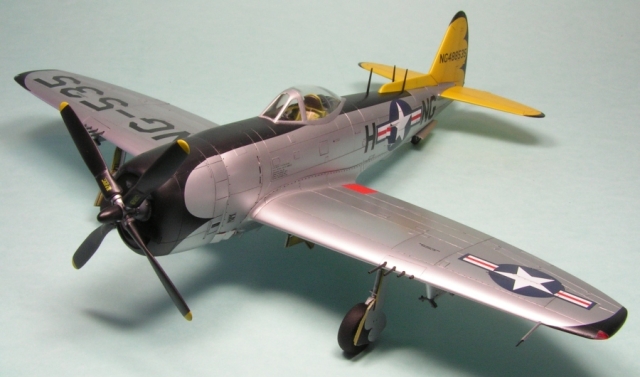
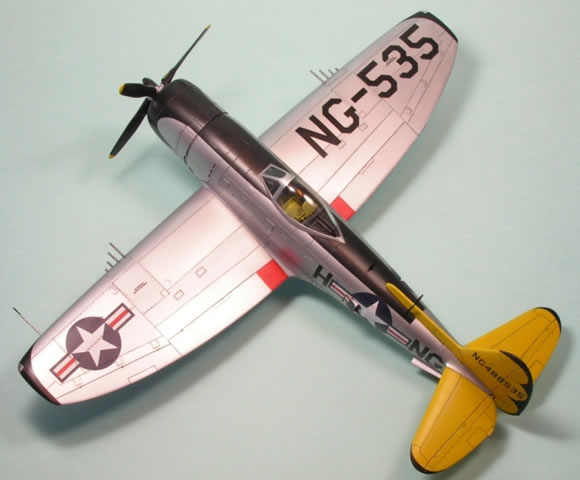
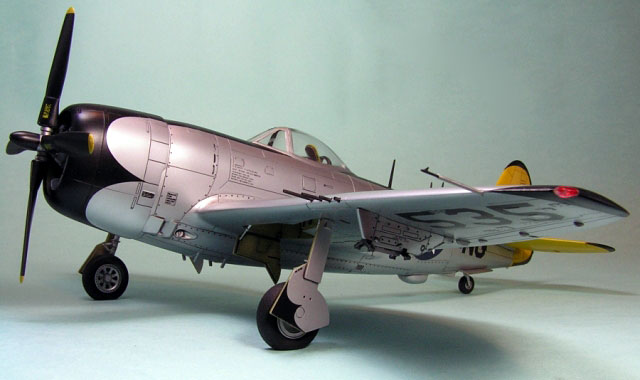
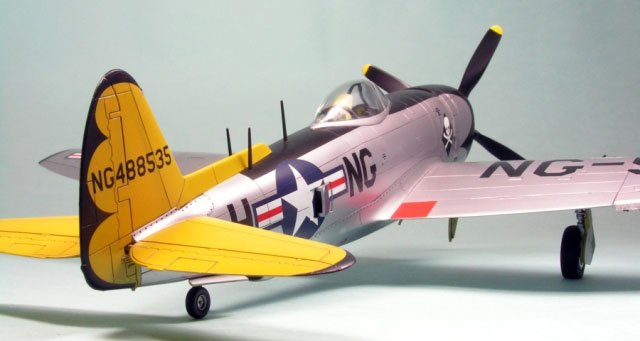
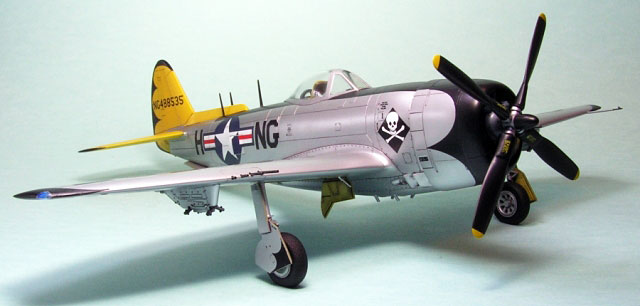
Republic F-47N Thunderbolt
by Jon Bryon
|
Republic F-47N Thuderbolt |

Academy's 1/48 scale P-47N is available online from Squadron.com
I bought Academy's rendition of the P-47N back in 2002, in a slightly bizarre ebay transaction.
Someone put it up for auction, and there were very few bids, so I put in a low bid and won. I noticed the seller was in Cambridge, where I was studying and living at the time, so I thought I could save on postage and pick it up in person. Imagine my surprise when I found out that the seller was a technician in the same university department as me! I simply went downstairs and handed over the cash. Shortly afterwards I purchased some Aeromaster decals that would enable me to build this aircraft as a post-WWII F-47 to fit in with my collection.
I finally got the motivation to build this kit by buying Tamiya's excellent Thunderbolt and deciding to build them simultaneously. For that my opinion of the Academy kit would suffer a little; the Tamiya version of the P-47 is just superb and it's hard to imagine another kit of the same subject competing with it. Nevertheless, the Academy P-47N is not a bad kit and I enjoyed building it.
Since I was going to close the canopy, the cockpit is mostly as it comes in the box. The only changes I made were to substitute the gunsight with one from the Tamiya kit and to add seat belts. Because I don't know any better, I painted the cockpit Interior Green and all the undercarriage bays and doors Zinc Chromate Yellow (all from the Gunze Mr Color laquer acrylic range); please, no emails telling me it should be a different colour...it's too late now! The cockpit detail was adequate for my purposes (actually, I think it's quite good, but pales when compared to the Tamiya kit) and I simply added some seatbelts made from foil with buckles made from copper wire (the latter only adding interest; they are not accurate).
With the cockpit in place, the fuselage halves were joined. They were horribly warped, but not lengthways. I attached them together along the spine using superglue, from the nose to the tail, and left it to dry. The lower halves did not even touch and I used copious amounts of tape and liquid cement to force the lower fuselage to meet. Once done, extensive clean-up of the seam commenced. Compared to the Tamiya kit, the lower fuselage is really lacking in detail, especially towards the rear. There is a 'bay' right in front of the tailwheel bay which has a nasty seam running through it; I boxed in the area with paper impregnated with superglue.
On the wings the gun bay covers were glued in shut. The fit was okay. The upper wings were then glued to the fuselage assembly to try and minimise gaps in this area. Once dry, the lower wings were then attached. The mating surfaces between the wings and the fuselage were not completely flat and a gap appears between the two towards the rear of the root. The gun inserts were added and the moulded in gun barrel was removed (the other three are provided separately). I removed the rocket stubs, since the pylons provided by Academy don't look very accurate and I found pictures of Hawaii ANG Thunderbolts both with and without these. The large pylons, however, seem to have been a standard fit, and were added before painting.
I spent a fair amount of time cleaning up the seams with finer grades of sandpaper to reduce the number of scratches that would show in the final finish. I followed up with Tamiya polishing compounds applied with an electric toothbrush. Once the tail planes were added, construction was largely complete. The canopy was added in a closed position; it has no positive location. Before painting commenced, a number of other issues had to be addressed.
The topic of P-47 props was somewhat vexing. General consensus from various reviews (and people I know) was that the prop in the Academy kit was flat out wrong, and ProModeler got it right in their N. Since I had the P-47M from Tamiya, my (hopeful) plan was to swipe a prop from that kit. No such luck. Tamiya provide 4 props, and I thought their symmetrical, cuffed example would be fine, since photos of Hawaii ANG P-47s clearly show they were not fitted with the asymmetrical prop Academy provide. However, I stumbled across a post on the Hyperscale forums where someone pointed out that neither Academy or Tamiya (or, I believe, ProModeler) provide the correct prop for a P-47N. Closer examination of the photos showed that the prop blades were symmetrical, but the cuffs were not. To get a closer approximation to reality I had to use the Academy prop boss and cuffs, and the blades (minus cuffs) from the Tamiya prop. This operation required lots of deep breathing, copious amounts of superglue and careful sanding. I'm not over the moon with the results, but it's definitely better than using the big cuffed symmetrical Tamiya prop without modification. One other small modification to the prop was to blunt the boss a little; as moulded by Academy, it looked a little too sharp to me.
With the prop out of the way, the next issue was the engine. Academy's engine is for a P-47D, and therefore wrong. It's also very small. Since I had the relevant parts left over from the Tamiya kit, I cut off the crankcase from the Academy engine using a razor saw and stuck on the correct Tamiya items. It looks better... The engine was then inserted into the cowling, which has a different shaped opening to the Tamiya (sorry about all these comparisons...I think there is only one more major comparison to come). The opening looks too wide and too circular.
Paint followed. The primer was Gunze Mr Surfacer 1200, which was nice and smooth for the metallic paint that would follow. Mr Color (which was used exclusively on this kit) black was sprayed on for the anti-glare panels, cowling ring and prop. Yellow followed for the tail. The Aeromaster instructions note uncertainty regarding the horizontal tail surfaces; apparently they may have been yellow, they may have not. I like colour, so threw caution to the wind and painted them yellow anyway. Once all this was masked up I was faced with the challenge of the natural metal finish.
Usually I am a big fan of Alclad II metallic paints. Unfortunately, I don't have any access to Alclad in China, so was forced to use Mr Color Silver and Aluminium. The silver was laid down as a base coat and then some panels selectively masked off and the aluminium sprayed on. Once the masking was removed, I added highly thinned Gunze Smoke along some panel lines by using pieces of card to mask panels on one side of the line. Johnson's Klear was applied as a protective clear coat before the subsequent dark grey oil wash.
I then approached decalling with some trepidation. The black scallops were going to be a challenge. I applied them first, and was pleasantly surprised. There were no gaps around the cowling, and those around the tail and wing tips were added without too much difficulty. However, the decals are fragile and took a lot of care to apply without destroying them. There is extensive decal film between the scallops, but it seems essential to their integrity. In retrospect, it would have been better to use the decals as templates for a mask. The rest of the decalling went without too much trouble. The decals didn't respond as much to Mr Softer or Mr Setter as I'd have liked. The national insignia didn't fit to well around the air outlets on the fuselage either.
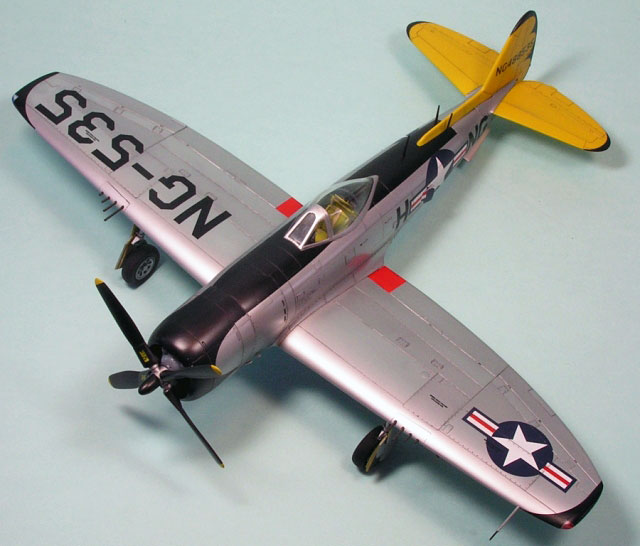
It wasn't until I had finished decalling, and was looking at a couple of photos of a Hawaii ANG F-47N with the scallop markings, that I realised I had made rather a large mistake. Aeromaster didn't provide above or below plans of the aircraft, and I had used the profiles to mask the anti-glare panels and place the scallop markings. Unfortunately this meant that at the bottom of the cowling the decals overlapped in the wrong place and my model has four scallops, instead of five. I can't blame Aeromaster, since I wasn't paying enough attention...another of my classic decalling blunders! Once the disappointment of this discovery had (mostly) worn off, I touched up all the gaps around the wing tips and rudder and began to add all the small details.
 The various antennae were glued to the fuselage spine and the gun barrels into the wings. These were made from brass tube, along with the pitot tube (with brass wire and a little bit of paper). The finish was tied together with a mix of Polly Scale Satin and Matt varnishes airbrushed over the non-metallic surfaces and the decals. The various antennae were glued to the fuselage spine and the gun barrels into the wings. These were made from brass tube, along with the pitot tube (with brass wire and a little bit of paper). The finish was tied together with a mix of Polly Scale Satin and Matt varnishes airbrushed over the non-metallic surfaces and the decals.
Once the undercarriage was added (Academy provide nicely bulged wheels) and the masking from the canopy removed, I considered it complete. My last disappointment was to see that the stress required to fit the canopy so it sat correctly caused some hairline cracks to form. I would recommend using a vacform replacement, since if it is to be closed, the kit hood doesn't fit very well. Furthermore, the Academy windscreen is significantly different in shape to the Tamiya version; I presume Tamiya got it correct.
So, overall, a satisfying build made somewhat less so by dropping the ball a couple of times (mainly with the scallop decals and the canopy). Nevertheless, it's a colourful plane and I'm glad to place it on the shelf. Compared to the Tamiya kit there are a few noticable shape oddities (especially the cowling opening and the windscreen) and some necessary fixes (the prop and the engine). However, I expect this kit to be completely superceded once Tamiya release their version.
I found the photos at www.p47pilots.com to be invaluable during this build. Note that the scallop-marked aircraft in these archives appears to be a different airframe, 488369.
Model, Images and
Text Copyright © 2008 by Jon Bryon
Page Created 29 May, 2008
Last Updated 29 May, 2008
Back to HyperScale
Main Page |
 Home
| What's New |
Features |
Gallery |
Reviews |
Reference |
Forum |
Search
Home
| What's New |
Features |
Gallery |
Reviews |
Reference |
Forum |
Search