|
Hasegawa's 1/48 scale
F/A-18F Super Hornet
by
Hubert Ortinger
|
F/A-18 F Super Hornet |

Hasegawa's 1/48 scale F/A-18F Super Hornet is available online from
Squadron.com
Background
Three types of carrier based airplanes were due to be deactivated in the 1990s: the F-14 Tomcat, A-6 Intruder and EA-6B Prowler.
Because there was no direct replacement and due to financial considerations, the McDonnell Douglas company offered an improved Hornet - the single-seat F/A-18 E and its two-seat version F.
The Super Hornet started as a development of the original design concept, however it is actually its own airplane with new 30% larger airframe. Apart from its size, the new airplanes can be differentiated by the rectangular engine intakes.
The enhanced engine brings 35% more thrust and even the avionics equipment is identical to 90% with the old Hornet. Equipped with drop tanks, the Super Hornet can also supply different airplanes in air to air refueling and so relieves the S-3 Viking in their task.
Characteristic of all Hornets are the leading Edge Extensions (LEX). These approximately triangular junctions, which begin underneath the cockpit window and flow into the wings, make the airplane still controllable and better manoeuvrable also with high approach angle.
Hasegawa's Super Hornet Kits
I would argue that Hasegawa leaves the Super Hornets of its competitors Revell and Italeri behind - however it comes at a price! Nevertheless, what Hasegawa has to offer is first cream. Best moulded and on highest level! The box is filled stout and beside reserve tanks even there are two AIM-120 AMRAM and AIM-9X Sidewinder rockets packed in. For detail Freaks there is still a small „walk around“ for the variants which can be marked attached.
Cockpit and Fuselage
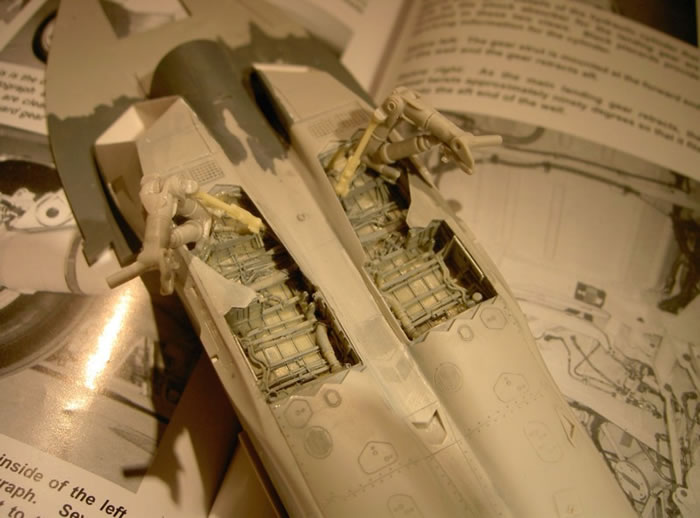
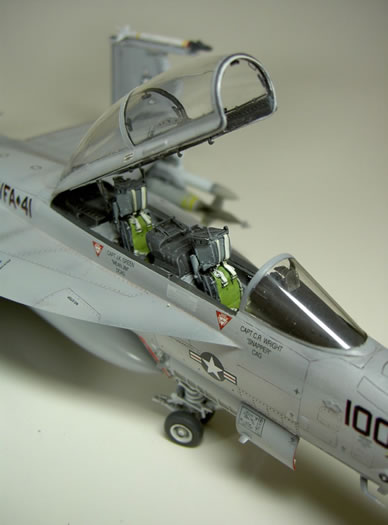
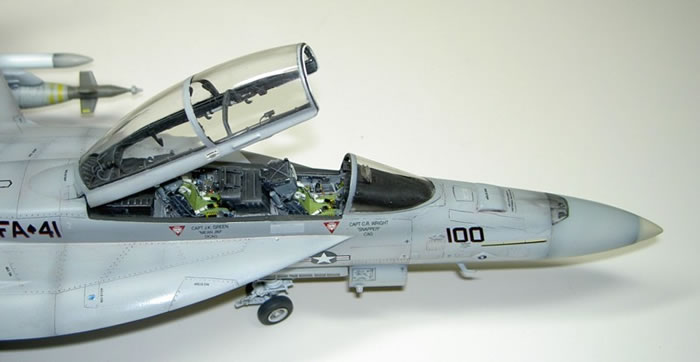
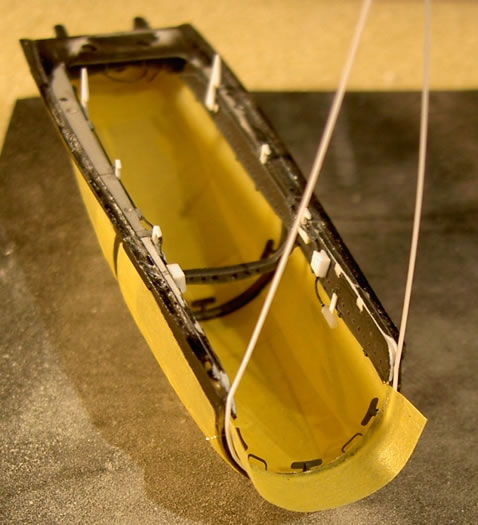
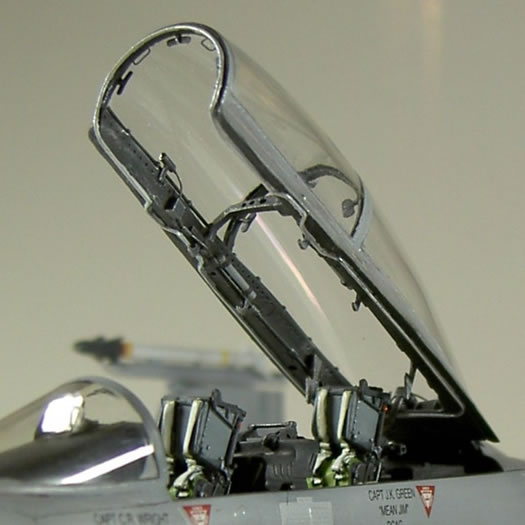
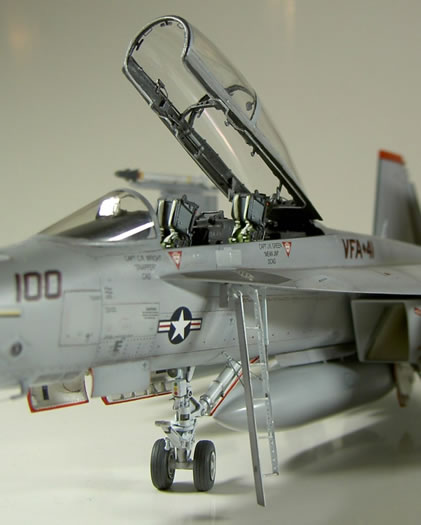
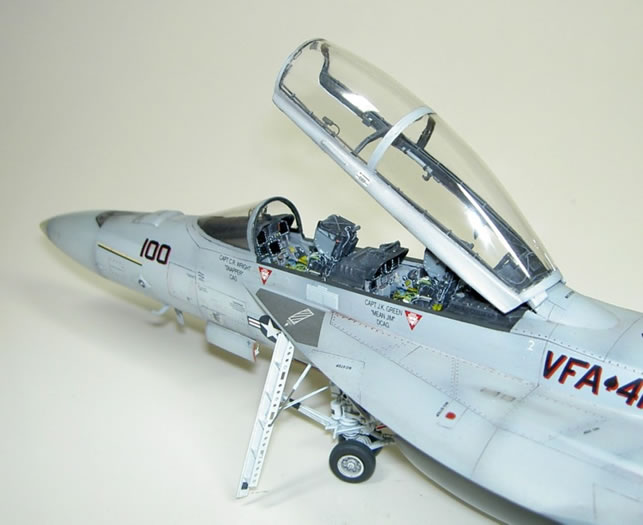
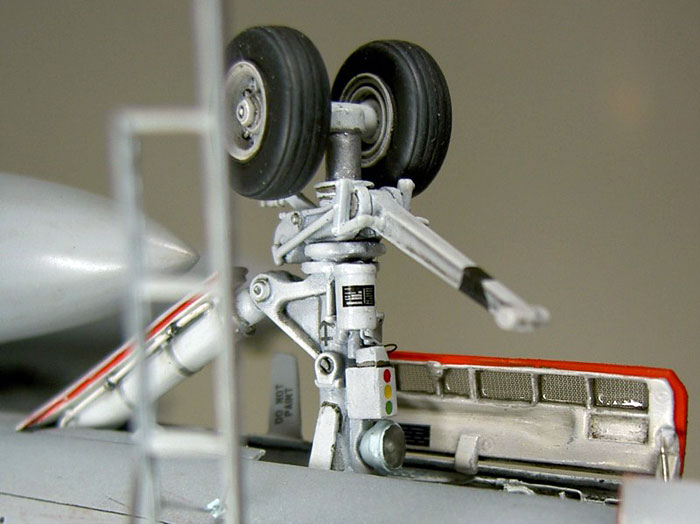
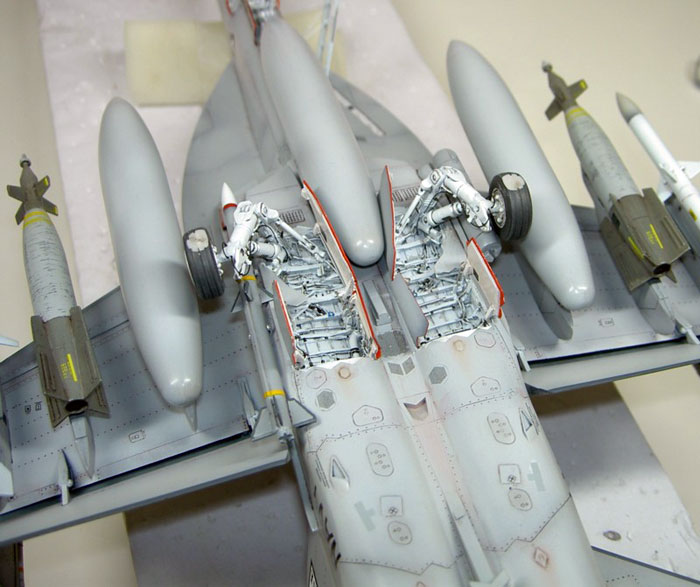
Although the standard is very high, I did not want to use the kit’s cockpit because of the sparse and beltless ejection seats. I decided to use the Black box Resin cockpit for the F version, however it is meant for the Italeri model. Nevertheless it can be inserted relatively easily, only on the bottom I had to saw away much material, since I decided for using the F/A-18 wheel housings of Aires also. In my opinion here is the second weak point of the kit: The side panels are not detailed. Fortunately the chassis is almost identical with Hornet and Super Hornet also. However since the set is not for this model I can not further-recommend such experiments. The attaching of the landing gear legs got to a patience sample of which I nearly would have been despaired. For this reason I already stuck it in this early building phase. The detailling and following painting becomes very difficulty! The main gear sliding doors with „Stealth“- points/teeth come out of the box again.
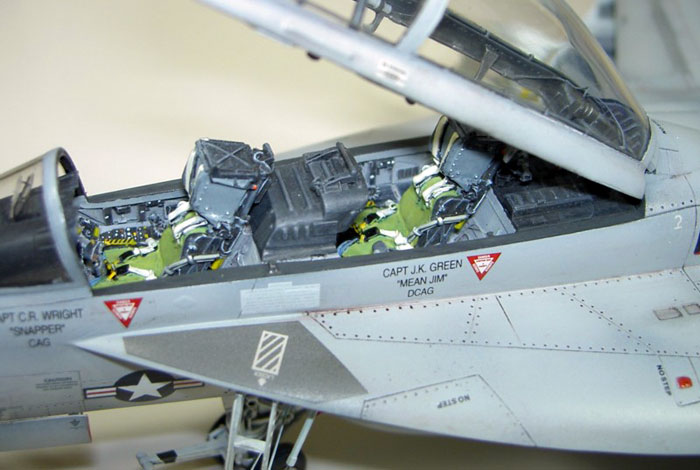
For a accurate detail painting of the Sea Grey cockpit and the Black Box ejection seats oneself should take time. The interior framework of the pulpit is as standard equipment rather simple and needs already some wire and Styrene. Various catch heels, video cameras, rear view mirror, hand grips and all kinds of things demand nerves and time, however which is well put on, since by the generous dome everything is to be seen good.
Intakes and Control Surfaces
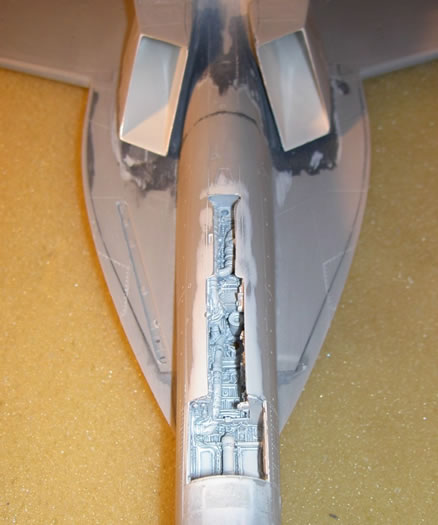
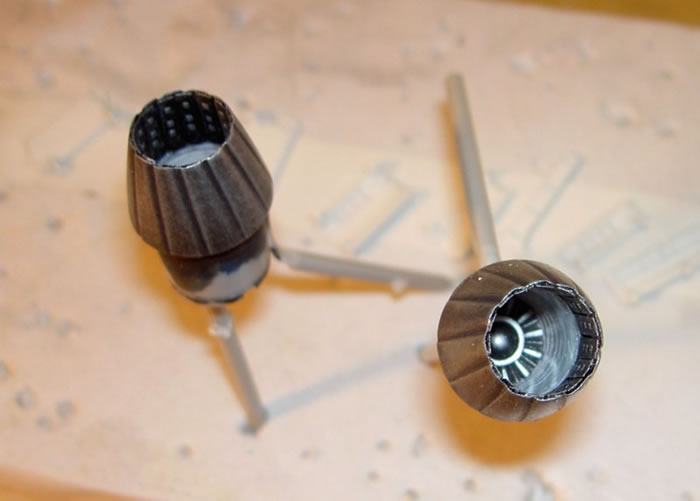
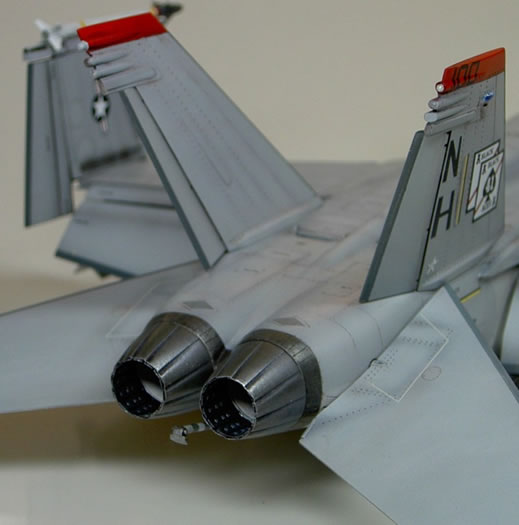
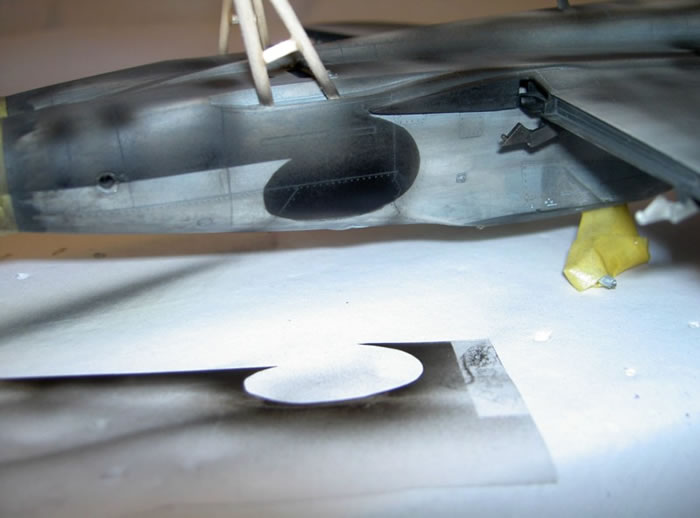
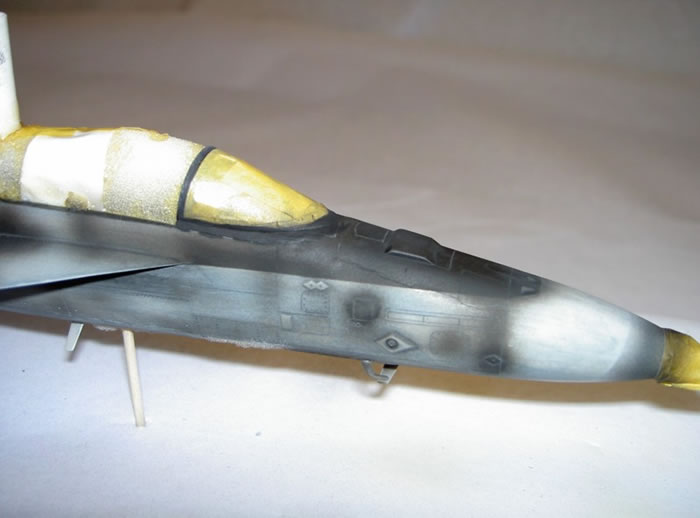
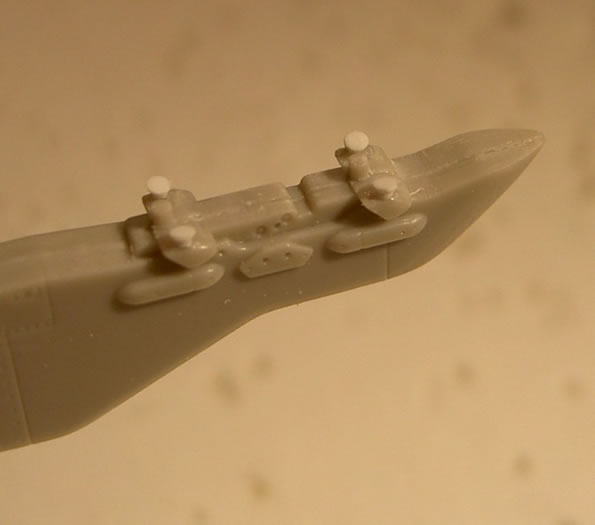
On the Hornets trunk back there are two air inlets, which I extended inward with plastic card, otherwise one would see nothing inside! I detailed the engine nozzles with the EDUARD set and filed the overlaping segments to emphasize more clearly. Because of the afterburners pipe inside is smooth, I tried to imitate a little structure with a tapper. Then I painted this part with a dirty white, the remainder of the Noozels in different metal shades. They are inserted completely in the end of the assembly. With a little blue chalk they still receive the final touch.
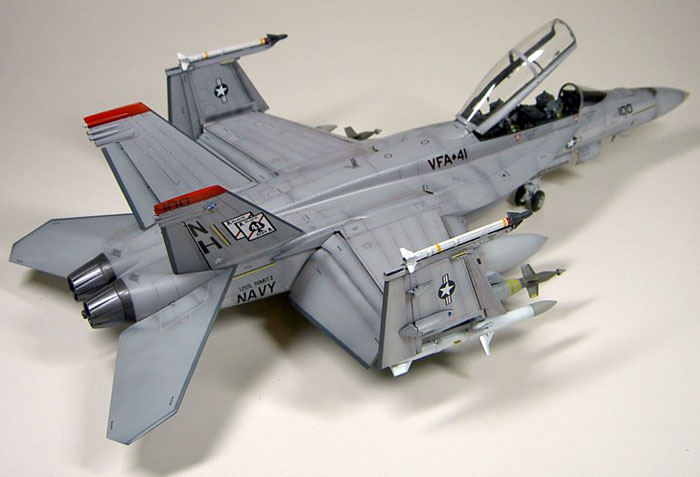
Hasegawa offers the option to represent the wings folded. However the parting should be no problem, also for beginners. No expenditure must be operated here, except the for thinning out of the “steel plate“ at the edges.
With the control surfaces Hasegawa went even so far to performed it completely separately, so you can show the ailerons/landing flaps and slats lowered as well as the rudders can be installed bended. The elevators can be inserted in the end because for plastic pipe and soft plastic disks. Also the assembly of the vertical stabilizer with appropriate dihedral is a breeze! All these parts I adapted without gluing and fastened them on toothpiks to be able to paint them separately. Therefor I reached despite uniform grey a loosened up constitution.
But first it was time to be worried about the Intakes. After a full white priming with the brush I polished the tube on high polish. Since however only the rear range had to be white I must masked it with tape, which proved itself as most complicated.
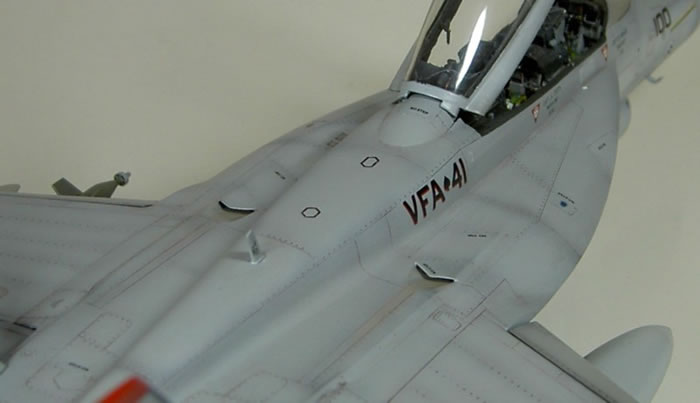
When sticking the fuselage halves I did not come around using al lot of putty. In particular within the rear range, at the flanks and on the lower surface of the LEX surfaces unpleasant columns accrued witch had to be filled up. The engravings which were lost after sanding had to be engraved again. I turned my attention also to the entrance ladder, witch right side was replaced by a photoetched part. For the footsteps I used cut to length plastic profiles. The brace for supporting to the trunk wall are from thin wire.
External Stores and
Markings |
Before it still went to painting I thought over the color dividing line between upper and lower surface. The only little darker compass grey of the trunk back became only very weakly shading, so that I already masked the appropriate ranges with tape before preshading, so it should still well visibly shine through after the final lacquer finish. See also the pictures.
After the first colour application I brightened the center to accent the panel lines after sufficient drying time with diluted Vandikbroun.
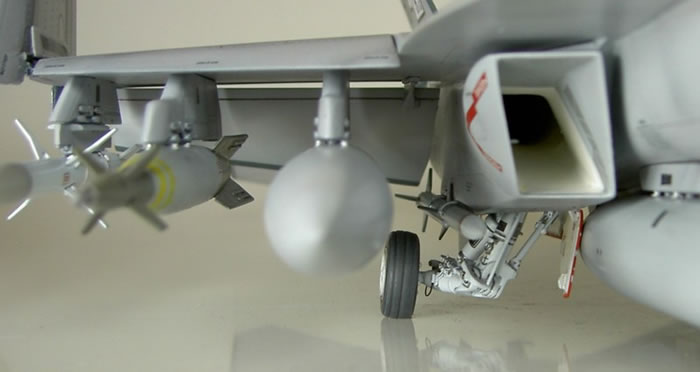
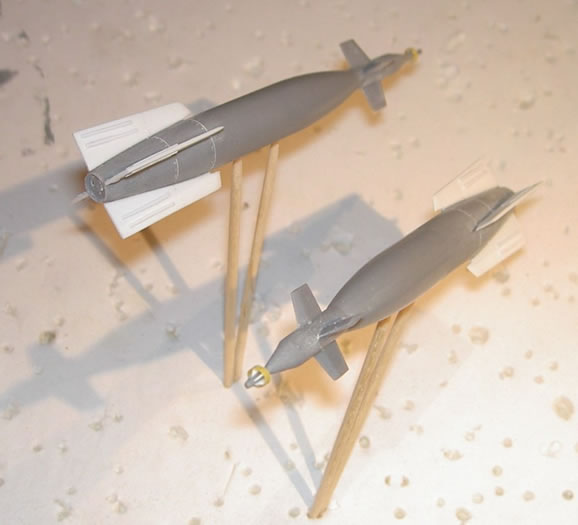
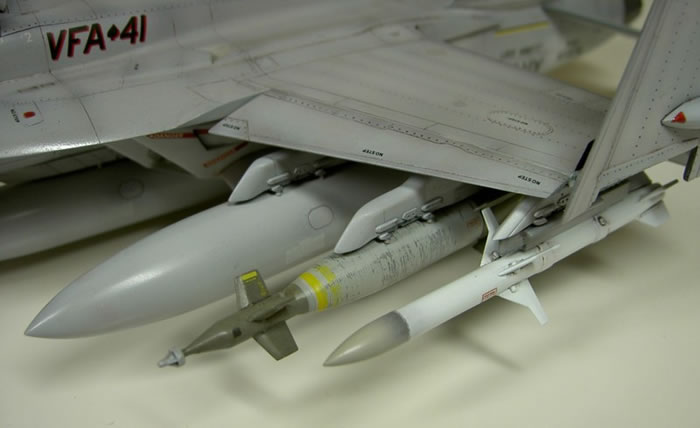
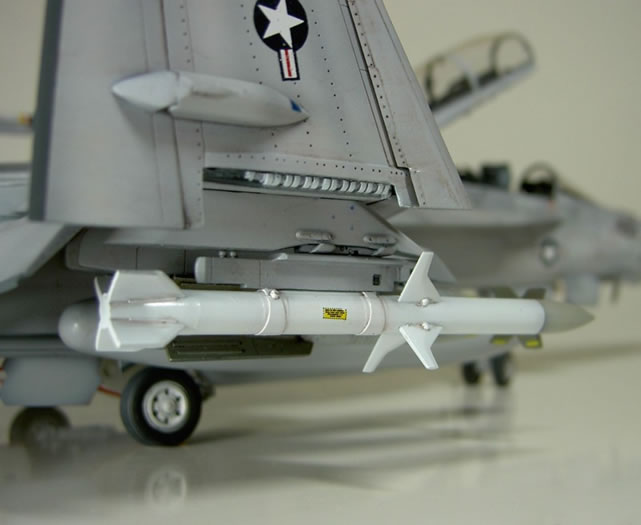
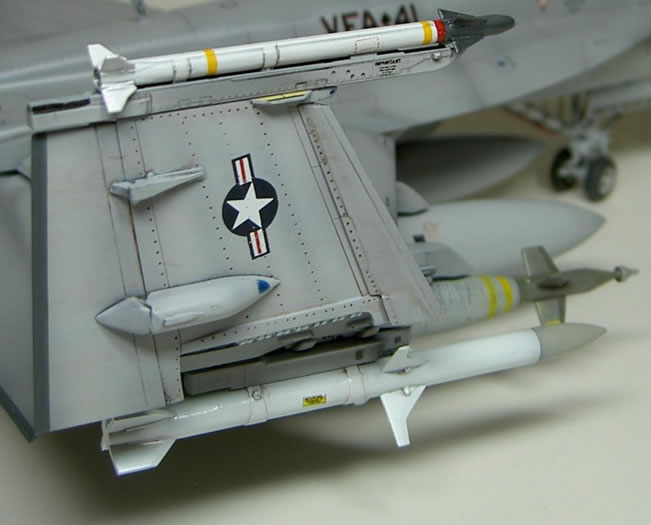
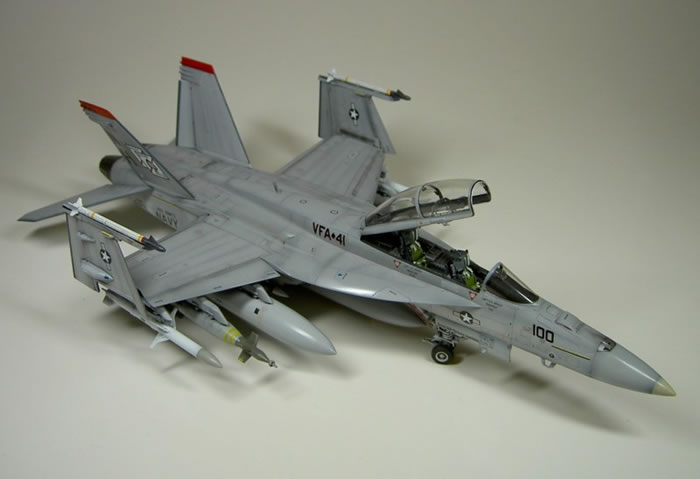
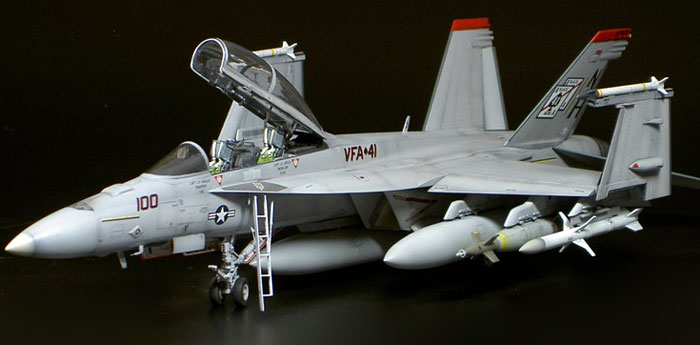
After my misery with the fuselage I stuck this in relatively loaded condition, however, which came quite right because I wanted to attach each quantity of bombs and/or external loads anyway (weight!). Off course the tires were still easily flattened. Beside the tanks and the enclosed rockets I took still a pair of AGM-88 and GBU-10 from the Hasegawa weapon sets. For lack of alternatives I modified the bombs and rebuilt them to GBU-16 cause such were used by the operation „Iraqi Freedom“. If I already equips my airplane with weapons like this, I also wanted to look for a archetype. I discover with „Two Bobs“.
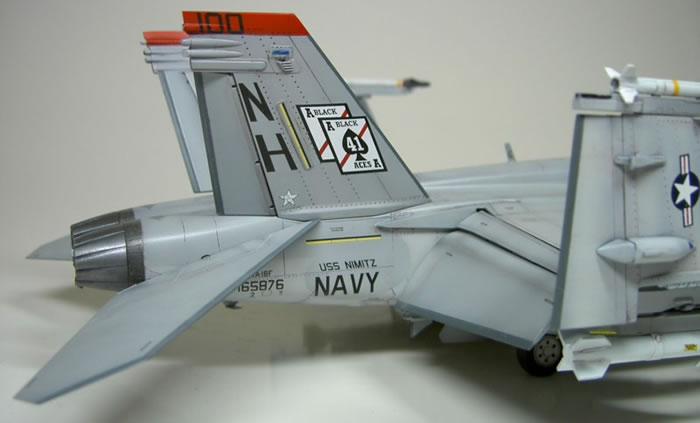
The commander's airplane from Squadron VFA-41 based at the aircraft carrier USS Nimitz during the maneuvers in the Persian Gulf. I inferred only the necessary characteristics unit markings from the Decalsheet, otherwise I used the first-class Hasegawa sheet. To emphasize thereby the Decals for the numerous ventilation screens, which I could use well, since the engravings were pulled in the model surface, in particular within the range of the air intakes by grinding works. For the processing of the Decals I used again Set and Sol from Micro Products. In connection with the shining colors of X-tra Colors the decal film disappeared nearly completely.
With a semi gloss varnish I completed the lacquer finish.
After sufficient drying process I added the individual components to the finished model together and set still highlights in the form of shining formation lights and low keyed weathering from chalk powder.
Hasegawa got it!
Model, Images and
Text Copyright © 2008 by Hubert Ortinger
Page Created 10 January, 2008
Last Updated
10 January, 2008
Back to HyperScale
Main Page |
 Home
| What's New |
Features |
Gallery |
Reviews |
Reference |
Forum |
Search
Home
| What's New |
Features |
Gallery |
Reviews |
Reference |
Forum |
Search