|
1/72 scale Group Build
Fokker F. I & Dr. I Triplanes
by
Russell Lee
|
Fokker F. I & Dr. I Triplanes |

HyperScale is proudly supported by Squadron.com
Group Build
1/72 Fokker F. I and Dr. I Triplanes
Eduard (kit 7014), Revell (kit 04116), Roden (kits 010 and 017)
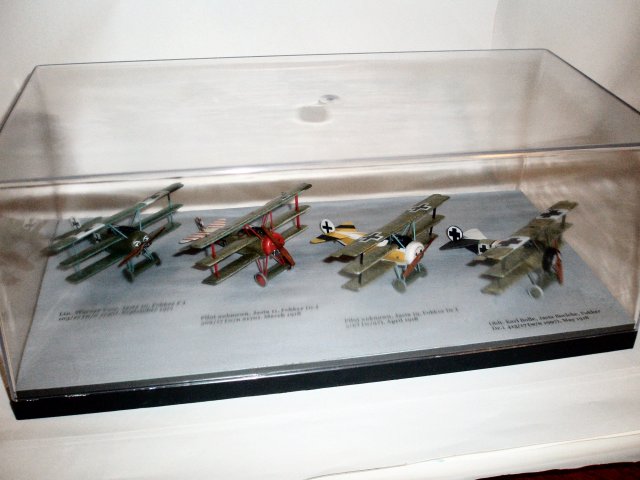
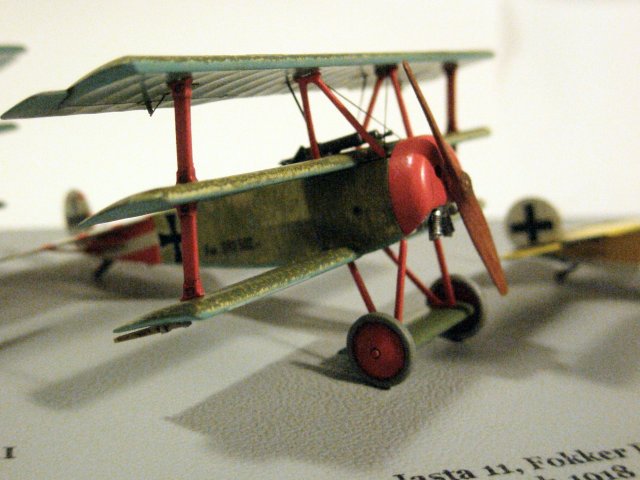
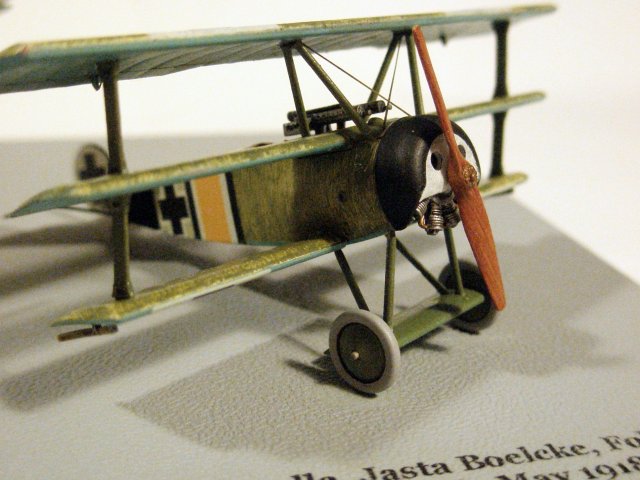
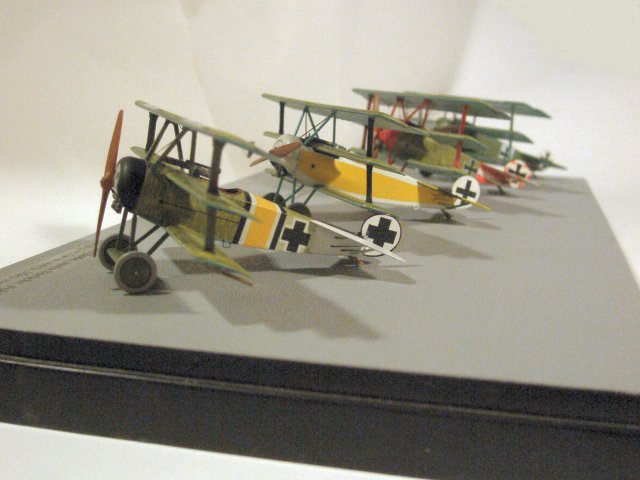
The four kits, along with nifty Blue Rider decals and a Progard display case (sized 13 ½ x 6 ½ x 5 ¼ for two 1/24 car models) inspired this project. Fokker Dr. I Collection BDP-004 (includes sheets BR233, BR237, and BR245) by Blue Rider provides a variety of colorful and interesting markings that cover most of the Dr.I’s operational history. I chose to model triplanes from Jasta 11 in March 1918, Jasta 19 during April 1918, and the triplane that Oblt. Karl Bolle flew while a member of Jasta Boelcke in May 1918. The decals are on the thick side but this came in handy when I had to wrestle them into position. A mix of Elmer’s and water snugged the decals right down and cutting away the clear carrier film improved the final appearance. Roden kit 017 provided decals for the Jasta 10 airplane flown by Werner Voss.
Maintaining written notes on the configuration and markings of each triplane kept things straight in my mind. Voss’ F.I, for example, needed modifications (widen aileron tips, add lower cowling cross-brace, add curve to the horizontal stab and elevator leading edge, omit wing tip skids) while the Bolle machine needed a Oigee sight. The notes also helped to sort out the inevitable judgment calls required when sifting the mysteries of World War I color and markings. After cleaning and painting all four sets of machine guns, cowlings, wheels, and axle wings, and joining the middle wings (Eduard, Revell) and lower wings (Roden) to all four fuselages, I concentrated on building one kit at a time, beginning with the Voss triplane kit by Roden.
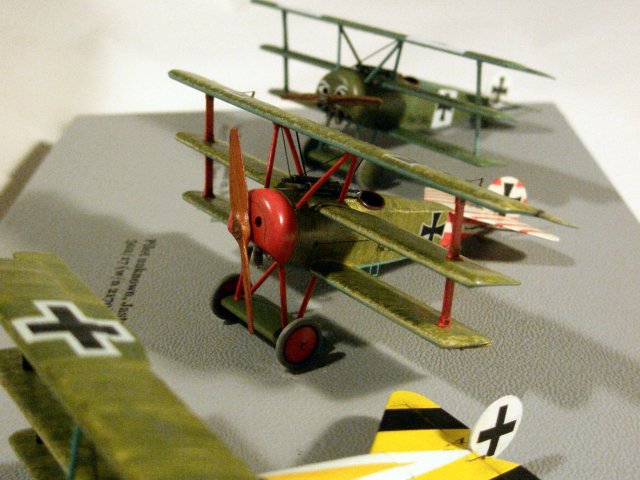
Mister Kit’s excellent line of acrylic World War I colors furnished all the critical shades: GC-06 Fokker Olive Green, GC-07 Fokker Torquoise, GC-10 Fokker Clear Doped Linen, and GC-15 Jasta 11 Red. A few drops of denatured alcohol thins the paint nicely and does not discourage it from sticking tenaciously to surfaces primed with Tamiya Surface Primer (L). I used Tamiya’s masking tape to mask for painting and to protect the fuselage during continuous handling during the installation of various bits, decaling, and touching up during the latter stages of assembly. The tape did not lift paint or decals.
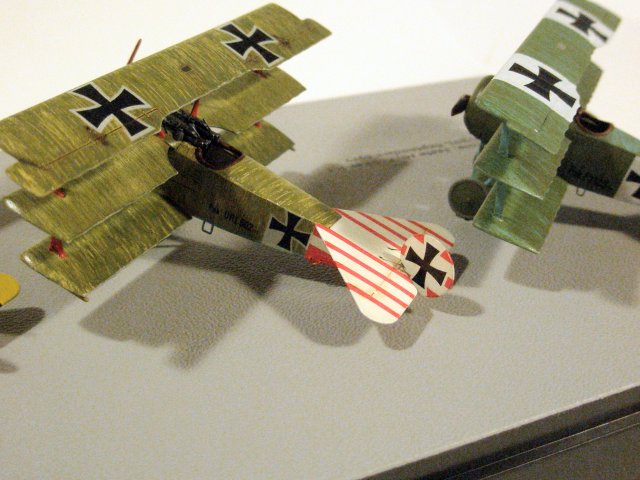
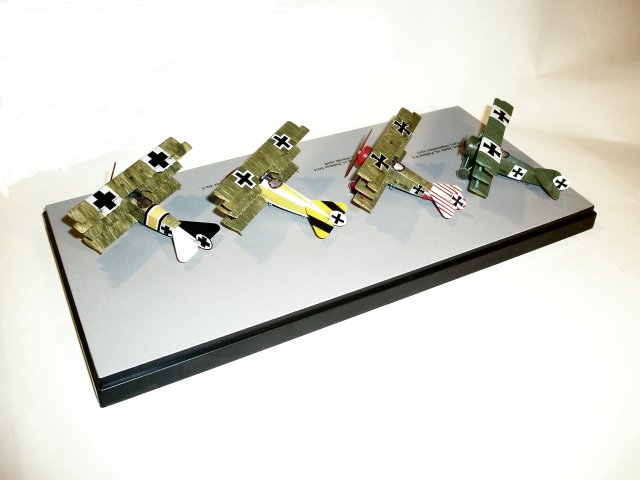
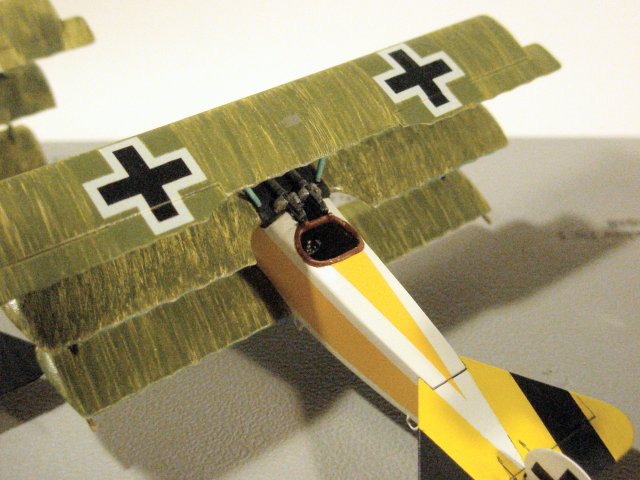
Scratch’in the ole’ noggin for a while led to several experiments on a sheet of styrene before I devised a way of rendering the elusive Fokker streaked finish to my satisfaction. A cheap glue brush with stiff and thick bristles did the trick. I slopped some green over the base coat, then spread it with the glue brush in the desired direction. I had about 30-45 seconds to work the green to the desired pattern and consistency before the acrylic began to clump and look yucky.
Revell and Eduard made their interplane struts in one piece that passes through a slot in the middle wing and glues to the top and bottom wings. Roden challenges the modeler by splitting the struts into pairs. How to jig the struts in proper position to glue? Blue-Tac to the rescue! Very small balls of the stuff were sufficient to hold the strut in desired position as I placed a small drop of Tenax with my trusty Touch-N-Flow. Yes, the acrylic bubbled up but then settled down almost like new as the glue dried – nifty! By using tape to carefully fix the model to a 6 in x 4 in sheet of glass and then rubber-banding the glass to the very handy Victory Productions VPS001 Model Stand, I was able to free both hands for the delicate work of aligning and gluing the struts.
EZ-Line and fine plastic rod made nice rigging. I chose not to rig the aileron control wires on the Roden kits but the modeler easily could do so. First, install wire posts in the ailerons and then drill holes for the rigging to pass through the main wing, before gluing the ailerons to the main wing. Once in place, CA glue one end of EZ-line darkened with maker to the lower aileron post, run the line through the main wing hole, CA to the top post, trim off the excess and you are done. All four sets of landing gear struts never seemed to square up and gave some trouble.
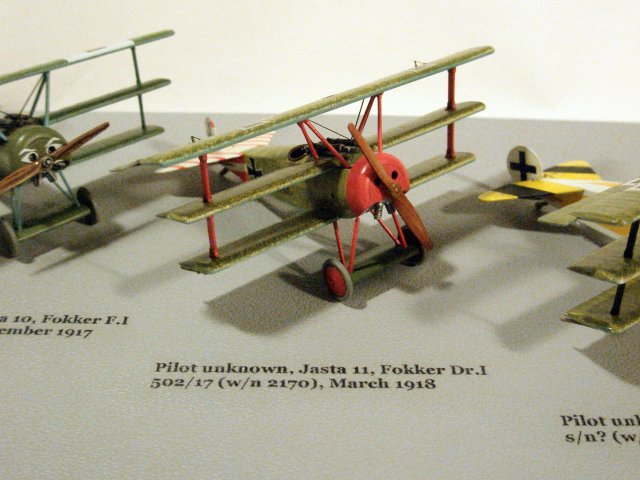
At first, the case seemed too small to hold the four finished aircraft. I grouped the tripes in various formations and found the angled stagger gave the best appearance. I printed the descriptive labels on Testor’s clear decal paper fed into my HP 812C Deskjet printer. Through trial and error, I eliminated fonts that were too wide, too small, or hard to read – Georgia bold size 11 seemed to work out. Elmer’s and water set the decals nicely.
Short lengths of wire glued into the tires and tailskids at the beginning of the build anchored each model to the base. They can withstand moderate tilting but that is all! The models were so light and the wire stiff enough that the tailskid wires were unnecessary.
The project provided great challenges – thanks for letting me share it with you.
Model, Images and
Text Copyright © 2008 by Russell Lee
Page Created 23 January, 2008
Last Updated 23 January, 2008
Back to HyperScale
Main Page |
 Home
| What's New |
Features |
Gallery |
Reviews |
Reference |
Forum |
Search
Home
| What's New |
Features |
Gallery |
Reviews |
Reference |
Forum |
Search