Tamiya's 1/48 scale
Nakajima J1N1 Gekko
by Michael Scarborough
|
|
Nakajima J1N1 Gekko |

HyperScale is proudly supported by Squadron
HyperScale University Course 101: Tamiya 1/48 scale J1N1
Professors Cooper and Wauchop...
 My dad, former Navy pilot and aero historian, Bill Scarborough, began building models back in the late 1920s. He would salvage fruit crates from the local grocery and, plans in hand, carve away. He did well with it, and his first flight in a real airplane, an Eastern Air Transport Curtiss Condor, was the result of winning first place in a competition for a model he had made of a Boeing F4B-4. Only in his dreams would it have occurred to him that he would be flying real F4B-4s, in training at Pensacola, just a few years later. My dad, former Navy pilot and aero historian, Bill Scarborough, began building models back in the late 1920s. He would salvage fruit crates from the local grocery and, plans in hand, carve away. He did well with it, and his first flight in a real airplane, an Eastern Air Transport Curtiss Condor, was the result of winning first place in a competition for a model he had made of a Boeing F4B-4. Only in his dreams would it have occurred to him that he would be flying real F4B-4s, in training at Pensacola, just a few years later.
He passed his love and knowledge of model building on to me, and it was always with great excitement (for us both) that he would bring home to me a model from the Pentagon gift shop or the PX of whatever Navy base we were living on.
During my teen years, when my dad began doing a lot of writing, there was no telling who might be on the other end of the phone when it rang: Bill Larkins, Dave Lucabaugh, Pete Grozs, Bob Mikesh, Fred Dickie, Leo Opdyke and, in later years, Barrett Tillmann and the late Jeff Ethell were all regular correspondents. My dad led the teams for, and I was also fortunate enough to take part in, the restoration of the Wildcat at the Smithsonian NASM, the FF-1 at the Naval Air Museum at Pensacola, and our own Fairchild F-24. It was a heady atmosphere in which to build models, and I did my best, always under my dad’s watchful and very critical eye, to do what I could at accurizing and detailing the kits of the era. Unfortunately, youthful impatience and inherited self-criticism led to burn out. When I went off to college, no models went with me. Besides, styrene could hardly have competed with sorority coeds.
In the intervening 20 or so years, I built one model: a 1/72 scale PV Ventura like my dad had flown with VB-144 in the South Pacific and, incidentally, the plane depicted on the back of his book, Ventura in Action. Being long out of practice, the build was OK, at best, but my dad appreciated it.
Then, about 18 months ago, for the first time in years, I ended up in a hobby shop looking for some materials for my work as a decorative artist and cabinet maker. On the way to the register I noticed the aisles with the plastic kits and thought, “what the heck, let’s see what’s happened in the last 20 years.” It is good that the proprietor had a supply of cold water with which to revive me, as I passed out on first glance. “Tamiya makes an He-219? And in 1/48th scale?....and a Beaufighter?..no, Two Beaufighters?? WAIT..THREE BEAUFIGHTERS??? And two Mosquitos??? My GAWD, what’s all this stuff from Hasegawa? What is Classic Airframes??? And where are the Aurora kits??” About this time the store owner came over to see what all the shouting was about, and to hand me my teeth which had fallen on the floor. I explained the reason for my surprise, and he chuckled and said, “ohh…so you don’t know about after-market stuff, either?” My world was about to be further rocked.
As part of my renaissance in the world of model building, I also fell under the spell of miniature figures and attended the World Expo in Boston. There I met the amazing Mr. Mike Good, supreme model maker, miniature artist and a great guy, to boot. We began trading emails and I explained my sense of being totally overwhelmed by what was now available. We went on to discuss my unfamiliarity with many of the new techniques and materials available to today’s model builders. (Believe me, you guys have NO idea how easy you have it.)
Mike had the solution to my lack of education in things modern: he suggested I read and study the series of HyperScale articles written by Gregg Cooper about his step-by-step build of the Tamiya Gekko. Mike also suggested that I look at every article done by Chris Wauchop and really study the way he painted and weathered his models.
I followed Mike’s advice and am now a changed man.
There is no need for me to describe my build of this kit. I simply commend Gregg’s article to you if you, like I, are returning to model building after a long hiatus or are just getting started in this wonderful hobby of ours.
You may find the three parts of Gregg's excellent series by following these links - Part One, Part Two, Part Three, and Chris Wauchop's Gekkos are here (early version) and here (late version).
But I will reiterate that you guys have no idea how easy you have it today.
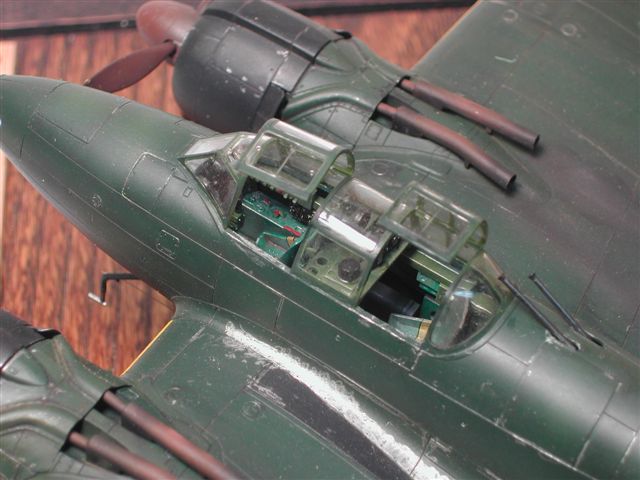
The intelligent engineering of this Gekko kit, the ease with which it went together and the crispness of the detail simply astounded me. I made full use of all the products and materials suggested in Gregg’s wonderfully helpful and well-written article, and paid close attention to all the techniques he suggested.
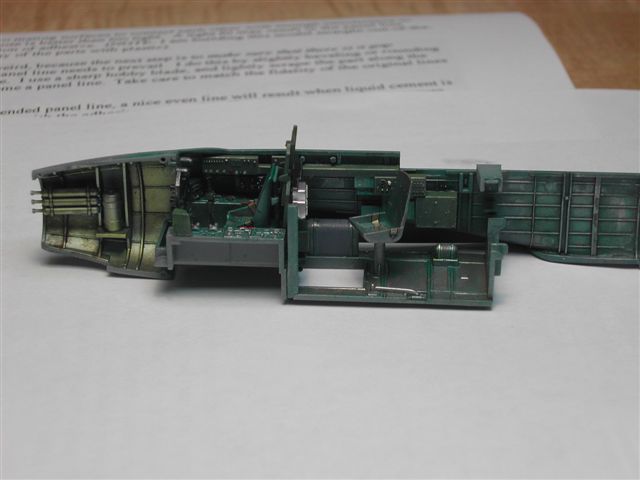
I especially liked the idea of using a minimal amount of glue and pressure in joining the parts that fell along panel lines, thereby securing the pieces, but preserving the line itself. Also, the use of Testor’s liquid cement to smooth the remaining surfaces on areas that had been carved out or thinned is pure artistic genius. I also carefully followed Gregg’s admonition to get everything lined up properly and found a stack of cards under paint bottles to work really well for this. Mostly, I found the overall sensible attitude towards building extolled by Gregg to be inspirational.
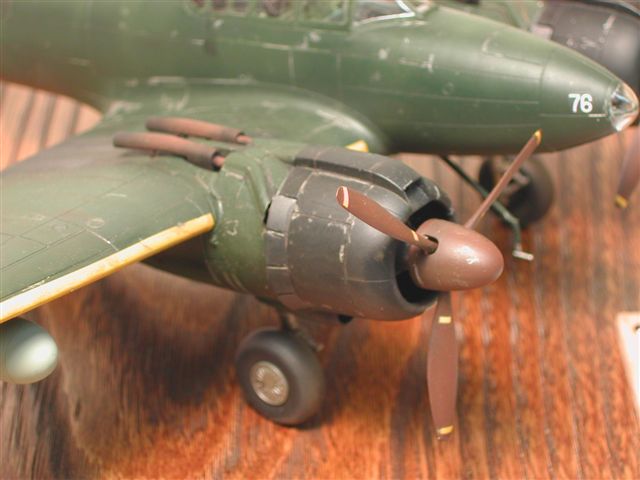
One bonehead move I made was with the guns. Tamiya-san has given us a set of well-detailed guns and a beautiful, openable gun bay in which to display them. I wanted to make this build as unpressured as possible, so I chose to skip the detail painting and keep the hatch closed. What I didn’t realise, but would have had I looked at the instructions (!), was that the gun barrels that protrude out of the bay have to be installed in the gun breeches inside the bay before you close up and glue the bay! I ended up resting the barrels in the apertures and gluing them there. Please don’t look too closely.
I was fortunate enough to grow up around real airplanes and now spend most Sunday mornings at the Metropolitan Museum of Art. Mike Good and I have also had numerous discussions regarding developing the ability to really SEE what you are looking at in order to be able to imitate it. I believe these facts combined give me an advantage in really knowing what I am looking for in a well and accurately finished model, even though my ability to re-create that finish is a long way off.
What I find most amazing about the work of Chris Wauchop is his ability to paint a scale model airplane to REALLY look like a real airplane but in small scale. Sadly, too many of the model building articles on the Internet today feature what I’d call models of models…..people building models that imitate other builders’ models, instead of real airplanes. The emphasis on pre-post-panel paranoia, etc.,etc.,etc., has made otherwise talented builders miss achieving the overall look of a real, used airplane. Not so Chris Wauchop. Really LOOK at his work. Compare it to pictures of real airplanes, and you will see what I mean.
Do yourself a favor and get yourself the Osprey book "Modelling the Messerschmitt Bf 110". Not only is there great advice from Brett Green about full builds that would be applicable to any model, there are also several builds in which Chris has done the weathering, detailing step by step how it was done. In my humble opinion, this book and the other in the series by Osprey should be like textbooks for anyone serious about building accurate models.
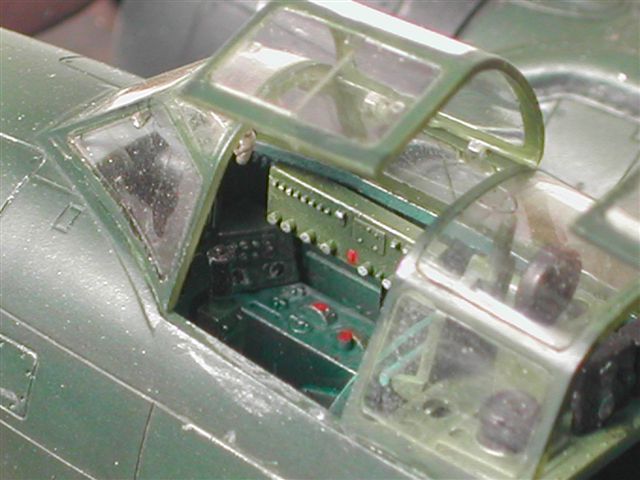
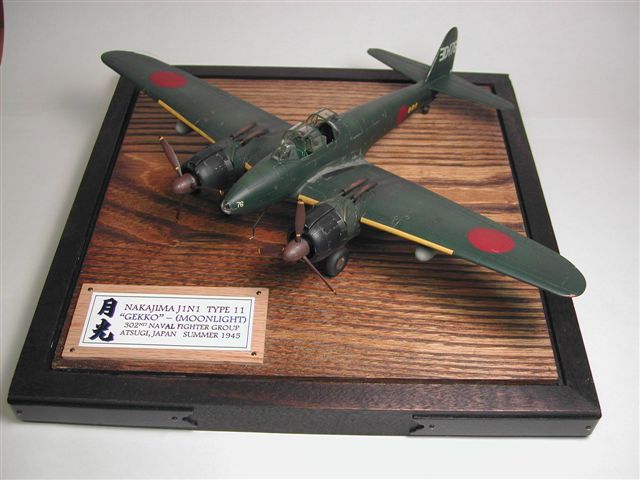
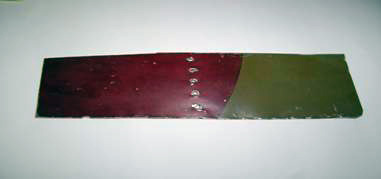
I scrupulously followed Gregg’s painting regimen for the interior and was pleased with the results. For the exterior, I followed Gregg’s text and materials and Chris’ pictures. I also introduced myself to Black Magic masks to paint the hinomarus
and based the color on a Rufe relic I inherited from my dad. (More about that in a subsequent feature)
 I am now a convert to the use of a silver pencil to replicate wear on painted surfaces. I think the possibilities for an accurate depiction of worn surfaces are great. But, as became clear to me when I really looked at the pictures of my build, it takes a LOT of practice to get the technique right and accurate looking. I have a ways to go with this method. I am now a convert to the use of a silver pencil to replicate wear on painted surfaces. I think the possibilities for an accurate depiction of worn surfaces are great. But, as became clear to me when I really looked at the pictures of my build, it takes a LOT of practice to get the technique right and accurate looking. I have a ways to go with this method.
Oh yeah, the base.
Part of my “real” work is designing and making furniture. Having seen some very boring bases at the competitions I have now attended, I decided my Gekko needed something a bit different and more specific to its Japanese pedigree, so I chose to make the base as if it were a piece of Tansu furniture. It was an interesting endeavour…just call it kind of a wild hair of an idea…..brothers, any time a bald man gets any sort of a hair, he grabs it.
For my first build in a LONG time, I was pleased with the results, but even more excited at the potential presented by using these techniques and materials.
If you, as I, have come recently back “to the fold,” and are overwhelmed and mystified by the current techniques and materials regularly referred to in articles on HyperScale, do yourself a favor and have a look at this great series of articles.
Do yourself another favor and, instead of picking some long-coveted prehistoric kit-o-saurus out of your stash, buy yourself a kit made within the last few years to start with. There will be plenty of time later, once you have rehoned your skills, to go back and re-scribe panel lines, etc., etc., etc., on a kit you’ve had since you didn’t have that pot belly.
Model, Images and Text Copyright and 2008 by Michael Scarborough
Page Created 9 June, 2008
Last Updated
9 June, 2008
Back to
HyperScale Main Page |
 Home
| What's New | Features | Gallery | Reviews | Reference | Resource Guides | Forum |
Home
| What's New | Features | Gallery | Reviews | Reference | Resource Guides | Forum |