Hasegawa's 1/48 scale
SAAB J-35F/J Draken
by Mike Millette
|
|
SAAB J-35F/J Draken |

Hasegawa's 1/48 scale Draken is available online from Squadron.com
Introduction
Conceived of in 1949 and first flown in 1955, Saab’s J35 Draken was a contemporary of many of the great classic jet fighters including the Mirage III, MiG 21, English Electric Lightning and the American “Century” series. In its 40 year service history, the Draken has undergone a number of upgrades culminating in the J 35 F & J, the subject of Hasegawa’s latest 1/48 venture. The Draken was also exported to Austria, Denmark and Finland incorporating some unique features into the design as it served under these flags.
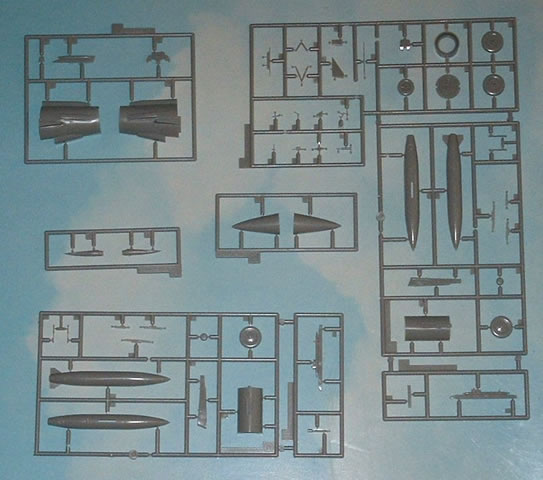
The Kit
A new 1/48 scale Draken has been high on a number of modeler’s wants lists for quite some time. The only previous model of this aircraft in anything close to this scale is the quite old Adams kit in ~ 1/50th scale, later re-released by Lindberg. The new Hasegawa kit is in every way superior to its predecessor. Molded in Hasegawa’s typical light gray & clear, the kit consists of 109 parts, a good portion of which make up the rather complex landing gear. Panel lines are crisp and fine, and parts fit is, for the most part, excellent though there are some areas where the modeler will need to address some minor discontinuities.
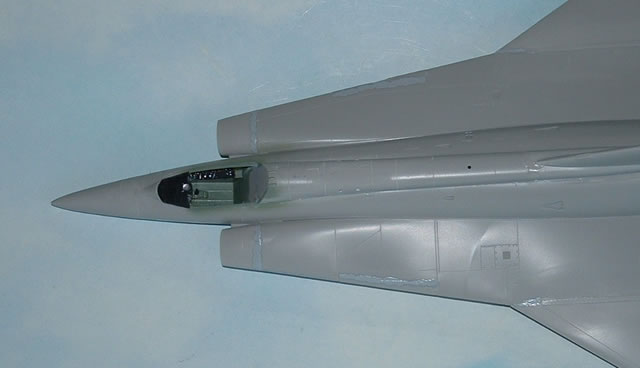
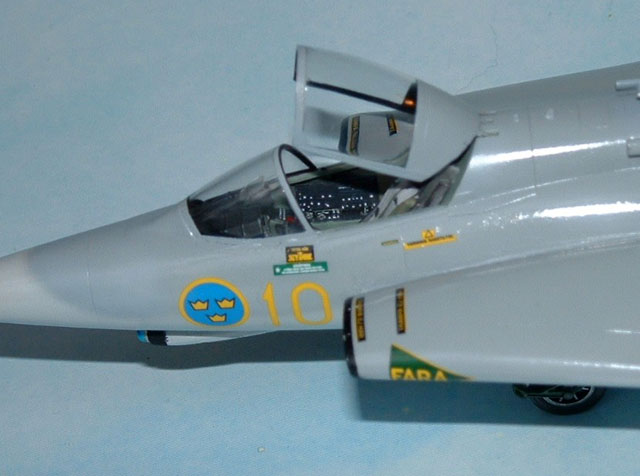
Cockpit
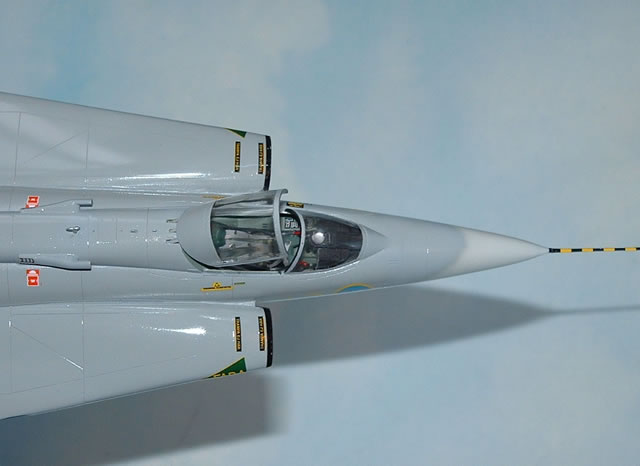
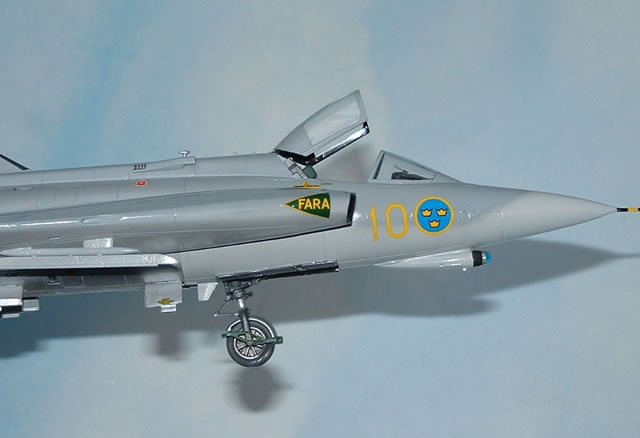
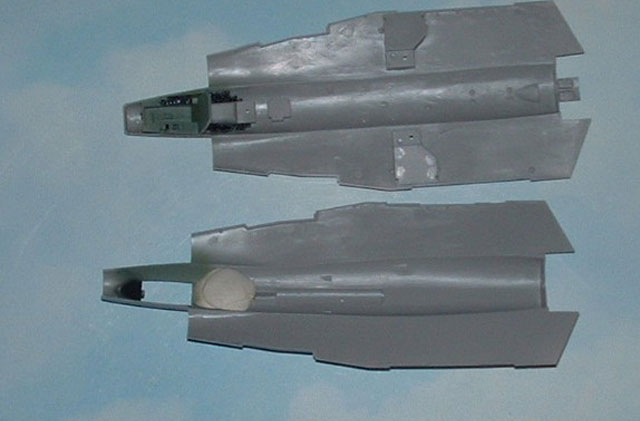
Construction begins with the cockpit and nose cone. The Draken will be a tail sitter without some weight to counterbalance the weight of the wing and tail. I assembled the nose cone and filled it full of lead shot, securing it with superglue. The cockpit was glued in place and similarly shot and superglue were laid in below the cockpit as well. This still felt like it might be a bit light, so a blob of epoxy putty was formed into the upper portion of the fuselage and left to cure.
Looking at various pictures of Draken cockpits reveals an amazing array of greens from cockpit to cockpit and even within a single cockpit as well. These range from a bright, yellowish Zinc Chromate color to a fairly dark green in some cockpits. For the most part I painted my interior with British Interior Green, though the aft half of the right sidewall was painted a slightly brighter green. Decals were applied to the instrument panel and left and right consoles. Unfortunately the decal on the right hand console began to slip and my attempts to straighten it while it was under the influence of Solvaset, resulted in a ruined decal. I ended up removing the damaged decal and painting the right hand console & sidewall by hand. Curiously, photos reveal detail on the left sidewall, which unfortunately is not represented, by any plastic detail or a decal in the Hasegawa kit. I used some random leftover cockpit decals to simulate the detail that should be there. The seat was also assembled and painted. I used tape for the seat belts, as I wanted to build this kit OOB. Once the cockpit detailing was complete and instrument panel & rudder pedals were added, the fuselage was closed up and the exterior work begun.
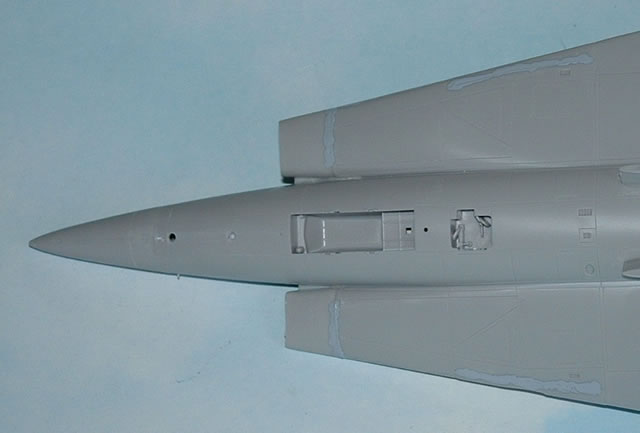
Fuselage/Wings/Tail
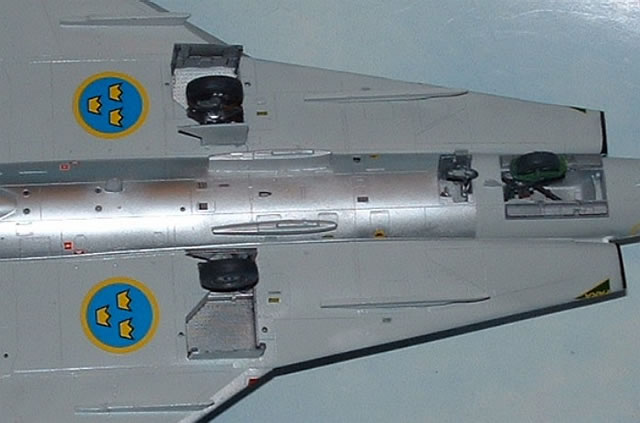
The layout of the Draken really lends itself to a top/bottom assembly rather than the fairly typical left/right. This makes for a very clean spine and belly and a minimum of cleanup and panel line restoration. Once the top and bottom pieces have been mated, the modeler can then begin adding wing tips, tail and a few options. It appears that Hasegawa has set this kit up to accommodate a number of different versions. Included in the kit, are panels on the spine that utilize the scoops that appear on the F’s and J’s. Parts are also present to allow construction of earlier and some export versions as well. Inserts for different cannon configurations, an older antenna and flashed over holes in the wing roots, and separate wing & tail tips suggest that Hasegawa intends to release several other versions of the Draken as well.
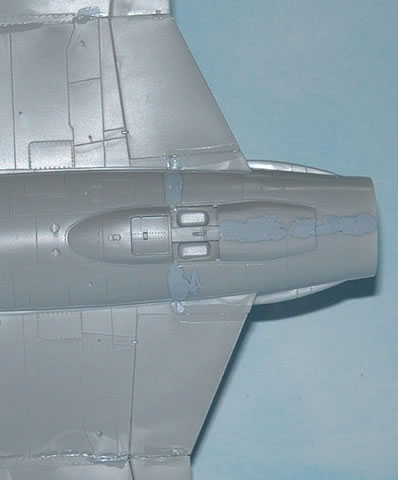
These various options do however result in some minor issues for the modeler to address during construction. The wing root inserts fit well from front to back, but leave a surprising “step” on the upper & lower surfaces of the wing. I addressed these with a couple of brush applications of Mr. Surfacer 1000 followed by a spray of the same. Also, the outboard portions of the wing appear to sit too high once installed in their slots. As a result, the reinforcing strip along the bottom ends up being slightly recessed and and the upper reinforcing strip sits a bit high next to the inboard upper surface. Since I didn’t notice this until after they had been glued in place, my options or addressing this were limited. I ended up masking off the reinforcing strip and spraying several coats of thinned down Mr. Surfacer until the wing surface inboard of the strip looked about even with the surface outboard of the strip. The next time I build this kit I think I’ll try scraping some plastic from the bottom of the tab on the outer wing panel that slots into the main assembly.
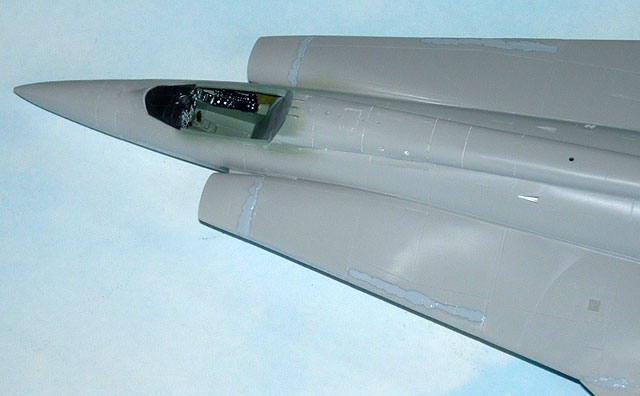
Adding the aft portion of the fuselage also resulted in some odd discontinuities as well. The aft fuselage mates well from side to side, but when attached to the forward fuselage/inner wing, it needs to be carefully aligned. I couldn’t get mine to line up perfectly, top and bottom, so I did the best I could and once again Mr. Surfacer came to the rescue. This join does occur at a point there the aft fuselage swells so it was a good choice for this join, but it still seems to need more than a bit of attention. The intakes are very nice pieces with substantial plastic “walls” around them to prevent damage of the very fine inlet edges in the box. Once glued in place though, these also leave another step, which was addressed, once again, with Mr. Surfacer.

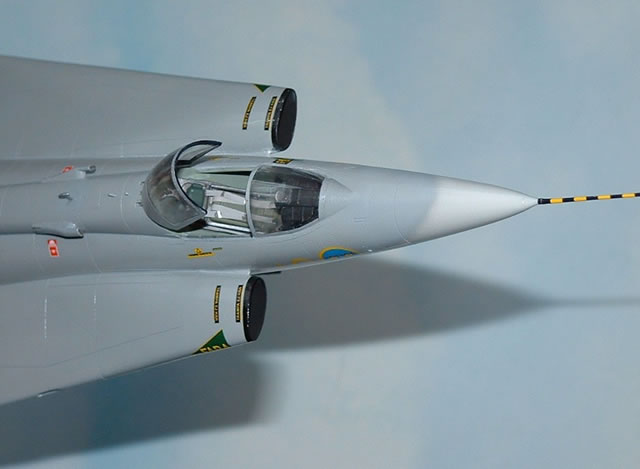
The engine exhaust and vertical fin are simple additions, and slot very neatly into the larger assembly. Lower wing fences and pylons were carefully added as well. One area where I didn’t follow the instructions was regarding the wing lights. The kit comes with the wing lights as an integral part of the outer wing leading edge. The modeler must carve out the light location in the leading edge and carefully glue in place the very small clear parts. I elected to not cut out the wing leading edge and simply paint the navigation light colors over the silver of the rest of the leading edge.
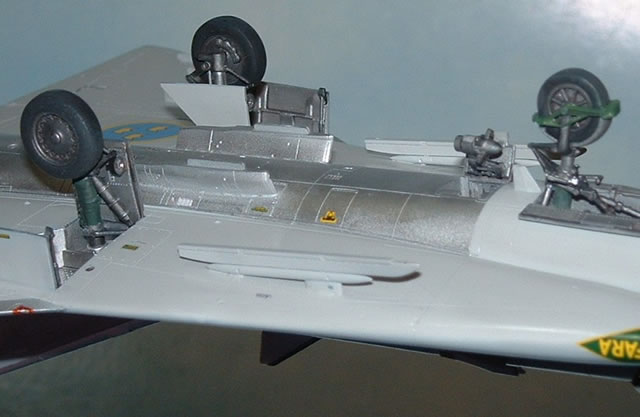
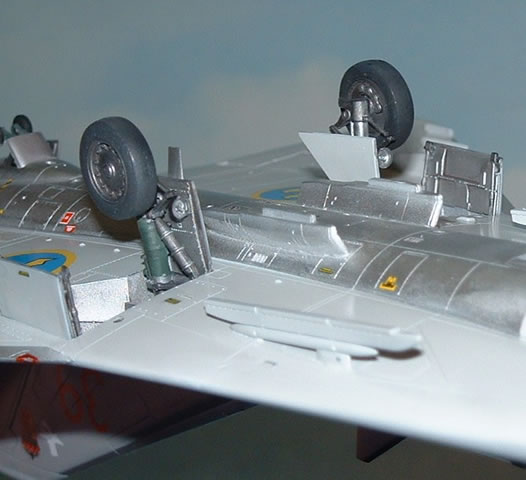
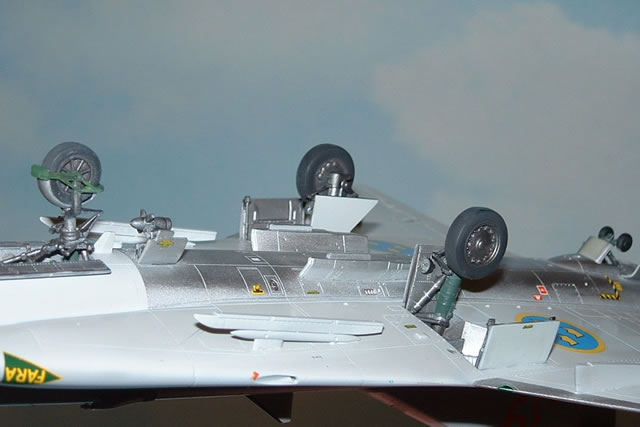
Landing Gear
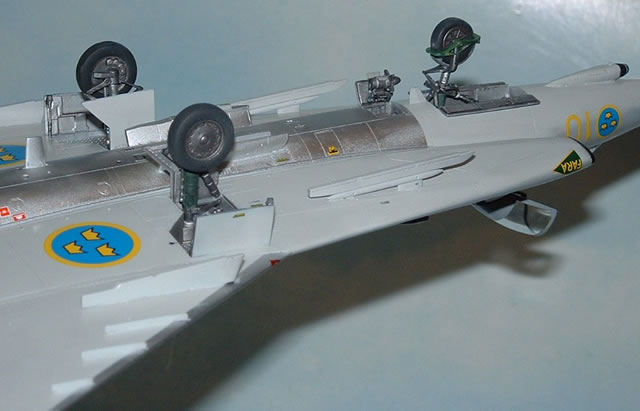
Curiously, the landing gear proved to be the most complex aspect of this build. Each gear consists of a number of parts, which seem to be painted a number of different colors. Looking at my references, it appears that the main portion of the landing gear strut is painted either dark green or gray. I have seen examples of both. I chose to paint mine green. The main gear assembles consists of upper braces, main gear post, wheel/tire and drag brace. Landing lights, gear doors and door retract actuators complete the main gear assemblies.
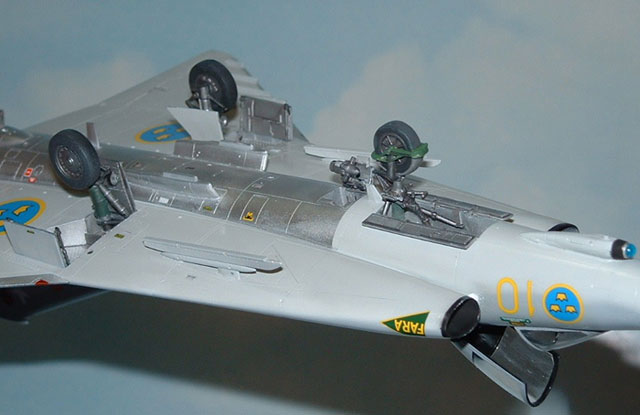
The nose gear is even more complex, with various braces, steering mechanism and fender to be added. Care must be taken when assembling, lining up, and installing the delicate nose gear pieces. The last part of the gear is the tail bumper. This was a fairly simple arrangement compared to the other three gears. Lastly, various antennas and the ram air turbine were added.
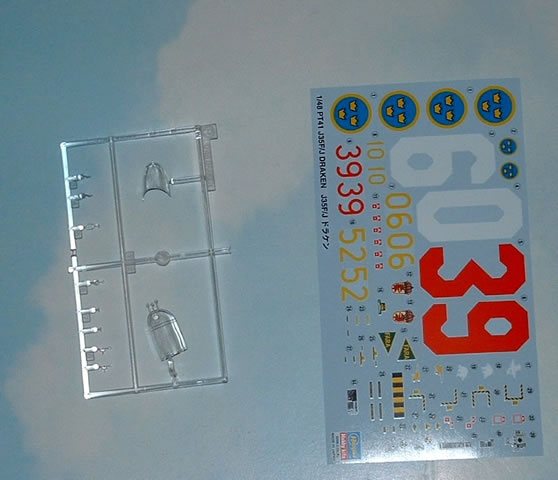
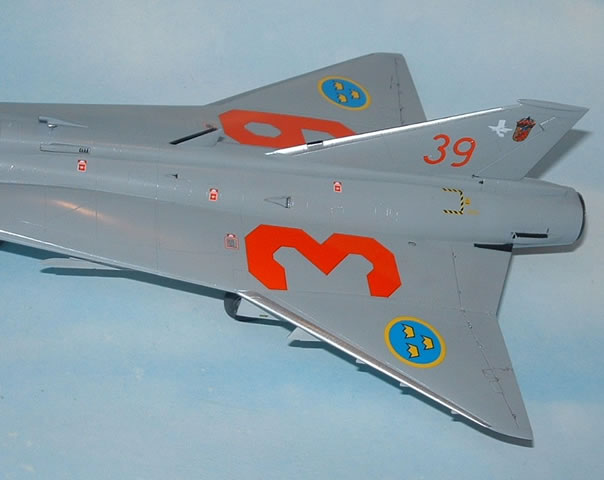
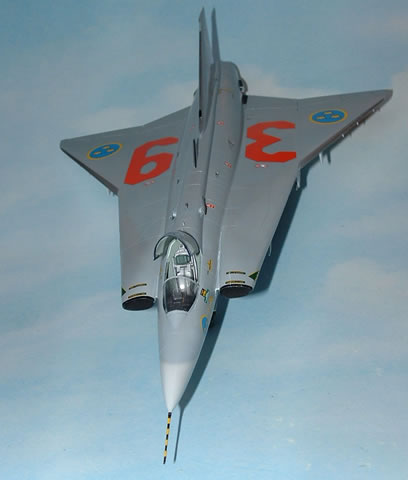
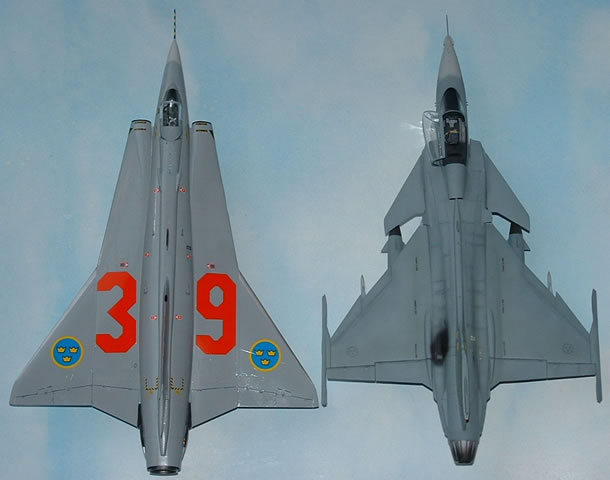
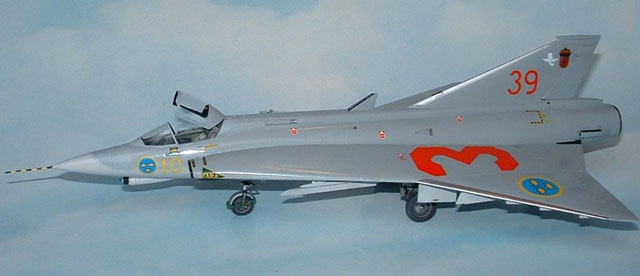
Given that this is a brand new kit of a subject that hasn’t really been seen in this scale, there isn’t any aftermarket for it yet, including decals, so your options are limited… barring a bit of creativity. The kit provides the modeler with three options, Yellow 06 and Yellow 52 in the standard Swedish Draken scheme of dark blue and olive green, as well as day glow Red 39 in the more recent Swedish two grays camouflage. I chose red 39. Color callouts on the instruction sheet include FS numbers for pretty standard gray colors, but the modelers will need to consult their references to get the blue/green scheme just right. This scheme seems to weather to a variety of different colors.
Leading edges of the outer wing, and fin were painted in Alclad aluminum, as was the bottom of the fuselage, as per the instructions. Reference pictures of Red 39 show it in what looks like a fairly new, glossy and clean state so my model was completed with no weathering and a smooth surface.
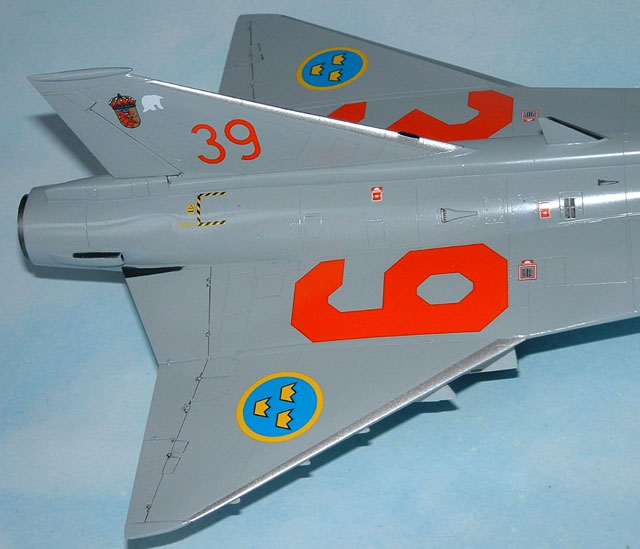
Hasegawa has provided an array of squadron and maintenance markings all of which responded very nicely to the application of Solvaset. I cut the black and yellow stripe decal, for the pitot probe, in half lengthwise. I found this made it much easier to apply. Lastly, patches of black were added to the inner trailing edge of the wing and to the tops of the aft scoops to replicate non-skid. These are not in Hasegawa’s instructions, but appear on almost every F or J I have seen with the exception of some of the color birds. One last note, on most Drakens, the aft end of the spine looks to be a dark bare metal color. On Red 39 this area is painted the same as the rest of the upper surfaces, but many (most) appear to have it bare metal. As always, it pays to check your references.
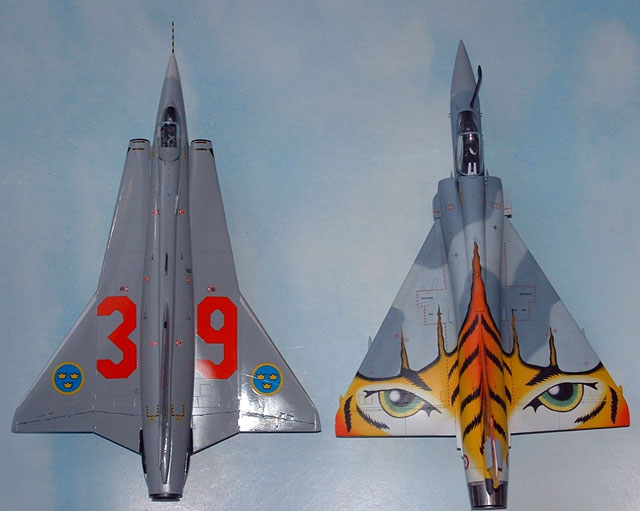
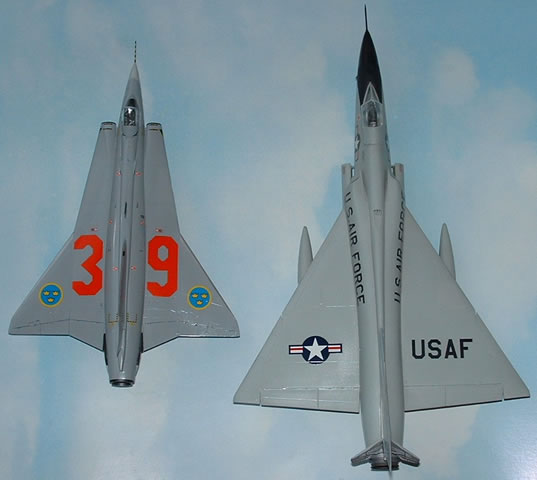
After finishing the Draken, I thought it would be fun to compare it with a few of its Delta winged cousins for contrast.
Hasegawa’s 1/48 Draken is a winner, with one or two minor things to watch out for. I wish Hasegawa much success with this kit and look forward to building additional versions, which options in the kit suggest are forthcoming. Hopefully one of these future kits will be the Danish fighter/attack version!
There are some great looking presentation birds in all of the services with which the Draken served as well as an interesting variety of camouflage schemes to choose from, so there’s lots of potential to put colorful Drakens on the table and not look just like the next guys. Hopefully the decal manufacturers will find enough interest in the kit to make decals for at least some of these schemes. Since Day-Glo seems to be difficult to do really well as a decal, a set of masks for the Swedish and Austrian numbers would be great.
It would appear that Hasegawa, at least intends to release an Austrian version next, with the red/white/red anniversary scheme. http://www.geocities.jp/hobby_show_album/japan/shizuoka2008/0414.htm
It also looks like Tally Ho will be releasing some new Draken decals soon as well. http://www.matusek.cz/web/view.php?cisloclanku=2008040009
Excellent!
Print:
There are a number of print references for the Draken. These are what I have on hand.
International Air Power Review #5, Summer 2002
Aerofax Minigraph #12, Saab J35 Draken by Robert F. Door, Rene Francillion, and Jay Miller
World Airpower Journal, Vol 17, Summer 1994
Famous Airplanes of the World #77, Saab 35 Draken
Online:
There are a number of on line references as well. Here are a few:
Saab 35 Draken page:
http://www.canit.se/~griffon/aviation/text/35draken.htm
Airliners.net has some great pics of Drakens. Here is a link to Draken search results.
Draken Page:
http://fly.to/draken
Walkarounds:
Lots of walkarounds are available for review. Thanks to everybody who made their pictures available for those of us who couldn’t be there to see them in person. You guys are great!
http://www.primeportal.net/hangar/luc_colin3/saab_j-35a_35067/
http://www.primeportal.net/hangar/luc_colin/rf-35_walk_1.htm
http://www.ams.vr.it/AircWalkAround/Zeltweg/Zeltweg_AP2000/Draken/draken_01.htm
http://www.aircraftresourcecenter.com/AWA1/101-200/walk149_Draken/walk149.htm
http://www.aircraftresourcecenter.com/AWA1/501-600/walk596_J-35Draken_Agulhon/walk596.htm
http://aircraftwalkaround.hobbyvista.com/walkindex.html
http://aircraftwalkaround.hobbyvista.com/sk35/sk35.htm
http://www.romove.be/walkaround.html
Last, some neat video of Drakens performing the Cobra super stall maneuver and just doing their thing. This is pretty amazing, considering the age of the design and lack of fly by wire control:
http://www.youtube.com/watch?v=jqiDEcfSnXs&feature=related
http://www.youtube.com/watch?v=Hax3rhqGJcQ&mode=related&search=
http://www.youtube.com/watch?v=JsqY6U6DocM&feature=related
Images and Text Copyright ©
2008 by Emerson Miura
Page Created 28 July, 2008
Last Updated
28 July, 2008
Back to
HyperScale Main Page |
 Home
| What's New |
Features |
Gallery |
Reviews |
Reference |
Forum |
Search
Home
| What's New |
Features |
Gallery |
Reviews |
Reference |
Forum |
Search