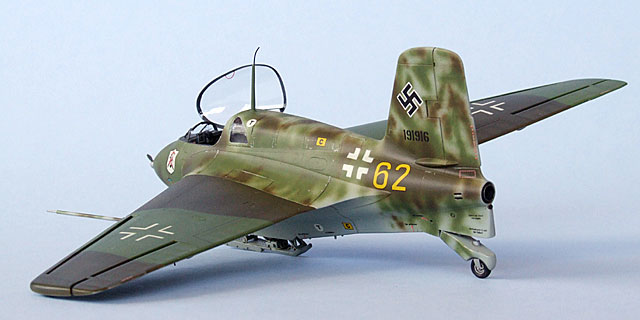
Dragon's 1/48 scale
Messerschmitt Me 163 Komet
by Bruce Salmon
|
Messerschmitt Me 163 B-1 Komet |

HyperScale is proudly supported by Squadron.com
I bought the Komet because I was looking for a quick build to add something interesting to the cabinet and to escape the torment of my other WIPs. How wrong could I be!
Aftermarket Products Used
Squadron (9613) Messerschmitt Me 163B vac-u-form canopy
Cockpit / Fuselage
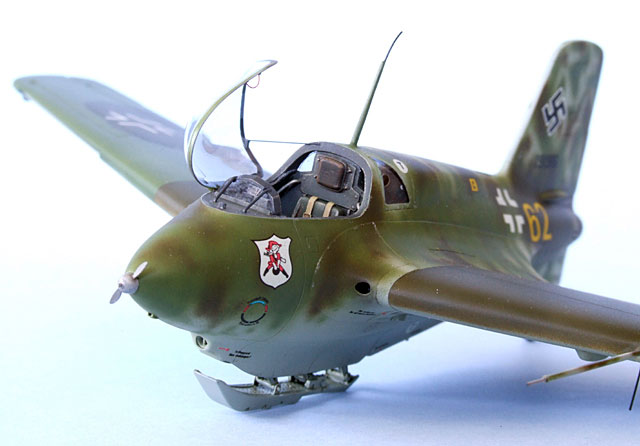
The front office is very spartan so I cooked up a load of extra detail using numerous references including walkarounds found on the internet.
Once painted Tamiya XF 63 German Grey with other bits picked out in various colours, washed and drybrushed it looked very authentic. The clear section just behind the cockpit is too short and needs to be shimmed at one end to fit properly – extra detail was added here too.
After the cockpit was complete the fuselage top and bottom halves were joined; no dramas here. Nose cone to fuselage join was filled with loads of putty and reshaped to cure its pronounced “pinched” appearance. The tail section was then attached and needed lots of putty to fill the gaps and a rescribe afterwards.
Wings
The wings went together well except for the leading edge slats which needed to be lengthened to fit properly. Attachment to the fuselage was good and only a tiny amount of putty was needed. A new pitot tube was made from brass tube and wire and superglued in place.
I used a generic colour scheme and transposed the codes so that my kit would be different from any other Komet modelled. Clear parts were masked etc.
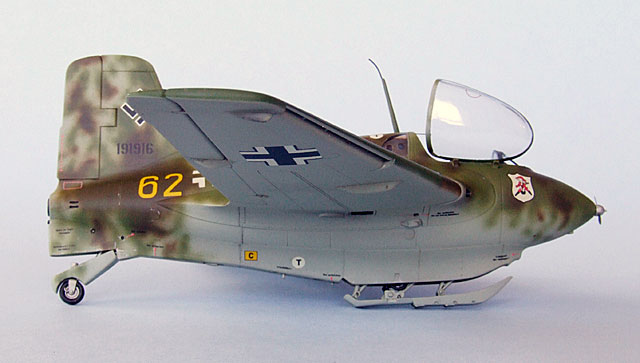
Undersides: 3 – Tamiya XF23 Light Blue / 6 – Humbrol 28 Camouflage Grey / 3 – Humbrol 64 Light Grey
Topsides: Tamiya XF62 Olive Drab and Xtracolor X212 RLM83 Light Green
Painting was pretty straight forward until I came to spray the Xtracolor paint. I had thinned it with turps and it took ages (weeks) to dry. The border between the two upper surface colours was masked using thin “worms” of Blu-tack then covered with Tamiya tape. I also repainted the fuselage camo pattern numerous times until I was happy enough with it. The crosses were masked with Tamiya tape and painted.
NB: Xtracolor paint should be thinned with white spirits (so now I read the instructions…) A coat of gloss varnish followed before decaling.
Decals
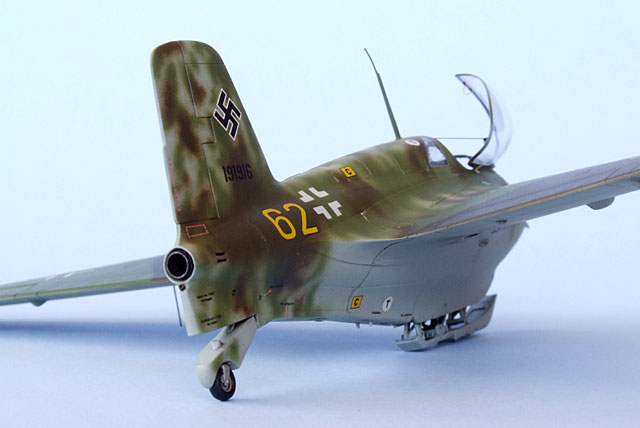
Everything bar the crosses is kit decals although spare swastikas had to be sourced from a politically incorrect Me. 109. The kit decals are thick which made it difficult to see where to position them over inscribed panel lines. Once the decals were set the Komet got a coat of varnish prior to the weathering process.
Weathering
I gave the Komet subtle weathering as they were inclined to blow up before they got too grubby - a precursor to our consumer society perhaps. This involved an all over light wash with raw umber oils and a little bit of paint chipping on the fuselage only using Tamiya XF16 Flat Aluminium and a fine brush (I didn’t chip the wings as they were made of plywood).
Masking comes off the rear windows – well actually no – probably due to excessive coats of paint and varnish. A sharp pair of tweezers did the trick but also left nasty deep gouges. A profanity fest ensues - neighbours gape in awe at my command of the language - birds explode into flight - small animals scurry for cover… Kit is sent back to the box till it learns some respect and grows a better attitude.
Meantime I tried to think of some simple effective ways to replace the damaged windows. Six months later I still hadn’t thought up an easy fix but made a decision to complete the kit regardless. I asked myself a new question – what is the least possible work I can do to fix the windows besides doing absolutely nothing? Well… how about coating them in loads of Future… could it really be that easy? Indeed it was – I didn’t even try to sand out the gouge marks just a quick wipe with alcohol to clean them and then about 20 coats of Future over the next couple of days – filling the holes first then blending into the whole window. It worked a treat although I wouldn’t recommend it for larger areas such as canopies.
Final Assembly
The landing skid doesn’t fit very well in the down position and needed extra support from plastic card to make it strong.
Armoured glass is attached – you need to do this with white glue so as not to destroy the contacting paint layer (put the superglue down). Any air that gets between the two surfaces will make the glass into a mirror (not what you want!). Brass wire replaced kit plastic for the glass bracing.
Aerials attached, top and bottom.
Vac-form canopy attached with epoxy after being polished using Tamiya polishing compound – you need to be careful during this process and go slowly - I pressed a bit hard and the canopy crazed around the edges.
Finally, the electrical generator propeller was attached.
Despite the age of the moulds you can make this little Uber-Glider into a gem with a bit of elbow grease. I’m sure mine will look even better when I put it in a diorama. Calling it “Master Series” however, is slightly ambitious.
Model, Images and
Text Copyright © 2008 by Bruce Salmon
Page Created 19 February, 2008
Last Updated 19 February, 2008
Back to HyperScale
Main Page |
 Home
| What's New |
Features |
Gallery |
Reviews |
Reference |
Forum |
Search
Home
| What's New |
Features |
Gallery |
Reviews |
Reference |
Forum |
Search