Trumpeter's 1/48 scale
MiG-3 Early Version
by Dave Sherrill
|
|
Mikoyan Gurevich MiG-3 Early Version |

Trumpeter's 1/48 scale MiG-3 early version is available online from Squadron
As a modeler of WWII aircraft, I often find myself from time to time becoming highly interested in the aircraft of one particular air force over those of any other. One year it might be the RAF and six months later I’ll try to acquire every Japanese float plane kit I can find. Of late, it’s been the aircraft of the Soviet air force during WWII, also known as the VVS that have really captured my interest. And, it’s not so much the wide variety of Soviet aircraft that has caught my imagination, but also the resiliency of the VVS and its pilots who came off the ropes in the early stages of the Great Patriotic War, to gain eventual victory.
In just this last year I had completed a build of the Trumpeter 1/32 scale Mig-3, for my first model in that scale. I really prefer modeling in 1/48, so I was very happy when I found out that Trumpeter was issuing a kit of the same aircraft in a smaller scale. The 1/32 scale MiG was a very fun build for me with little or no fit problems, so I expected the same in 1/48.
I purchased the new 1/48 kit from one of my favorite vendors (Just Plane Hobbies), for under $20 at this April’s Seattle IPMS show. This is a real bargain in my opinion because you get a model with excellent fit as well as separate flaps, ailerons, and some under wing rockets.
The model is not without its faults, though.
Some of the riveting detail is heavy handed (It is a Trumpeter after all) especially on the underside parts and there are some slight sink marks that run parallel to the ailerons on the upper wing. You can fill the rivets slightly with Mr. Surfacer and sand out the sink marks. The leading edge wing light has a backing on the lower wing, but no back on the upper wing. This results in a Dutch Door look when the wing halves are joined. I removed the backing on the lower wing and stuck a railroad lens to a piece of sprue and glued it behind the opening. It looks better than a blank space, but that’s about all. Overall, I did not encounter any real fit problems that couldn’t be overcome with just a little sanding stick work. Another bonus is that there are no ejector pin marks on such parts as the landing gear doors, legs, or inner flaps. No pin marks that would be visible unless you picked the model up and turned it over and hit it with bright lights.
I began work on the model with the cockpit. (Has that ever been written before?). I think it’s an okay cockpit, some good detail but some that is clunky and not as refined as something from Hasegawa’s recent kits. I decided that I would make things easy on myself and paint the cockpit the same light blue color as the underside, inner gear doors, gear legs, and wheel wells. I should mention at this point the invaluable help I received in building this kit from Massimo Tessitori’s wonderful website on the Mig-3: http://mig3.sovietwarplanes.com/mig3/mig3.html No modeler should build a Mig-3 kit without visiting this website often.
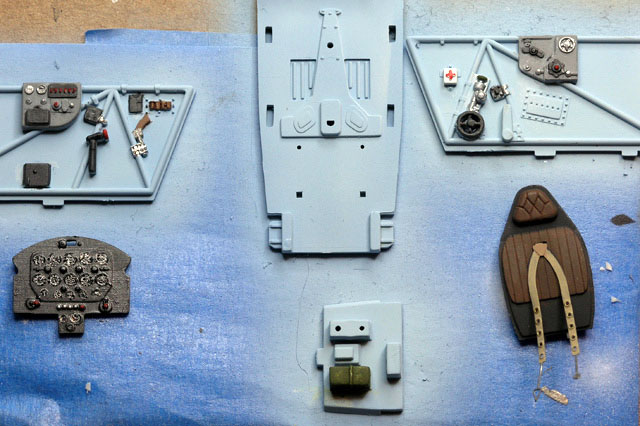
The instrument panel’s bezels are barely molded, but this worked to my advantage because I used Mike Grant’s excellent instrument decals punched out with my Waldron punch set. It’s easier to position these tiny decals if the bezels are not very prominent. To paint the cockpit I first airbrushed every part with a light blue mix of Tamiya acrylics. I then brush painted the smaller parts and details also with Tamiya acrylics. When I brush paint using Tamiya acrylics I usually will mix a small amount of paint in the lid of a plastic 35mm film container with a drop or two of Golden’s Retarder and a drop or two of bottled water. The retarder keeps the paint from drying too quickly and leaving visible brush marks. An airbrushed base coat is absolutely essential as well. When I use the retarder it’s easy to smooth out any brush marks before the paint dries. I should mention that I use 35mm film containers for all my painting work. They are excellent vials for mixing and storing small amounts of paint. The lids are great too for small amounts of paint and CA. I have a connection at the local film processing business who gives me boxes of hundreds of empty containers whenever I need them. For free. (And, yes, people still shoot a lot of film). When I’ve painted everything to my satisfaction I airbrush all the painted cockpit parts with a 1:1 combination of Testors Dullcote and Glosscote lacquers in preparation for applying an acrylic sludge wash. I don’t want the protective coat too glossy because I want the wash to obtain a little bit of purchase on the surfaces and not be completely wiped away during clean up. For my wash recipe I use Polly Scale acrylics (usually a dark grey color) mixed with some water and dish detergent. Polly Scale acrylics seem to wipe away easier than other acrylics. A 1:1:1 ratio seems to work fine for me. I wipe away any excess wash with a Q-tip dampened with some Windex. If I have to get into cramped spaces I use a bit of Q-tip cotton wrapped around a toothpick. Here are pictures of some of the base painted cockpit parts before wash application and after clean up. I’ve also “dry brushed” the raised detail with a silver pencil. Before wash:
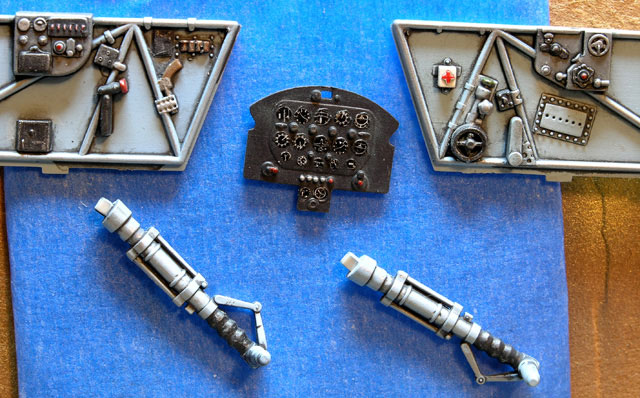
After an application and clean up of sludge wash followed by a silver pencil:
Once the cockpit was painted and assembled I was able to join the fuselage halves. One thing I didn’t do as per the instructions was to insert the rear radio platform until after I had a chance to clean up the seam where the rear cockpit decking comes together. I had to use a pair of tweezers to slip this radio platform into place, but it went in OK as long as the pilot’s seat was not installed and thus in the way. Since I wanted to have the canopy posed open I waited to put the pilot’s seat in until the very last because it would have otherwise interfered with the masking of the cockpit opening. One thing I should make note of here is that the instructions are in error with respect to the placement of the radio platform. If you follow Trumpeter’s directions you will end up gluing the radio platform part behind the rear decking (and out of sight) instead of in front of it. I don’t think anyone would really be able to goof this up, but it should be said nonetheless.
The rest of the basic construction went very well except for one minor issue with regard to the wing to fuselage join. To facilitate a snug upper wing to fuselage fit (it seems), Trumpeter has molded what I would describe as a U-shaped “grip”, for lack of a better term, to the inside wall of the upper wing part that would fit against the fuselage part. It certainly does what it’s intended to do (bring the parts together) but it also results in a short but very narrow, maybe 1mm, opening along what would otherwise be a perfect join. By molding the part the way they did they created a slight sink mark which I thought I could either fill with a very thin piece of card stock or simply employ my sanding stick to even it out. I opted for sanding because I tend to be lazy and it turned out to work just fine. I’m sorry I didn’t take any pictures of this and my description may be fuzzy, but you’ll see what I mean if you ever get to this point in building the kit. It’s a great idea, just not perfectly executed.
If you’re looking for a kit that goes together quickly and ready for painting the Mig-3 is a good choice. In the whole basic construction sequence there were only a couple of seams that needed re-scribing and they were on the leading edge of the wings. I began painting by airbrushing a coat of Floquil enamel primer. I like using a primer for a couple of reasons. By using a primer I’m able to see any imperfections in my seam filling or rescribing work I might need to correct. The primer also provides a perfect base for the Tamiya acrylics I prefer to use. Without a primer, Tamiya acrylics are good to use, but I sometimes make a mistake where I have to sand down a spot or area. Tamiya acrylics don’t like to be sanded. They don’t feather out nicely. They basically look like they’ve been scratched rather than sanded. But, join them with an enamel primer and they take sanding as smoothly as any enamel.
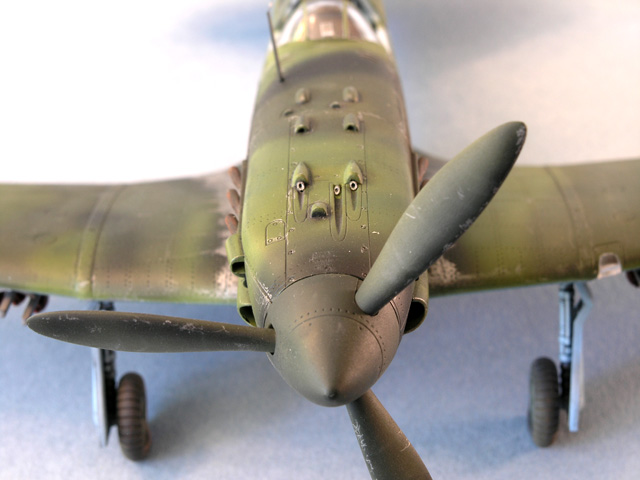
The Trumpeter Early Version Mig-3 gives you three painting options. One in an all white upper surface scheme, one (Pokryshkin’s) in an all OD upper surface scheme, and one in an all A-II light green upper surface with a black forward cowl and spinner scheme. None of these schemes seemed particularly interesting to me, but Massimo Tessitori came to my aid again. It seems that early in the war many of the early version Mig-3’s received field repaintings. Migs with all green upper surfaces were often painted with either dark green or black bands. This was something of a prelude to when similar camouflaging would be done at the factory level on later model Mig-3’s. I didn’t have any decals in the spares box that matched any specific profiles of field repainted Migs as depicted in profiles on the Massimo’s website, but I had several that were close. At this point I decided to paint my model as if it were a Mig-3 that had been repainted in the field. I like to paint my models in a style I learned here on HyperScale from Gregg Cooper in his terrific construction trilogy on the Gekko.
http://hyperscale.com/features/2002/gekkogc_3.htm
I first painted the upper surfaces a light green mix of some Tamiya acrylics that I judged to be close enough to a VVS A-II light green. I then took some of this light green paint and lightened it further with some plain white and thinned it to a watery consistency. I then airbrushed this color over the base coat of A-II green in a random, splotchy pattern.
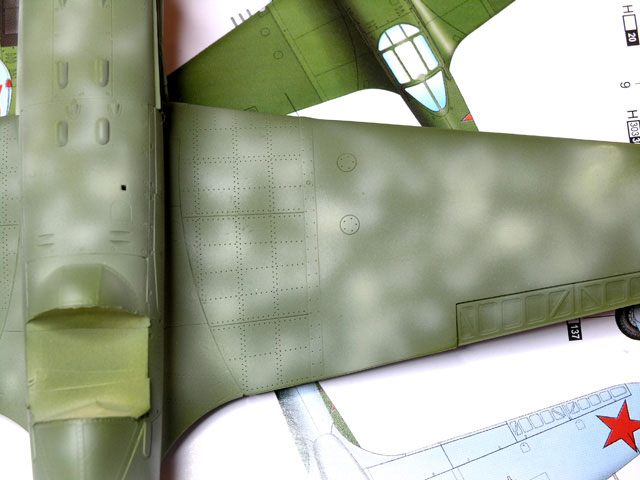
This splotchy pattern was then covered with a thinned coat of the base green until the shading had some subtlety to it without being what I considered “overcooked”.
My green color mix was a bit duller than the kit illustrations but that’s what I wanted.
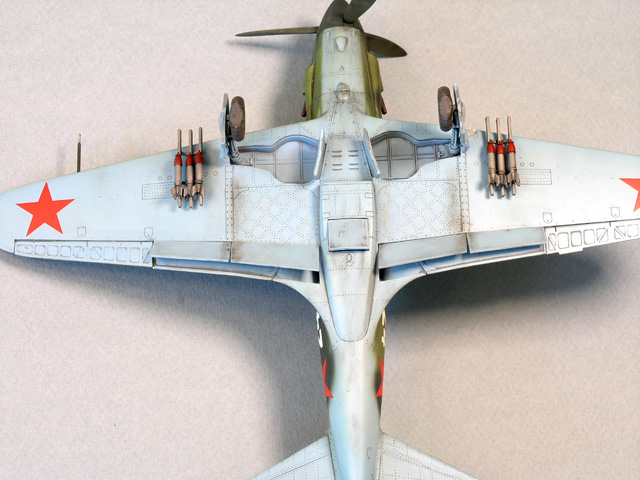
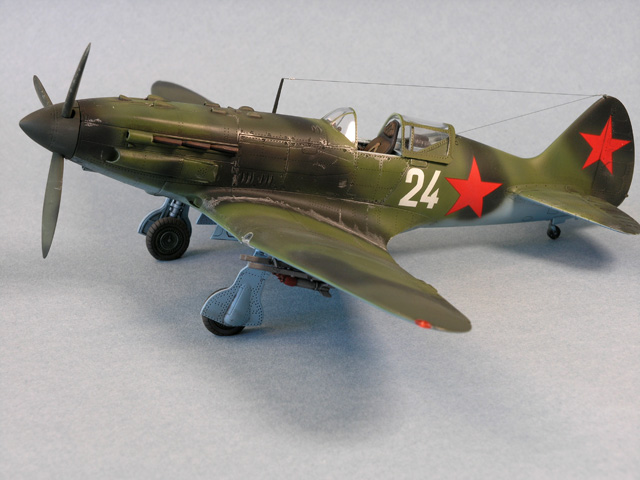
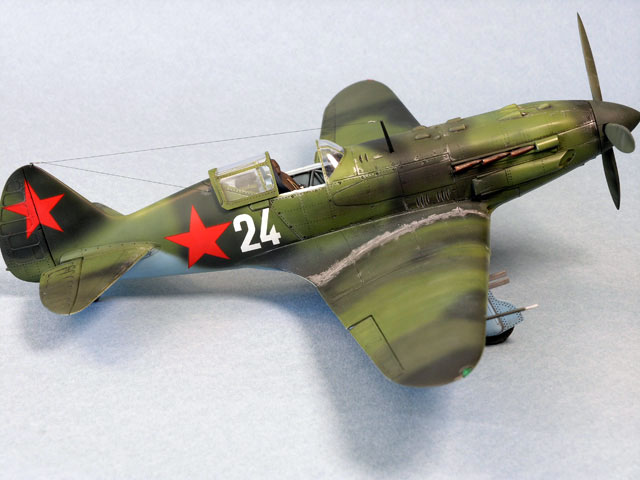
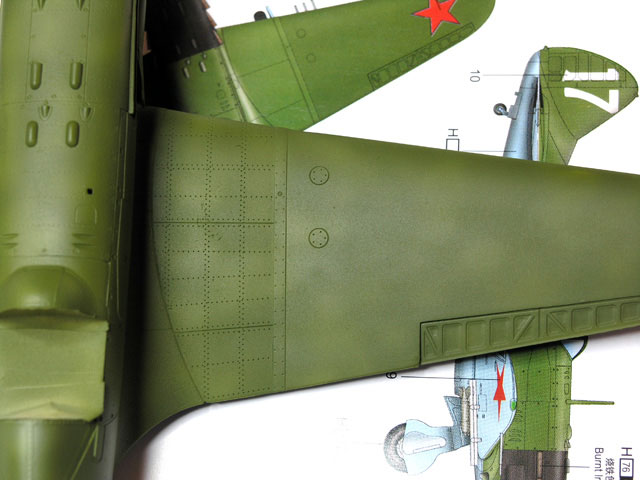
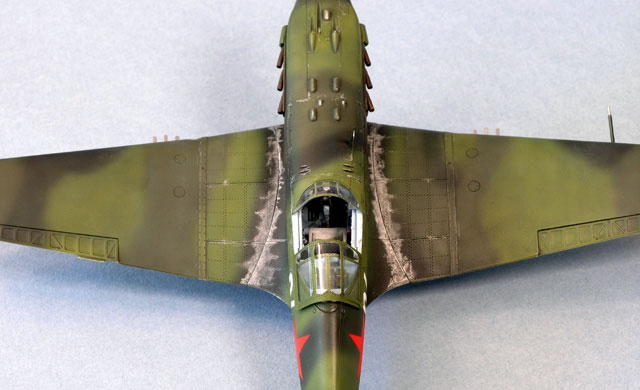
Painting went really easy from this point because field repaintings in the VVS, from what I could judge, were done with very soft demarcation lines. There was only a little back and forth between colors to correct for some slight overspray spatter one usually gets from freehanding different camo colors. I tried to depict repainting of dark green and black banding with Tamiya XF-13 IJA green and Tamiya XF-69 NATO black. Below is a picture of the completed model. From some pictures of Mig-3’s it was apparent that the wing walk areas were highly worn and weathered.
One item of this model that could stand a bit of enhancement is the engine exhausts. Quickboost makes a resin set of the Mig-3 exhausts in 1/48 but the kit parts are simple enough to drill out if you have a set of small drill bits, good lighting, and some kind of magnifier. The first thing I do when drilling exhausts or guns is to paint the areas I want to drill with some Windsor & Newton silver ink.
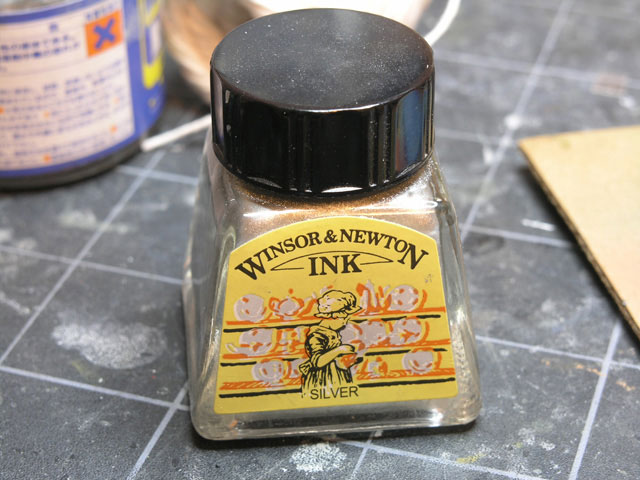
Winsor & Newton silver ink is a modeler’s friend. With this stuff you can paint a silver color onto a model’s surface to check for seam errors and then remove easily with a damp rag. (Don’t hold it under running water unless you want silver particles spread everywhere). The stuff is water soluble and one jar will last a couple of years until it starts to thicken up and it’s time to get a new one.
By painting the end of the exhaust stubs with silver ink I make it easier to locate my pilot hole before I start to drill.
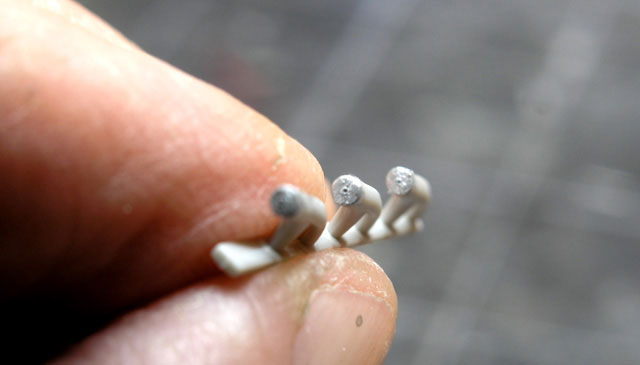
My pilot hole is initiated with a sewing needle that’s been chucked into a pin vise. The same tool I use for re-scribing. I then begin drilling with the smallest bit possible and expand upwards in drill bit size until I’ve gotten as far as I dare to go with thinning the exhaust tube walls.
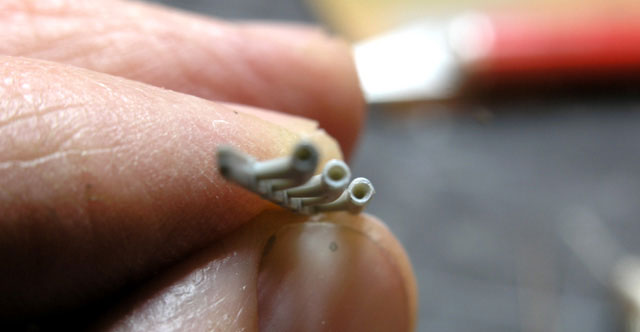
(Please note the paint along and under the fingernails. Dead giveaways to identifying a modeler.)
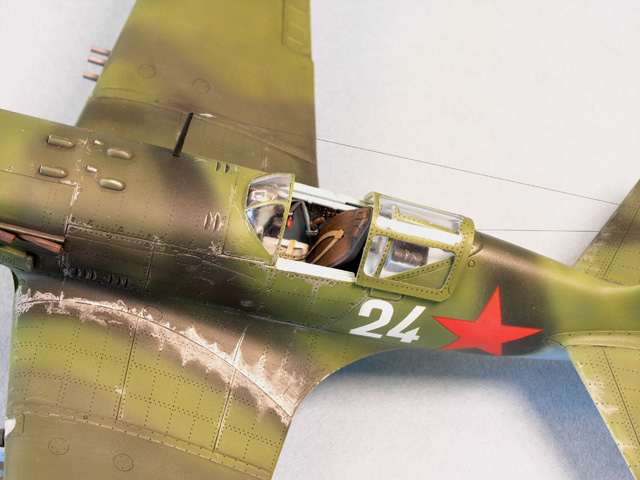
Trumpeter’s clear parts are quite clear and thin. The forward windscreen and rear canopy parts fit very well to the upper fuselage. I masked the canopy parts with Bare Metal Foil after first dipping them (and drying thoroughly) in Future. This method has served me well over many a model and I don’t think there’s any other way of masking that allows a modeler to come as close to the outline of the framing as this one does.
http://www.clubhyper.com/reference/maskingbmfds_1.htm (Shameless plug.)
I think it’s time to wrap this build article up with some mention that I replaced the kit upper fuselage gun tubes with hypo tubing and rigged the antenna wires with ultra thin nylon line from Dai-Riki. I thinned all my paints, enamel and acrylic, with Advantage medium dry urethane reducer. Thank you Tony Bell, for that tip. The final model was weathered with a Berol Prismacolor silver pencil for the wing walk areas and Carre pastel chalks were used for overall streaking and exhaust staining. I was also able to use a set of True Details wheels for the Mig-3 as well as a PE Sutton Harness from the spares box. The True Detail wheels are a bit too flattened for my taste, but it is better that than not having a flat spot in my opinion.
I am well aware that I’ve built a model of plane that didn’t actually exist. I guess I should say, didn’t possibly exist. It is, I think, representational in many ways of Mig-3’s that were repainted in the field in those desperate days of 1941-42. From my research there didn’t seem to be any rhyme or reason as to whether numerical codes went on the aircraft’s tail, ahead of the star, behind the star, whatever; or if the red star insignias were on the tails or not. This ambiguity gave me what I thought was a certain amount of artistic license to build and paint a model (within certain historical guidelines) of my own creation. And, it was whole lot more fun to build than trying to replicate something in the kit’s instructions. Modeling is fun, right?
The Early Version Mig-3 differs from the Late Version primarily with the details of the upper cowling and the lack of slats on the wings. Both versions look very much alike. The Mig-3 was not a war winner. In fact, it was probably as dangerous to its pilots as the enemy was. But, it is a unique aircraft, somewhat reptilian looking in my opinion, and very much representative of Soviet design and technology in its day. Get either version and you will have a lot of fun building a model.
Model, Images and Text Copyright © 2008 by Mark Davies
Page Created 15 July, 2008
Last Updated
21 July, 2008
Back to
HyperScale Main Page |
 Home
| What's New | Features | Gallery | Reviews | Reference | Resource Guides | Forum |
Home
| What's New | Features | Gallery | Reviews | Reference | Resource Guides | Forum |