Trumpeter's 1/32 scale
P-47D Razorback
by
Ian Robertson
|
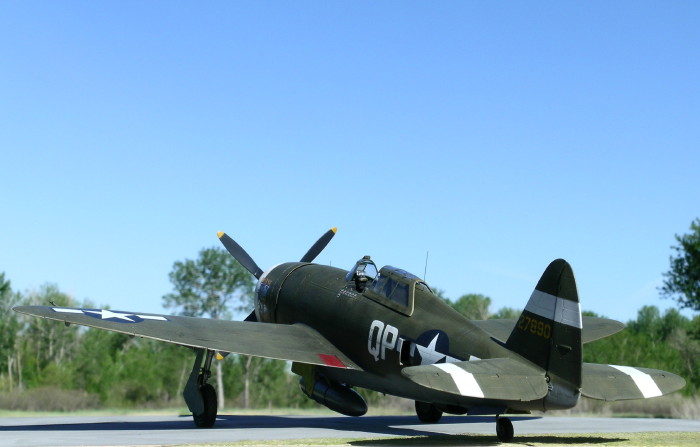
Republic P-47D Thunderbolt Razorback |

Trumpeter's 1/32 scale P-47D Thunderbolt is available online from Squadron.com
Trumpeter’s 1/32 P-47D Razorback is a welcome addition to the growing number of large scale model aircraft on the market, and currently it is the only game in town for this version of the P-47. It is an expensive kit that bustles with parts, many of which will never see the light of day once the model is complete (the internal ducting for the supercharger immediately comes to mind). The kit also continues Trumpeter’s tradition of extensive rivet details, although in this case the rivets are restrained compared to some of their other offerings.
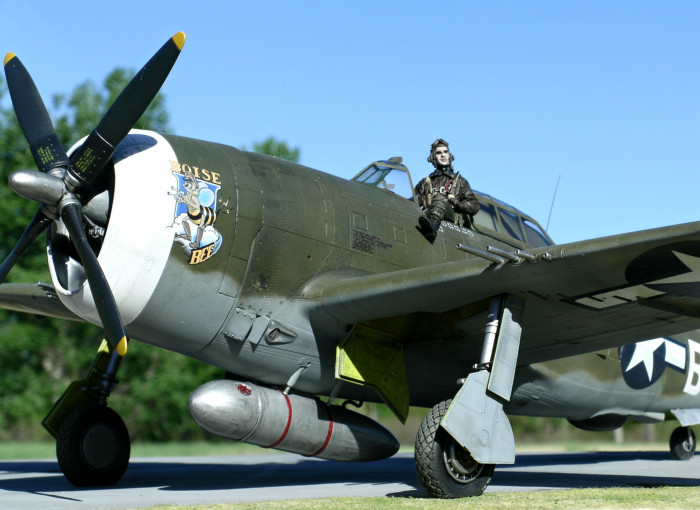
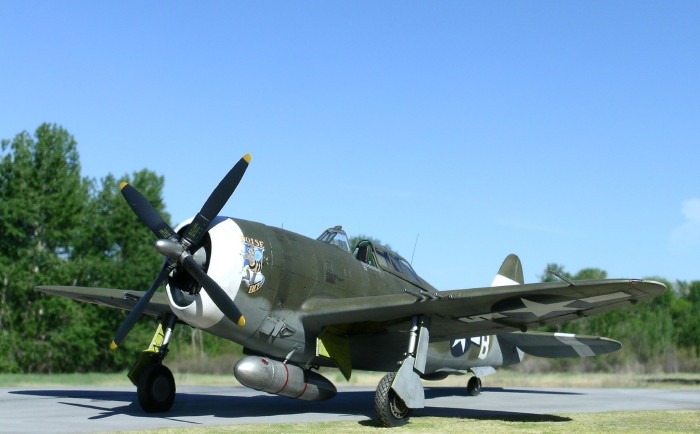
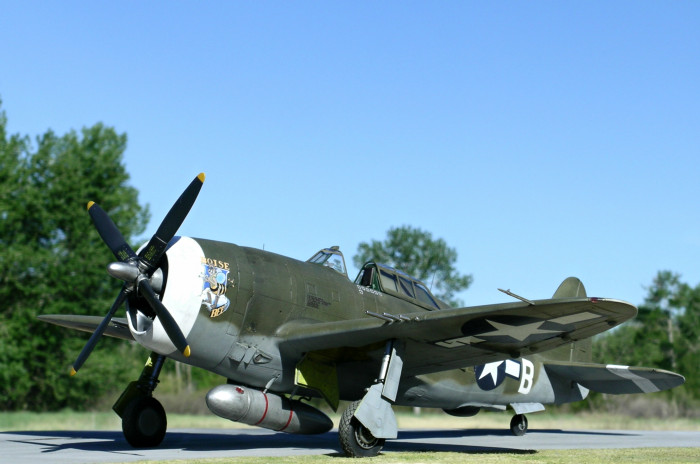
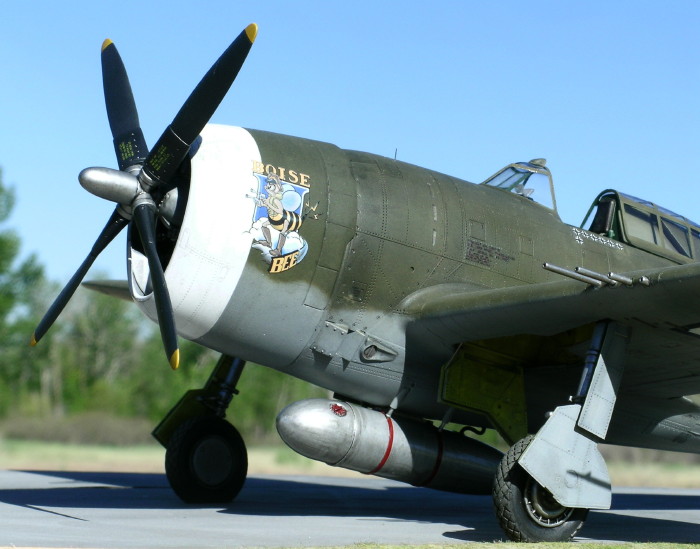
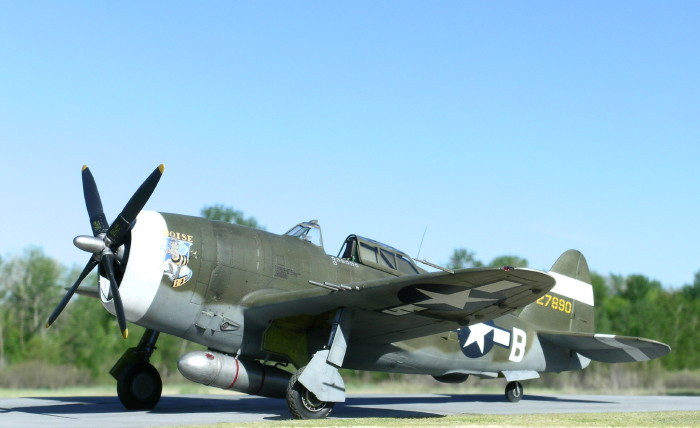
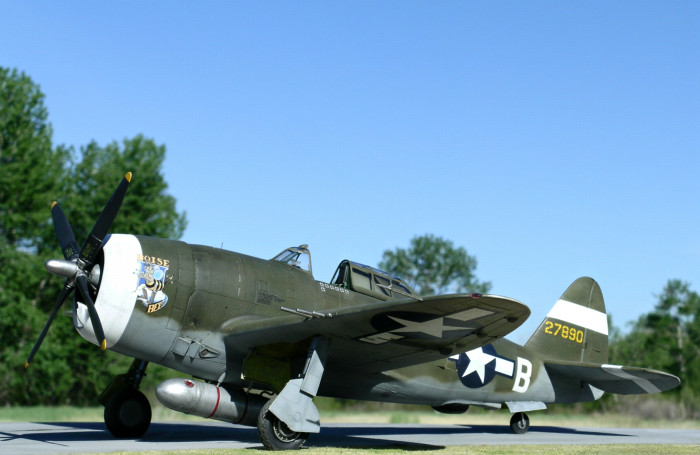
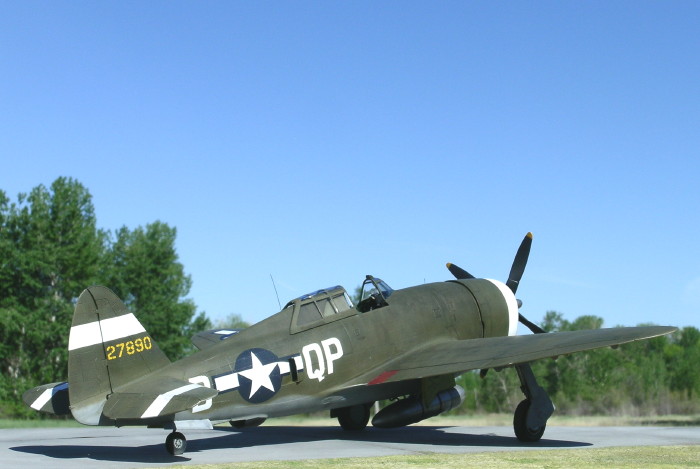
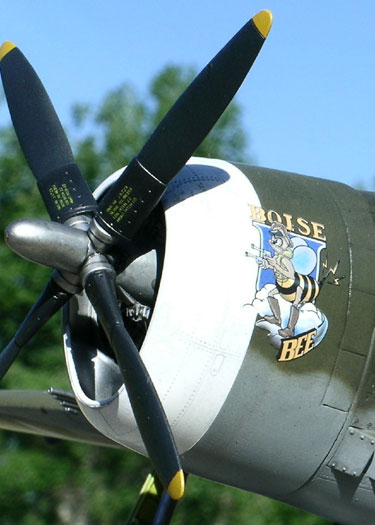
In searching for a unique scheme for the model, I was fortunate to receive a nose art decal for Capt. Duane Beeson’s “Boise Bee” from BARRACUDAcals, a new player on the aftermarket decal scene. At the time only the artwork for “Boise Bee” was available, so rather than wait for the full decal release I opted to paint and mask the fuselage codes and use spare decals for the serials and insignias. Complete decals for “Boise Bee” and two other Razorback schemes will soon be available in 1/48 and 1/72 from BARRACUDAcals (BC48001 and BC72001, respectively). Full 1/32 decals for “Boise Bee” will be available as a future BARRACUDAcals release.
About Capt. Duane Beeson
Duane Beeson, a native of Boise, Idaho, began his military career in 1941 when he was accepted for flight training in Canada with the Royal Canadian Air Force. In September 1942 he was posted to No. 71 Squadron at Debden, but a short time later his Eagle Squadron was absorbed into the Eighth Air Force. Beeson flew his first combat missions in Spitfires over Dieppe with the 334th FS. In mid 1943 he transitioned to the P-47D Thunderbolt (“Boise Bee”), and in early 1944 to the P-51B Mustang (“Bee”). Beeson accumulated kills quickly, and on March 23rd 1944 he was ahead of Don Gentile as the USAAF’s top ace.
However, Beeson’s fortunes changed on April 5th 1944 when he was hit by flak while strafing a German airfield. He was forced to bale out of his P-51 and spent the rest of the war in a POW camp. Beeson is credited with a total of 22.1 victories, 17.3 of which were air to air kills. He was one of 10 USAAF pilots to become an ace in two different types of fighter plane. Sadly, Duane Beeson died of a brain tumor in 1947 at the age of 26.
The Trumpeter Kit
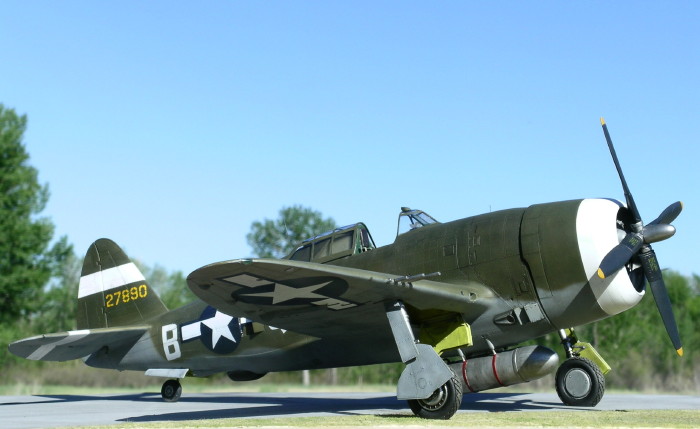
Trumpeter’s big 1/32 scale P-47D Razorback is an impressive kit – one that I would certainly build again - but it’s not without shortcomings.
The rivets are relatively subdued for a Trumpeter kit, but I am among those who feel the model would be better off without them. I’d hesitate to build this kit in a natural metal scheme for fear that the rivets would shine like rhinestones. With an olive drab over neutral grey scheme the rivets are far less prominent.
I also found some issues with fit and accuracy – more on this below.
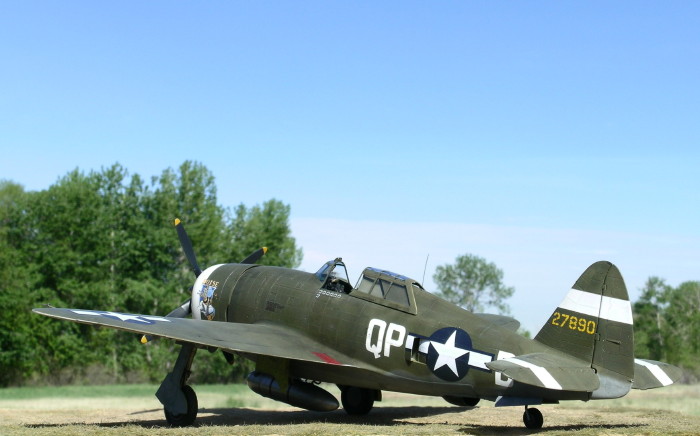
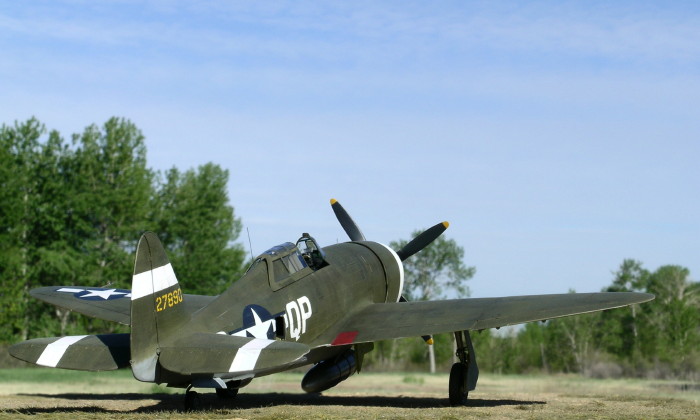
The cowl flaps on the Trumpeter kit are correct for the P-47D-10 and later. However, Beeson’s P-47 was a D-1, which means that the lower two cowl flaps on each side should extend the same length back as the other cowl flaps. I did not catch this detail until the model was complete, so it remains incorrect on my model.
I made two aftermarket additions to my model: resin weighted wheels from Contact Résine (to replace the rubber tires that come with the kit), and a resin 108 gallon drop tank from CAM.
Construction begins with the cockpit, which is well detailed and includes photo etched seatbelts. I painted the cockpit Dark Dull Green using a mixture of Polly Scale RAAF Foliage green and a touch of RLM 67 Dark Olive Green.
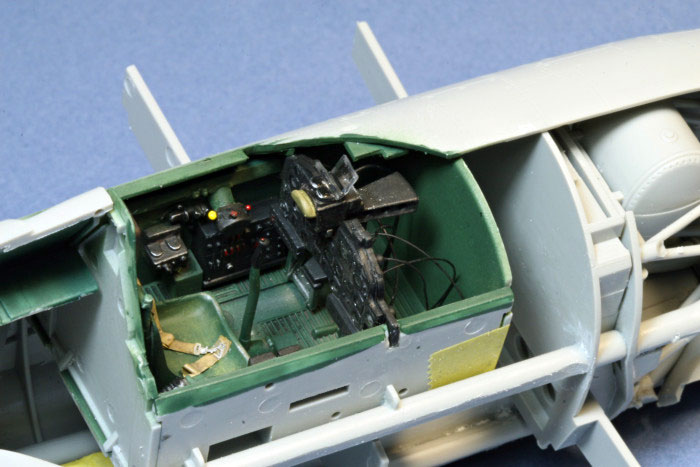
In case you were hoping to skip the steps that involve the supercharger ducts that will never be seen in the final model, no such luck - the cockpit tub and wing spars are connected directly to the ducting. I built and inserted the ducting rapid-fire using tube glue, CA glue, and tape, whichever was closest. I guess one could go all out filling seams and painting the duct work, but why bother? A very strange choice by Trumpeter to include these details in the model.
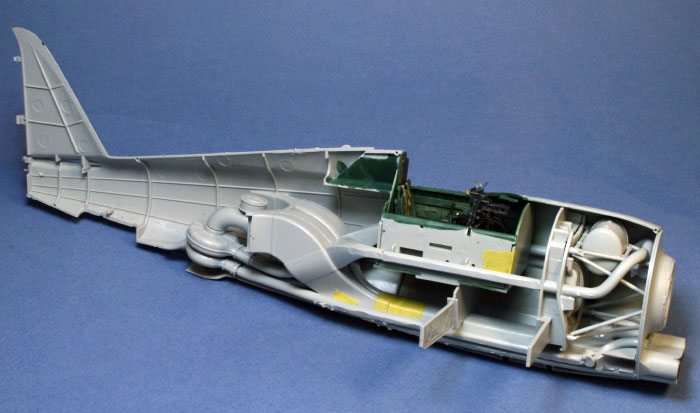
The kit’s engine is well detailed and comes with much better magnetos than the Hasegawa 1/32 P-47D bubbletop kit. As shown in the photo, I wired up the front of the engine with fine solder wire.

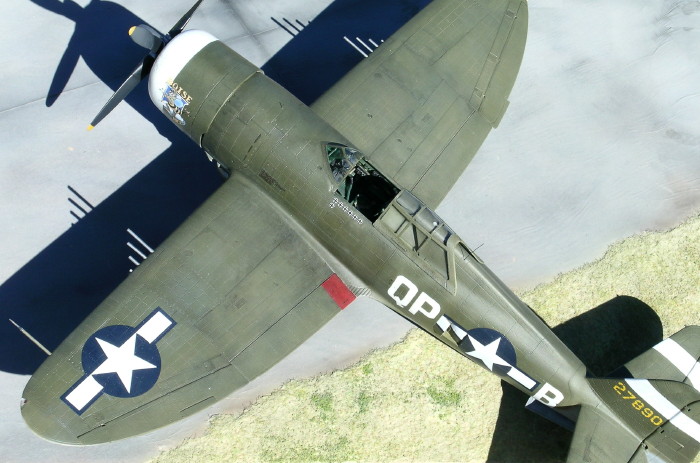
Although I was impressed with the overall fit of this model, the gun panels on the wings were exceptions. When I dry fitted these panels on the wings there were noticeable gaps along the edges, and more seriously, the panels sat lower than the rest of the wing surface. To remedy the latter problem I added strips of styrene to the ledges that support the panels, thereby raising the panels flush with the wing surface. The gaps along the edges were filled with putty and thin strips of styrene where needed.
Another concern with the model became apparent when I attached the undercarriage – something was seriously amiss. Although the rake of the gear appeared correct, the nose of the model sat noticeably low. My impression was confirmed when I placed the Razorback nose to nose with my Hasegawa P-47 bubbletop. Indeed, the Razorback sat about 1 cm lower at the spinner. Scale drawings in my Kagero P-47 vol. 1 book confirmed that the Hasegawa P-47 sat at the correct height, so something had to be done with the Razorback.
I extracted the Razorback’s struts from their plugs in the wheel wells and then compared them to the struts on an unbuilt Hasegawa P-47. They were the same length. After some head-scratching I concluded that the discrepancy was caused by the depth at which the struts insert into the wheel wells – they insert deeper in the wheel well of the Trumpeter kit, causing the Razorback model to sit low at the nose. To correct this problem I added a 2 mm thick piece of styrene into the plug for each strut, effectively extending the struts so that the nose was raised to its proper height. A metal pin was inserted into each strut to help reinforce its connection with the wheel well. I then fixed the struts in place using 5-minute epoxy. The upper section of the gear covers had to be raised slightly to accommodate the new sit of the struts. This repositioning is consistent with photos of P-47s.
As a cautionary note, I have not seen this issue about the sit of the P-47 Razorback raised in other reviews of the model, so perhaps I made a gaff. However, it’s difficult to see how that would be the case given that the only parts involved are the struts (which are same length as those in the Hasegawa kit), and the wheel wells (which are deeper in the Trumpeter kit). In any case, it’s something to be wary of when building the kit.
Camouflage
 I primed my model with Tamiya fine gray surface primer and then used a micromesh sanding cloth (3600 grit) to polish the surfaces and remove any rough spots. I then painted and masked the white on the front of the cowl, the stripes on the tail, and the fuselage codes. I painted the wheel wells and interior surfaces of the gear covers with Misterkit yellow zinc chromate primer. I primed my model with Tamiya fine gray surface primer and then used a micromesh sanding cloth (3600 grit) to polish the surfaces and remove any rough spots. I then painted and masked the white on the front of the cowl, the stripes on the tail, and the fuselage codes. I painted the wheel wells and interior surfaces of the gear covers with Misterkit yellow zinc chromate primer.
I used Polly Scale Olive Drab and Neutral Grey acrylics for the camouflage. Various shades of these colors were sprayed repeatedly to create a lightly weathered appearance.
Thinned black Tamiya acrylic was used as a wash and for creating additional color variation on the model’s surfaces.
The panel behind the cockpit was painted in faded Olive Drab.
Decals
I sprayed the model with a clear coat of Future before applying the decals. I then added the BARRACUDAcals nose art decal. The art work is exceptional and matches the photos I have of the original aircraft.
The remainder of the decals I patched together from various sources including Cutting Edge (insignias) and Eagle Strike (serial number). I made my own decal for the aircraft data plate.
Despite the problems I had with the undercarriage and the gun panels, I really enjoyed building this kit and I would not hesitate to build another ($$ permitting). Hopefully BARRACUDAcals will continue to extend their range of marking options for this kit and the 1/32 bubbletop.
Model, Images and
Text Copyright © 2008 by Ian Robertson
Page Created 3 August, 2008
Last Updated 3 August, 2008
Back to HyperScale
Main Page |
 Home
| What's New |
Features |
Gallery |
Reviews |
Reference |
Forum |
Search
Home
| What's New |
Features |
Gallery |
Reviews |
Reference |
Forum |
Search