Tamiya's 1/48 scale
P-47D Thunderbolt
by
Ian Robertson
|
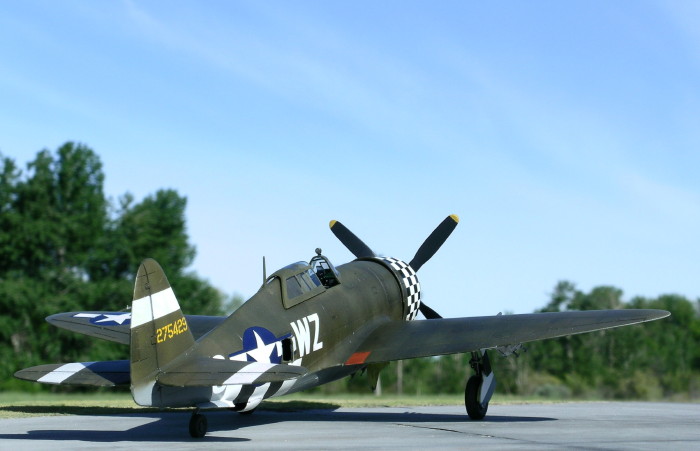
Republic P-47D Thunderbolt "Razorback" |

Tamiya's 1/48 scale P-47D Razorback is available online from Squadron.com
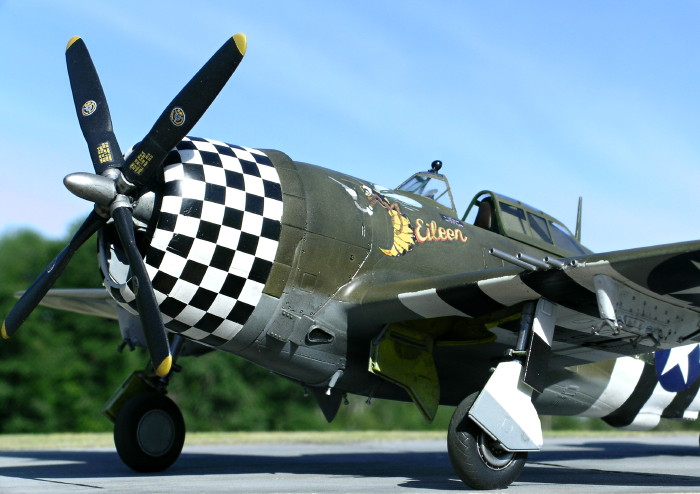
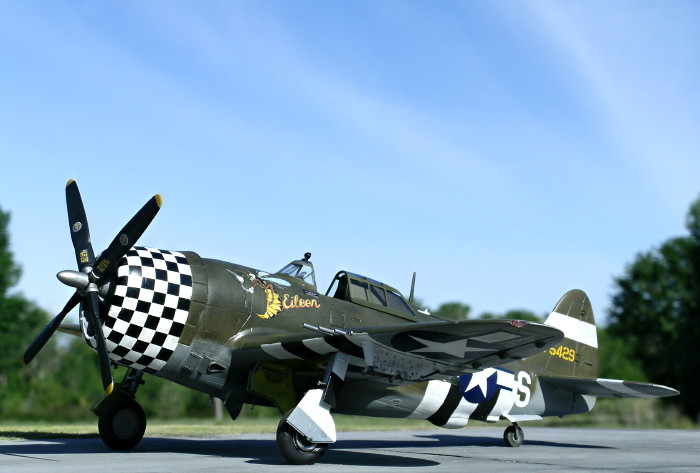
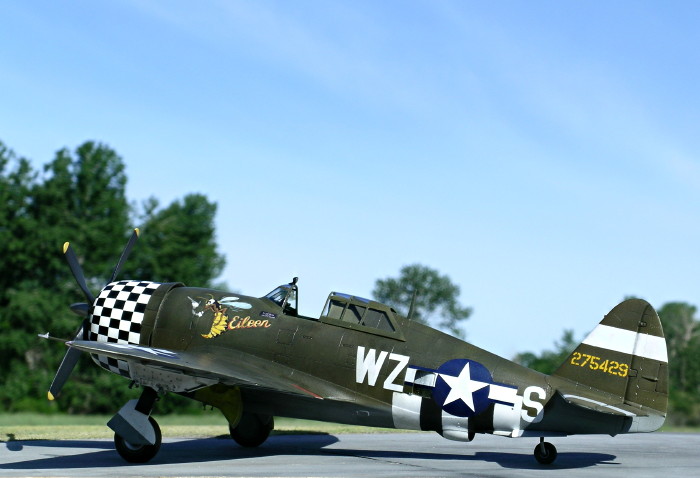
While searching for a unique subject to build I came across several photos of Frank Oiler’s P-47D Thunderbolt “Eileen” - not the familiar bubbletop for which there are several aftermarket decal options, but rather the lesser known Razorback of the same name. While the connection between Oiler’s bubbletop and Razorback is unmistakable from the artwork and name, I concluded that there were enough differences to make the nose art decal for the bubbletop unsuitable for the Razorback. Therefore, I opted to make my own. Here I present that effort on Tamiya’s 1/48 scale P-47D Razorback.
Tamiya’s P-47D Razorback thunderbolt needs no introduction and in my opinion ranks among the best model kits available in 1/48 scale. Unlike its Hasegawa counterpart, the Tamiya kit captures very well the portly nature of the P-47D. Construction is straightforward and problem free, and the engineering and detailing is excellent.
I painted the cockpit on my model dark dull green using Polly Scale RAAF Foliage Green mixed with a touch of RLM 67 Dark Olive Green. The instrument panel was painted scale black. I replaced the kit’s armored glass with a thinner piece cut from clear acetate, and I used photoetch seatbelts from Eduard.
I painted the wheel wells and interior surfaces of the gear covers with Misterkit yellow zinc chromate primer.
Although not visible in the photos, I wired the engine with fine soldering wire. The inside of the engine cowl was painted Alclad II duraluminum, although gray would have been another good option.
Camouflage
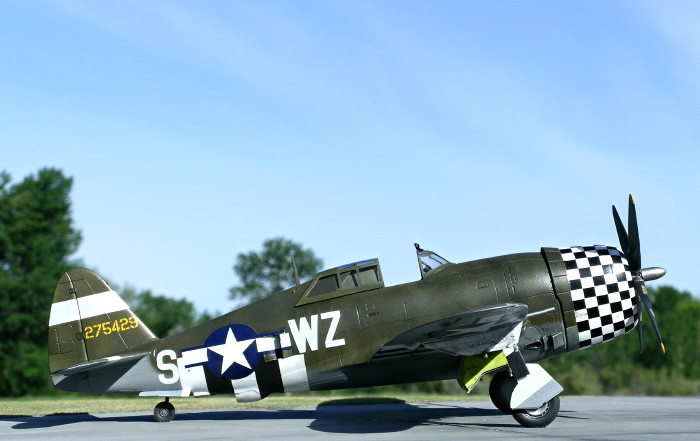
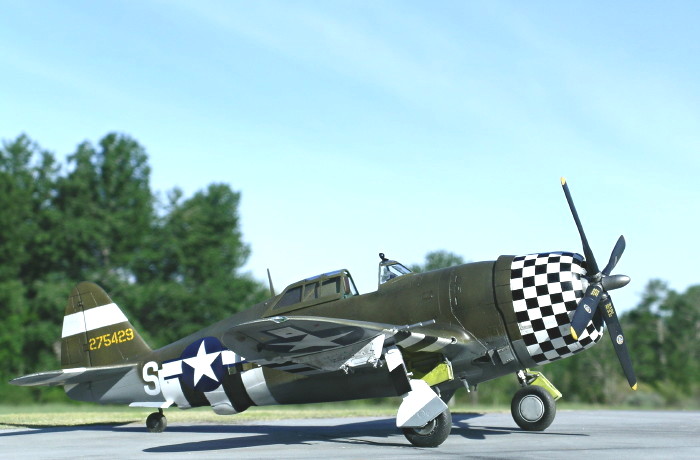
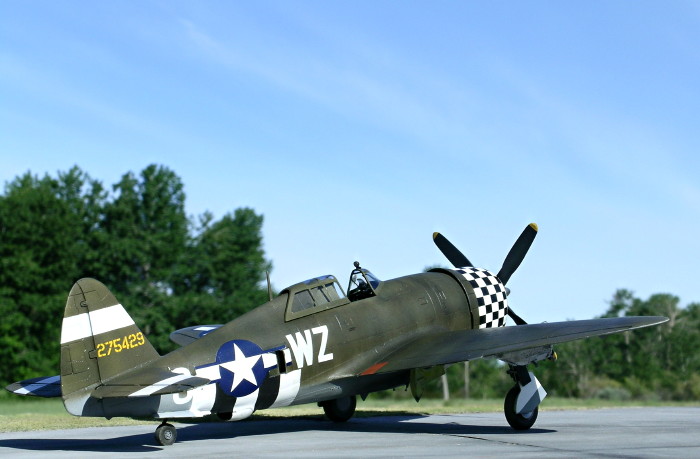
 Photos suggest that some checker nose Razorbacks in the 78th FS were delivered in natural metal and then camouflaged in (presumably) RAF Dark Green, as evidenced by the natural metal panel behind the cockpit, and in some cases natural metal canopy frames. However, Oiler’s Razorback appears to have been painted olive drab (OD) over neutral gray. Photos suggest that some checker nose Razorbacks in the 78th FS were delivered in natural metal and then camouflaged in (presumably) RAF Dark Green, as evidenced by the natural metal panel behind the cockpit, and in some cases natural metal canopy frames. However, Oiler’s Razorback appears to have been painted olive drab (OD) over neutral gray.
For my model I used Polly Scale OD and Neutral Gray acrylic paints. Several shades of OD were applied to create variation on the upper surfaces.
Invasion stripes were painted and masked on the underside the fuselage and wings prior to application of the upper and lower camouflage colors. The stripes on the port side of the fuselage were painted uneven based on a photo.
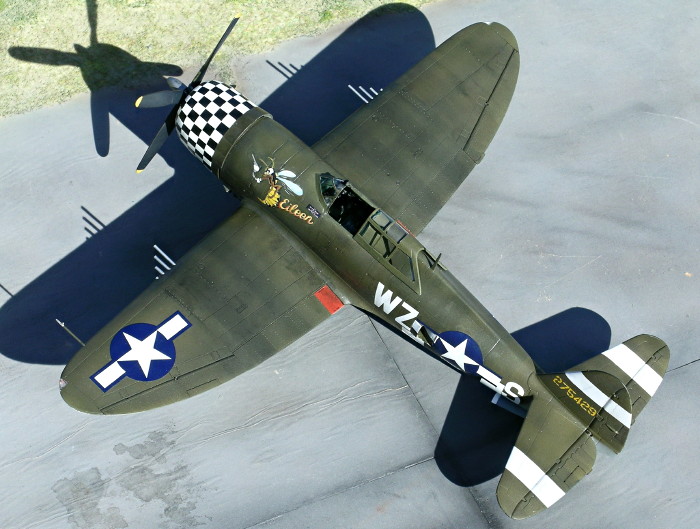
Once the upper camouflage had been applied I used masks and postshading (i.e., thinned black paint sprayed over the OD) to create a faint representation of over-painted invasion stripes on the upper fuselage and wings. This effect is speculation on my part because none of the photos of “Eileen” show the upper wings or spine of the fuselage.
Markings
To create the artwork for my decal I traced a photo of the aircraft’s noseart onto paper. This tracing was then scanned into Photoshop where I edited the details and added color. The image was scaled in Powerpoint and printed on Testors clear decal paper using a Hewlett Packard Deskjet printer set to highest resolution printing. The decal was left to dry overnight and then sprayed with several coats of Testors Decal Bonder (clear lacquer). A decal was also made for the nameplate. It identifies the pilot – Lt. F.E. Oiler, as well as the crew chief – S/Sgt C.O. Clark.
Because decals printed on inkjets can be rather translucent (black and other dark pigments being exceptions), I decided to apply my decal to a white base painted earlier on the model.
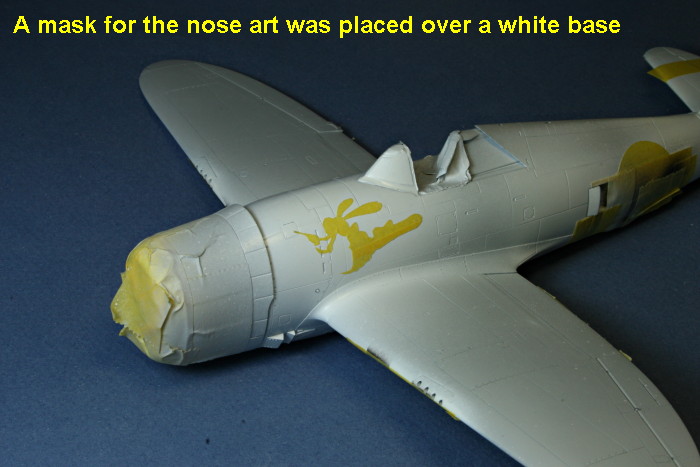
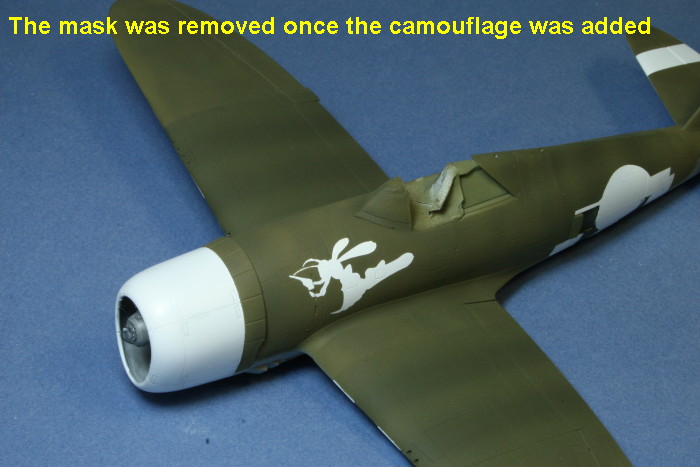
I created a mask from Tamiya tape cut in the shape of the artwork and positioned it on the model prior to applying the upper camouflage. When the camouflage was complete I removed the mask and clear-coated the model in Future in preparation for the decal. After applying the noseart decal and letting it dry thoroughly, I touched up the paintwork around the edges of the wasp and lettering.
I used Tamiya’s decals for the checkered cowl and national insignias, Superscale decals for the fuselage letters, and Aeromaster decals for the serial number. A photo revealed that the blue trim on the trailing edge of the port insignia on the fuselage was missing.
Although on close inspection home-made decals may fall short in terms of quality compared to those made by professional companies, they provide modelers with an inexpensive option for creating schemes for which there are currently no aftermarket decal options. Consider giving it a try.
Outdoor images were taken with a Nikon Coolpix 5400 digital camera. The “unsharp mask” tool of Adobe Photoshop was used to restore some of the clarity and crispness lost during image compression. The “blur” tool was used to help merge the base with the natural background. Indoor construction shots were taken using a tripod with a Canon EOS 30D fitted with a macro lens.
Model, Images and
Text Copyright © 2008 by Ian Robertson
Page Created 17 January, 2008
Last Updated 17 January, 2008
Back to HyperScale
Main Page |
 Home
| What's New |
Features |
Gallery |
Reviews |
Reference |
Forum |
Search
Home
| What's New |
Features |
Gallery |
Reviews |
Reference |
Forum |
Search