|
Academy 1/48 scale
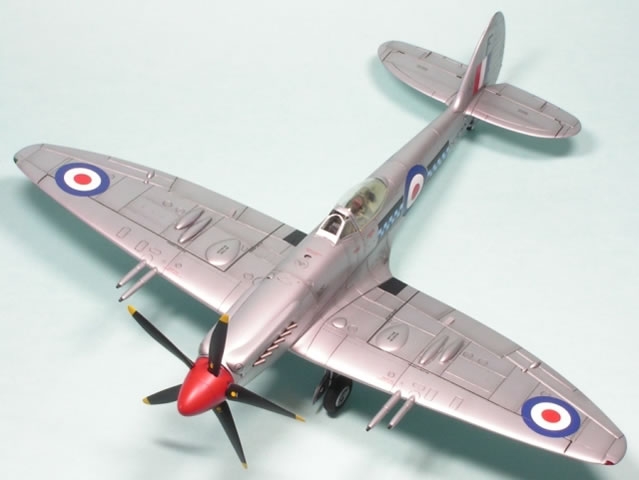
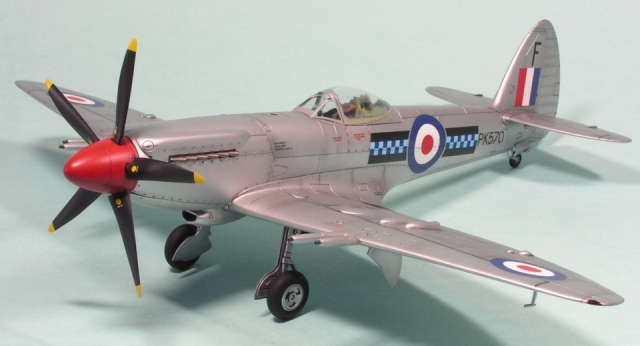
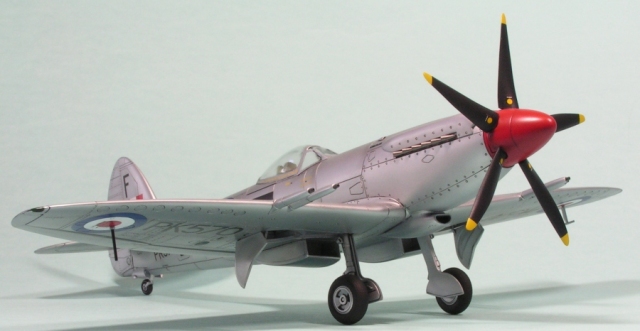
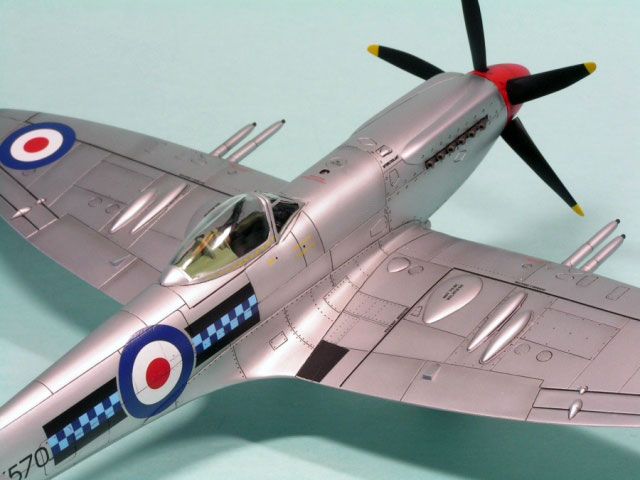
Supermarine Spitfire F.22
by Jon Bryon
|
Supermarine Spitfire F.Mk.22 |

Airfix's 1/48 scale Spitfire F.22/24 is available online from Squadron.com
This Airfix late mark Spitfire was an impulse purchase whilst passing through Hong Kong. I saw it on a shelf with a box insert declaring it to be a model of 'Kai Tak's last Spitfire' for only HK$45, or about £3. Bargain! Strangely, the box art shows a Hong Kong based F.24 flying over distinctly non-Hong Kong-like scenery. This is the third version of this kit I've built so far.

As my time in China neared its end, I needed a quick build that wouldn't take more than a few weeks. This kit fitted the bill, with good engineering, fine detail straight from the box, and a low parts count. I had to rush it to get it built, taking five weeks to complete, which for me is pretty fast. Consequently, it is rougher than I'd like; the paint certainly isn't as smooth as it should be.
My only addition to the cockpit was some seatbelts made from metal foil and copper wire. The whole assembly was painted in Mr Color British Interior Green and installed before the fuselage halves were brought together. All effort in the cockpit was pretty much wasted as nothing below the cockpit sills is visible through the coke-bottle thick canopy. The fit of the fuselage halves was fine; I used superglue for the main assembly and as a filler afterwards to tidy up the seams.
Once the fuselage was together I added the upper wings using polystyrene cement. The fit was fine and the wing roots just needed a light sanding and rescribing to remove evidence of the join. The lower, one-piece wing was test fitted and found to foul with the bottom edge of the rear cockpit bulkhead. The bulkhead was sanded back and the lower wing attached. The fit was okay, but some superglue was required as a filler where the wing met the lower rear fuselage, followed by some careful rescribing. I posed the flaps up, and they are a little short spanwise, but I left this uncorrected. The airframe was completed by adding the upper nose bulges, the lower nose cowling (which required some adjustment and sanding, since it's a little too narrow towards the front), the various intakes (which all fitted beautifully), rudder and the tailplanes (also an excellent fit).
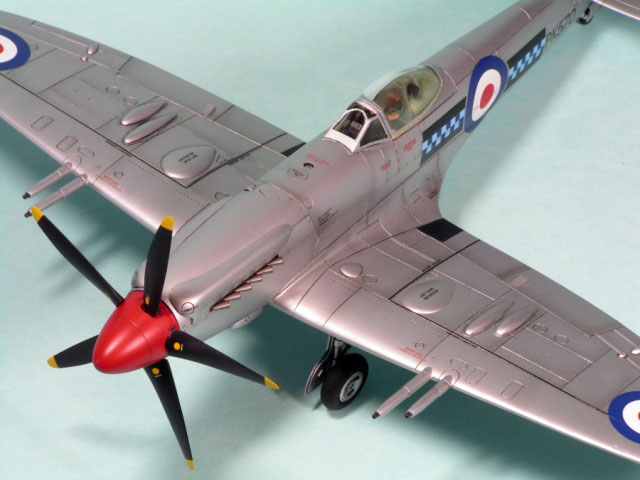
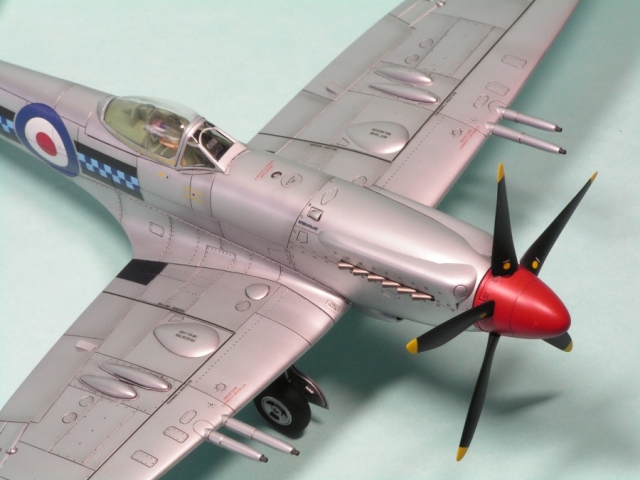
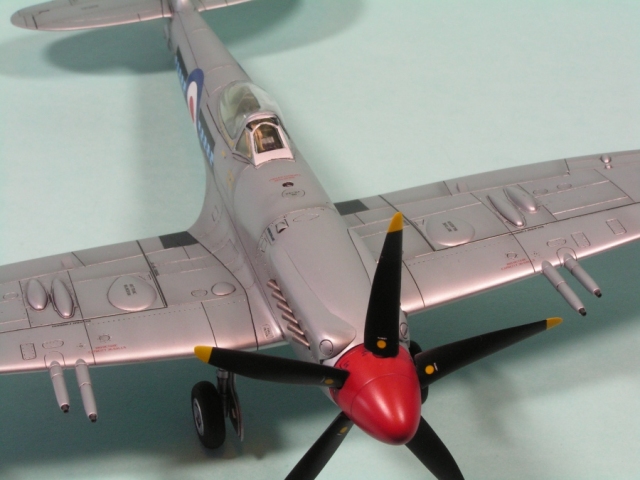
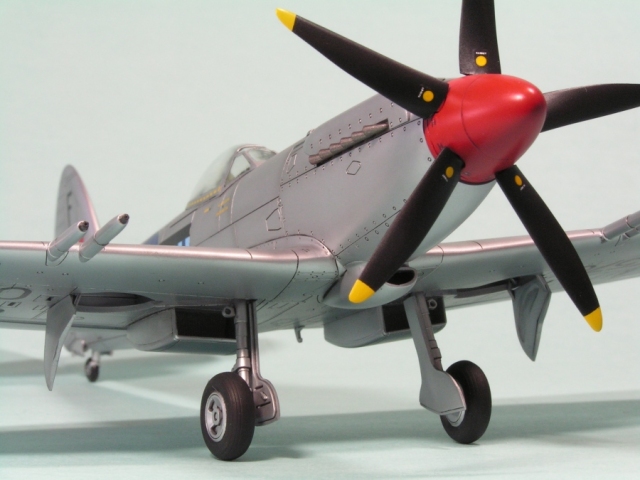
Added extra detail was minimal. The exhausts were drilled out (painted and added separately at the end of the build), as were the cannon barrels (added before painting). The prop was built and painted without any fuss, as was the undercarriage. Note that if you want to add the underwing weaponry, you will have open up holes in the lower wing; Airfix neglect to mention this in the instructions.
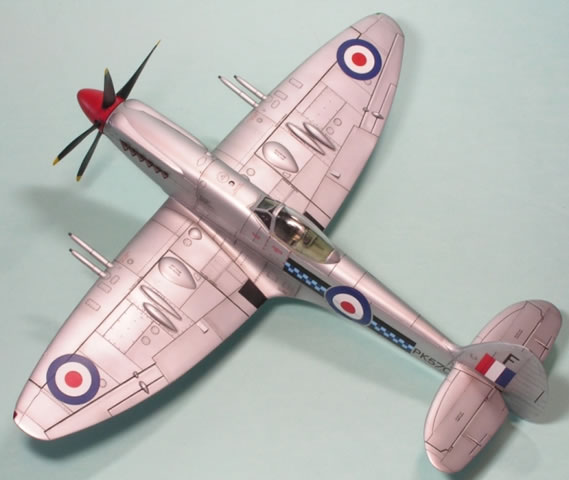
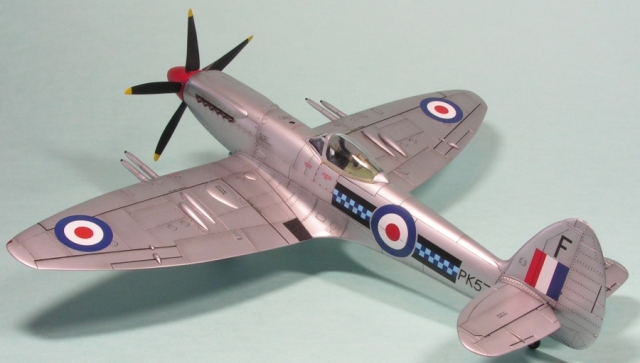
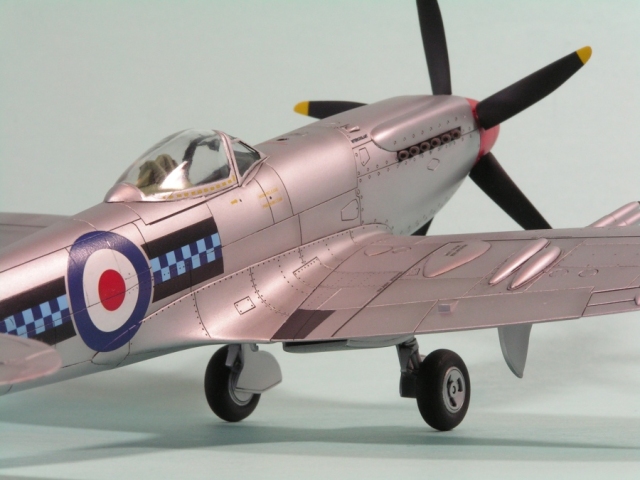
Thus the model arrived at the painting stage very rapidly. I knew before commencing the build that I wanted to have a silver Spitfire in my collection, which limited my choice from the kit decal sheet to the example from 603 Squadron. Close examination of the Airfix decals was disappointing. The 603 squadron markings around the fuselage roundels were badly out of register. Since I am not fond of Airfix decals anyway, I opted to purchase replacements. A quick search on Hannants' website uncovered some Eagle Strike markings for late mark Spitfires, with a 603 silver example included, and so these were swiftly ordered and delivered. Painting then commenced.
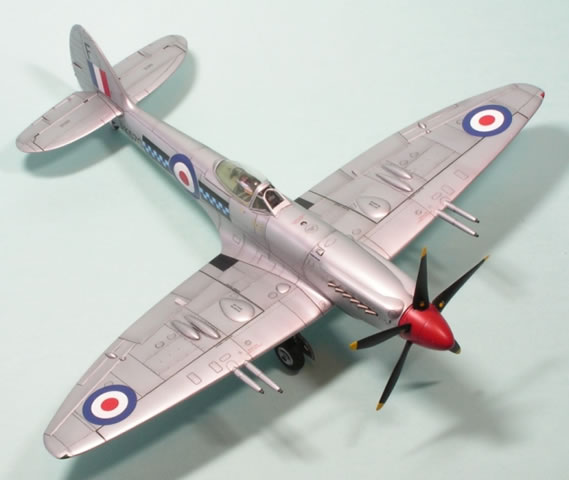
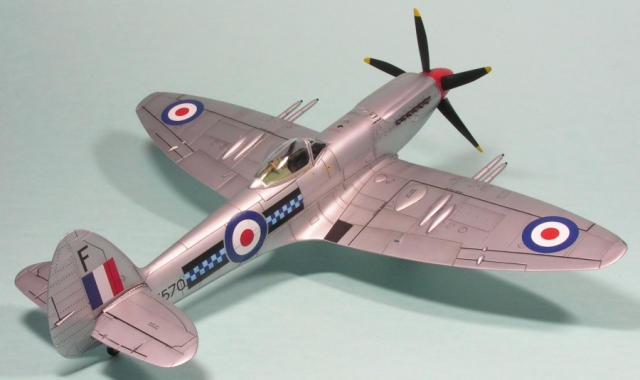
My standard preparation procedure was followed: the model was polished using Tamiya polishing compounds applied with an electric toothbrush, cleaned using washing-up liquid and water, then primed with Mr Surfacer 1000. Since silver Spitfires were painted, rather than natural metal, I wanted a slightly rough surface to try and make the final finish look more like paint. In retrospect, Mr Surfacer 1000 was too grainy and I should have used 1200 for a smoother finish. The only silver paint I had access to was Mr Color Silver. This is great paint, but rather bright and shiny. The whole airframe was sprayed silver and then I experimented by post shading with Mr Hobby Color Smoke, using a mixture of freehand and masked airbrushing along the panel lines. This was an experiment and not one I count as much of a success; I think the final effect is rather too extreme and patchy. Nevertheless, following my policy of not redoing paint work, I left it and applied a gloss coat of Johnson's Klear. An oil wash, using cheap black oil paint thinned with Zippo lighter fluid, was run into all the recessed detail using a fine brush and the excess removed after 10 minutes with a clean cotton cloth.
The decals were applied using Mr Mark Setter and Microsol. In my experience, the most frustrating aspect of decalling is the inconsistency of my results. For example, using exactly the same procedure, one of the underwing roundels sucked right into the recessed detail, whilst the other remained resolutely flat. Grrrr! The decals are very thin, adhered well and exhibited no silvering. Eagle Strike provide most but not all of the stencils; some were sourced from the Airfix sheet. Eagle Strike note that many late Spitfires didn't carry stencils, but a photo of PK570 from www.abpic.co.uk (see http://www.abpic.co.uk/photo/1035920/) clearly shows quite a lot of stencils (although not quite the same as on the kit!). An oil wash was applied over the decals where they crossed recessed detail.
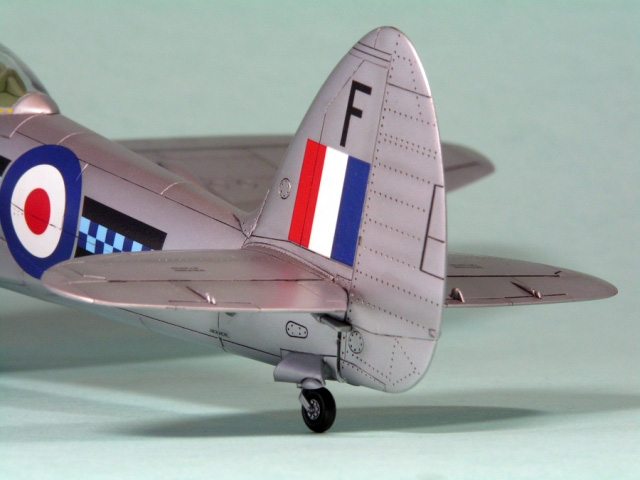
As a note of interest, the markings supplied by Eagle Strike do not match the photo of PK570 linked to above. The squadron markings supplied are over-sized (as noted in the instructions), but the photo shows them to be much smaller, with the serial completely forward of the tailplanes. I also followed the Airfix placement instructions for the roundels on the wings, rather than those suggested by Eagle Strike. Furthermore, the Eagle Strike squadron markings have the checks in light and dark blue, whereas Airfix supply them in light blue and red. I have no colour references, so was unable to make a judgement as to which is correct. I am also aware that aircraft markings change with time and that PK570 may have carried out-sized markings at some other time compared to when the photograph was taken. Of interest in the photo is that the panel lines are quite visible.
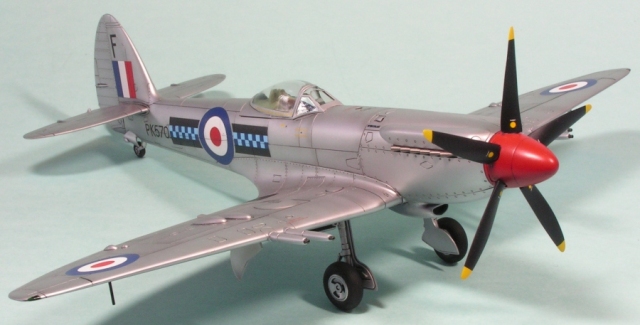
In an attempt to reduce the shiny glare of the silver paint, an overcoat of Polly Scale Matt and Satin varnishes was airbrushed over the entire airframe. I always do this after all the small parts have been added (undercarriage, doors, pitots, exhausts, etc.) to tie the finish together and to allow any glue at the joins (which is glossy) to be matted down. Fitting the undercarriage legs was an excercise in frustration and simply a case of trial and error until they clicked into place. Once the varnish was on the only items remaining were to remove the canopy masking, add the wheels and apply some gloss varnish to the lights. Unfortunately, the masking on the windscreen went awry and I had to paint in the very thin silver arched frame using my single, ancient fine brush, followed up by some judicious clean-up with a toothpick. It doesn't look great... The canopy is very thick and the model would definitely benefit from a vacuum-formed version.
This was a rushed build with some resultant rough areas. However, the Spitfire to my eyes is such an attractive aircraft, even in this late mark form, and the silver finish and red spinner complement it very well. One error I noticed far too late is that the wing trim tabs are scribed on the upper wing surfaces, but not on the underside. Nevertheless, the kit is, in my opinion, the best from Airfix (even better than the Lightnings) and I look forward to completing the quartet with the Seafire FR.46 I have waiting in the stash to be built.
Model, Images and
Text Copyright © 2008 by Jon Bryon
Page Created 29 May, 2008
Last Updated 29 May, 2008
Back to HyperScale
Main Page |
 Home
| What's New |
Features |
Gallery |
Reviews |
Reference |
Forum |
Search
Home
| What's New |
Features |
Gallery |
Reviews |
Reference |
Forum |
Search