|
Pacific Coast Models' 1/32 scale
Spitfire Mk.IXc
by
Brett Green
|
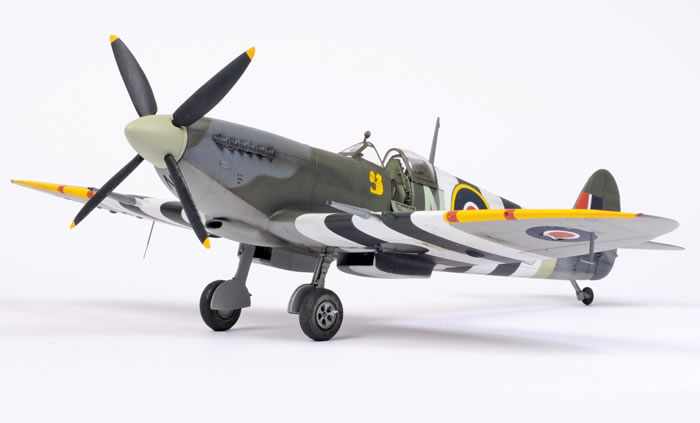
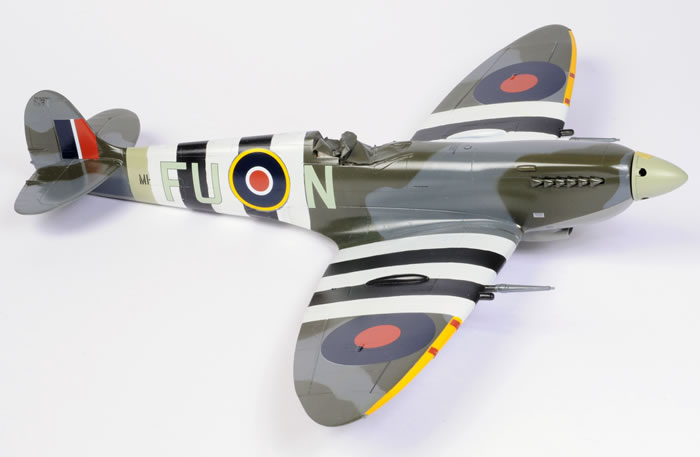
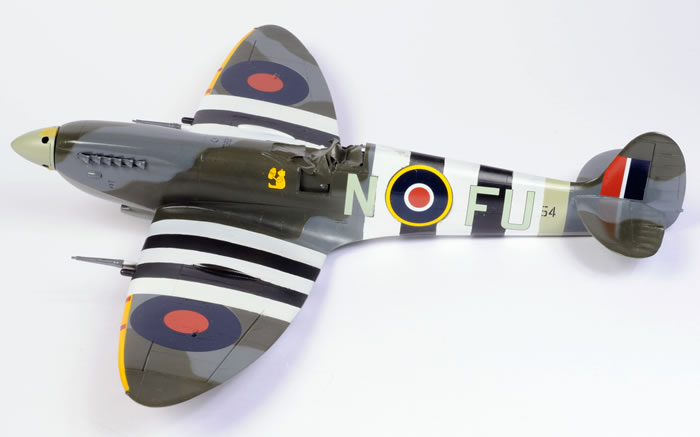
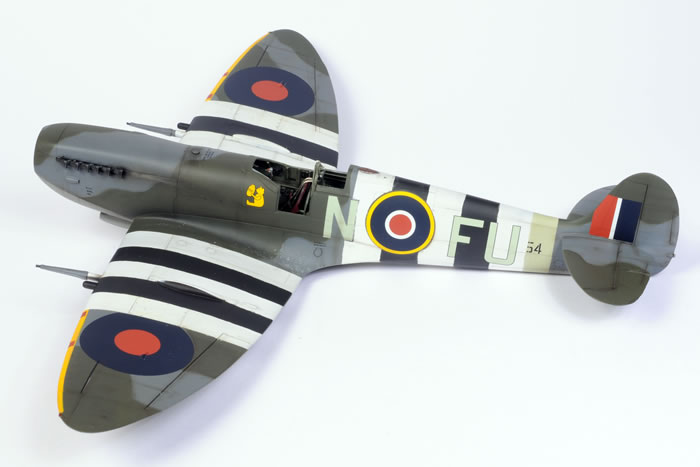
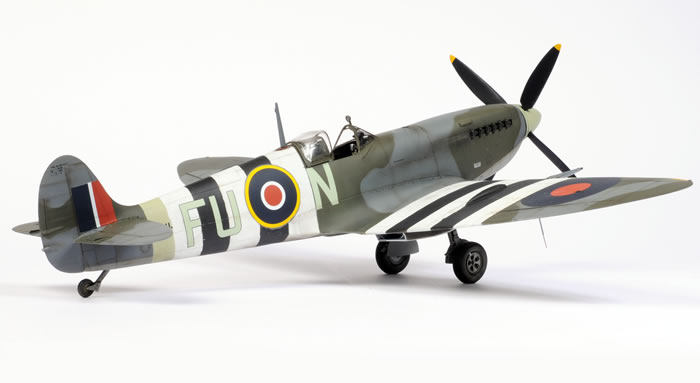
Supermarine Spitfre Mk.IXc
453 Sqn. RAAF, June 1944 |

HyperScale is proudly supported by Squadron.com
Background
The Focke-Wulf Fw 190 asserted its authority as soon as it appeared over the Channel Front in September 1941. It was so clearly superior to the Spitfire Mk.V that RAF Fighter Command curtailed operations twice - from November 1941 to March 1942, and again from 13 June 1942, due to unacceptably high losses against the Luftwaffe's "Butcher Bird".
The Rolls-Royce Merlin 60 series engines would offer the Spitfire the essential edge it needed to balance the scales against this new foe, but the high altitude Spitfire Mk.VII and the unpressurised Mk.VIII were still many months away from production.
An interim proposal was therefore made to provide a suitable solution in a more timely fashion. The Merlin 61 engine would be fitted to the existing Spitfire Mk.V airframe, matching the Fw 190s performance at medium and high altitudes. This aircraft was known as the Spitfire F.Mk.IX, Type No.361.
The resulting Spitfire retained the clean lines of the earlier Mks. I, II and V, but featured a longer and modified fuselage to accommodate the bigger engine, revised intakes, radiators and oil coolers, and a four-bladed propeller to handle the greater power.
The Spitfire Mk.IX underwent a number of design refinements, engine improvements and general modifications during production.
Although initially conceived as a stop-gap measure, the Spitfire Mk.IX and the essentially similar Mk.XVI (powered by a Packard Merlin engine) eventually became the most numerous of all Spitfire variants with more than 7,000 delivered to the RAF, the VVS and other Allied air forces.
The Spitfire Mk.IX continued in front line service until the end of the Second World War.
Pacific Coast Models' 1/32 scale Spitfire IXc in the Box
Modellers have been waiting a very long time for a 1/32 scale Spitfire Mk.IX. Until now, our only options have been expensive resin or vacform conversions requiring considerable skill and effort.
At last, we have a high quality, multi-media 1/32 scale kit of this vital Spitfire variant.
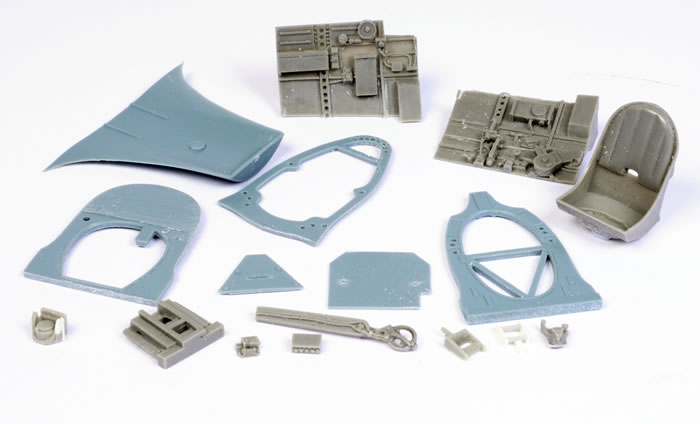
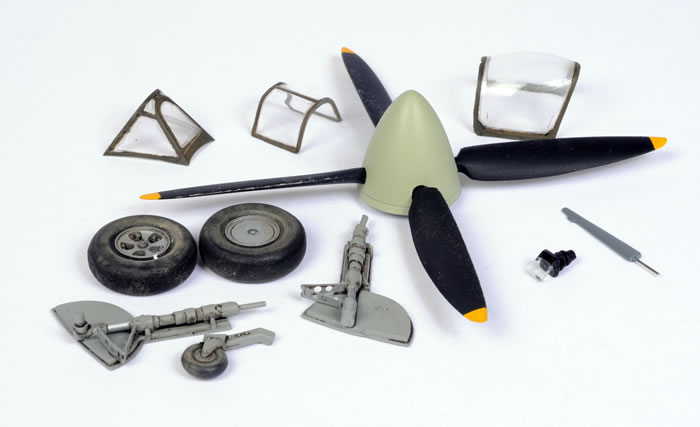
Pacific Coast Models' Spitfire Mk.IXc comprises 70 parts in grey plastic, 9 parts in clear, 21 resin parts, a colour photo-etched fret and markings for six aircraft.
The plastic parts have been moulded by Sword of the Czech Republic. The plastic is shiny, and surface detail is excellent - crisply recessed fine panel lines and selected rows of rivets are the order of the day. The overall impact is restrained and impressive.
The 21 grey resin parts are mainly used detail the cockpit, but also include wheels, undercarriage bays and two different styles of exhaust - flared and tubular. The two styles of wheels included are five spoke and covered hub. The five spoke wheels saw service on the Spitfire Mk.V, but many Mk.IXs were also fitted with this style of hub into 1944. A four spoke wheel was introduced for the Mk.IX during 1944. Spitfire Mk.IXc wheels were also sometimes fitted with a covered hub, which is the second option supplied in the kit.
The resin parts are excellent.
The colour photo-etch fret offers glorious eye-candy for the front office including a beautifully detailed instrument panel, harness straps with printed stitching detail and much more.
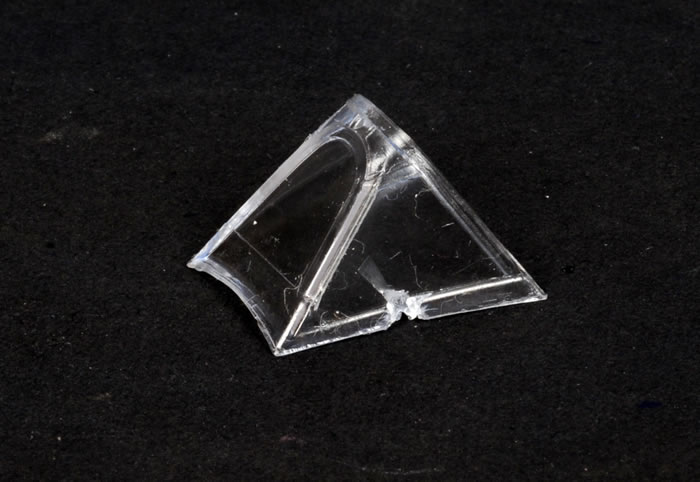
The clear parts are very nice - thinly moulded and good looking in shape.
The overall outline looks good but there are some shape issues with the propeller blades, and the undercarriage doors lack the characteristic bulge of the Mk.IX. On HyperScale's Plane Talking Forum, Roy Sutherland has also suggested that there may be some shape problems with the cross-section of the engine cowling. In general though, Pacific Coast Models' 1/32 scale Spitfire Mk.IXc most certainly looks like a Spitfire!
For more details and photos of the kit parts, check my FirstLook review on HyperScale from May, 2008.
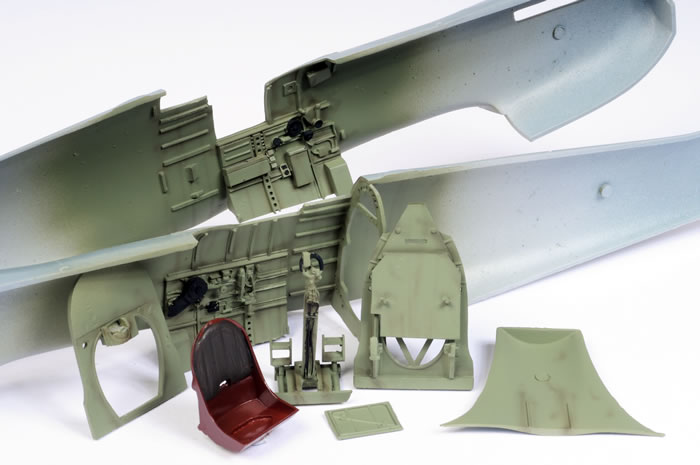
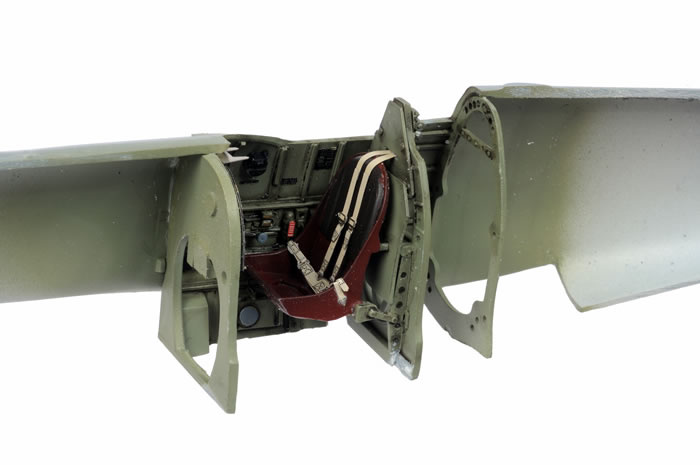
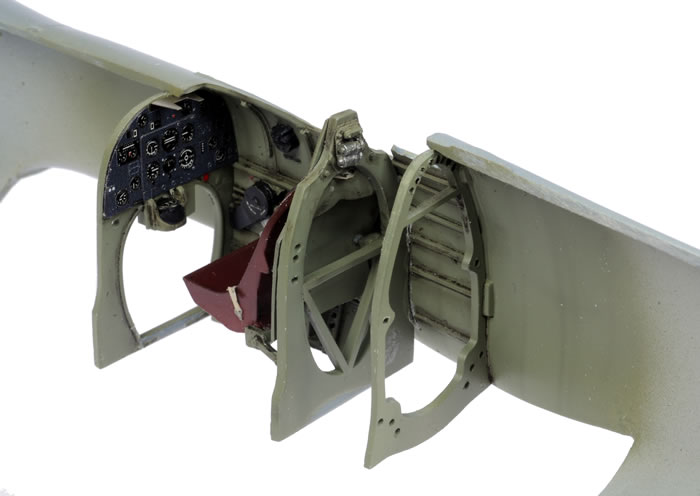
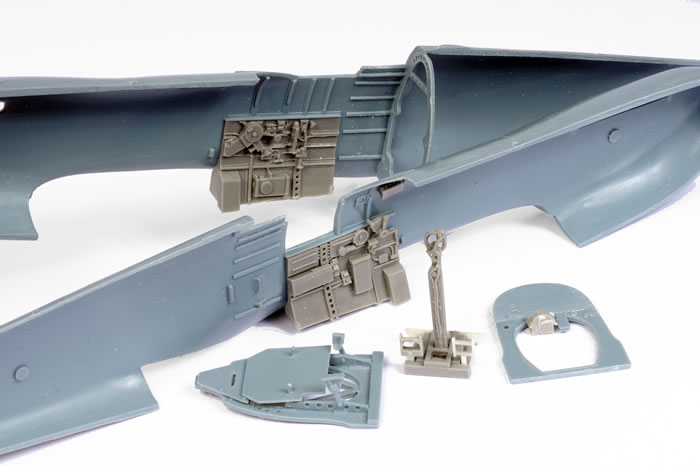
I started converntionally with the cockpit, which looks great straight from the box. The cockpit comprises a combination of resin, injection plastic and colour photo-etch from Eduard. You really won't need a single aftermarket item here.
My only problem was that I lost one of the rudder pedals during cleanup, so I had to scratch build another from plastic strip, rod and airfoil section.
Careful painting, weathering and the installation of the colour photo-etch (using Gator Glue) really brings out the best in the front office. Xtracrylix paint was used for the British Interior Grey Green colour, while the Bakelite seat was painted using Tamiya XF-10 (which has gone slightly glossy in the bottle over time - perfect for the sheen of this plastic ancestor).
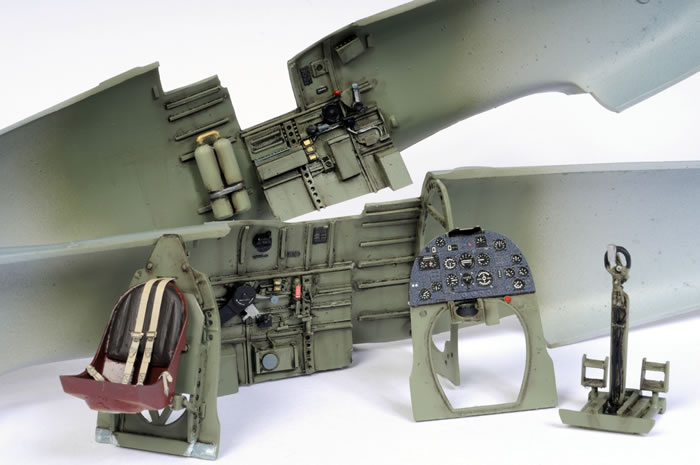
Some fiddling and trimming was needed to get the bulkheads snugly between the fuselage halves, but it was no great drama - just a matter of test-fitting and adjusting as required. The most important step is to carefully remove any flash from all parts before assembly.
The resin exhausts were installed prior to the fuselage halves being joined. This actually proved a bit tricky, as they are too wide to fit from the inside and, at first, they also seemed to big to fit from the outside. In the end, I trimmed the slots in the fuselage halves and just managed to squeeze the fishtail exhausts in from the outside using brute force, but not before breaking off one of the stacks! This rogue exhaust was glued in place once the others had been fitted.
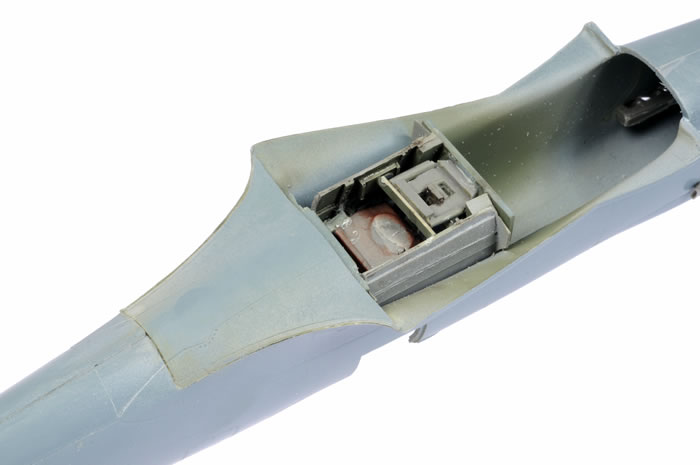
The lower fuselage "gull wing" fillet fitted quite well, but I could not figure exactly how the combined rudder and control column assembly was supposed to be installed. The rudder pedals should be just forward of the instrument panel bulkhead and the control column just aft, but the part does not seem to be either long enough or narrow enough. Next time, I think I will cut the part into two before assembly so that I can glue the front section with the rudder pedals in front of the instrument panel and the control column aft.
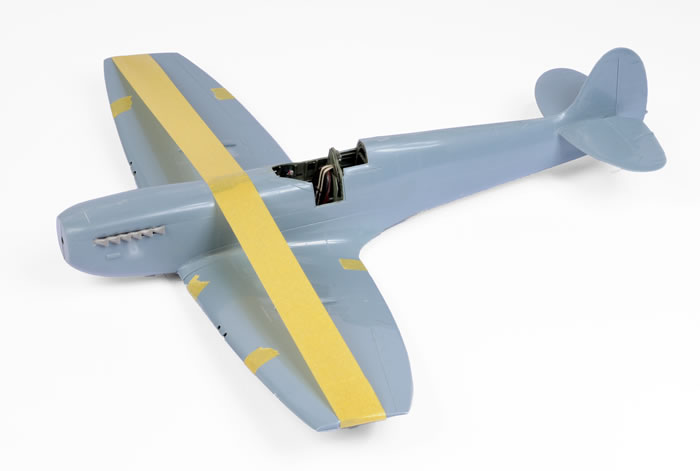
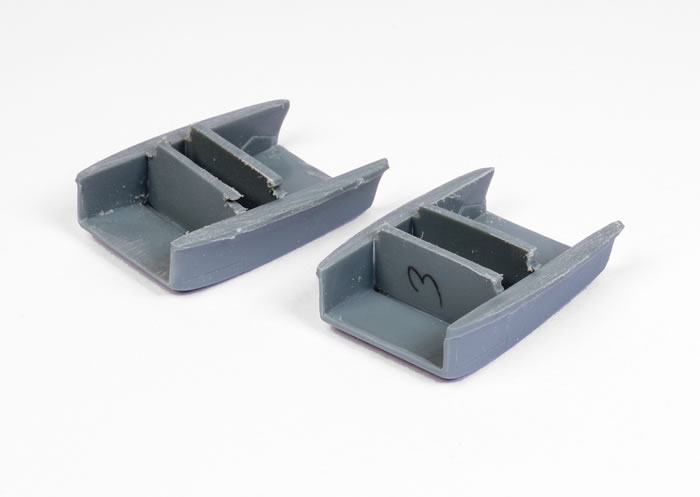
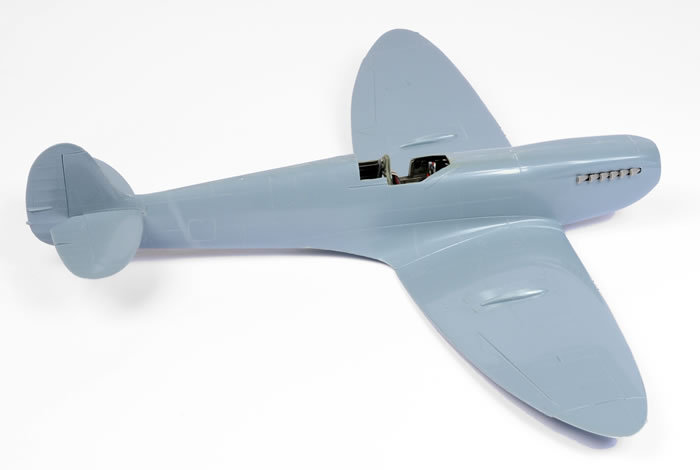
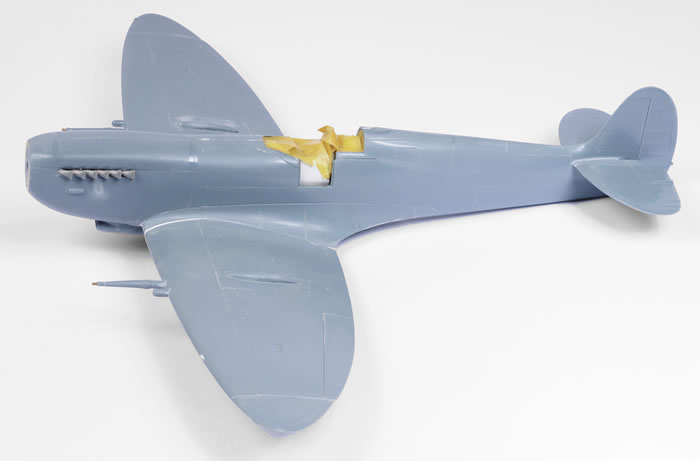
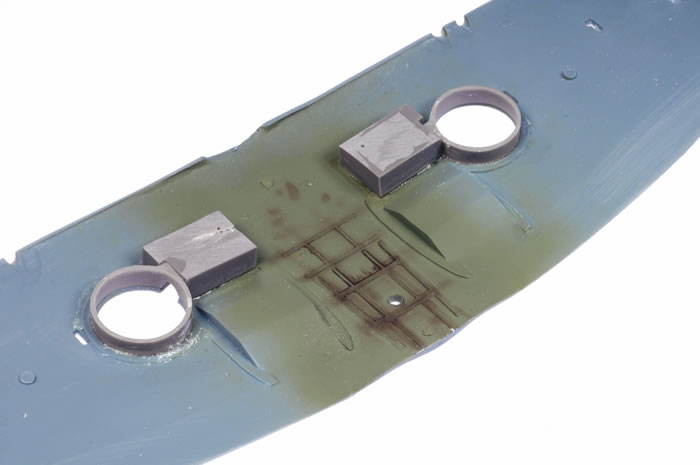
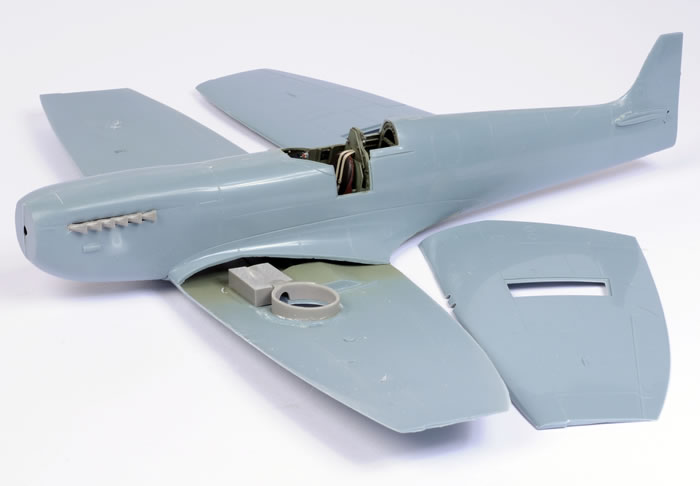
I decided to glue the lower wing assembly onto the fuselage before adding the upper wing halves. I figured this would give me the best chance to maintain the correct dihedral, and would also let me get the fit just right with the lower wing fillet and the lower engine cowl. Note the resin wheel well parts installed in the picture below. They do not interfere with the fit of the upper wing, although a little effort with a razor saw is required to remove the casting block from the top of the gear leg covers.
The openings in the bottom of the wing for the machine gun ejector chutes are solid, so these need to be drilled out of the stout plastic before the wings are finally assembled.
With this minor modification made, the upper wing halves were offered to the lower wing.
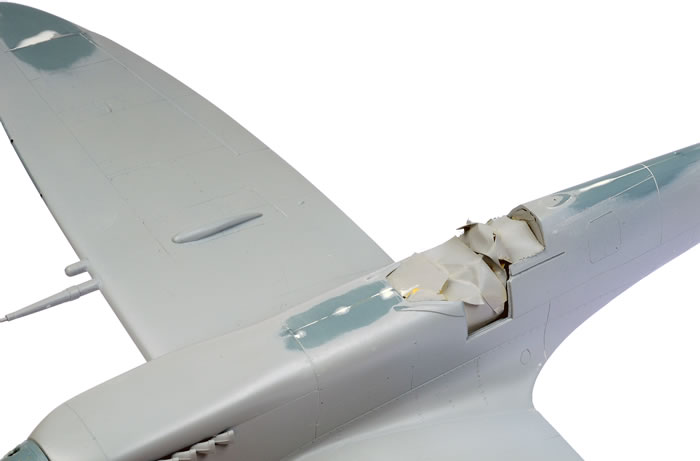
The fit of the main components was very good indeed, especially for a large, short-run kit. There were no gaps at all at the taiplane or the starboard wing joins. There was a wedge-shaped gap on the port side of the wing. This was later filled with Milliput. The only other areas requiring filler were an uneven step at the bottom of the wing where it met the lower cowl, and a few sections that suffered ragged damage when the sprue connectors were cut off.
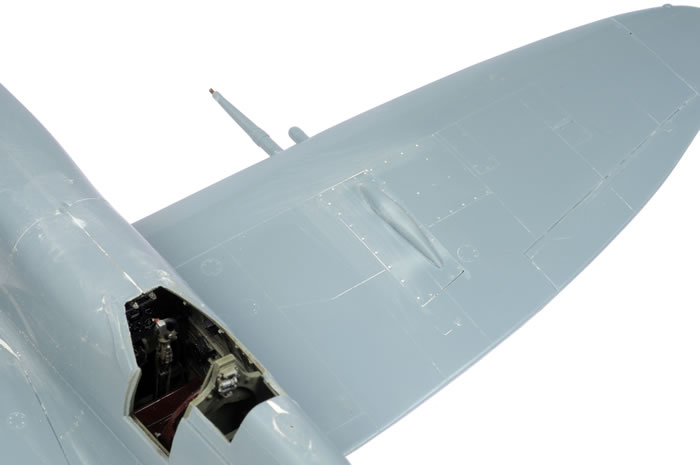
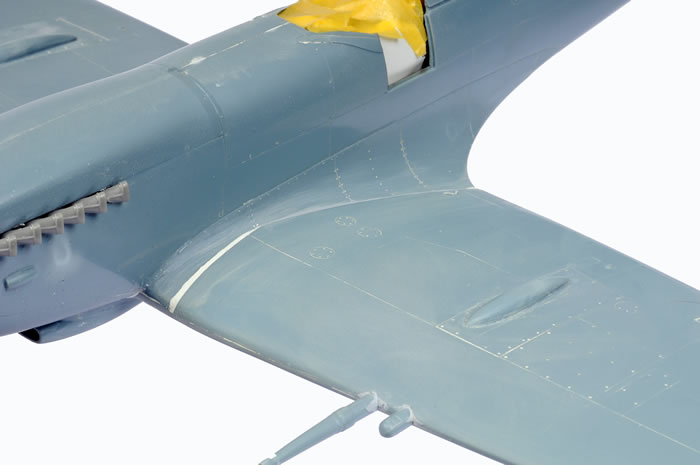
The blank panel for the wing cannon was a little too flat to properly fit the curve of the upper wing, so I bent the parts until the match was better. You can see the stress marks in the photos where I bent the plastic. The naorrow bulges were used for this late Mk.IXc, and they needed a little bending too.
The model was ready for filling and sanding when I took a closer look at the cannon bulges. I was not entirely convinced by their shape in the first place, appearing to be a bit too symmetrical from front to rear, so I had slimmed down the back of each side before gluing them in place. There was still something wrong though. On closer examination, I realised that I had stupidly glued the starboard side bulge on the outside panel instead of the inboard panel!
There was only one thing to do - strip off the bulge and relocate it to the correct position. This might be easier said than done though, as it was held securely in place with liquid glue.
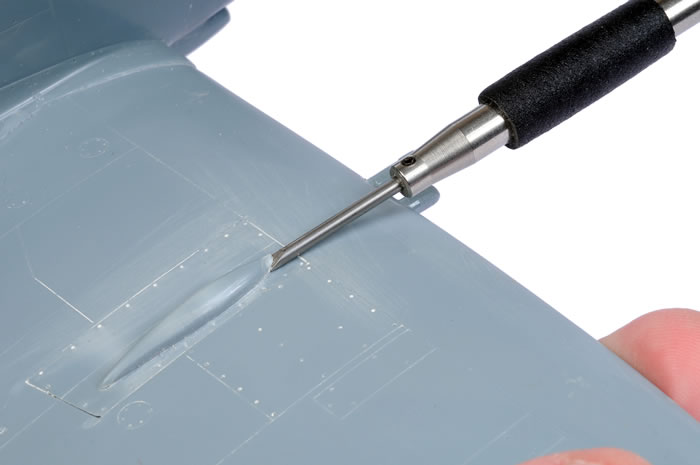
I broke out my Mission Models Micro Chisel. This was the perfect tool for the job. Fitted with the wide chisel attachment, I could get the surgically sharp edge under the front of the bulge and hopefully lift the whole thing off with minimal damage.
Well, there was good new and bad news. The excellent Micro Chisel was even more effective than I had hoped. After a little wiggling and one hard push, the chisel ripped through the glue below the bulge and flipped it into the air, totally intact.
The bad news was that the stainless steel chisel continued its journey apace, past the trailing edge of the wing and burrowing efficiently into my left hand between thumb and forefinger. I pulled the chisel out in an immediate reflex action.
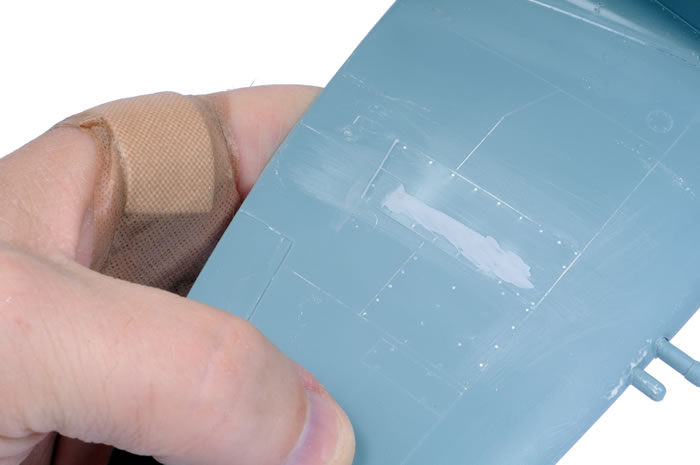
"Oops", I thought, "That'll be a bad one". Before the bleeding started, I could see an attractive 1 cm blue line below the skin, tracing the journey of the steel chisel shaft through my hand. It hardly hurt though. This is the advantage of wounding yourself with a truly high quality tool!
Fortunately, the entry point was quite small as the head of the chisel had gone straight in. Also fortunately, I had missed any nerves or arteries. Three Band-Aids and a bit of pressure quickly stopped the bleeding and intermission was over.
Back in my workshop, I started crawling on the floor to find the far-flung bulge. Luck was on my side here too. The bulge was still in very good shape, just needing a little sanding of the base before it was ready to reposition on the wing.
In preparation, I brushed some Tamiya Surfacer onto the slightly scarred surface where the bulge had been.
When dry, the Surfacer was sanded flat and the bulge secured to the inboard panel with Tamiya Extra Thin Liquid Cement.
I managed to ruin one cannon barrel end as I was trying to hollow it out withthe tip of a a hobby knife. I replaced both barrel stubs with brass tube to cover my mistake.
In preparation for the primer coat, the cockpit was masked and I finished off filling, surfacing and sanding.
There was a slight step at the top and bottom of each of the wing tips that was levelled off with Tamiya Surfacer. I also wiped a smear of Tamiya Surfacer on the join lines for the horizontal tail planes and rudder.
Sanding on the cowl deck and the fuselage spine had damaged the fine recessed panel lines, so these were rescribed. A thin brush-coat of Tamiya Extra Thin Liquid Cement removed the burrs from the freshly scribed lines.
The biggest filling job required (and really the only gap of consequence) was a wedge at the leading edge of the port side wing root.
This was first flooded with gap-filling super glue, then finished off with Milliput White, a two-part epoxy putty that may be smoothed and shaped for up to half an hour after application. Very handy stuff.
Painting
 Don't forget to drill out the two .303 machine gun ports in each wing leading egde before painting. Don't forget to drill out the two .303 machine gun ports in each wing leading egde before painting.
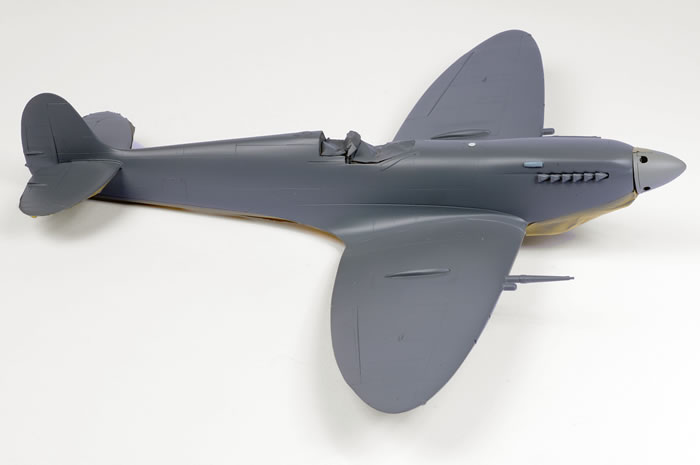
Tamiya Grey Primer was sprayed on the model straight from the can. This highlighted some persistent problems. The step between the starboard wing and the wing tip was still quite visible, so this was subjected to further sanding and more substantial filling with Milliput. The upper fuselage seam line still looked untidy too, so I used Milliput to smooth the joins once and for all.
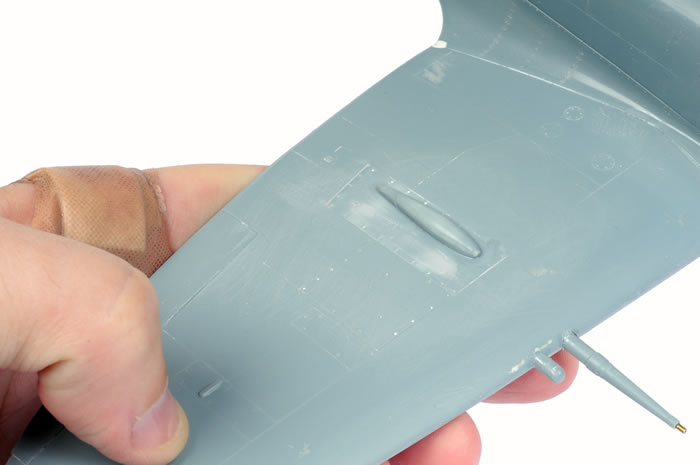
I also addressed some untidy business underneath the model. The joins between the gull wing fairing and the bottom of the fuselage was re-filled with Milliput and, when thoroughly set in around four hours, the curved panel lines were rescribed. The bottom of the supercharger intake was also filled and sanded smooth.
The lower surfaces of my model were painted with Tamiya's AS-11 Medium Sea Grey straight from the rattle can. The finish was smooth and satin - just what I was hoping for.
The lower surfaces were masked with Tamiya tape, and the fuselage, wings and tailplanes received a base coat of Tamiya Ocean Grey. This time the paint had been decanted from the spray can into a jar. The paint had been in the jar for a few weeks now, and was starting to thicken considerably, so it was mixed with around 70% lacquer thinners to restore its milky consistency.
After I had sprayed the first colour coat I noticed that I had not attached the compressor intake bulge to the starboard side of the top cowl. Although the part is included in the kit, its installation is not mentioned in the instructions. I carefully glued this onto the painted cowl.
I also realised that I had not allowed for the filler cap on the cowl deck, in front of the windscreen. On the real aircraft this was recessed. However, I thought that would be too difficult to replicate at this late stage (i.e. I was too lazy to try), so I had the choice of scribing or attaching a very thin raised filler cap. I chose the latter. The cap was punched from thin scrap plastic using my Waldron Punch and Die set, and surrounded by four fasteners, punched with a jeweler's beading tool.
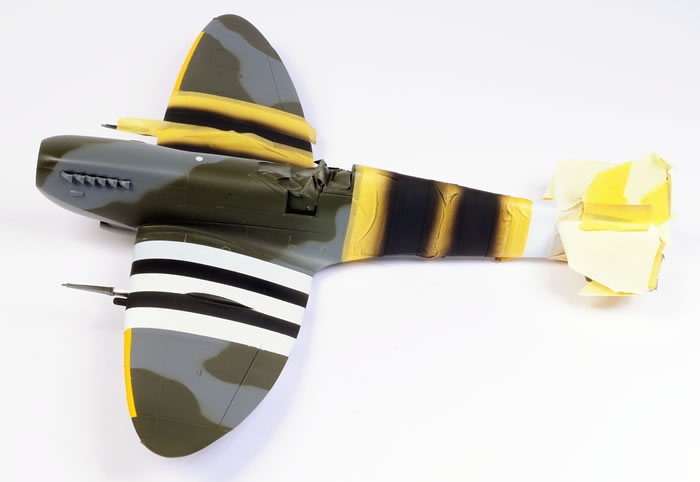
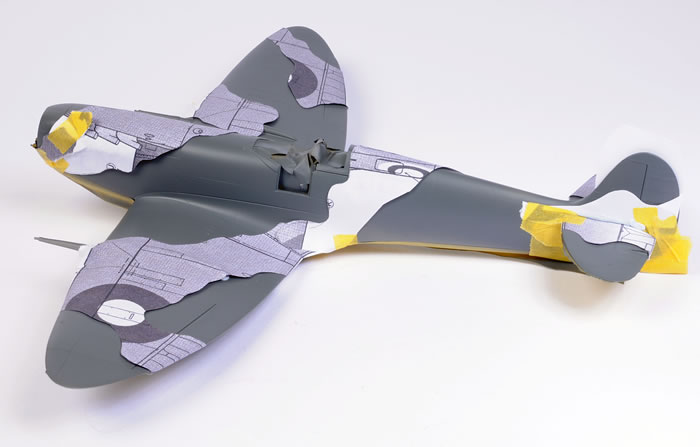
The upper surface camouflage plans from the kit instructions were scanned, scaled up to 1/32 in Photoshop, increased in contrast and converted to monochrome before being printed and cut into masks. These were attached to the model using small blobs of Blu-Tack underneath, and Tamiya tape at the edges, in preparation for the disruptive camouflage colour of Dark Green. I did not worry about camouflage masks for the mid-rear fuselage, as this would be completely covered by invasion stripes.
Mr Color RAF Dark Green was used for this colour. Mr Color is also a lacquer paint.
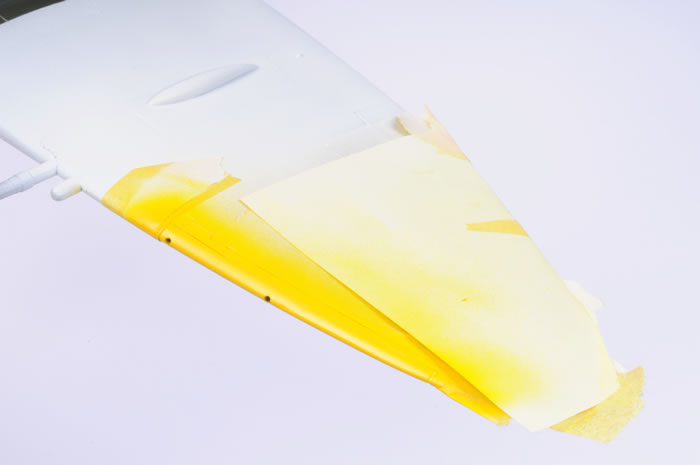
Once dry, the camouflage colours were masked in preparation for the dominant full invasion stripes. The leading edge ID stripes and an allowance for the Sky-coloured fuselage band were also masked at the same time. The white base paint would make a good undercoat for the pale leading edge stripes and Sky band.
Tamiya's Fine White Primer was used for the white coat. This was sprayed straight from the can, at a reasonable distance though to avoid an obvious build up of paint at the edges of the masks.
The yellow ID stripes were sprayed using Tamiya's acrylic Flat Yellow with a spot of Red mixed in to deliver a richer tone.
The black invasion stripes were now masked and sprayed. The colour was actually a 50/50 mix of Tamiya XF-1 Flat Black and Red Brown.

The Sky fuselage band was the last masking and painting task for the moment. I used Mr Color RAF Sky lacquer paint. While the airbrush was still loaded with Sky paint, I sprayed the spinner and backplate at the same time.
When all the masking tape was removed, the overall picture was revealed. The paint job looked very stark, but this was toned down once weathering and decals are in place.
I was not really satisfied with some of the camouflage demarcations on the fuselage, so these were revised and improved in several rounds until I was eventually satisfied with the result. I think that there are particular elements of RAF camouflage that really define the scheme. On the Spitfire, the forward cowl is one of those critical aspects. I remasked and resprayed the demarcation between Ocean Grey and Dark Green on both sides of the mid/forward fuselage.
The port-side yellow ID stripe was a bit wonky too, so this was re-masked and sprayed again.
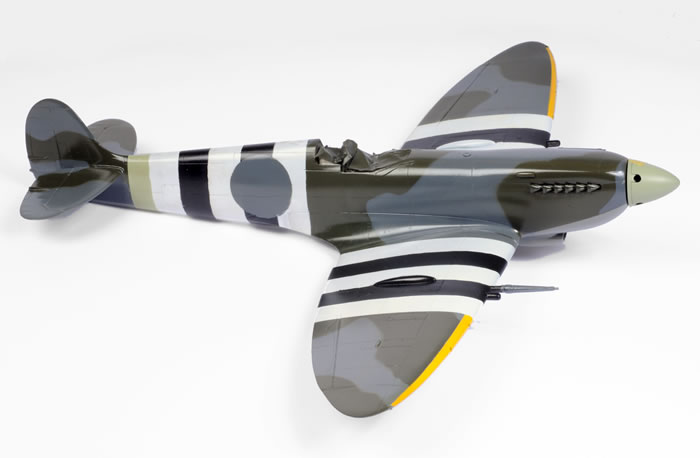
453 Sqn. invasion stripes were applied by brush, so I "randomised" the edges using a method that I also employed on my Airfix Spitfire IXC last year. I simply took a fine brush and subtly (hopefully) broke up the clean masked lines with a few wiggles and intrusions of black on white and vise-versa.
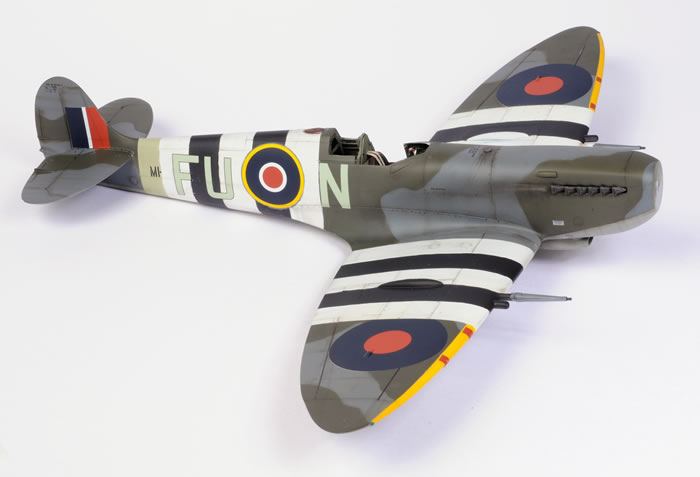
Wartime photos of these 453 Sqn. Spitfire show a slight border around the fuselage roundels and codes where the ground crew painted the stripes around the markings. To make life easier, I masked and sprayed a camouflage patch slightly bigger than the diameter of the roundels.
Two coats of Future were now sprayed, providing a nice glossy coat for the decals.
Decals
Decals were sourced from Eagle Editions' new 1/32 scale release, EC#114 Spitfire Mk.IX.
The "FU" squadron codes are printed with a black outline. This was a decent representation of the unpainted surrounds, so I did nothing further to these. On the port side of the fuselage, however, the individual letter "N" partially overlaps the forward white invasion stripe. I masked the rearmost stroke of the letter and ran a grey Letraset Promarkeralong the edge of the masking tape. With the tape removed, this left an irregular grey line hard up against the back of the Sky-coloured letter. When the decal was applied over the invasion stripe, it looked like a narrow unpainted strip between the code letter and the white stripe.
Before they were applied, the upper wing roundels were measured and cut where they would be overlapped by the invasion stripes. The same treatment was meted out to the serial numbers.
EagleCals' decals were perfectly opaque and performed flawlessly with application of Micro Set and Mocro Sol. Colours look good too (although the Sky codes are a slighty different shade to Mr Color's interpretation that I used on the spinner and fuselage band. Next time, I will wait for the decals to arrive before painting any Sky on an RAF aircraft!)
Finishing Touches
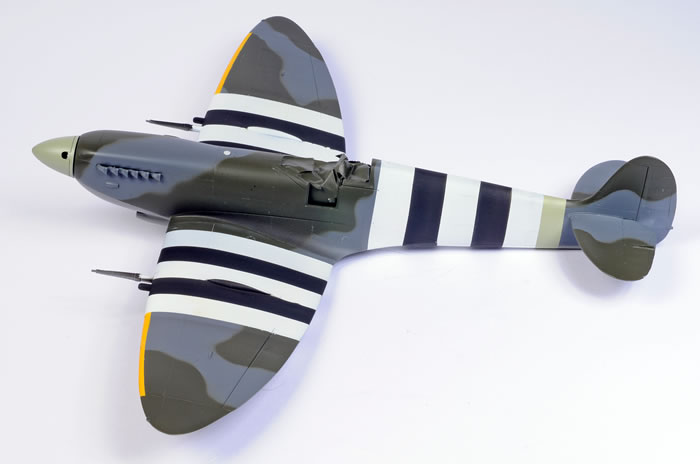
The model was given a top coat of Polly Scale Flat. Two thin applications over the gloss finish resulted in a nice flat finish.
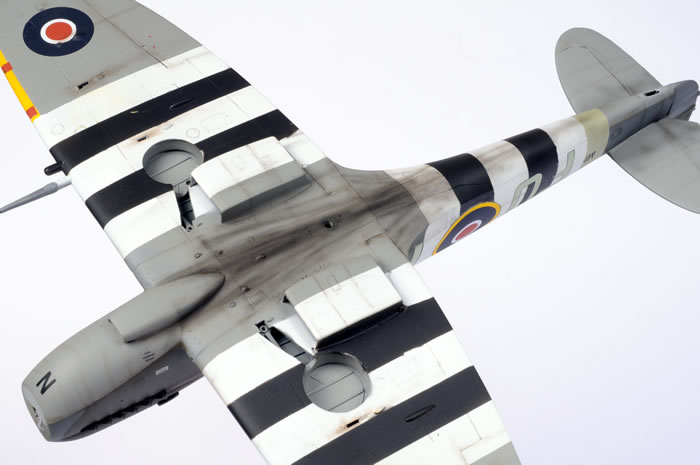
The airframe was shaded with a thin mix of Flat Black and Red Brown. This was sprayed along control surface hinge lines, selected panels, in a few random spots and streaks and along the demarcation line between the Ocean Grey and Dark Green. This slightly reduces the harshness of the sharply masked demarcation.
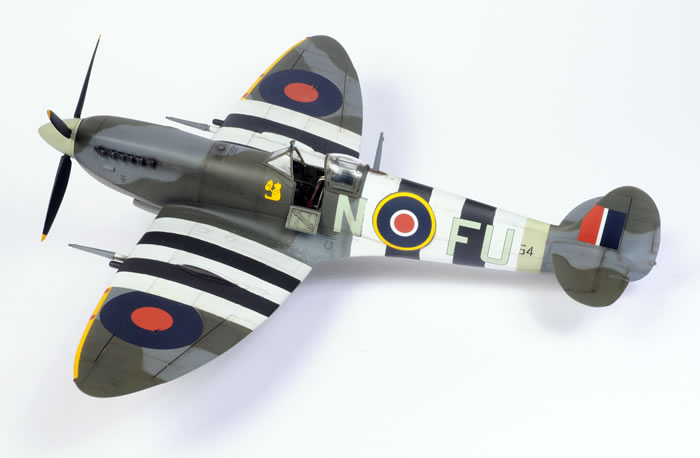
Thsi same mix was used to apply generous staining on the lower surfaces, as was frequently seen.
A silver pencil was used to apply some "chipping" to the wing walks.
The clear parts were nice but they are quite brittle, so extra care is required when removing them from the sprue. I can testify to this through bitter experience, as I managed to gouge a giant chunk from the windscreen with my sprue cutter. Repair would have been next to impossible, so I dived into a Hasegawa 1/32 scale Spitfire Mk.I which still has the Mk.V windscreen (fine for my purposes) on the clear sprue as well as the Mk.I windscreen. I was relieved to find that the Hasegawa windscreen fitted perfectly on the Pacific Coast fuselage, so my bacon was saved. The kit's sliding canopy section fitted snugly over the fuselage spine without any surgery or replacement needed.
I had a little trouble with the gunsight, which prevented the windscreen from sitting in the correct position. I extended the gunsight mount, effectively moving the gunsight rearwards and away from the windscreen. This fixed the problem. All windscreen parts fitted well, and were secured with Micro Krystal Kleer.
I had cut off the short plastic locating pins for the undercarriage and replaced them with longer, stouter brass tube. Corresponding holes had also been drilled into the wheel bays to ensure precise alignment and a strong robust fit. The painted undercarriage was now inserted and secured with super glue.
After I had finished the model, it was pointed out to me that I had glued the undercarriage oelo scissors on the back of the legs.These should be on the front, but they were only fitted to Spitfires from September 1945 so I simply removed them from my D-Day machine.
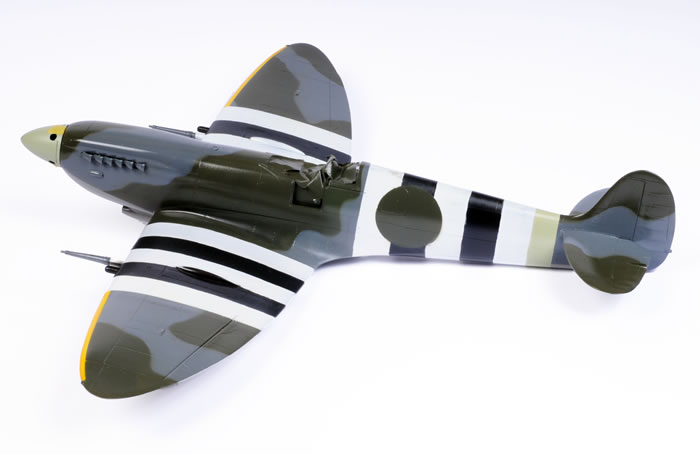
A hole was drilled in the bottom of the starboard wing for the IFF rod antenna. The antenna itself was cut from a length of industrial light filiament. The pitot tube was glued onto the other side.
The base of the aerial mast had been drilled and fitted with a fine steel wire pin. From mid-war, most Spitfires did not have an aerial wire running from the top of the mast to a rudder post - the wire was actually inside the mast and the red-brown, teardrop-shaped base was an isolator.
I really wanted to fit a cylindrical 90 gallon drop tank or a 500 lb British bomb, but I could not find a source for either.
The exhaust stacks were brush painted with Testor's Metalizer Gunmetal before receiving an oil wash (a mix of Lamp Black and Raw Umber). When the wash was dry, I simply ran my fingertip over the top to expose the shiny edges and weld beads of the nice resin exhaust stacks.
With the propeller assembly in place, the model was finished.
I am very impressed with Pacific Coast Models' first non-Italian subject.
Pacific Coast Models' 1/32 scale Spitfire Mk.IXc is well detailed, has gorgeous surface features, and is generally accurate in outline. With its comprehensive resin content supplemented by colour photo-etch, you won't have to spend a cent on after-market improvements, making the ticket price of USD$59.95 appear quite reasonable.
Due to its limited-run nature, you should ideally have had some experience with short run kits or resin accessories before tackling PCM's Spitfire Mk.IXc.
Having said that, I have built around a dozen limited-run kits in the last few years, and this would definitely be the easiest that I have worked on. Parts breakdown was straightforward and, after suitable cleanup, fit was good.
If you spend sufficient time preparing the parts and test-fitting (in other words, showing this kit the respect that any limited run offering demands), then you should be rewarded with a very attractive and detailed model of the most numerous Spitfire variant.
Model, Images and
Text Copyright © 2008 by Brett Green
Page Created 5 June, 2008
Last Updated 5 June, 2008
Back to HyperScale
Main Page |
 Home
| What's New |
Features |
Gallery |
Reviews |
Reference |
Forum |
Search
Home
| What's New |
Features |
Gallery |
Reviews |
Reference |
Forum |
Search