Czech Master Resin's 1/72 scale
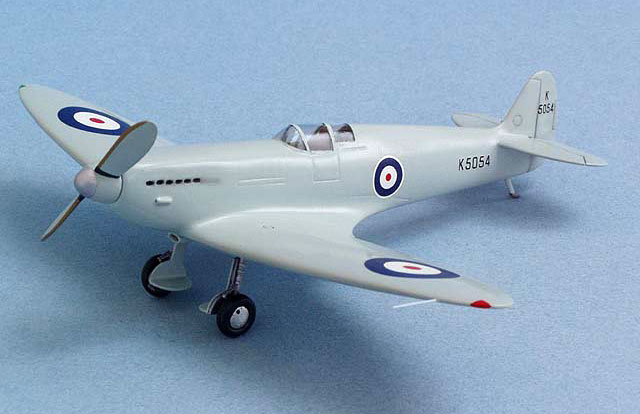
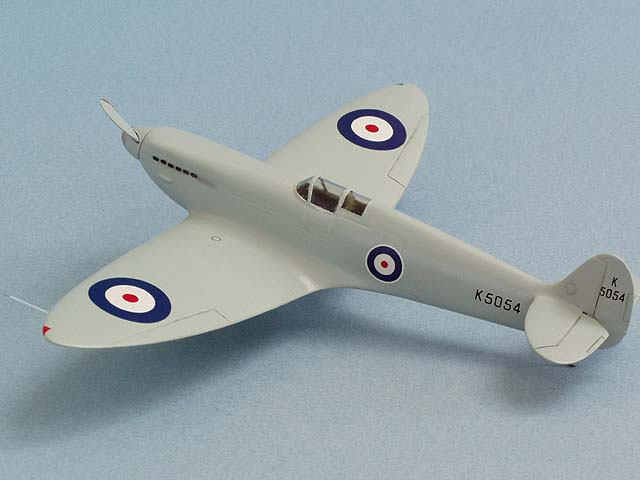
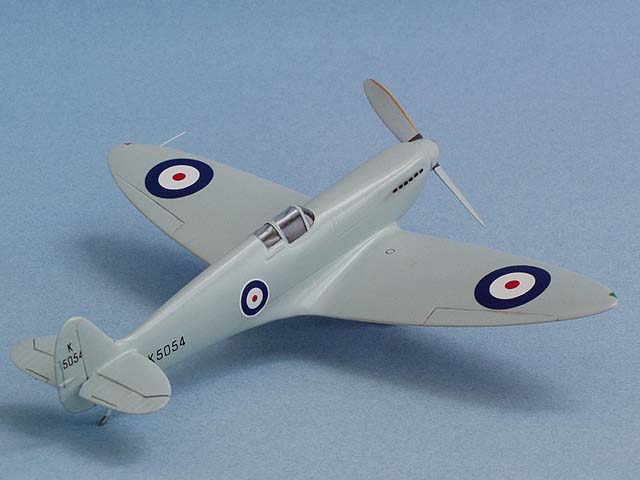
Spitfire Prototype K5054
by Bernie Hengst
|
|
Supermarine Spitfire Prototype K5054 |

Czech Master Resin's Spitfire Prototype K5054 is available online from Squadron
A friend gave me the kit to build for a review.
Twenty- nine resin parts are carefully packed in small groups and sealed in individual plastic bags. This protects them from damage in transit. Four of these parts were optional horizontal stabilizers and their separate elevators to be used instead of the fixed ones.
The parts were cleanly moulded with very few air holes. Also separately packed were two vacuformed canopies.
The instruction sheet consists of two pages in A4 format showing the construction sequence and one page of decaling instruction. The decal sheet is from MPR and is beautifully printed.
Using a fine razor saw I cut the parts from the moulding blocks and cleaned them up using emery boards and different grades of sand paper. The small parts when cleaned, were placed into small Zip-Lock bags.
The cockpit parts were assembled using Cyanoacrylate. I lightly sanded the mating surfaces of the fuselage halves on sandpaper fixed to a glass pane. The cockpit assembly, the fuselage halves and the centre wing section were sprayed with Model Master RAF Interior Green. When dry the parts received some dry brushing with thinned black paint and lightened RAF Interior Green to add some depth.
The cockpit assembly was attached to the starboard fuselage and the fuselage sides glued together using CA. Before I put the model away for the night all the seam and pinholes that I found got a light brushing with Mr. Surfacer 500 to find and fill any imperfections.
The next day the filled seams and pinholes were carefully sanded with progressively finer grades of dry and wet paper. The assembled radiator, pre-painted and masked on the inside was added to the lower wing and the wing installed after which the wing-fuselage seam was filled with Mr. Surfacer 500. The rudder was glued to the vertical stabilizer with CA.
About twelve hours later I sanded the wing-fuselage joint and added a few more drops of Mr. Surfacer 500 to low parts in the seams.
The horizontal stabilizers were added and when the glue had set Mr. Surfacer 500 was used to fill the seam on the stabilizers.
The canopy, previously brushed on the inside with Future, was cut out, the edges carefully sanded until it fitted properly. It was than attached with white glue and on the next day the canopy was masked with Tamiya Tape.
After sanding the seams, short pieces of toothpicks were pushed into the holes for the main and tail landing gear. All the landing gear doors were stuck to masking tape fixed to wooden stir sticks, wheels stuck on toothpicks, the tail skid held by a self-closing pair of tweezers and the main landing gear legs held on the axle stubs by cloths pegs.
 A coat of Tamiya White Primer, siphoned from the can, was airbrushed onto the model. This dries very fast and showed a few imperfections on the seams and a few more tiny holes on the fuselage and lower wings. To fill these I used Mr. Base White 1000 and let this dry for twenty-four hours. After carefully sanding these spots the complete model was rubbed down with previously used 600 grit dry and wet paper for a very smooth finish. A coat of Tamiya White Primer, siphoned from the can, was airbrushed onto the model. This dries very fast and showed a few imperfections on the seams and a few more tiny holes on the fuselage and lower wings. To fill these I used Mr. Base White 1000 and let this dry for twenty-four hours. After carefully sanding these spots the complete model was rubbed down with previously used 600 grit dry and wet paper for a very smooth finish.
The propeller, the landing gear, the inside of the landing gear doors and the wheel hubs were sprayed with Tamiya Silver AS-12, siphoned from the can. When dry the front of the propeller spinner was masked with tape and Humbrol Maskol.
Now to the fun part – mixing the paint for the Prototype Spitfire. The instruction sheet suggests to use Medium Sea Grey as coming close to the “Blue-Grey” blend called “French Grey”. After studying different black and white photos where the roundels are visible I thought that this colour would be too dark when compared with the white of the roundels and mixed my own colour using Model Master Paints. I started with white and added some light grey and a few drops of blue. This colour was sprayed onto the model, the propeller and the outside of the landing gear doors. I let this paint dry for two days, then polished it with “Mastercasters” ‘Miracle Shiner and Polisher’ before coating the model with Floquil Crystal Cote in preparation for decaling.
The propeller was masked again to paint the two small black areas near the propeller hub and after this had thoroughly dried the propeller blades were masked to spray the thin brass leading edge.
The decals, manufactured by MPR, settled down with out the use of any decal-setting solution. When dry the model was wiped down with a damp cloth to remove any glue residue fro the decals and sprayed again with a thin coat of Floquil Crystal Cote, to seal the decals.
A day later the landing gear legs and the tail skid were added and when the glue had cured the wheels were installed which had the tires painted with Pactra Hot Rod Primer then the landing gear doors were installed. A pitot tube, made from a stretched Q-tip handle and painted silver was installed in the port wing tip. The masking was removed from the canopy and the propeller added with a tiny drop of white glue.
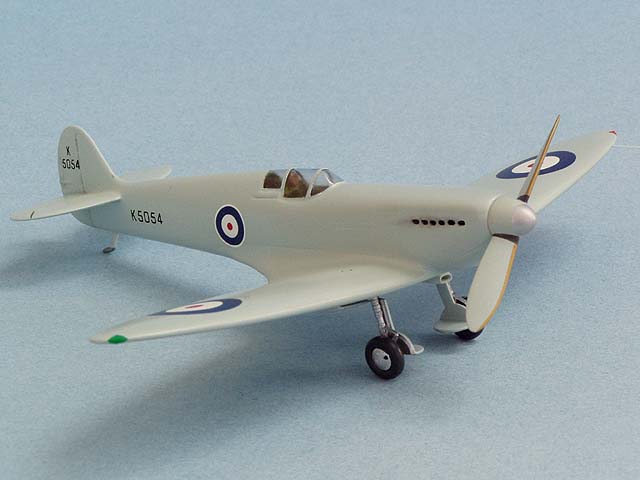
I was nearly going to say finished when I realized that I had forgotten to add the wing tip lights. There was no way that I was going to install them now by my usual way which is to use pieces of toothbrush handles. So out came the red and green decal sheets, small squares of each colour were cut and added to the wing tips. When dry they were brushed carefully with Humbrol ‘Clearfix’.
This resin kit from CMR builds up into a very nice model of the Spitfire Prototype – the “First of Many”.
Model, Images and Text Copyright © 2008 by Bernie Hengst
Page Created 31 August, 2008
Last Updated
3 September, 2008
Back to
HyperScale Main Page |
 Home
| What's New | Features | Gallery | Reviews | Reference | Resource Guides | Forum |
Home
| What's New | Features | Gallery | Reviews | Reference | Resource Guides | Forum |