Czech Master Resin's 1/72 scale
Supermarine Type 300
by Mark Davies
|
|
Supermarine Type 300 |

Czech Master Resin's Supermarine Type 300 is available online from Squadron
A Legend is Born
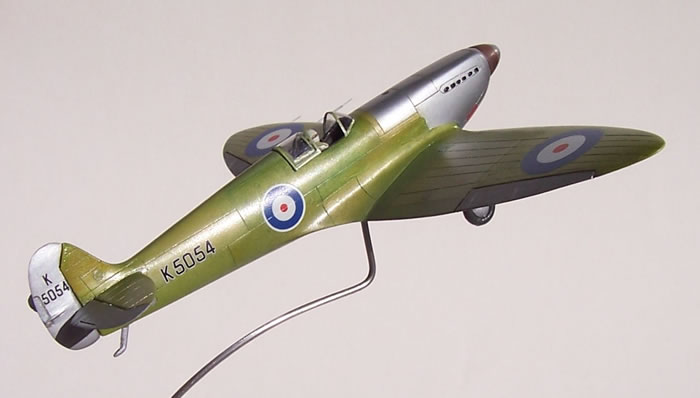
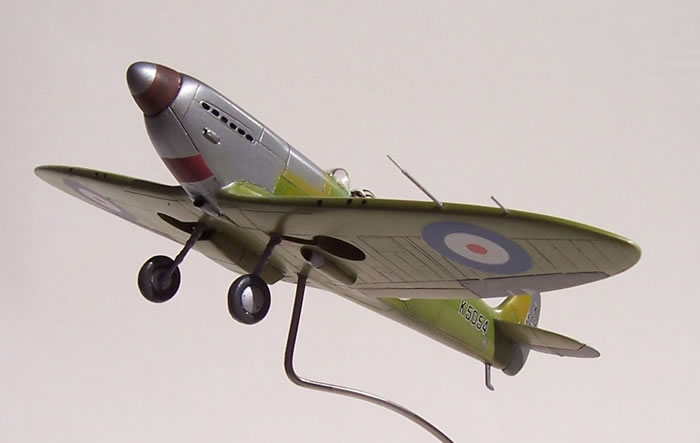
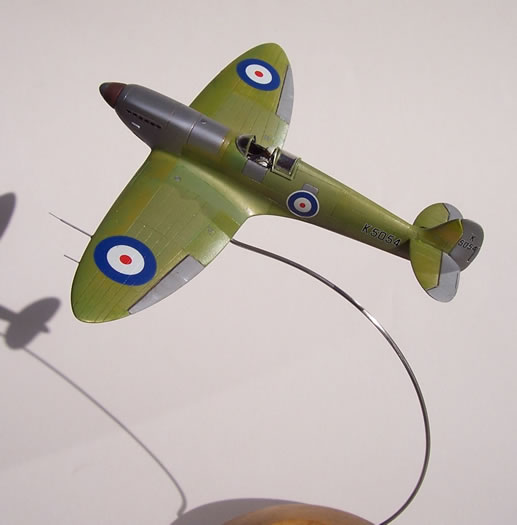
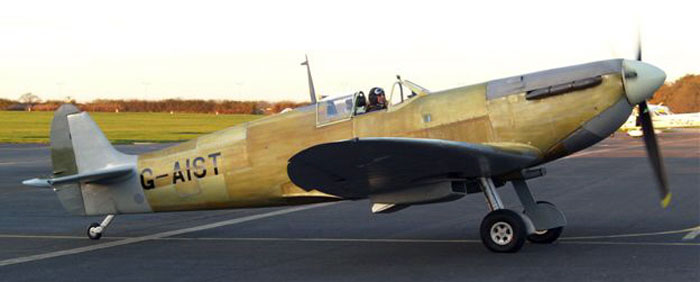
Although possibly not the prettiest Spitfire; the prototype in its first flight guise is none the less a fairly irresistible subject because of its significance as the first of the Britain’s greatest fighter ever. I say not the prettiest because of the in this form K5064 lacked undercarriage doors, had a fairly roughly hand beaten cowl and was finished in a mixture green-yellow anodised or lacquered alloy, red-brown primer and bare metal panels.
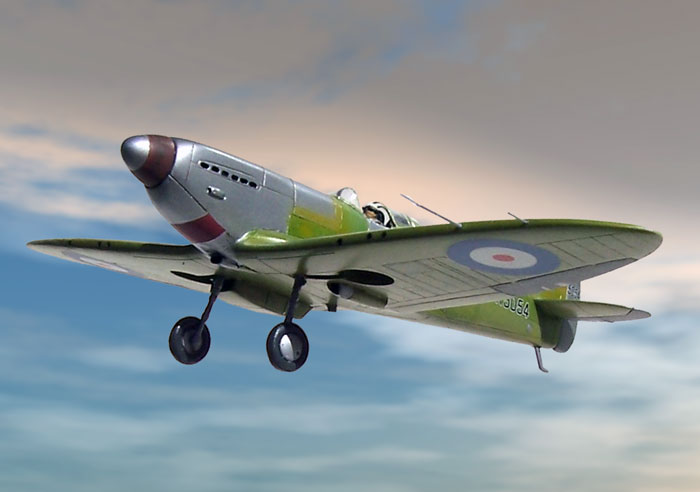
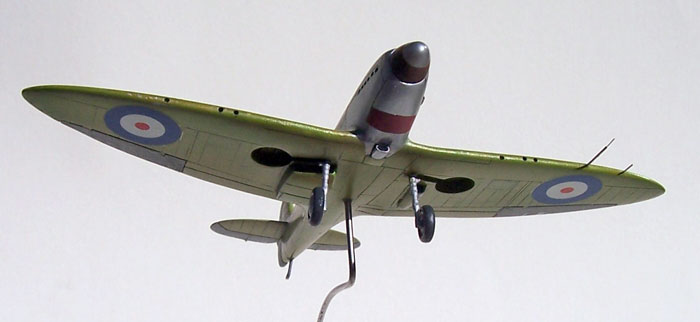
I felt that this subject had to be an in-flight model, and my original idea was to have the undercarriage partially retracting in the classic uneven manner of many single engine fighters, due to the prop wash slowing one leg and assisting the other in retraction. Research soon confirmed however that the landing gear was fixed for the first few flights.
The CMR Type 300 builds as easily as all the other CMR Spitfires I have experienced. It is really no greater challenge than a good styrene kit to build, with the possible exception of the vac-form canopy which some people struggle a bit with (although CMR always supply two with their kits).

The kit differs from other CMR Spits in that is has all of the multiple panel lines found on this first Spitfire, the extended radiator and oil cooler housing, different carburettor air –scoop, flush exhausts and tail skid, and of course rounded windscreen and flat canopy.
The major challenge was the green-yellow panel finish, of which only black and white photos survive. I looked into this subject and discussed it with a modelling mate who is an industrial chemist. He explained that the colours of the alloys could vary depending on how long they were dipped in the etching bath, and the composition of the alloy itself. Apparently Alodine 600 is yellow/gold, with Alodine 1200 being greener in shade. I also asked another modelling friend of mine who restores Spitfires and other warbirds for a living. He described the panel finish to me and shared me some photos of a modern restoration in the UK using a modern bronzy coloured alloy (see below). From the photos it was apparent that the finish did not appear uniform on individual panels. I don’t think that this was entirely due to panel ripples and light reflecting at different angles, and that the finish was indeed uneven.
I gave some thought to spraying clear yellows and green onto Alclad Aluminium, but decided instead to brush these colours using oil paints over aluminium. Initially this worked very well, being quick to achieve and needing no masking. The downside was that I overlooked was to protect the finish from dust during its slow dry time. The other problem was that it was very hard to repaint the finish if I damaged it when partly dry. This led me to lay on more oil paint than I wanted in some places, causing me to loose some of the translucency I had achieved. The simple fact is that the method can be very effective, but only with more care and patience than I displayed. The final finish was sealed with clear lacquer and decaled with no problems at all.
Because I chose to have my model as if just climbing from its first take-off I also had to give some thought to a turning prop and pilot figure.
My approach to props on flying models is to leave them off, and spray or pastel a slight blur around the spinner circumference. I do this because I feel leaving the blades on looks like a stopped engine. I personally don’t like clear discs and paint blurs, or worse still in my opinion etched metal blurred prop blades seen on some models. I base my preference on the fact then usually when you observe a real turning prop from a distance of 72 feet or more you actually see very little. This is not the case for some photos and movie clips where the camera catches the blades. Of course the best solution for model photography is an air-blown spinning prop at the time of the photo, but when restored to display you still have fixed blades looking like a dead engine. Anyway, I guess it’s each to their own opinion on this subject.
The pilot figure was also a bit of a challenge. The photos I found of Mutt Summers, who made the first Spitfire flight, showed him wearing white overalls and helmet with a silk scarf or cravat. Most of my spares box pilots wore bulky fur-lined flight suits with Mae Wests, and goggles up off their eyes. I found an Airfix Magister pilot without lower legs whose 50’s flight suit could be made to look like overalls. His head, arms and legs were removed and the torso added to the legs of another unknown brand pilot’s legs. The arms came from an Airfix Islander’s civilian pilot as these arms were slim like those in overalls, and could be posed on the joystick and throttle. The head was from a classic Airfix WW2 pilot with goggles removed. Goggles came from an Italeri pilot and were placed over the face with a 5 thou plasticard strap added. The head was then posed looking slightly to the side of the climbing aircraft.
Despite some painting problems, I enjoyed this build and decided to get on and build my CMR Spitfire prototype as it appeared at the Hendon new types park in a very nice overall grey-blue finish.
Model, Images and Text Copyright © 2008 by Mark Davies
Title image compiled by Brett Green
Page Created 10 August, 2008
Last Updated
10 August, 2008
Back to
HyperScale Main Page |
 Home
| What's New | Features | Gallery | Reviews | Reference | Resource Guides | Forum |
Home
| What's New | Features | Gallery | Reviews | Reference | Resource Guides | Forum |