|
Revell's 1/72 scale
Type VIIC U-Boat
by Matt DelRio
|
Type VIIC U-Boat |

Revell's 1/72 scale Type VIIC U-Boat is available online from Squadron.com
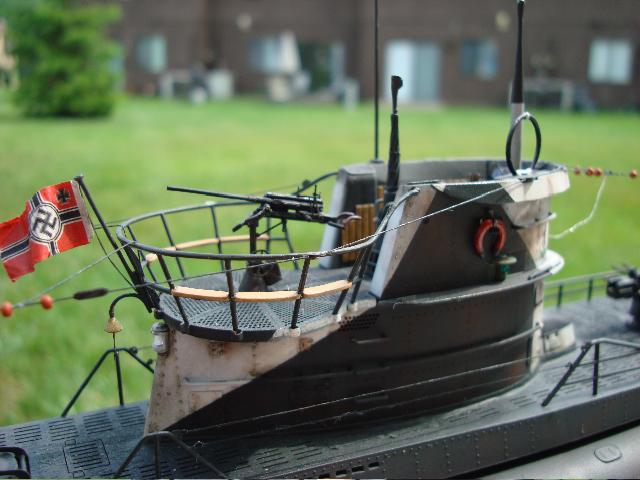
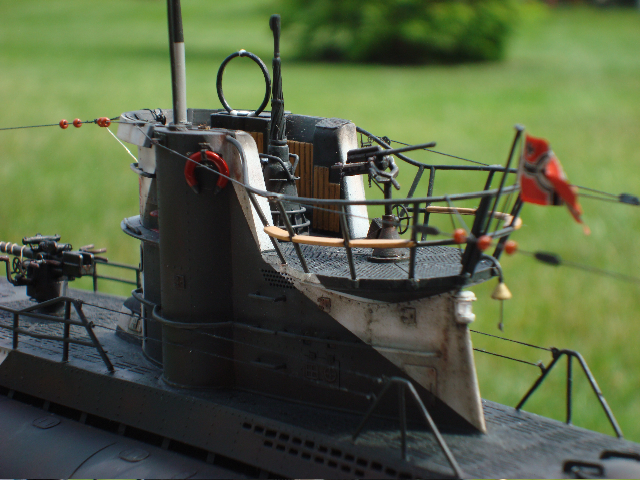
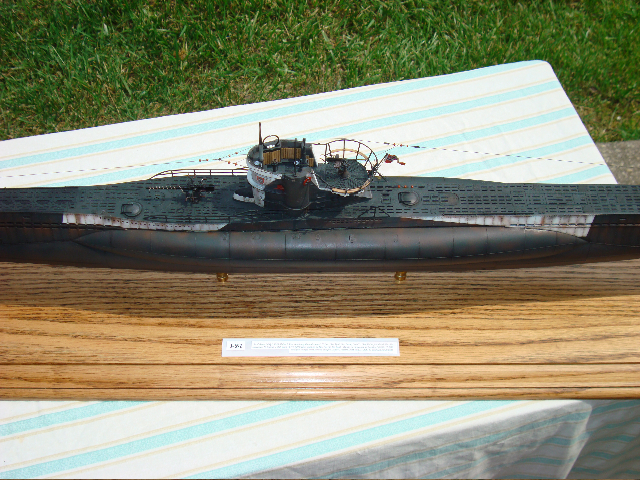
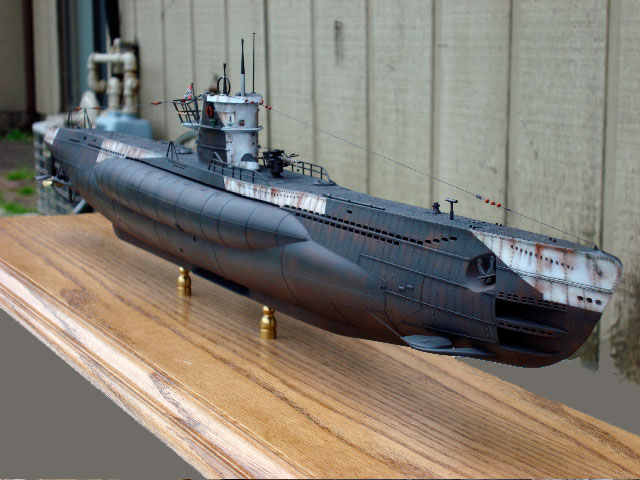
Here is my 1/72 Revell U-Boat, converted into the U-592.
The parts used:
-
Nautilus Models Type VIIC Wood Deck
-
Eduard Type VIIC U-boat PE set
-
White Ensign Models Type VIIC PE set
-
Yankee Modelworks U-Boat Upper Pressure Hull
-
ULAD U-boat Part III Decal Set
-
Archer Fine Transfers for Kriegsmarine Ensign
-
Evergreen Sheet Styrene (various sizes & shapes for scratchbuilding)
-
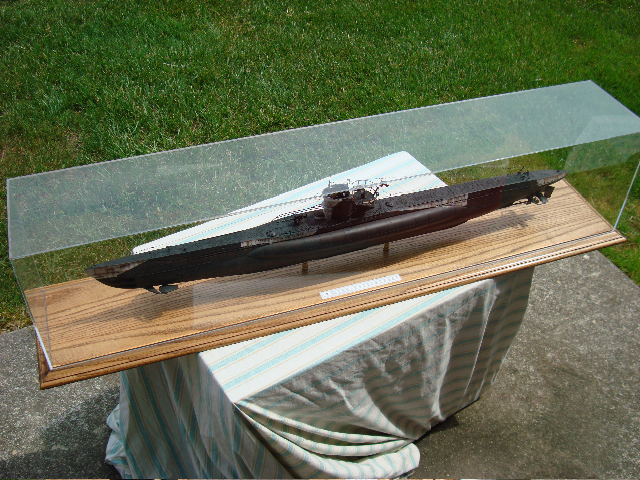
Grandpa's Cabinets Custom Made Cases
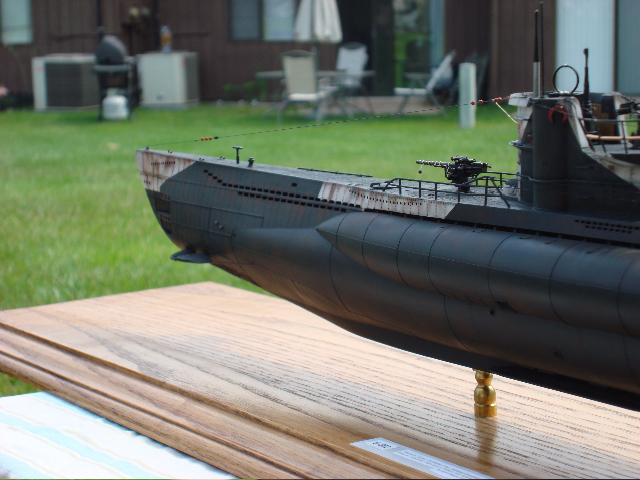
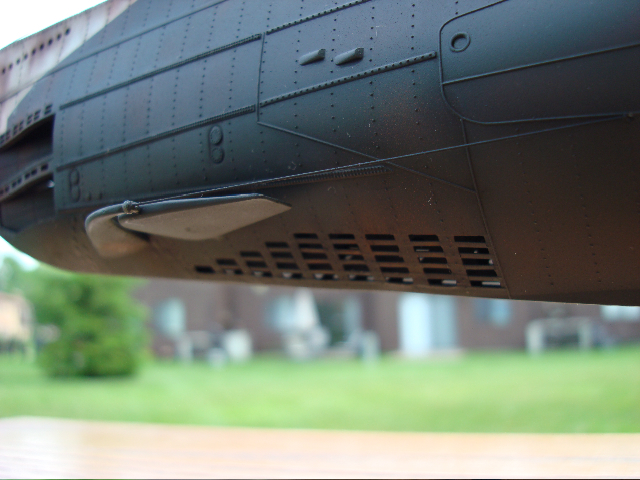
What I didn't include was the countless number of drill bits that I snapped, broke and otherwise destroyed in the process of building. The biggest challenge of this model was getting everything drilled out. Because even at the slowest setting on a Dremel tool, getting through the hull it'll burn too hot and inevitably melt the plastic. So, you can't just open a few flood holes and leave the others closed...they all must be opened! I used a pin vise to open all the flood holes. On the larger flood holes below the main deck, my approach was the largest drill bit I can fit, I drilled three holes one in the center, two on each side, then I used and X-acto knife to cut out the excess. Then with a small set of files, I got rid of the "evidence."
The only place where this approach didn't work, was the flood holes on the lower part of the hull forward (near the dive planes) and aft near the screws. Here I cut out sections vertically and then used styrene strips to replace the individual ribs. This worked well. The only time I used a Dremel was on the inside of the flood holes to make the thickness of the hull correct. This melted the plastic in some spots but only affected the interior. Not a problem.
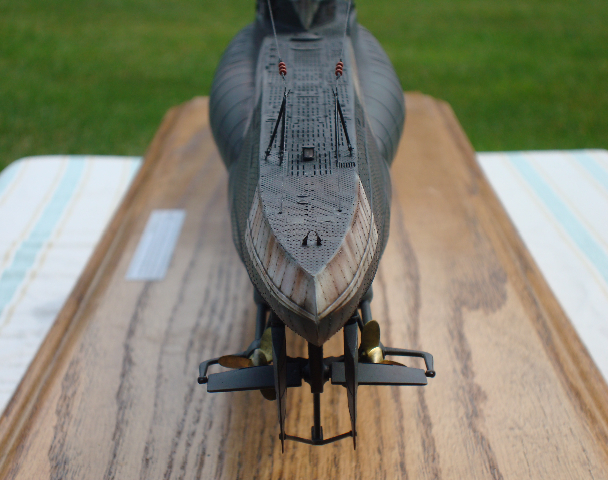
For the ribs above the saddle tank, I merely followed the outline with an X-acto knife over and over until I cut through, than I just filed out any remnants and sanded appropriately. The individual ribs themselves are made from strip styrene. Now that anyone could the pressure hull below the main deck, I needed to add some details that were missing. So I scratch-built the collar between the conning tower to the pressure hull and the two hatches. Also, a mount for the 88mm deck gun was built as well. Now, I could be wrong, but the pressure hull had some major fit problems in my opinion. It comes in three sections and I simply took large pieces of square-shaped styrene to serve as mounts for the resin pressure hull sections. Once it was time to put the two halves together, parts of the bow and stern would barely meet. But, I got them to fit with a two-part epoxy and some strong shipping tape. I had the same problem meeting the wooded main deck to the edges of the hull because to the pressure hull fit problems I just mentioned. But, I got it to work.
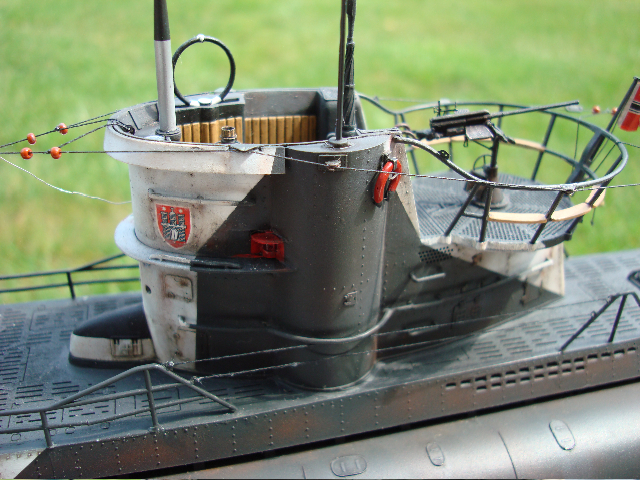
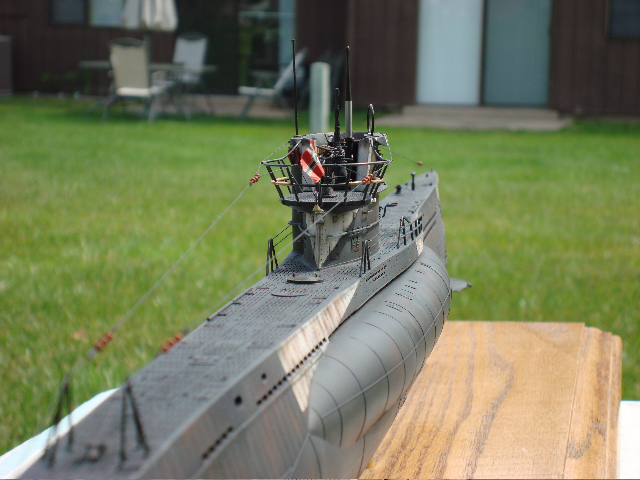
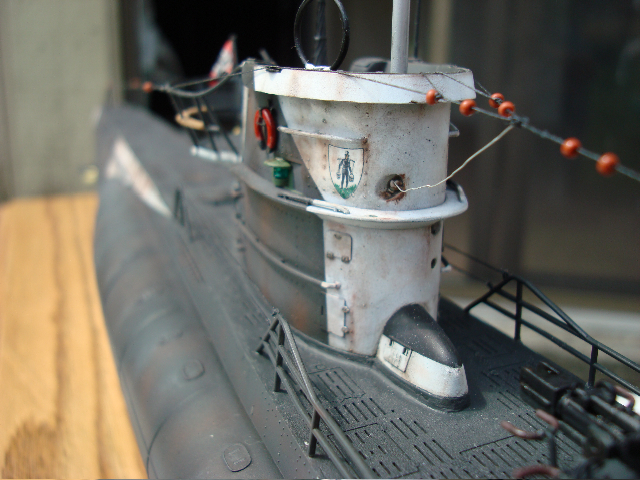
All the access doors on the main deck and the conning tower were replaced with the Eduard doors provided in the PE set. Life-ring mounts came from that set as well, and the various saltwater intakes/returns on the lower hull. I scratch-built the base for the main periscope with brass wire and sheet styrene. I scratch-built the port and starboard running lights as well as the anchor lights in the conning tower and the stern. It's basically clear plastic coated in Future floor wax with a tin-foil backing to make it look like a light, all it needs it a bulb.
I could go on and on but, I'll tell you briefly about the weathering job. I used Tamiya Acrylics, and Model Master Enamels to finish the model. I used the "rust" enamel to do pre-shading, and I used Tamiya's Nato Blue for the overall color. This particular sub was used near the arctic hence the white/black camouflage scheme. I did a dark oil wash on the entire model, and also sprayed in some blue/green acrylics to give the appearance of discoloration. I used some special weathering pastels, and dry-brushing techniques to get it nice and ugly.
It took a year and half to complete this model, and although it was a pain to make it, I sure do enjoy looking at it. I plan do a Gato next, so maybe in another two years I'll post another one. Or, I might just run this down to the IPMS nationals in Virginia Beach this year, see if I can pick up anything...Thanks for looking and greetings from the Philadelphia, PA area.
Comments are welcome - delriofam@mac.com
Model, Images and
Text Copyright © 2008 by Matt DelRio
Page Created 2 July, 2008
Last Updated 2 July, 2008
Back to HyperScale
Main Page |
 Home
| What's New |
Features |
Gallery |
Reviews |
Reference |
Forum |
Search
Home
| What's New |
Features |
Gallery |
Reviews |
Reference |
Forum |
Search