|
Classic Airframes' 1/48 scale
Grumman Widgeon
by
Kevin Martin
|
Grumman Widgeon |

Classic Airframes' 1/48 scale Grumman Widgeon will be available online from Squadron.com
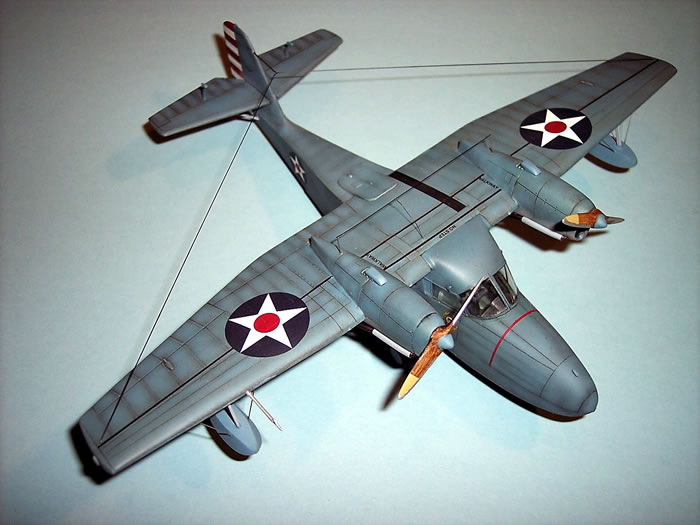
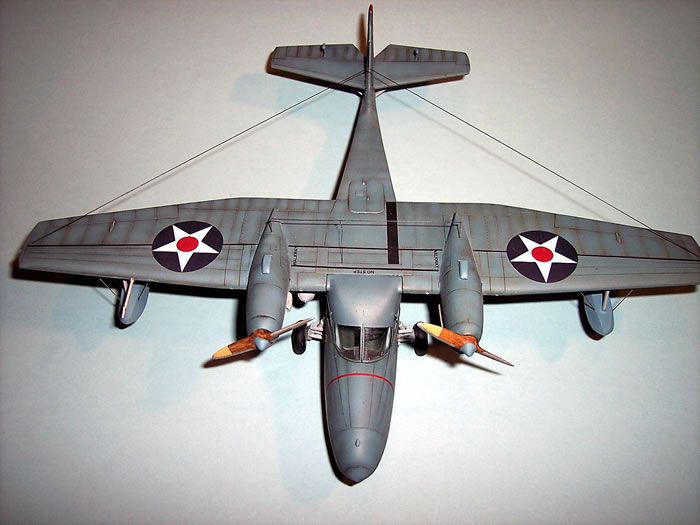
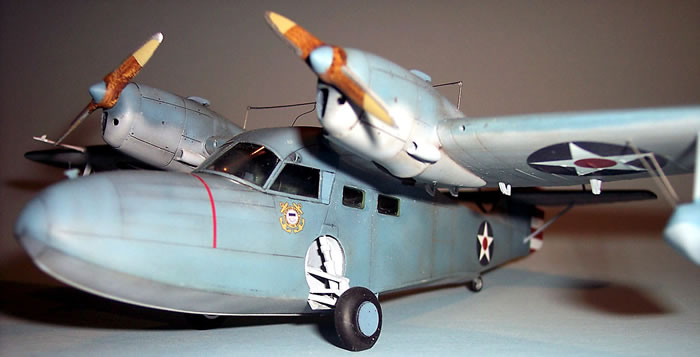
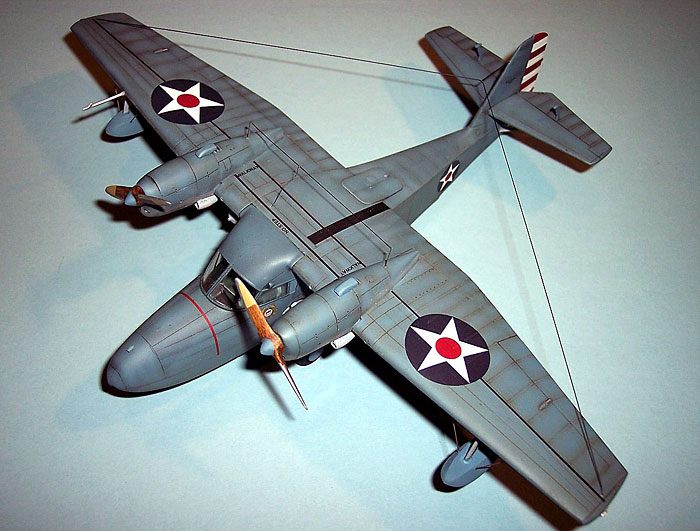
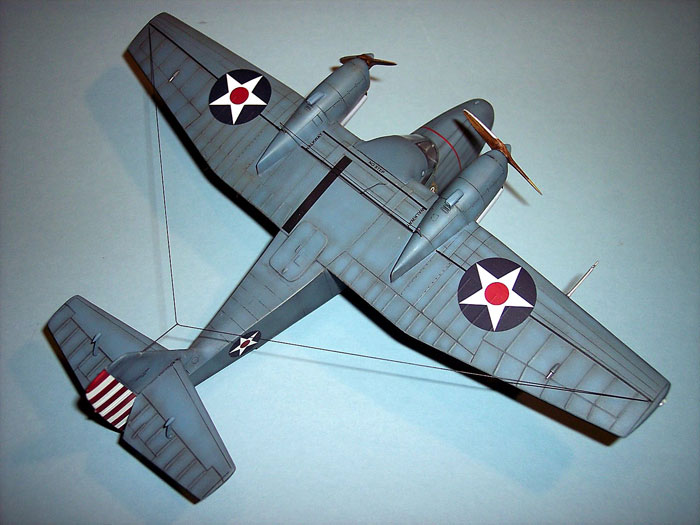
Here is my latest build from Classic Airframes. It's the newly released 1/48th scale Widgeon J4F. I was surprised when I first saw the plastic as I expected it to be a larger model. It's really not and appears very simple to build. It is, and it isn't. It will be difficult if you're a modeler without a big bag of tricks. I had to employ a few on this one baby.
The basic airframe goes together without much trouble. I used no filler to build this. Honestly, the fit of the basic parts are that good. Use the instructions as a guide and inspiration. For example,the horizontal stabs have molded in pins on the mating surfaces. More like bumps. I file them off, stick the stabs to the tail and hit with Tenax. I then eyeball them to proper position. Sand all your mating surfaces as the molding process does not yield the perfectly flat surfaces you'll find in Hasegawa, Tamiya, or other larger manufacturers. Keep in mind when building this that everything is made a bit over sized to make it easy to remove for the best fit. I started building by following the instructions. By the time I was finished 3 days later I found that there are better ways to work with the Widgeon. Rather then give the reader a long,overblown, step by step, I will leave you with tips that I found useful.
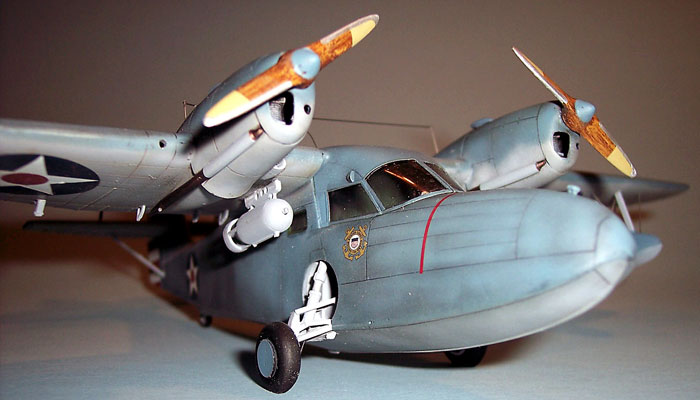
The instructions will have you installing the resin wheelwells into the fuselage halves first. This is handy to do as they provide for placement of the cockpit floor in the next step or two. But they make installing the actual landing gear later in the process a bear to handle from outside the completed fuselage. Trust me, install the 4 gear leg parts into the wheelwells first. These assemblies can then be placed into the model and glued in before the fuselage halves are joined, or after. I installed mine after the model was painted, and just before I closed the cockpit up with the greenhouse. I had to trim a bit of the slot at the bottom of the wheelwell opening to get the resin assembly to settle in.
The beautifully molded greenhouse comes in two pieces. The seams runs through the top and down the center of a natural windscreen center frame member. Nice touch. However my example when glued up and dry fitted showed at severe narrowing at the lower back corner where the assembly fits into the fuselage. The fuselage is too robust to squeeze to make a smooth transition from clear parts to fuselage sides. My solution was to install a spreader bar of plastic rod stock to widen the greenhouse. The result when dry fitting was a perfect fit. I did not glue this spreader bar in. When the time came to close up the cockpit, I carefully placed the greenhouse assembly with spreader bar wedged in, into position. Once the CA glue had cured I then knocked the spreader bar out of place and shook it out of one of the opened side windows. Hey, what can say? As a technique it ain't pretty. But it works! When I have side windows as small as these found on the Widgeon, I never use the kit supplied plastic windows. I opt to use Testor's Clear Parts Cement and make my own windows. So this is a step done last and allows me to remove things that ought not to be inside a model after it's completed.
The floats! Here's where we go from what looks to be an easy model to build to one that might give one thoughts to the contrary. I'm sure it's a simple step to rig a model for some modelers. Me? I hate this step. But it's a prominent feature of the Widgeon, and has to be done. Long story short, I completely trashed the pontoon struts after the second time of ripping the assemblies off the plane. I had been predrilling holes for the rigging to go into using a #80 drill bit. I used stretched sprue for the rigging and was never satisfied with the look. I couldn't get the sprue to tighten up under high heat. To solve this problem I took some stainless steel bristles from an old paint scraper brush that I use to clean the BBQ grill. They had the right look and were stiffingly (is that a word?it is now!) straight. I cut these to length using my usual tried and true method of trail and error. In an hour, I had placed all 12 pieces to complete my rigging.
The rudder decal. Do not place both sides on in one sitting! They are greatly over sized to allow for placement. I placed one side and let it cure overnight. It folded over to the other side quite nicely. Now I certainly couldn't go placing the other side on and not expect it to wrap around as the first side did. That would be just plain wrong. I cut the rudder decal out from the sheet as close as close can be to the image. I made a small notch at the hinge joint where the horizontal stab encroaches into the decal. While I have the decal where it lines up with the stripes on the other side, I marked with a ballpoint pen the trailing edge of the rudder onto the back of the decal. I then cut along that line and applied the decal. Violins! It worked!
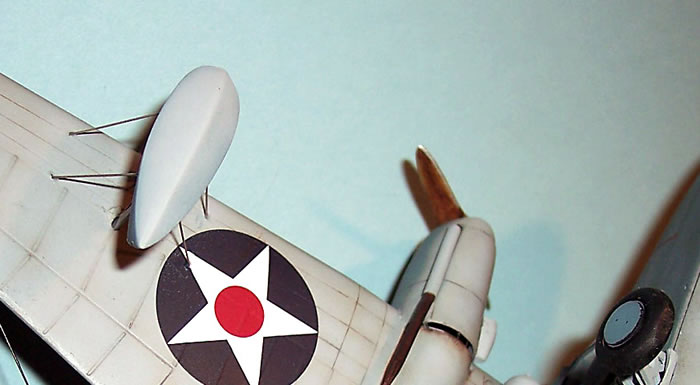
The props! The Widgeon had solid wooden props. The instructions will have you painting them black. I was happy with that until I asked on Plane Talking a simple question regarding the color of the depth charge. I was as giddy as a schoolgirl when Bill Bailey posted a picture of what might have been the very plane I was building.
The props? They were anything but black. The props are a natural laminated wood with tan tips to about one third the length of a blade. Added to that is a metal leading edge that curves at the tip and a painted center of the prop. I loved it and hated it at the same time. How was I going to pull this off?
I started by painting the prop overall Floquil Railroad Colors "Mud". When this was dry,I applied a coating of Future. When this cured I applied Winsor Newton Burnt Umber oil paint with a cotton swab, removing just enough to get that streaked look of wood. I applied a setting coat of Future over this. I then painted the center of the prop the same blue gray used on the upper part of the plane using my draftsmans circle guide as a mask. The tips were then painted using the same Floquil "Mud" used as the base color for woodyizing in the first step. The props were then given another protective coat of Future.
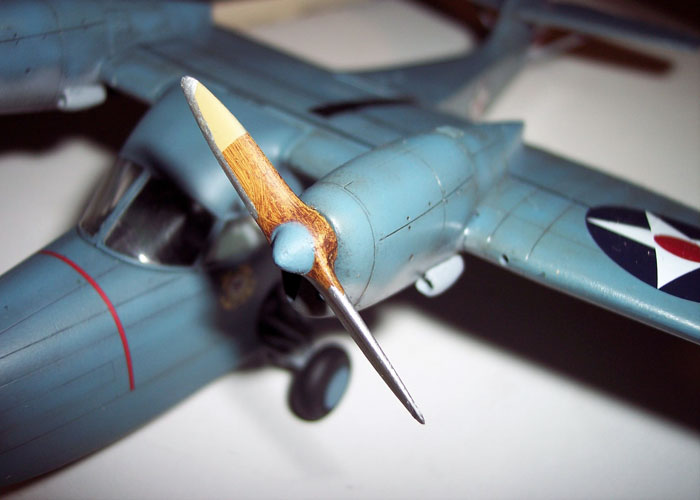
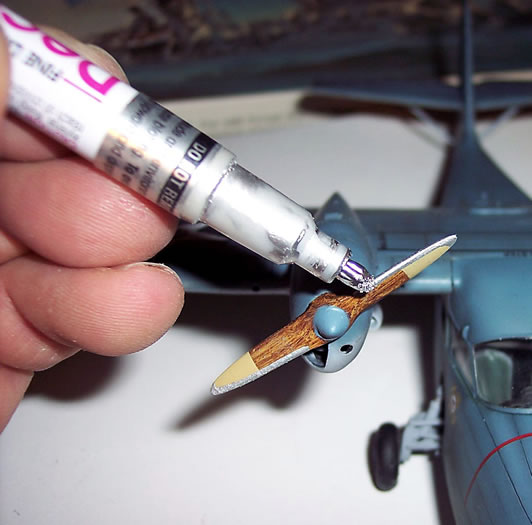
The last step is recreating the metal leading edge. Masking something this small and with it's delicate finish at this point was too risky. I opted to follow " The Force" and hand paint this step. Using my DecoColor Liquid Silver paint stick, I carefully placed the wet tip on the inside of the prop blade and slowly drew it down the edge to the tip. The tip of this paint stick is soft enough to grab hold of the prop edge and not wander and maintain an equal sized edge of paint. I then made a simple curved sweep at the tip to complete the look.
I really enjoyed this project as it tested me to solve problems. I might even do another!
Model and
Text and Images Copyright © 2008 by Kevin Martin
Page Created 28 July, 2008
Last Updated
28 July, 2008
Back to HyperScale
Main Page |
 Home
| What's New |
Features |
Gallery |
Reviews |
Reference |
Forum |
Search
Home
| What's New |
Features |
Gallery |
Reviews |
Reference |
Forum |
Search