|
Hobby Boss 1/48 scale
G.M. Wildcat Mk.VI
by Fernando Rolandelli
|
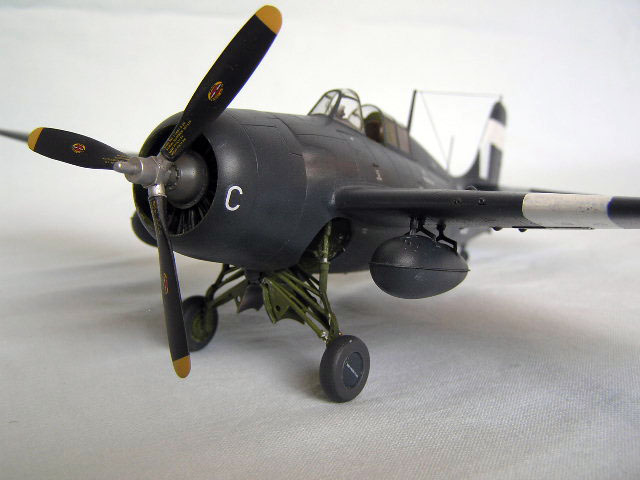
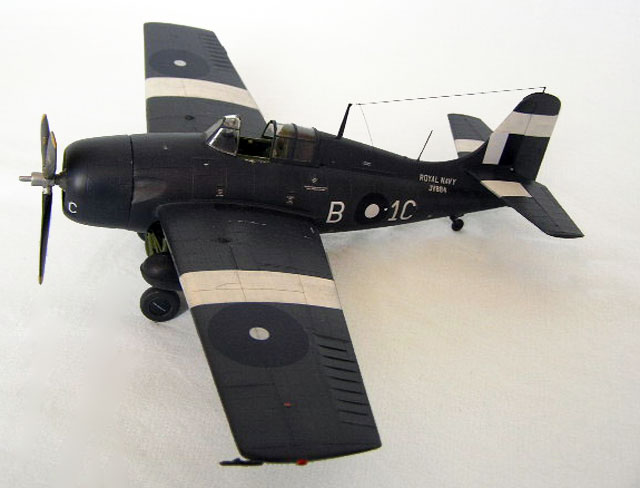
General Motors (Eastern Division) Wildcat VI
B-1C JV884, 882 Sqn. FAA, HMS Searcher, East Indies Fleet, 1945 |

Hobby Boss' 1/48 scale FM-2 Wildcat is available online from Squadron.com
History
We have all read how Grumman was asked to develop a lightweight fighter for use aboard CVEs, and how that project, originally XF4F-8, was transferred to General Motors (already producing the FM-1, similar to the F4F-4 but with only four guns) as the FM-2. Eventually the most produced of all variants, with 4,437 delivered, it performed yeoman’s work in the ASW role within US Navy composite squadrons, never in the limelight exception made of the gallant stand of the CVEs of the three “Taffies” of the Task Group 77.4 against Kurita, in the “Battle of Samar” phase of “SHO 1 Operation”, a series of battles collectively known as “Battle of Leyte Gulf”, where –I assume- the fighter component was composed by FM-2s, and even that is overlooked.
Use of the Wildcat VI by the Fleet Air Arm was a bit more proactive, specially in the late phases of the North Atlantic campaign, where both Mk. Vs and VIs from no less than half a dozen escort carriers, including 882 Sqn.’s Wildcats aboard HMS Searcher, took part as fighter cover for attacks against shipping all along the Norwegian coastline. Later the carrier was designated and even undertaken a refurbishment for Eastern service, though it only arrived there in August 1945, operating until October, together with her faithful 882 Sqn.
The Kit
The new Hobby Boss Wildcat kits will be considered as promising by some and disappointing by others. It is a nice family of kits, including early F4F-3s and -4s, only little short of the acclaimed Tamiya Wildcat and certainly a vast improvement over the Sword kit. However, in this particular kit, No. 80330, the very peculiar relationship between the lengths of both front fuselage and cowling is most probably not accurately depicted. Both parts, though specific to this kit, have exactly the same length as the earlier, Pratt&Whitney powered versions. Now, in his IMHO seminal article available somewhere in this very site, Bruce Archer points out that the cowling in the FM-2 was, not “long” (P&W) or “short” (Cyclone), but “unique”. This may only mean “not so long, not so short”, which in 1/48 may translate in a couple of millimeters. It must be noticed that the overall length should not vary, so that the visual effect is apparent only against good angled pictures, but if you look real hard and you are real picky you’ll notice something weird. To make things a little bit worse, the cowling follows the general contour of the P&W one, while the FM-2’s does seem a bit more bulbous, though not nearly like the Cyclones’.
Otherwise, it lacks some FM-2ish details that can be added as construction goes (or left aside whatsoever), and the painting guide is terrible, but all in all a reasonably good model could be produced out of it.
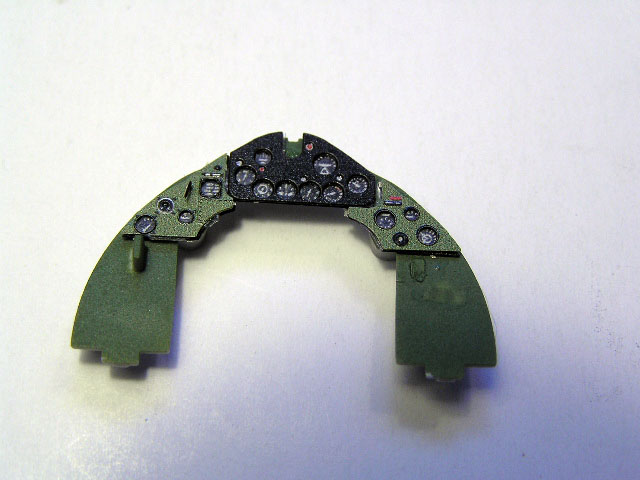
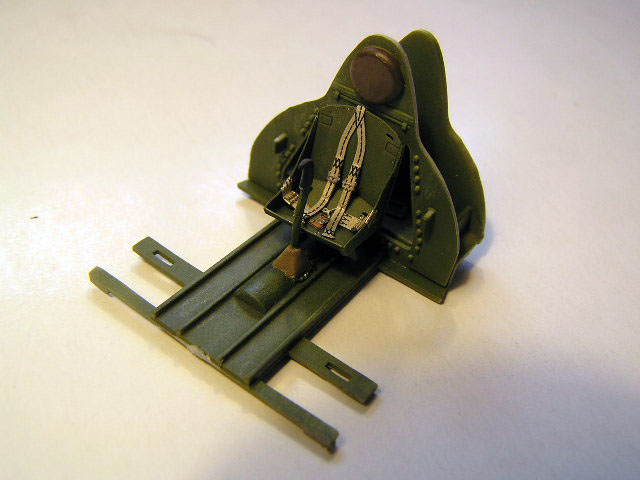
To furnish the cockpit, I throw in the customary Eduard PE set (FE246, for the Tamiya F4F-4), plus the equally customary Squadron vacuformed canopy (9505, for the Monogram kit). Late in the assembly I realized that a FAA machine should have British seatbelts, so I used the ones in Eduard 49006 (after pondering options, I did not use the Sutton, but the “RAF late”, as shown, for instance, in Eduard’s recent Hellcat I/II boxing). FAA decals were sourced from the Techmod 48051 sheet, dedicated to the Wildcat VI, with five machines, three in EDSG/DSG/Sky and two in SBG. I pondered replacing the propeller with the Cutting Edge product, but decided against after carefully looking at pictures.
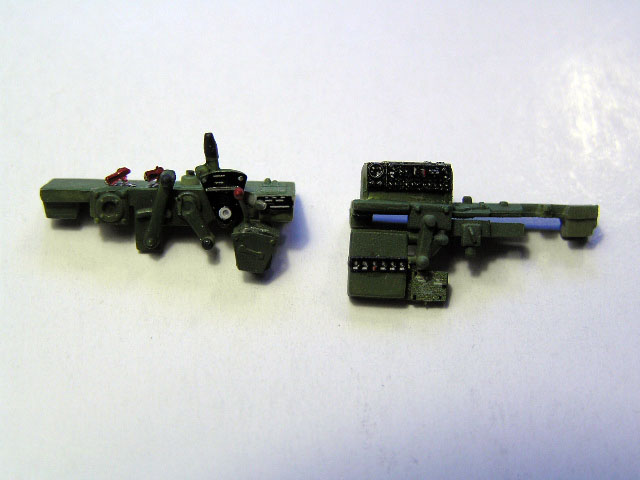
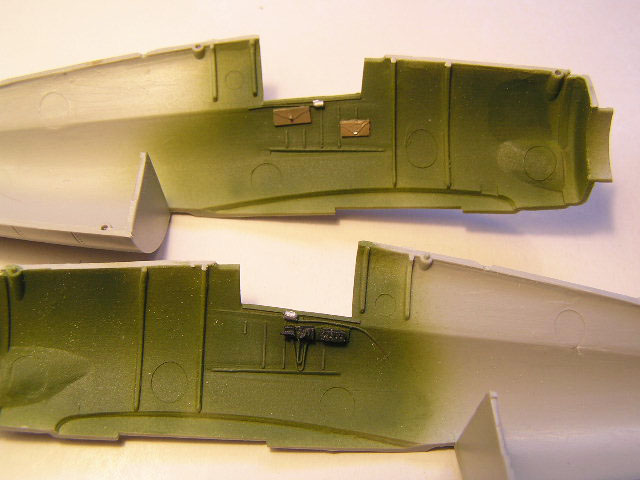
The cockpit is like a bit smaller than the Tamiya’s, so some trimming of the parts is on order. Nevertheless, the new Eduard sets specific for the Hobbyboss kits, inexplicably do not include the seat, which is the single part other than the instrument panel that makes a real difference. All the interior components were painted in US Interior Green; though references are conflicting, some support that Eastern painted the whole interior, from cowling to tail in such a color, including the undercarriage and the windows, though the instructions have you keep them glazed.
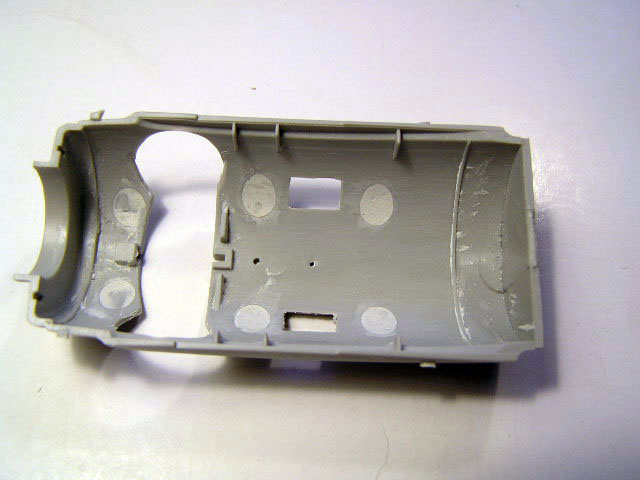
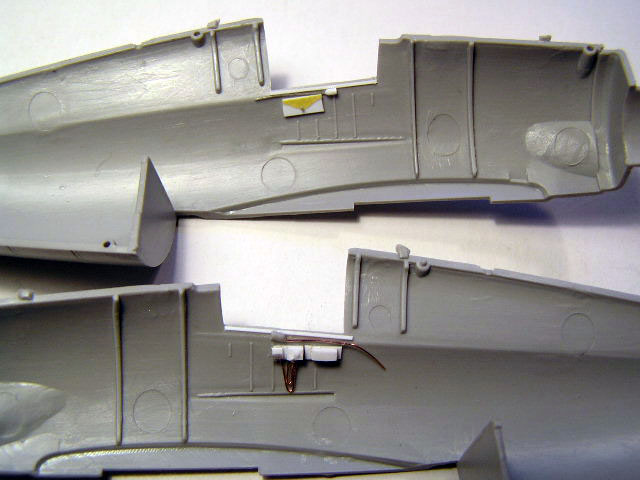
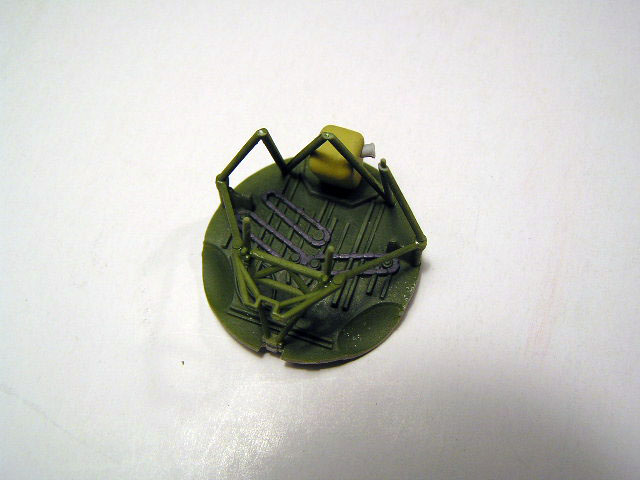
The boat-shaped subassembly fits admirably to the fuselage, though if you are not very careful with the PE additions to the cockpit, you may have some difference at the front, just like me, which will haunt you later. The engine’s bear struts have not positive fit, and the instructions are not clear; same can be said of the undercarriage, and I fixed them after much looking at the Tamiya instructions!
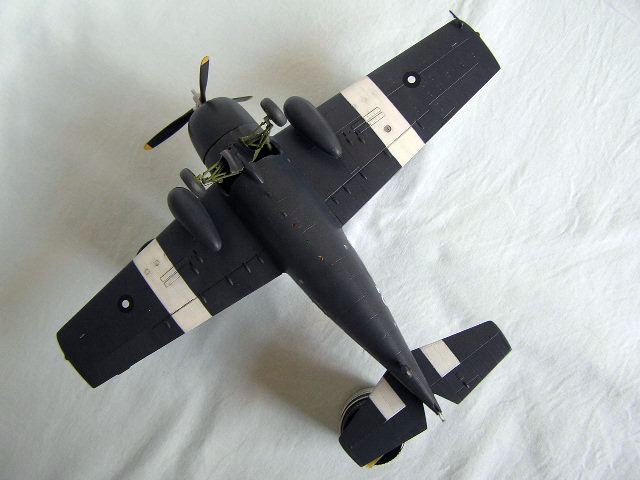
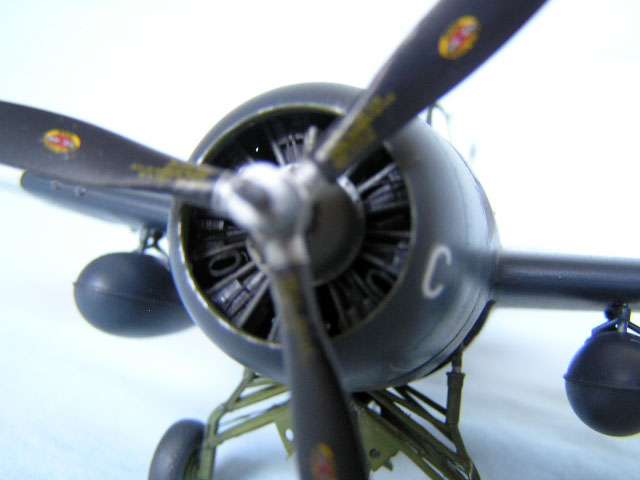
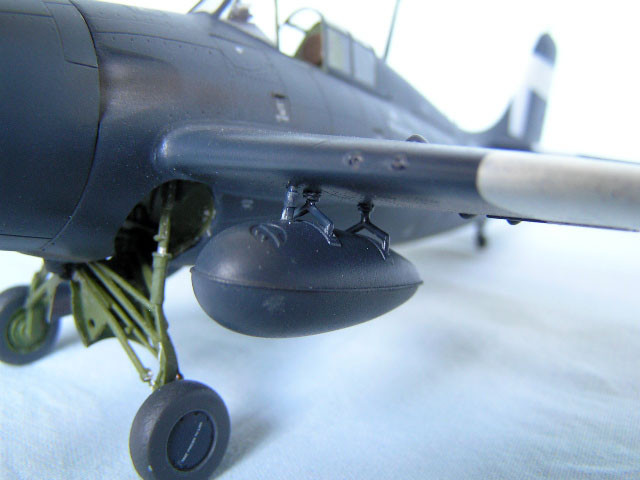
I decided to keep the two “intercoolers”, which I assume one is for the oil coolers (deleted from the wing undersurfaces) and the other for the single stage supercharger of the Wright 1820, and that structurally-wise would have been very difficult to left aside anyway! Efforts had to be made for the undercarriage not to protrude too much, “tiptoeing” the model. I decided to fix the undercarriage to the fuselage at this stage to help assess the diedhral, whose fearfully small tabs do not inspire any confidence. In the end they were more than enough and the diedhral was more than acceptable at almost the first go. I fixed the brake lines directing them to the interior of the wheel bay, but not to the exact point where they enter the fuselage, references on which I found later. All the fiddling with the undercarriage came back upon me when trying to glue the doors; which, if glued to the flanges in the struts, left a funny angle at the belly fairing. I compared them to the Tamiya’s, and saw the latter have a much wider and angled flange which connects to the fairing; I added it with triangles of plastic sheet. I opened up the plastic blanking the upper exhausts and added them, 3-2, but could not do the same with the lower ones. Inside the cowling I deleted the F4F-like intakes and placed two small oval ones between the lower cylinders of the otherwise very acceptable engine, which received the customary ignition cables made from wire.
It is my understanding that originally FM-2s lacked the reserve fuel tank, but the decal for it is present on the Techmod sheet, and the engraving in the HB fuselage, so I kept it. I liked HB’s depiction of the underwing tanks mounting better than Tamiya’s, and the propeller better than the Cutting Edge one (though the perfect combo would be Hobbyboss blades into the CE boss). Conversely, I hated the way they represented the machine gun’s muzzles (complete undersized Brownings!) and just replaced the muzzles with pierced plastic rod. I embossed the landing lights in the belly, filled the gaps with White Glue and overpainted them in Silver and the appropriate Tamiya Clear color.
Fit of the engine assembly and the cowling is so good that I left them for after painting, and even then I did not glued them, which may be a real bonus for transporting the model to faraway Argentina in the hopefully near future. Conversely, I chose to leave out the aerial wire between the fuselage and the tip of the elevator, which have absolutely no chance of surviving such an ordeal (and sources are a bit confusing regarding its appropriateness)
Painting
Having decided for an Eastern Fleet all Sea Blue Gloss machine, I chose White Ensign ACUS07 “WW2 USN Aircraft Sea Blue FS 25042” to do it. I primed and pre-shaded the model as usual, painting the SBG in very uneven fashion to create nuances.
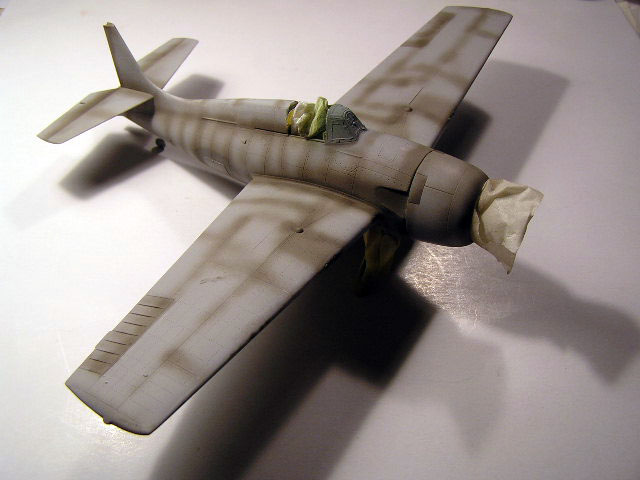
Flying surfaces were consistently painted in a slightly lighter shade, which was also randomly sprayed over the airframe, but avoiding the “center-of-panel-cloud” effect. Then, the White bands were masked and painted using Humbrol 22, again in an uneven, mottled fashion creating “instant fading”.

Further weathering was made with oils over the gloss varnish (I use Xtracrylix, impervious to such treatment), with a Burnt Umber random spraying, and with some “differential flat coats”, very effective in dark, glossy models. Exhausts were painted with some Light Grey undercoat, the same Burnt Umber mix and some Light Grey pastels after that.
The metal propeller boss was painted in Alclad Aluminium, and the very sparse chipping in Humbrol Metalcote.
Decals
Decals are of the highest quality and posed absolutely no problem. The roundel over the prominent door at the side of fuselage (which to make things worse stands proud) was persuaded to go by judicious using of the “hot flannel” technique.
Surely not the “definitive” FM-2 kit, and though I am painfully aware of the controversial cowling length, I still think a good model can be built out of it, being a little more careful than myself (who combines both haste and laziness). Though from a historical point of view some Atlantic machine is surely more important (and probably a machine from HMS Campania or Queen during the Norwegian campaign will follow), in this livery the model is very attractive. Will someone make a good Cyclone-powered Martlet kit/conversion sometime?
Sources
- Articles at Hyperscale by Bruce Archer, and by Paul Fontenoy at the defunct FAA SIG.
- “The Grumman Wildcat in Detail and Scale”, Bert Kinzey
- “Britain’s Fleet Air Arm in WW2”, Ron Mackay, Schiffer.
- “Modelling the F4F Wildcat”, Mark Glidden, Osprey Modelling, Osprey Publishing
Model,
Text Copyright © 2008 by Fernando Rolandelli
Page Created 7 October, 2008
Last Updated 7 October, 2008
Back to HyperScale
Main Page |
 Home
| What's New |
Features |
Gallery |
Reviews |
Reference |
Forum |
Search
Home
| What's New |
Features |
Gallery |
Reviews |
Reference |
Forum |
Search