Hasegawa's 1/48 scale
Mitsubishi F-1
by Luis Antonio Reyes Lavin
|

|
Mitsubishi F-1 |

Hasegawa's 1/48 scale Mitsubishi F-1 is available online from Squadron
Here is Hasegawa's 1/48 scale Mitsubishi F-1. The model comprises 166 well-moulded pieces.
In general the kit is very nice although the cockpit and wheel bays are simplified. I think that the main landing gear is simple too if we compare it with the photos of the real plane.
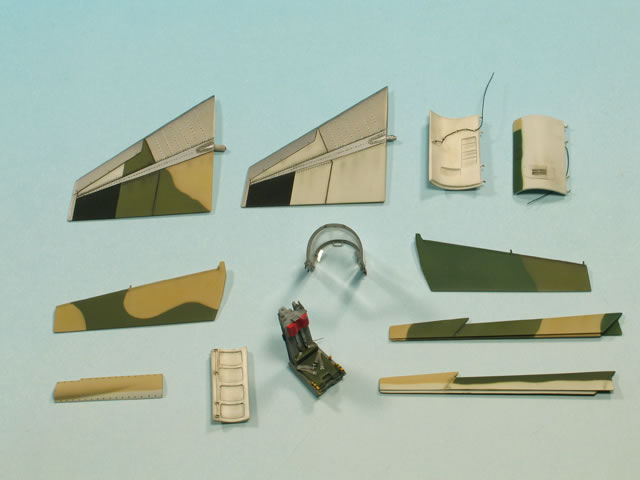
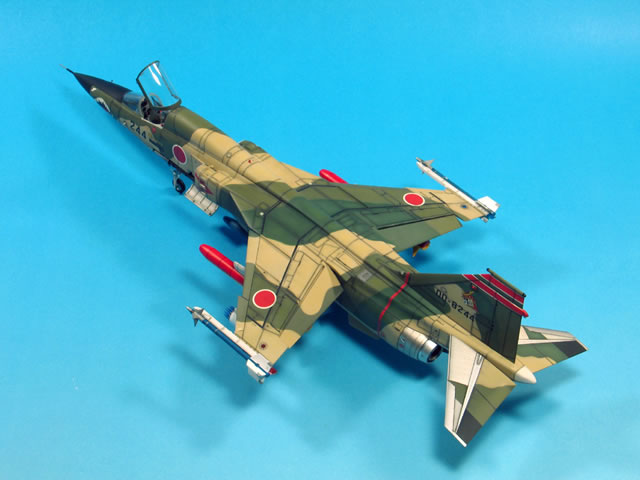
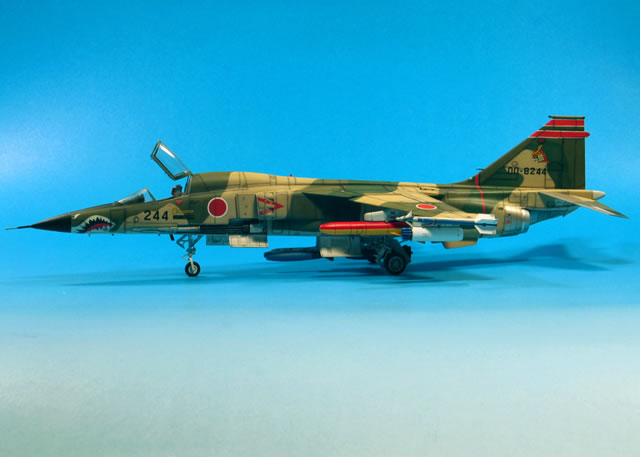
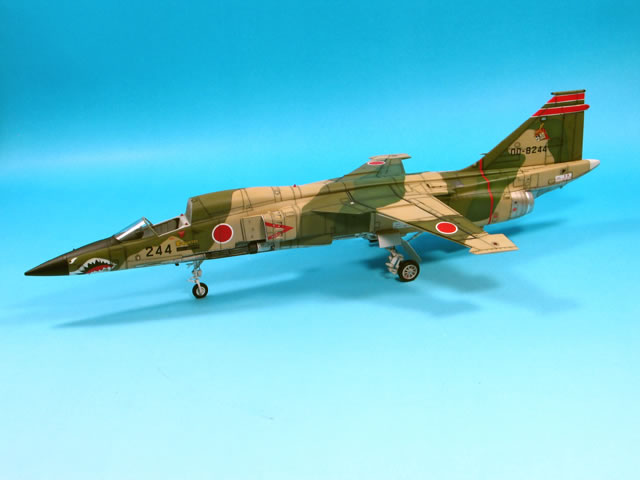
The F-1 always reminded me of the Jaguar, but I think that the Japanese aircraft is more streamlined. I decided to build a modern Japanese version because of the elegance of its camouflage.
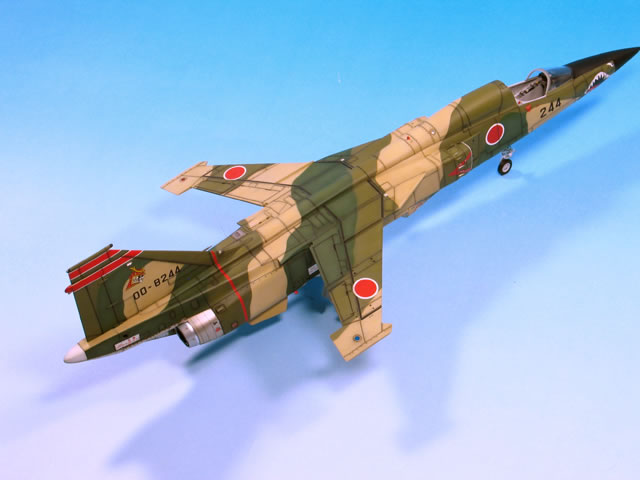
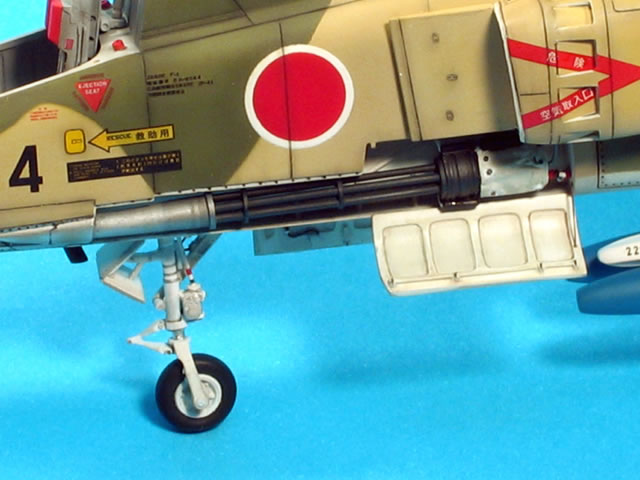
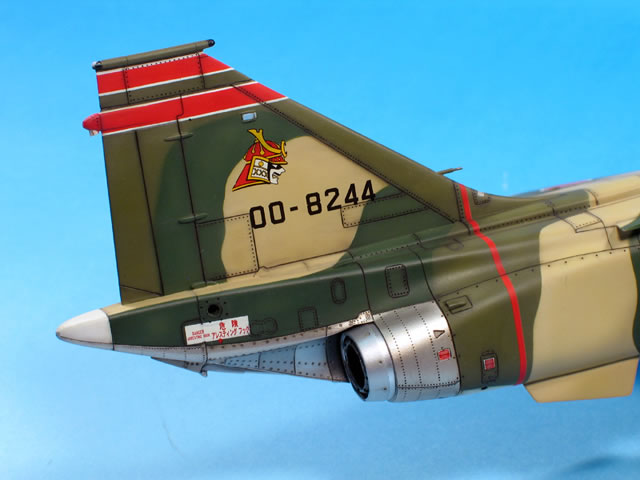
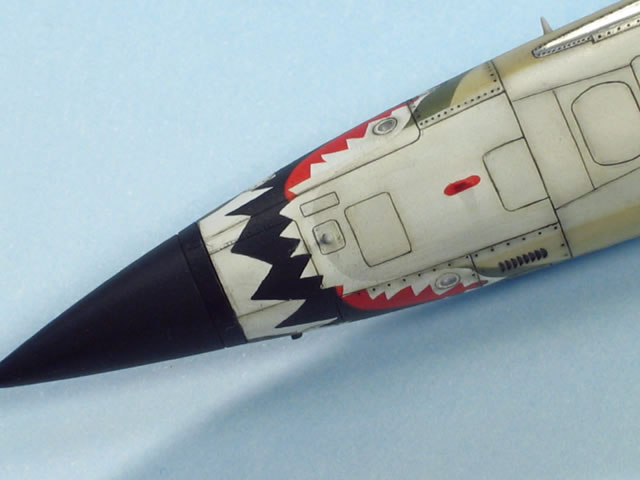
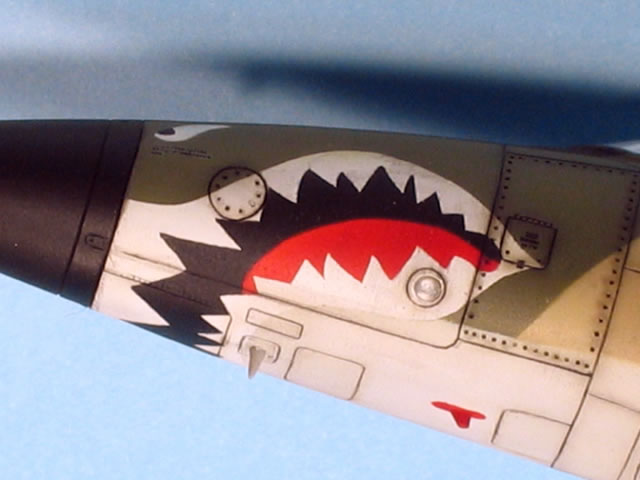
Searching pictures on the internet I found a scheme that included a shark mouth. This corresponded to a Misawa’s 3 Hikotai squadron plane. The 3 Hikotai’s typical emblem is a Samurai’s face, and the F-1 has two red stripes with the tail edged in white.
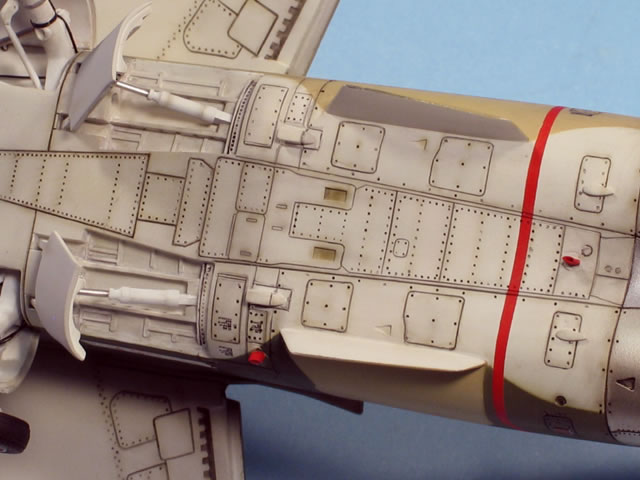
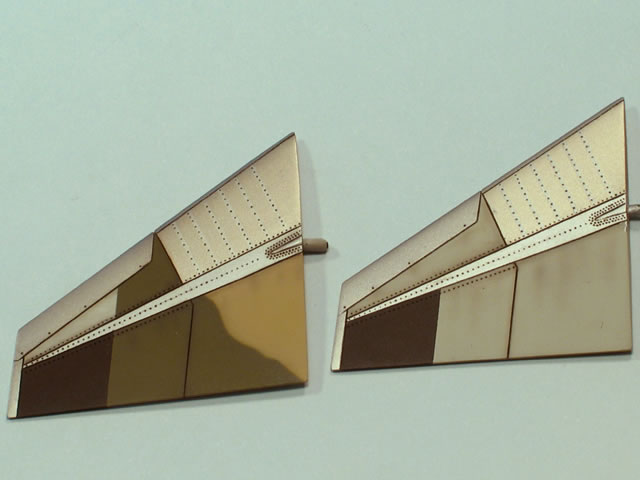
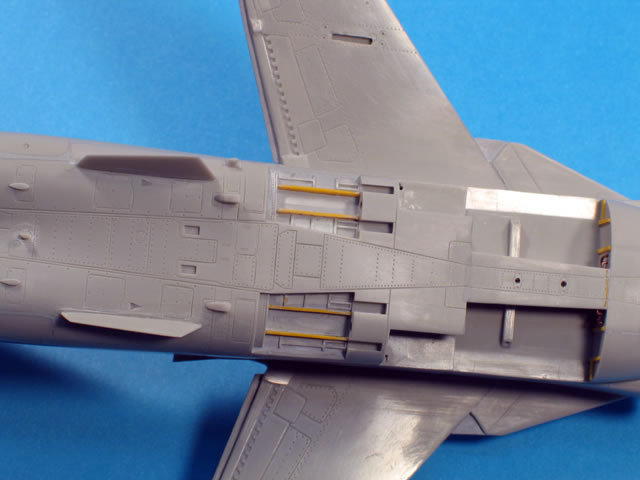
The kit's panel lines are very deep in some places. To fill them I have used Mr. Surfacer followed by sanding. Airbrakes were rebuilt using plastic card.
I added photo etched armours and some copper wire detail to the ejection seat .
For the rest of the cockpit I used an Eduard Zoom photo etched set. This provided detail parts for the instrument panel and the side consoles, plus enhancements for the ejection seat .

The HUD was build by scratch with a plastic sheet.
The canopy was improved with some wiring and latches.
I used acrylic colours of Tamiya to paint the cockpit in mixes of the XF-53 and XF-2.
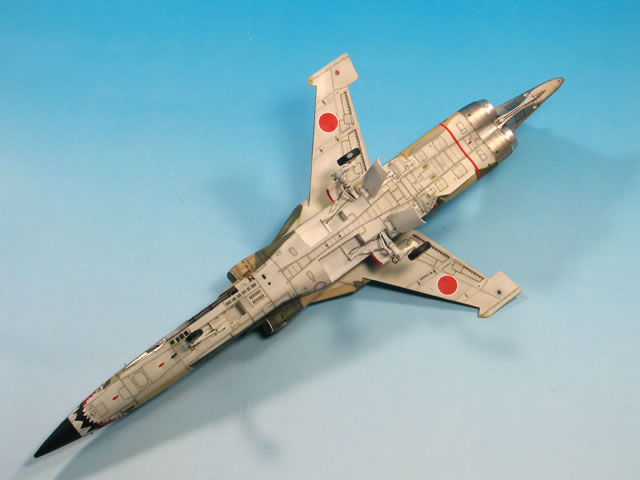
All the separate elements including flaps, slats and the landing gear doors were assembled next. I chose to scratch build the Vulcan cannon with its compartment and access doors.

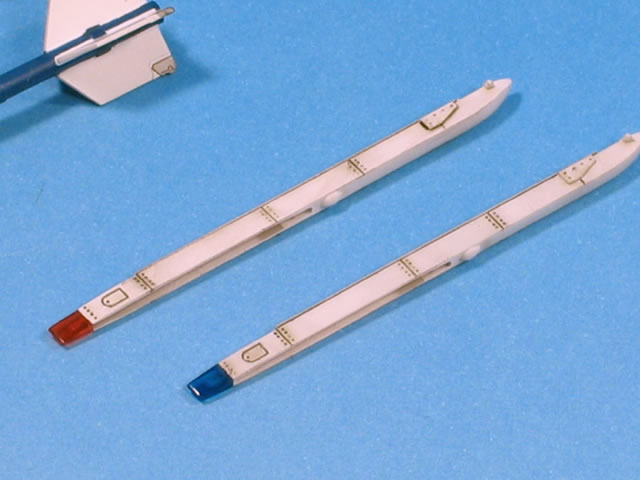
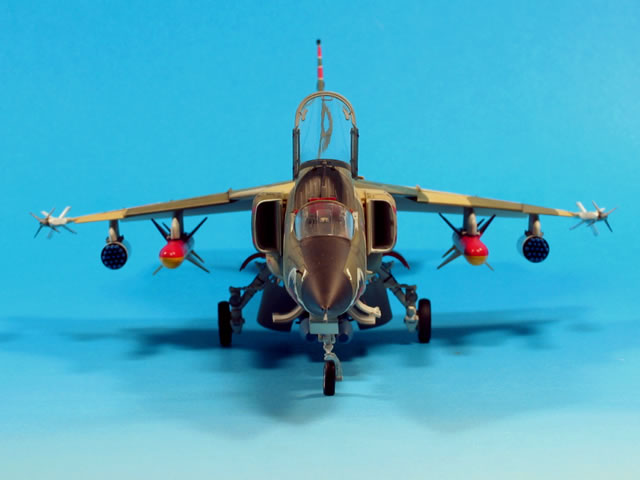
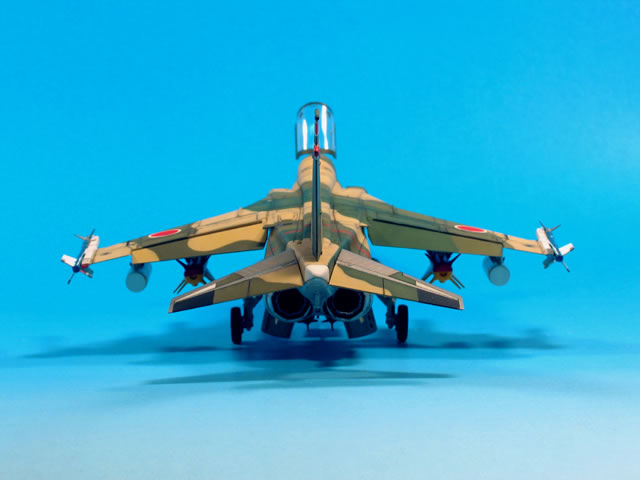
I prefer my models to carry a full load of weapons so I decided that this F-1 model should be fitted with typical ordnance for a naval mission. However I depicted the ordnance as inert as the colours are nicer than live weapons. The ASM-1 are red and yellow and the AIM-9 Sidewinder and the Mk-82 and rockets are blue.

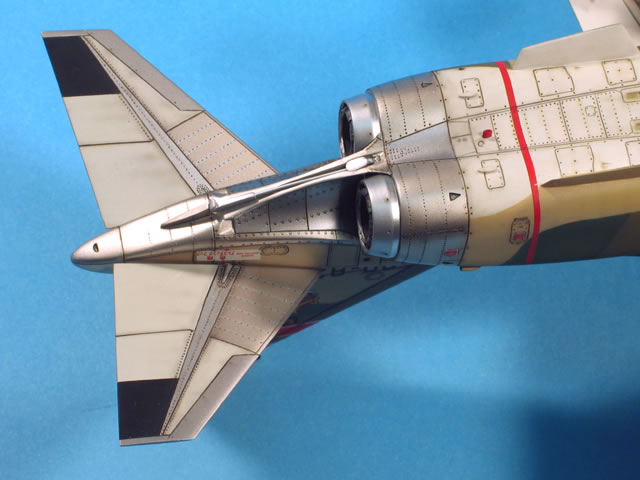
Other improvements include the addition of the positions lights, six in total, four in the lower part and two more in the upper positions. They are not included on the kit parts, so I drilled out the positions and filled them with clear plastic.
I also added position lights to the Sidewinders launchers in the wing tips and the lights places in the lower and upper parts of the edge of the wings.
I decided that the landing gears would also look better with hydraulic wires and landing lights. In this case I left the main gear doors opened, something that is only rarely seen when the plane is on the ground.

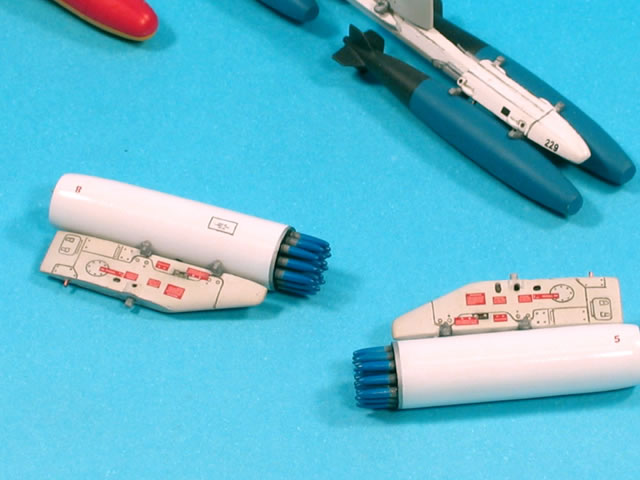
Weapons were sourced from various after-market Hasegawa sets. The FER (four ejector rack) where the four Mk-82 bombs are is made at scratch from a MER (multiple ejector rack) of Hasegawa. The 38 rockets are made at scratch taking as model the Me-262 rockets .
I could not find the colours required for this scheme in the standard ranges of Tamiya or Gunze, so I mixed my own to the following formulae:
-
Light Green: 20% XF-58 + 10% XF-2 + 70% Tamiya Acrylic Solvent
-
Dark Green: 10% XF-26+ 2%XF-2+ 1% XF-1 + 87% Tamiya Acrylic Solvent
-
Light Brown: 20%XF-2+ 10% XF-60 + 5% XF-5 + 65% Tamiya Acrylic Solvent
-
Light Gray: 20%XF-1 + 2%XF-60 + 2% XF-2 + 76% Tamiya Acrylic Solvent
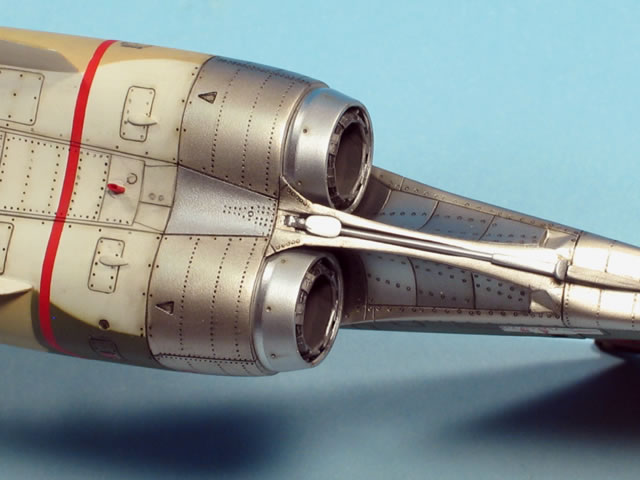
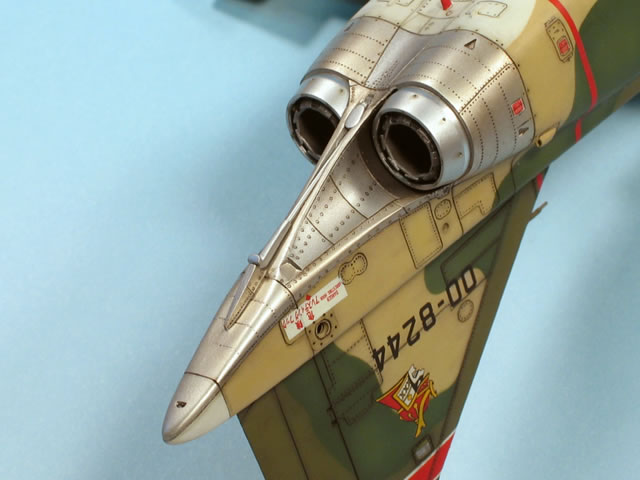
To lighten or darken the colours I used little mixes of yellow, black and brown until I got the right result. Plane, cannon, engine nozzle and stabilizers’ metallic finish pieces have been painted with Tamiya metallic colours, the result is unbeatable and the instant drying paint allows fast masking and other kind of paints too.
The mixes are as follows:
-
Tamiya Spray TS-17 Gloss Aluminium
-
Tamiya enamel X-12 Gold Leaf
-
Tamiya enamel X-10 Gun Metal
-
Tamiya enamel X-16 Aluminium
MicroScale varnish was applied after the metallic paint was masked.
When the varnish was dry I highlighted panel lines with a 00 paintbrush using a 50% of black and brown Vallejo’s mix.
An overall coat of Opal matt varnish from the Titan brand mixed with white spirit was applied to seal the paint job.
The “hinomarus”, the shark mouth and the red stripes were applied using home-made masks.
Model and Original Text Copyright © 2009 by Luis Antonio Reyes Lavin
English Text Copyright © 2009 by David Reyes Lavin
Images Copyright © 2009 by Julio Fuente Diazz
Page Created 17 February, 2009
Last Updated
17 February, 2009
Back to
HyperScale Main Page |
 Home
| What's New | Features | Gallery | Reviews | Reference | Resource Guides | Forum |
Home
| What's New | Features | Gallery | Reviews | Reference | Resource Guides | Forum |