Revell’s 1/32 Scale
Heinkel He 162 A-2
by Brian Geiger
|
|
Heinkel He 162A-2 Volksjäger |

Revell's 1/32 scale Heinkel He 162 is available online from Squadron
 Revell released their 1/32 He 162 kit in 2004. At the time of this writing, it remains one of the real bargains for a well-engineered 1/32 kit. Revell released their 1/32 He 162 kit in 2004. At the time of this writing, it remains one of the real bargains for a well-engineered 1/32 kit.
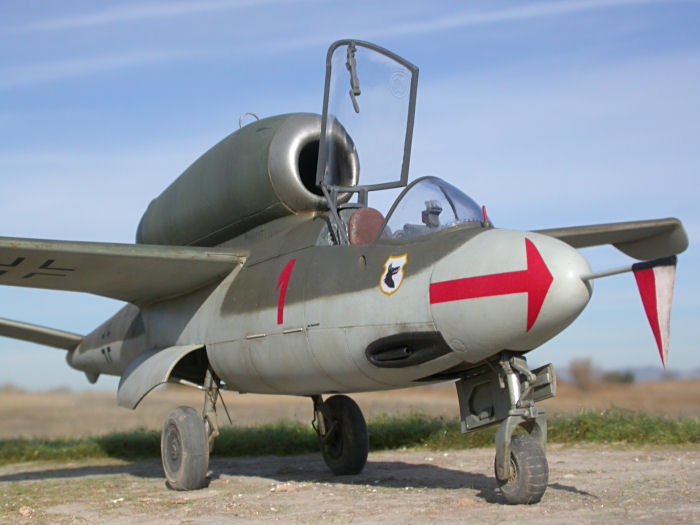
The small fighter is simple in design and that translates to a straightforward build.
The surface detail is crisp and adequately represents the mainly wood construction. There are a number of aftermarket decals and accessories available.
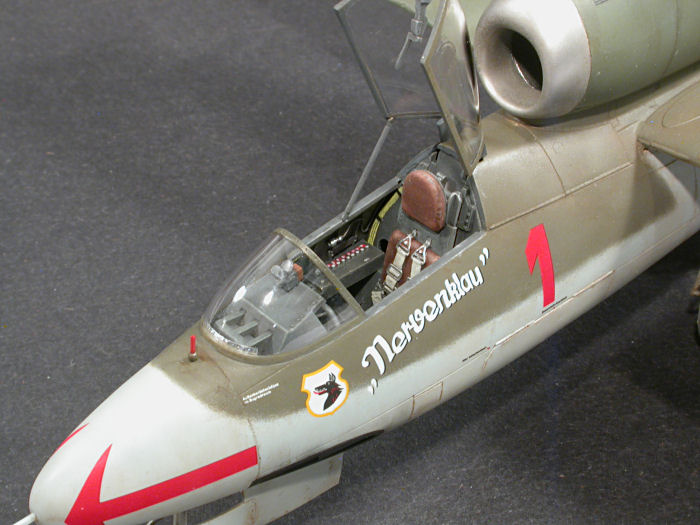
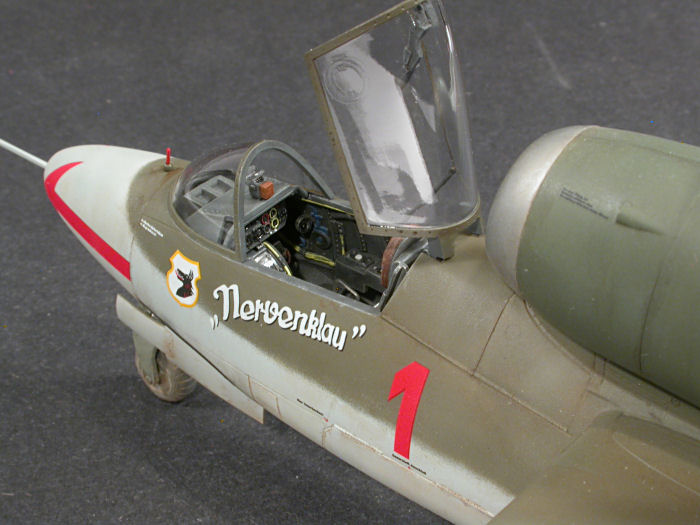
I started with the cockpit and made a few modifications. I added wires bundles and cable details using fine solder and stretched sprue. The kit seat was cut away and replaced with the superb QuickBoost seat with molded belts. Once it was integrated into the kit back wall part, it was a real pleasure to paint. The raised detail responded very well to drybrushing and it was much faster than messing with photo-etched parts.
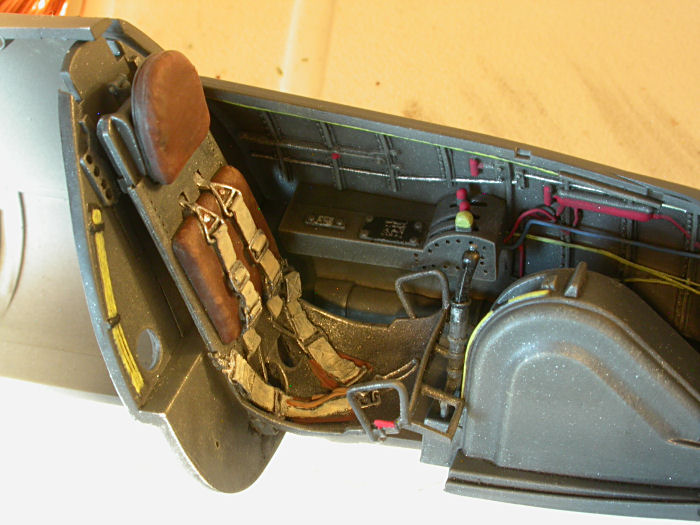
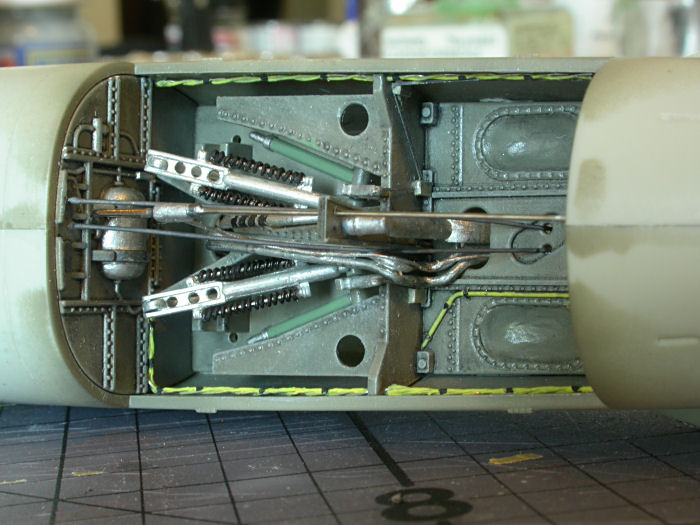
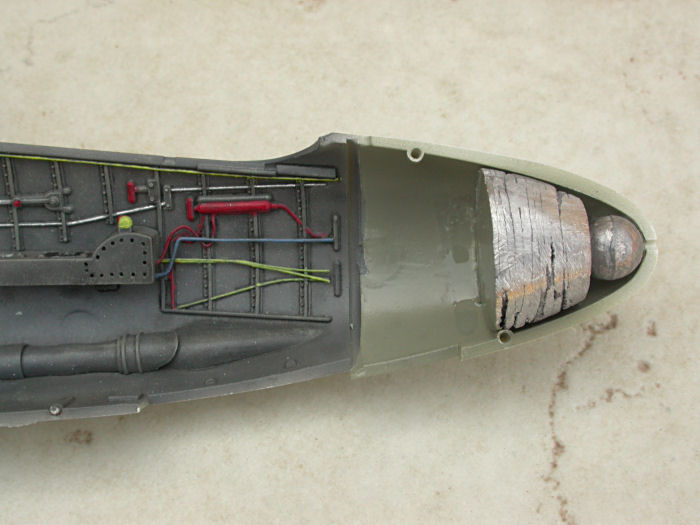
The tricycle landing gear requires some weight to be added to the nose. I pounded several lead fishing weights flat, hammered and glued them together, and filed the assembly to fit snuggly into the nose. I used the kit instrument panel, painting the raised details and finishing the instrument faces with Future Floor Wax.
Klaus Harold treated the HyperScale forum to a great series of super-detailed construction photos as he built this kit a few years back. I was able to use some of his work as a reference. The bulk of my modifications were details in the wheel wells made up of spue, fine solder, copper wire, insect pins, and EZ-line. Unfortunately, few details can be seen unless the model is displayed on a mirror base.

The clear canopy parts were dunked in Future Floor Wax and left off till virtually the end of the model. The forward section mated well with the fuselage with just a bit of white glue to fill the transition seam.
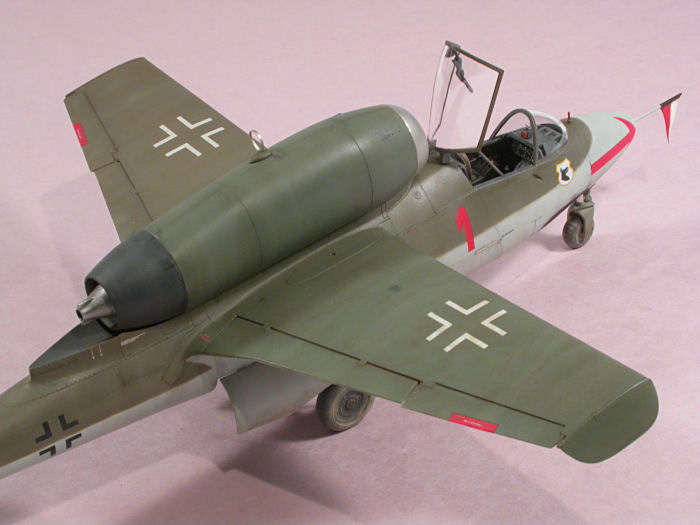
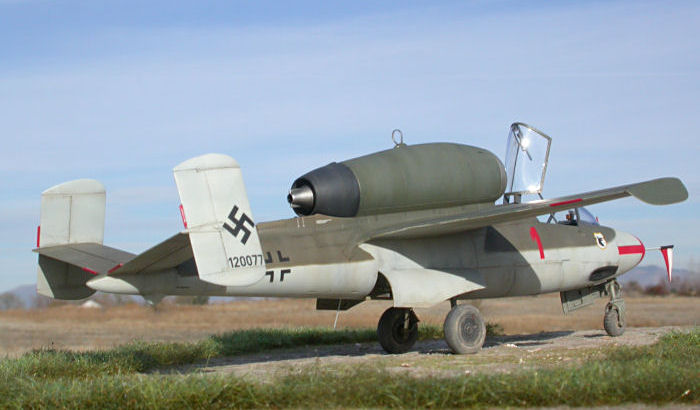
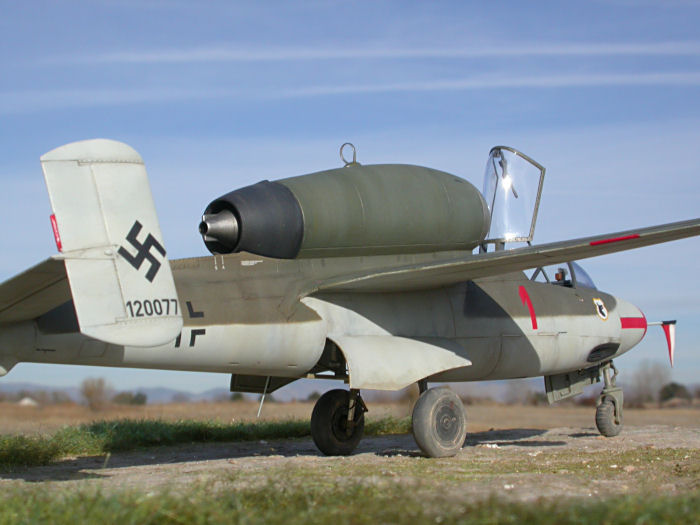
The overall fit of parts was very good, just a few things to look out for such as the wing to fuselage joints at the leading edges. There’s a raised reinforcement detail that seems like it should line up but required a little filling and sanding. Also, check your reference photos closely to match the outward angle for the main landing gear. The natural fit of the parts will result in the gear struts being too vertical, making for a very narrow track. I didn’t notice till it was finished and now it’s a sore spot that begs to be corrected.
Accuracy buffs will also want to correct the shape of the main gear doors, changing the arc profile of the lower edge to a straight line. The mating fuselage opening will have to be altered also.
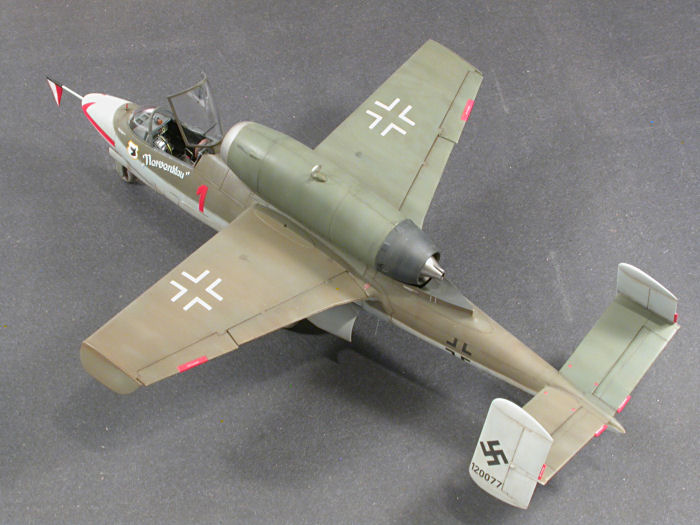
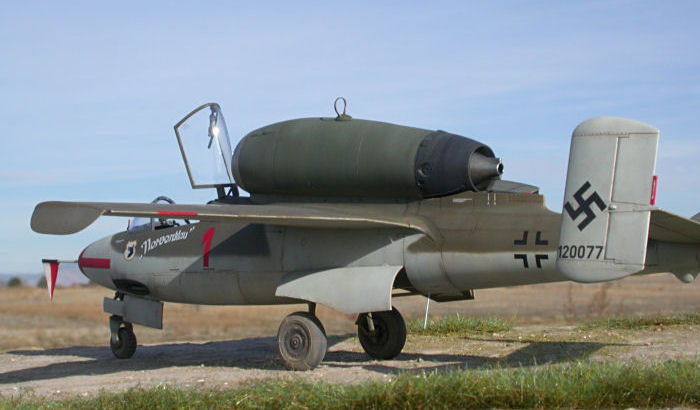
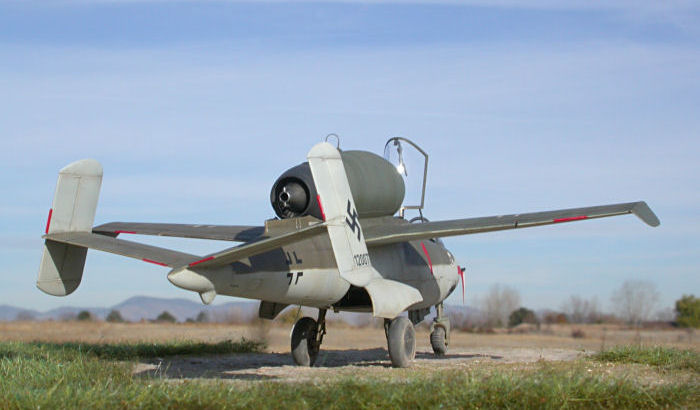
The instructions show that the ventral antenna should be located on the starboard side of the fuselage. I found a reference photo that appeared to contradict this and placed mine on the port. However, angles in photos can be deceiving and I later found better references that supported Revell’s instructions. I repositioned it after taking these photos.
Painting, Decals and Weathering |
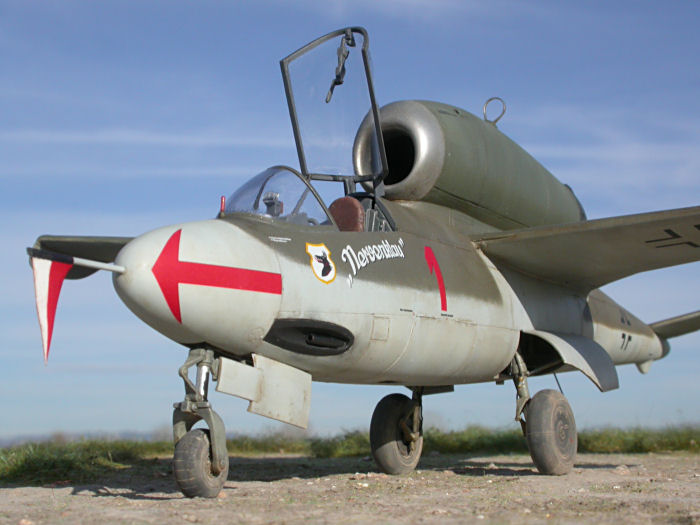
I used Testor's Model Master enamel paints for the RLM 81 brunviolette, 82 dunkelgrun over 76 lichtblau scheme. Rolling a “snake” of poster hanging putty and then airbrushing at a 45 degree angle achieved the semi-soft edge between the upper and lower colors. The engine intake was painted with Alclad polished aluminum and later over sprayed with heavily thinned Humbrol brown.
The kit decals were used with the exception of aftermarket swastikas.
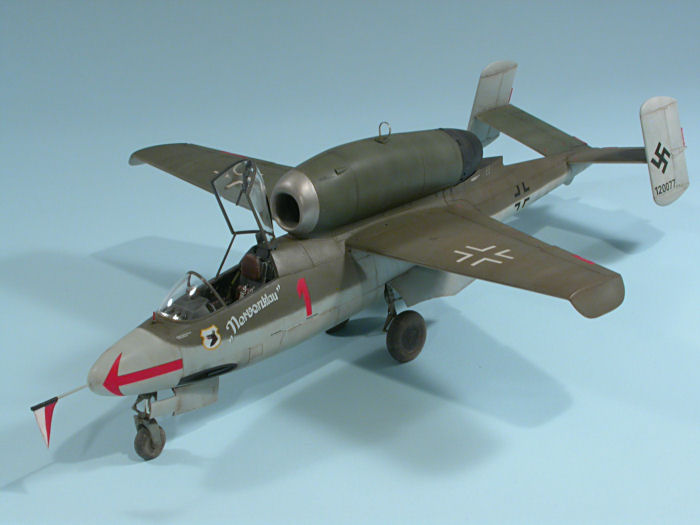
The model received a wash of artist oils thinned with Turpeniod to bring out the panel lines. This was followed up with some streaks of green, brown, and whatever color was handy. Finally, I sprayed a mix of Humbrol Flat and Gloss Cote to give it a slight sheen.
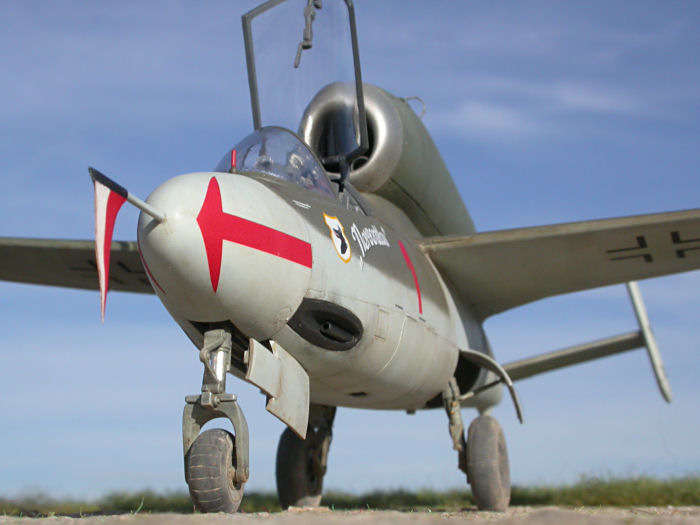
I added some black weathering powder stains around the cannons and finished the tires with Mig pigments - European Dust.
Following Chris Wauchop’s lead, I added a pitot tube flag, made from Tamiya tape.
Pictures were taken with a Nikon Coolpix 4500 and cropped, sized, & sharpened using Corel Paint Shop Pro 9.
Revell’s Volksjäger is a quick build that results in a sporty looking fighter, especially in a lineup of propeller driven aircraft.
Model, Images and Text Copyright © 2009 by Brian Geiger
Page Created 17 June, 2009
Last Updated
17 June, 2009
Back to
HyperScale Main Page

|
 Home
| What's New | Features | Gallery | Reviews | Reference | Resource Guides | Forum |
Home
| What's New | Features | Gallery | Reviews | Reference | Resource Guides | Forum |