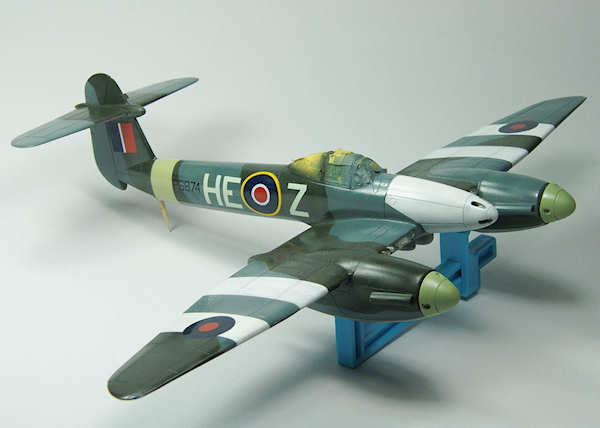
Classic Airframes' 1/48 scale
Westland Whirlwind
by Calum Gibson
|
|
Westland Whirlwind |

HyperScale is proudly supported by Squadron
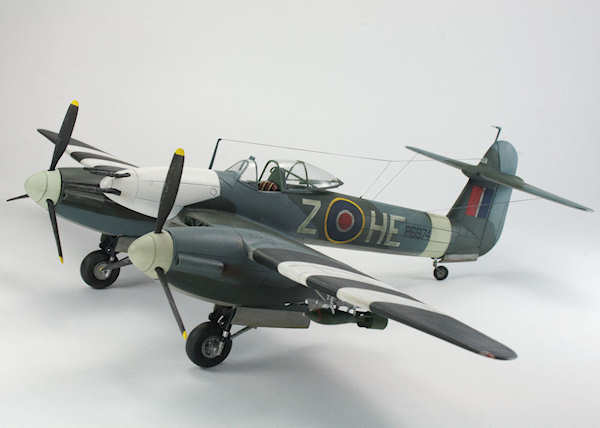
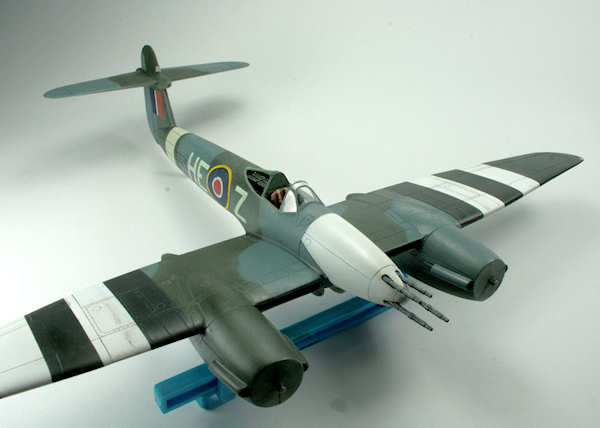
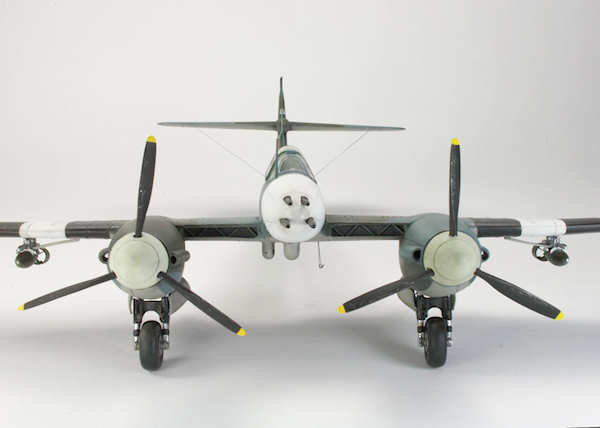
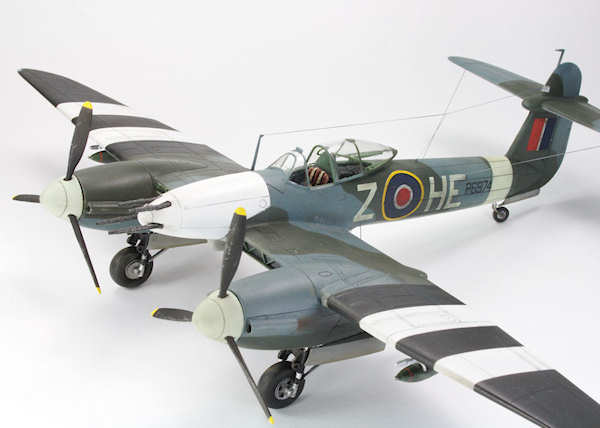
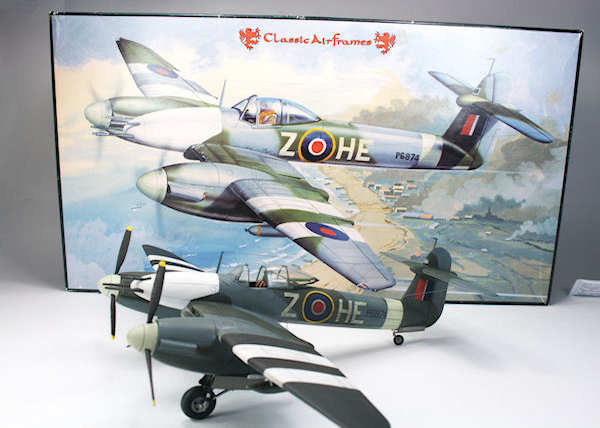
I've always thought the Whirlwind was such a mean looking aircraft so when Classic Airframes re-released their Whirlwind kit I had to have one, even more so as the Box Art had an interesting variation on "Invasion Stripes" for an aircraft used the Dieppe operation in 1942. This was curious as I had I had a look at "The Greatest Air Battle: Dieppe, 19 August 1942" by Norman Franks and it had no mention of 263 Sqn or Whirlwinds.
While building this aircraft I learnt a lot about the aircraft. it could have been a aircraft to rank alongside the Typhoon had it been given the chance that aircraft got. But a combination of unreliable (debatable) engines, an intense hatred from the Air Ministry and a poorly managed manufacturer doomed the aircraft to a production of just 274 airframes. For a great book on the Whirlwind look for a copy of the Airlife book "Whirlwind The Westland Whirlwind Fighter" by Victor F Bingham.
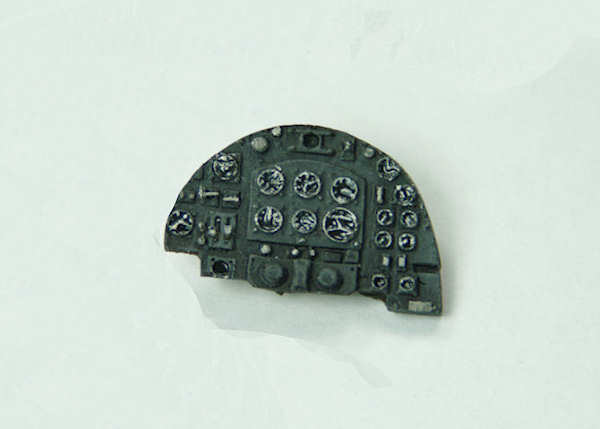
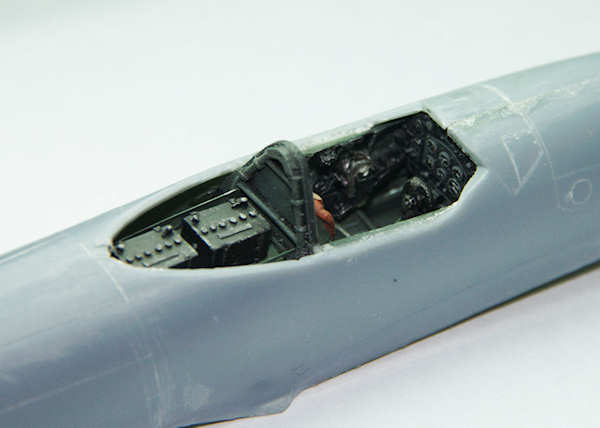
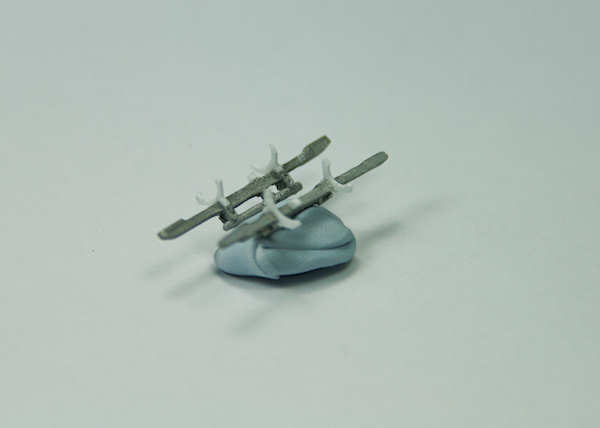
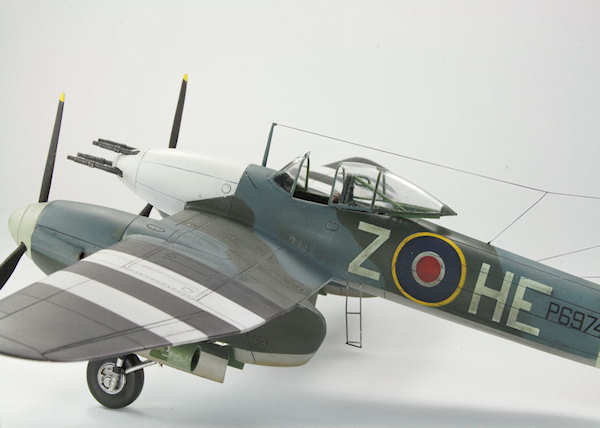
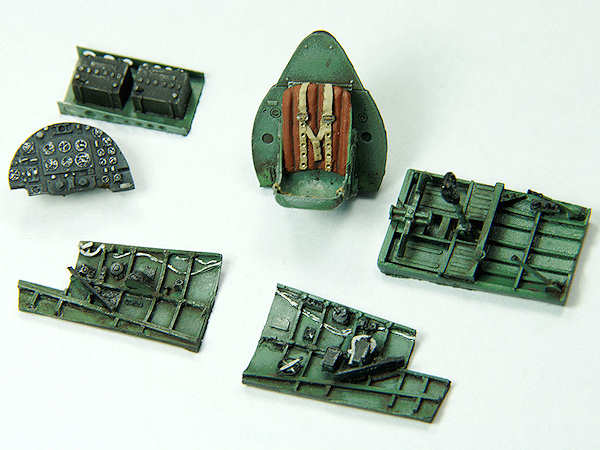
As usual construction started with the cockpit which is really a kit in itself. The cockpit was mastered by Roy Sutherland of Cooper Details and BarracudaCals fame and is one of the best out of the box cockpits I've ever seen. There are plenty of tiny photo etch pieces for the various knobs and levers, amazingly for me I managed not to lose any of them. The cockpit was mainly painted with Humbrol enamels. Following a bit of dry brushing a acrylic gloss coat and then a oil wash was applied. The detail on the instrument panel and compass was hand painted and glass simulated with a drop of floor polish (Pledge One Go in this case).
As expected getting the cockpit located in the right place took a lot of dry fitting. This was mainly due to the vagueness of the kit instructions. One of my pet hates when dealing with a Classic Airframes product. I can handle the fact that things don't fit perfectly and that there aren't locating lugs but it would be nice to get a set of instructions that helps you out more . For example I couldn't figure out where the little resin c pieces that go in the rear fuselage went, or what they were meant to do. It looks like they are hidden by the radio (or Battery tray) behind the pilot so I ended up leaving them out.
Anyway to get it located correctly I took 1 fuselage half and decided where I wanted the instrument panel to sit. I then glued the panel onto this piece. I then glued the side walls to the floor and slid them forward to mate with the instrument panel. I then glued this assembly to the fuselage half. From there I attached the other half glued with Tamiya Extra Thin cement and filled the seams with CA glue. This sounds simple but it wasn't.
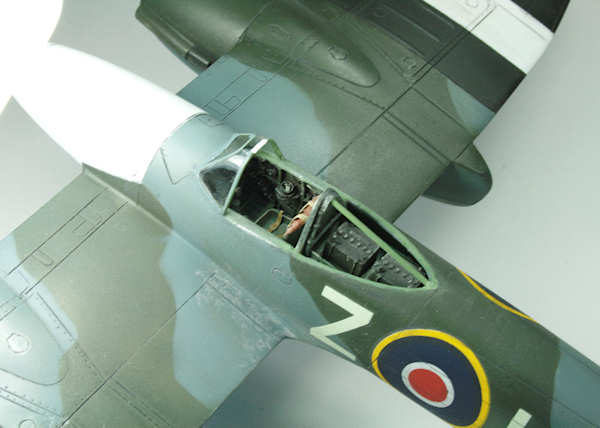
Because of off the lovely detail in the cockpit I just had to display the canopy open. Unfortunately the kit comes with a once piece injection moulded canopy. It was with much trepidation that I decided to cut the canopy in 2 pieces. Surprisingly for me with the careful use of a razor saw this proved remarkably easy.
Most of the following tips came from a unknown magazine article (authored by John Howard) I had found on building his kit.
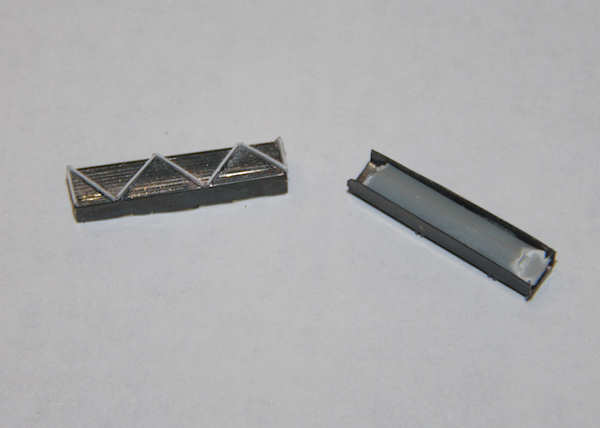
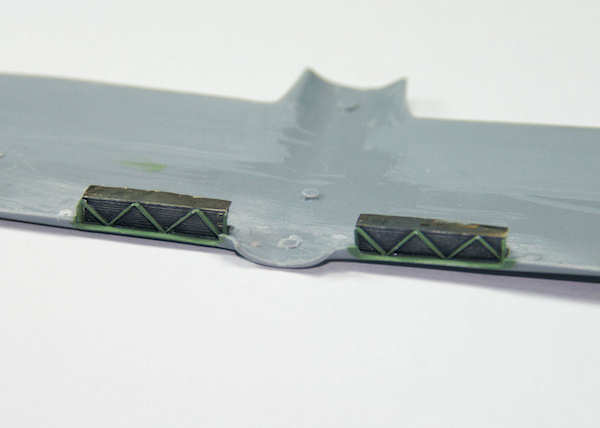
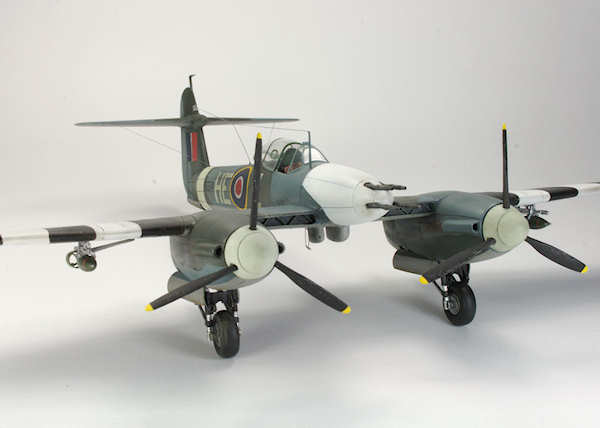
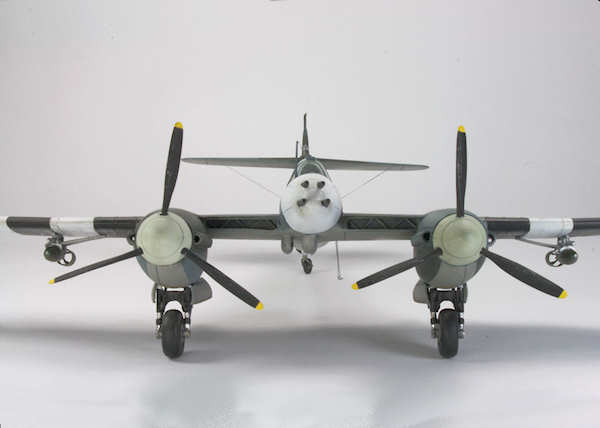
The PE Air filters lack the vanes on the front edges so added them with plastic card. I also thinned the rear of the wings as they were very thick.

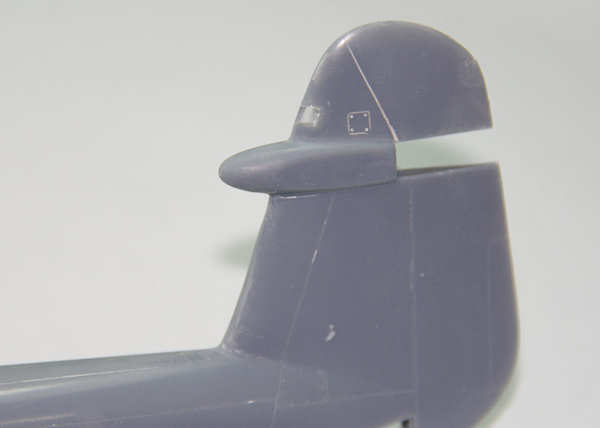
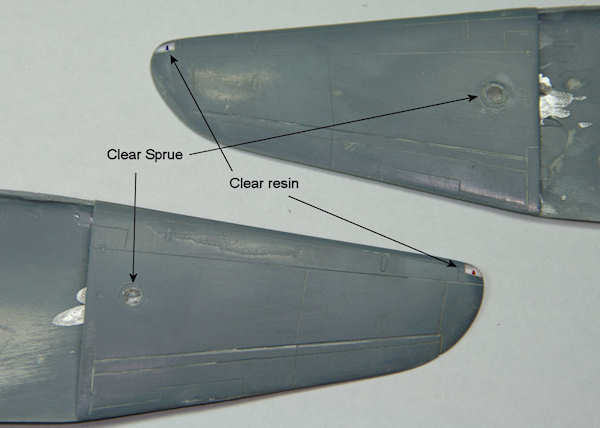
I drilled out the landing lights under the wings and replaced with clear sprue, sanded and polished to fit. The same was done for the antenna connection on the tail with a clear piece of resin used in this case. Finally the same approach was taken for the wingtip lights. To simulate the read and green bulbs a small hole was drilled in the clear resin and then filled with the appropriate clear red or green paint.
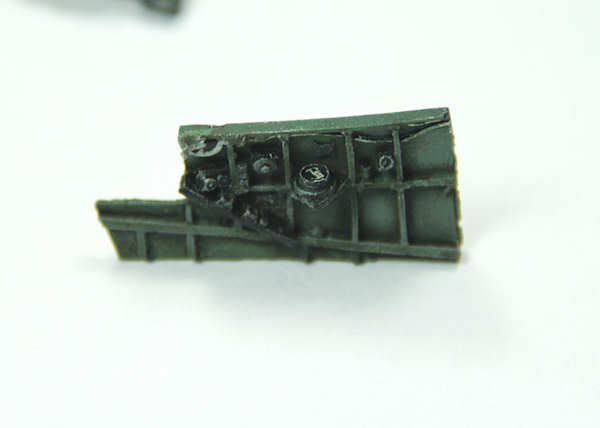
I had a lot of difficulty getting the radiators fitted so, to my eyes at least, they looked correct. I had to remove a lot of material on the inside of the sings to get them to fit. On the bottom of the wings the plastic ended up being was very thin. In the end I still wasn't really that happy with the result but they were together.

At the same time I tackled the small details parts. The sway braces for resin bomb racks were broken so I scratch built replacements from plastic card.
The plastic tail wheel was very flimsily so I built a new fork from a paper clip and made a new axle for the tail wheel from plastic rod.

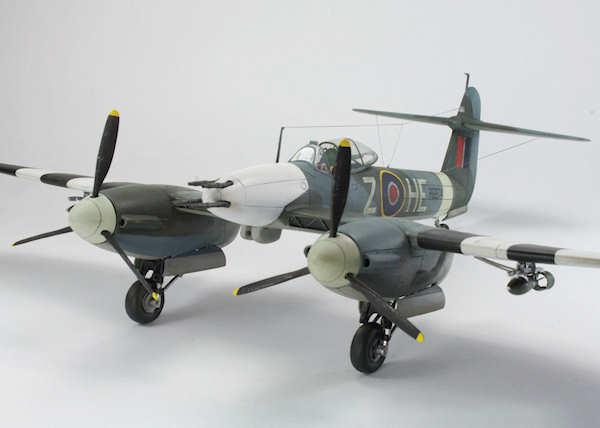
The spinners were very poorly cast and after clean up were not really round at the base. They were also to small for the nacelles. I repaired them as best I could but I was never entirely happy with the end result. As usual it wasn't until I'd finished that a way to fix this came to me.
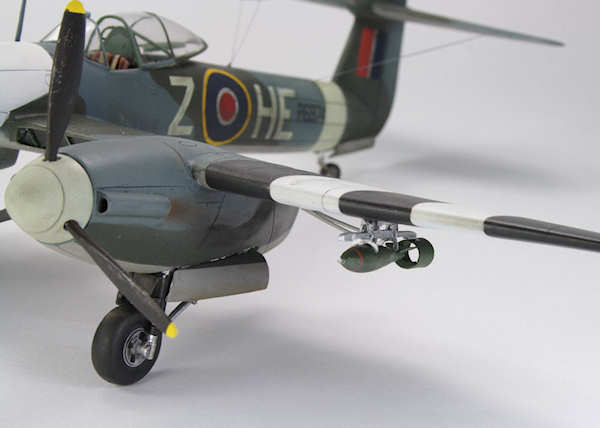
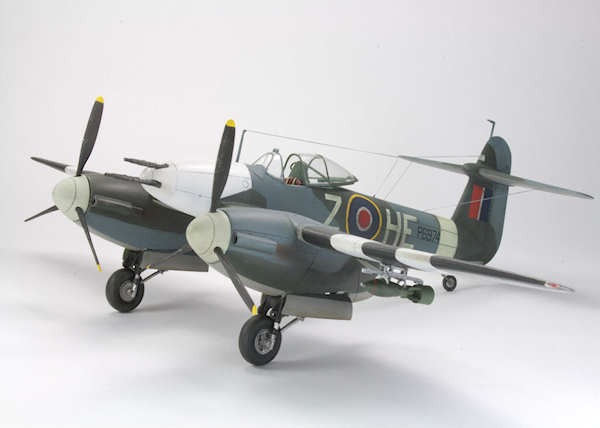
The bombs also proved to be mini kits with PE and resin parts but they look nice when assembled. Getting the tails symmetrical proved difficult and I don't think I really got them perfect.
The white metal landing gear also proved challenging with a fair bit of clean up required. Being white metal they are very soft and easy to bend. When together they were too wide so I filed the mating surfaces down so the width of the assembly appeared to fit in the wheel wells. I was to find out later I hadn't taken enough of.

It was about now that things went pear shaped. I posted some in progress shots on Hyperscale. Roy Sutherland pointed out a couple of things. One was that the serial number that Classic Airframes gives you for this aircraft (P6874) is for actually for a Airspeed Oxford.
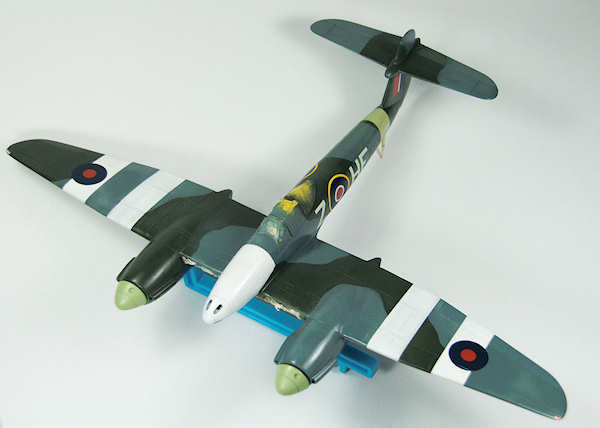
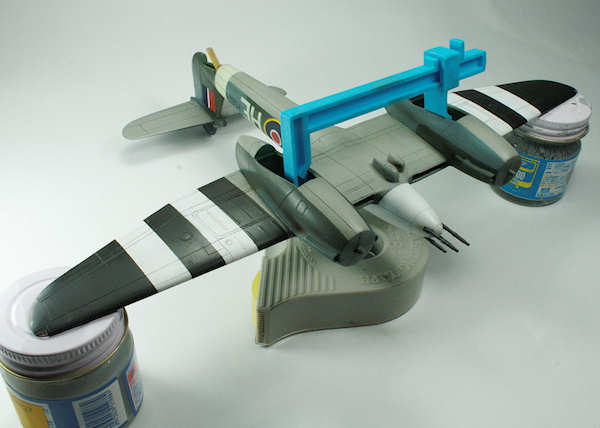
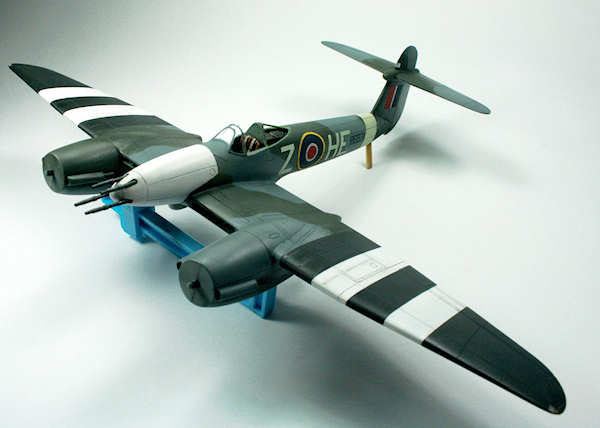
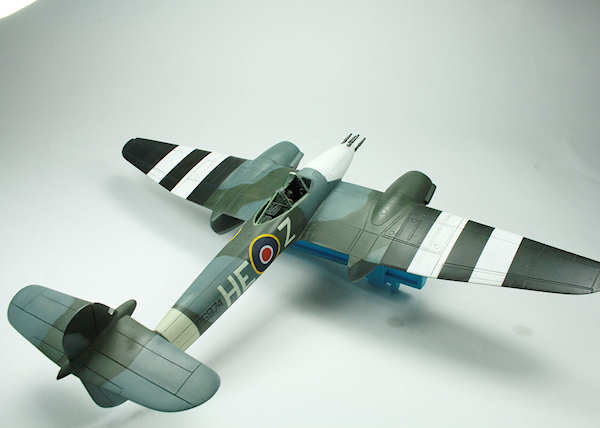
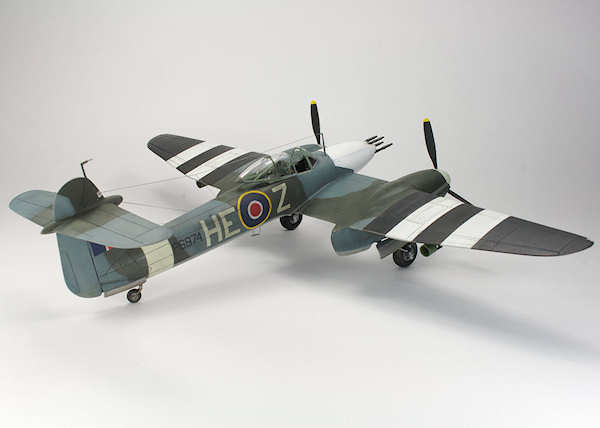
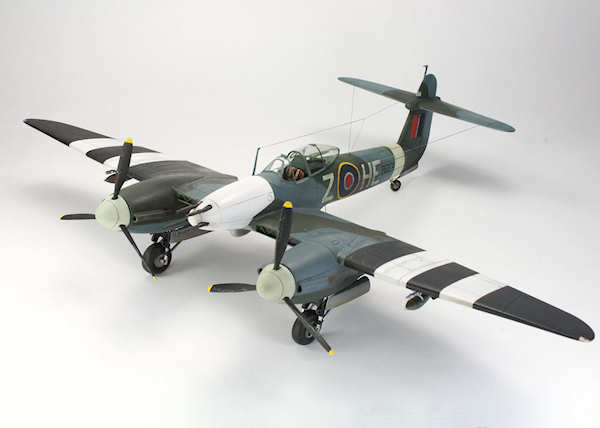
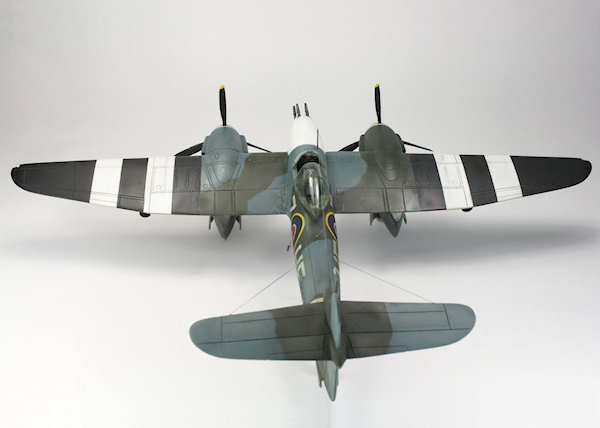
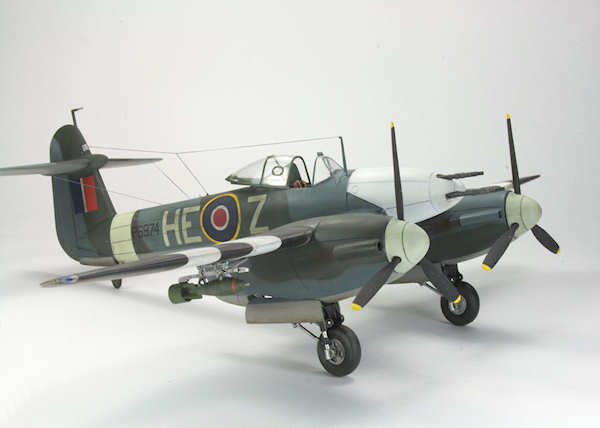
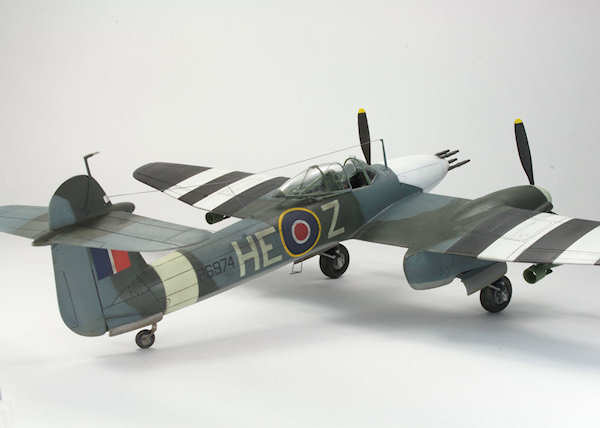
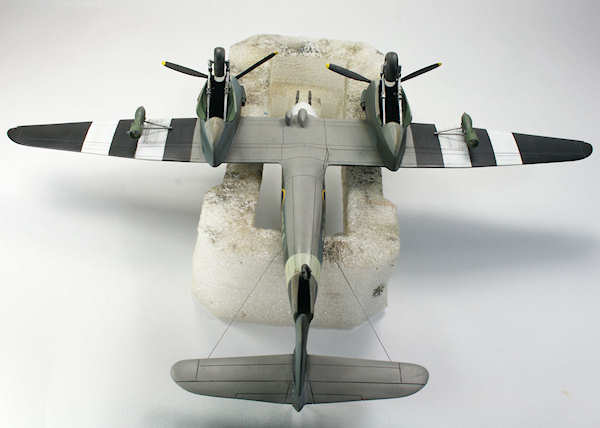
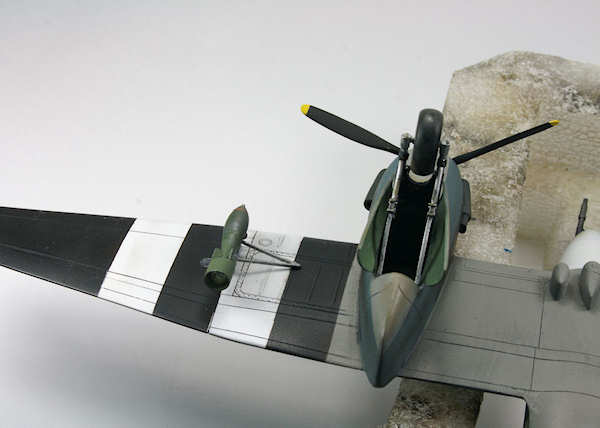
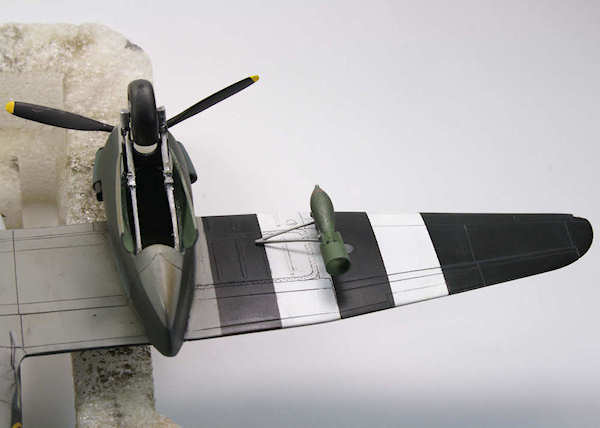
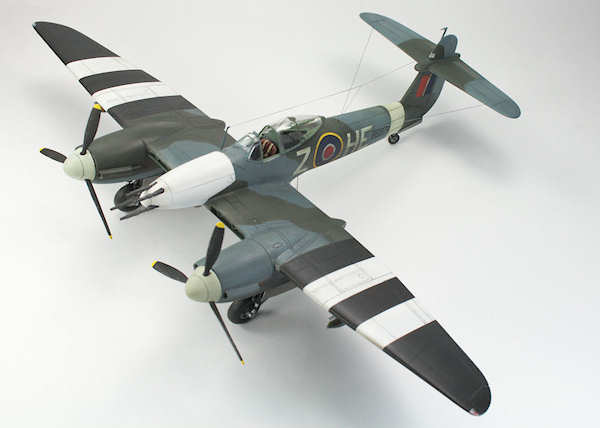
He also pointed out that this paint scheme was for Operation Starkey in September 1943, not Dieppe. And that he believed that the black should also be on the upper surfaces in a reverse pattern to normal D Day striped , I.e. Black White, Black, White Black and that the official drawings had been sighted by a friend who was researching Operation Starkey (since then he has released a decal sheet with one Op Starkey subjects). This triggered a memory, I'd seen some similar drawings in my copies of the 2nd Tactical Air Force Series of books, sure enough the official drawings (IWM reference no's 18410 and 1808) were in Volume 1. They quite clearly specify the black on the upper surfaces, give details for single and twin engine aircraft and detail the actual sizes of the bands but give no confirmation of the roundels.
Now I could find no pictures that confirm that the Whirlwind didn't have the scheme as depicted on the box art, instructions and in every other profile I've seen. But in the photos of Boston's in the 2 TAF book you can quite clearly see the black did go onto the upper wing surfaces however nothing on the roundels could be concluded form these images.
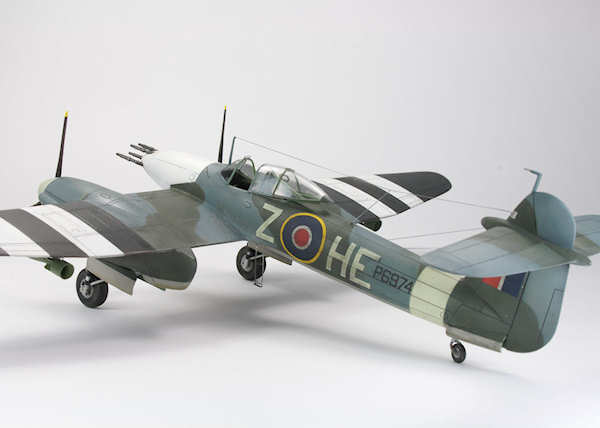
So I was in a quandary, do I go with everyone else and leave it as or do I go with the drawings...... As you can see (much to consternation of my wife) I went with the drawings. And as I now knew the stripe widths I also decided to try and correct that, instead of taking the simple route and just filling in the lines with the black. Bad move. The repair job just didn't work out so I used Mr Color thinner to strip the wings where the black and white needed to go. After a couple of hour work over a few nights A I got the bands back on. I left the roundels off as I assumed as it was only for a 2-3 day operation they would have just painted them over.
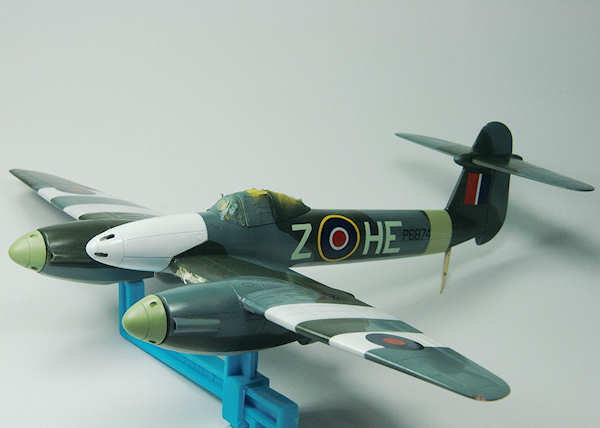
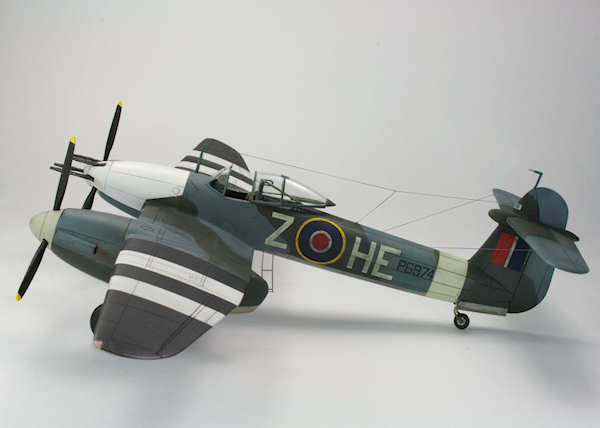
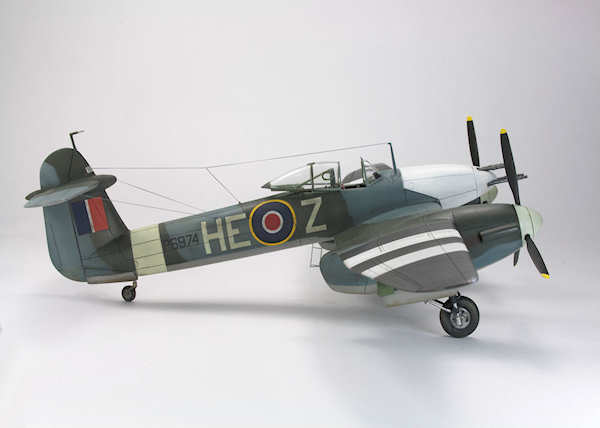
Now I also had the serial number error to correct. Fortunately the Airlife book "Whirlwind The Westland Whirlwind Fighter" had details of Operation Starkey including serial numbers of the aircraft that took part. The correct serial number for HE-Z was P6974. Wit a bit of careful masking it was relatively simple to correct the serial number.
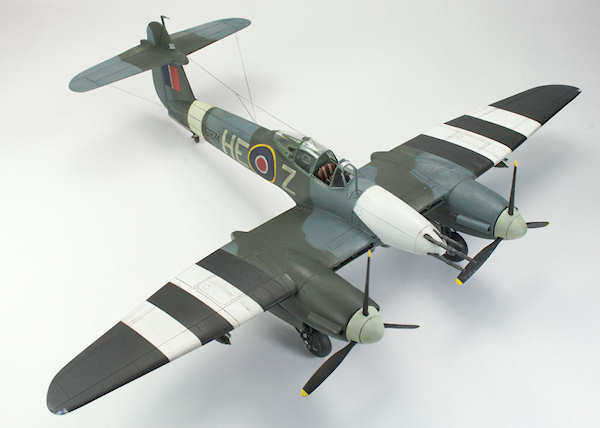
At this stage I also decided I wasn't happy with the colour of the sky bands and spinners. The Tamiya sky I used appeared to green and didn't match the decals at all . I tend to think that the decals and sky paint on the aircraft would usually be very similar is shade. The Gunze Sky was paler but not pale enough so in the end I used an old tin of Humbrol Duck egg Blue which was very close to the decals in colour.
Finally another coat of Tamiya Gloss Clear was applied and it was ready for a wash.
The wash (as usual) was Promodellers Weathering Sludge Wash for the wash. I like this stuff as being water based it's forgiving, cleans up easy and doesn't need to sealed prior to decaling.
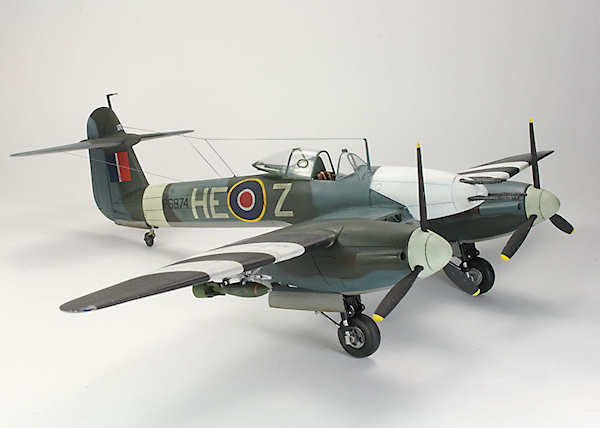
Getting the undercarriage parts together was a challenge as well. They were still a little to wide and the locating points along with the instructions made for some interesting moments.
Getting the prop blades into the spinners at the correct angles was also fun, especially as the mounting holes have no alignment tabs. Thankfully I had some good photographic references to study. I think I've got them reasonably right. I also had to figure out how to pose the spinners so their lack of size and circularity weren't to noticeable.
All the little details like the gun barrels, tail wheel, antenna masts and antenna wires were applied at this stage. Ezy line was used for the antenna and while it's not circular in profile, once in place you can't break it easily which is a huge plus for me.
Finally a flat coat of Gunze clear, again thinned with Mr Color Levelling thinner was applied and then canopy masks removed. A bit of tape residue was apparent on the canopy but this was easily removed with a bit of CRC (similar to WD 40) on a cotton bud.
Pastel chalks and a silver pencil were used to apply the final bit of weathering. I didn't apply to much weathering despite many operational Whirlwinds looking quite beaten up, as I had really had enough by this stage.
While I struggled with the build at times many of the problems were of my own making. And then there was the research, or lack of it on my behalf, but I think changing the paint scheme on the wings was worth it as it makes the aircraft stand out from those with the usual D Day stripes . Apart the criticism levelled earlier this kit isn't that hard to build and looks pretty nice when done. Hopefully Classic Airframes will re-release this in the future.
-
Flight Global Image Archives
-
2nd Tactical Air Force Volume 1
-
Clean Blue Westland Whirlwind Cockpit Photos
-
Allied Wings - Westland Whirlwind Mk I
-
"Whirlwind The Westland Whirlwind Fighter"
-
Magazine Article (author John Howard)
-
Hyperscale Article - Westland Whirlwind by Brett Green (Classic Airframes 1/48)
Mode, Text and Images Copyright © 2009 Calum Gibson
Page Created 17 September, 2009
Last Updated
17 September, 2009
Back to
HyperScale Main Page

|
 Home
| What's New |
Features |
Gallery |
Reviews |
Reference |
Forum |
Search
Home
| What's New |
Features |
Gallery |
Reviews |
Reference |
Forum |
Search