Hasegawa's 1/72 scale
Nakajima Ki-84 Hayate
by Mark Davies
|
Nakajima Ki-84 Hayate (Frank) |

HyperScale is proudly supported by Squadron
Background
The Nakajima Ki 84 Hayate (Gale), given the allied codename of Frank, was designed to replace the Japanese Imperial Army Air Force’s Nakajima Ki 43. In many respects it was a fighter that could pretty much equal the performance of opposing allied fighters whilst maintaining superior levels of manoeuvrability that were traditionally emphasised in Japanese fighter design.
However its reasonable armament and protection did not offset frequent problems with poor build quality towards the war’s end, especially with engines, and a shortage of experienced pilots. In all around 3,500 were built, with a few being operated by China and Indonesia.
The Kit
I suspect that the kit is reasonably accurate as it looks right in outline and proportions, but I must confess to usually leaving it to others to check and publish exact reviews and describe any accuracy problems etc.
Hasegawa’s kit is typical of earlier products from this manufacturer, which I think was probably first produced in the late 70’s or early 80’s. It compares very favourably with other brands of the time, with fine raised panel detail, crisp mouldings, good fit, simple cockpit, adequate engine detail and clear canopy. It’s probably fair to say in fact that it is superior to many Western kits of single engined fighters released around the same time.
Although it has no bearing on the kit’s quality, I also liked the fact that my example came in the original small box. Sufficient for the parts without leaving room for three or four more, as seems to be more modern practice with many manufacturers. However this also meant I got early Hasegawa decals, which were for their time inferior to some of the competition. No doubt more recent release have better decals and more options.
I decided to add a True Details resin cockpit and use a Falcon vac-form canopy I had put aside. I planned to keep the very fine raised detail, as I’m not always convinced by engraved surface detail (although it certainly makes building easier). It’s a year or so since I built this kit, but somewhere along the way I damaged some surface detail, and decided to build a “smoothy” as I call raised detail kits with surface detail sanded off.
As I have mentioned, the fit was generally good, so it all came down to painting. I think it was problems with white paint that caused me to I become a bit disenchanted with the build, and so I decided to just get things finished and move on to my next project. So I lowered my sights quality-wise and bashed on with it.
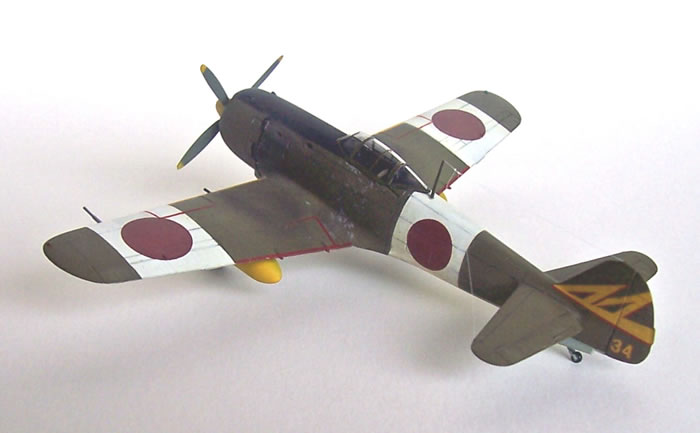
I chose to paint my national insignia, as the decals were a bright red, old and a bit out of register. The upper surface colour was a slightly modified Olive Drab or RLM 81 Braunviolet (I can’t recall) and IJAF Grey undersurfaces.
I then decided to draw in most of the panel lines with pencil. Being a bit disinterested in the build, I just used what I had to hand, and consequently the lines are not as delicate as would have been achieved by using a finer pencil. Kit decals were used for the tail marking. I realised I’d forgotten to paint and mask red lines around the flaps and other areas on the upper wings. These were quickly added, and I made a bit of a mess of them.
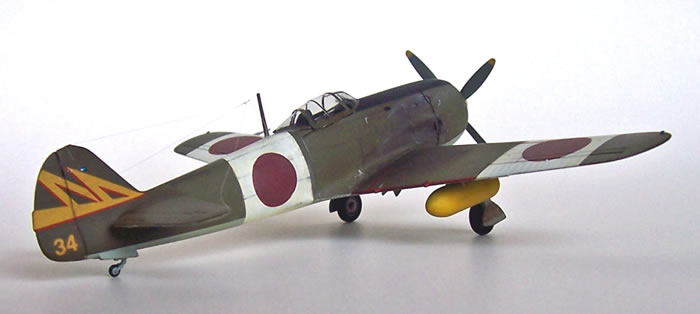
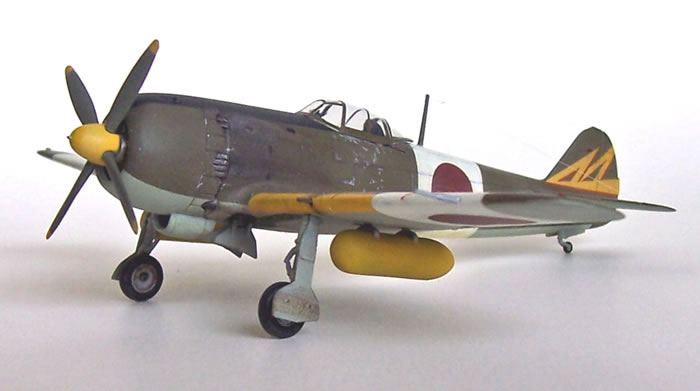
A bit of heavy weathering to suggest wear and staining was added for reality and to distract attention from a less than perfect finish. Things wrapped up with the addition of antenna wires and the brightly coloured drop tanks.
To add final insult to injury, I have just noticed from the photos that there is a slight gap between the windshield and fuselage on one side when viewed a low angle. It doesn’t show in my display cabinet, and so has not been corrected. C’est la vie…
To be honest I think that this kit deserved a better effort, as I it could be made to look very nice. As the reader will gather, I don’t feel that it’s my best work.
Normally I write a build article shortly after every kit I finish. A year or so down the track I decided that I should still write an article on the kit. After all, it served part of its purpose by filling my display cabinet with another 1/72 scale model and reduced my 1,000+ unbuilt collection by one! The fact I had some motivation problems cannot be blamed on this very “honest” kit. I also thought there’s no real harm in sharing one of my poorer efforts if only to illustrate that, from a collection if not quality standpoint, it was still worth finishing a build where you have run into problems you don’t feel like correcting.
I can recommend Hasegawa’s Ki 84 as kit well worth building. I have a more sophisticated Sword kit in the same scale which I shall tackle one day and make a comparison.
Image and Text Copyright ©
2010 by Mark Davies
Page Created 16 February, 2010
Last Updated
16 February, 2010
Back to HyperScale Main Page

|
 Home
| What's New | Features | Gallery | Reviews | Reference | Resource Guides | Forum |
Home
| What's New | Features | Gallery | Reviews | Reference | Resource Guides | Forum |