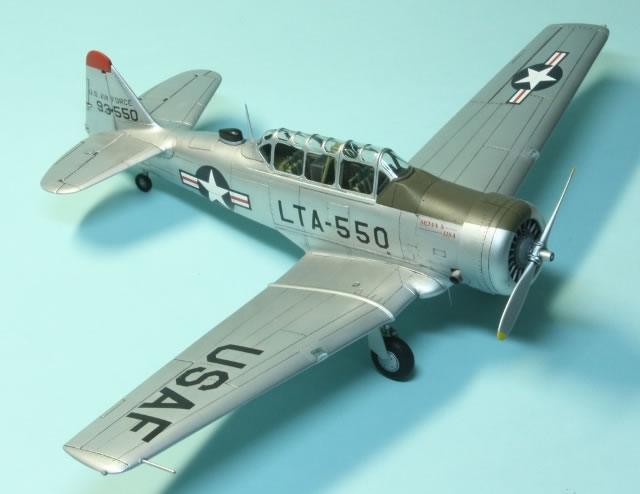
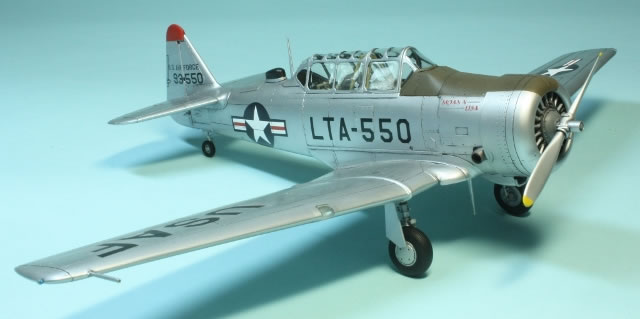
Ocidental's 1/48 scale
LT-6G Texan
by Jon Bryon
|
North American LT-6G Texan |

Italeri's 1/48 scale T-6G Texan is available online from Squadron
Another silver plane! After my brief diversion with Tamiya's grey F-16CJ, Ocidental's T-6G Texan kit rose to the top of the 'to build' pile to make it five silver planes out of the past six. Over the years I'd acquired Eagle Strike's 'Texans over Korea Part 1' decal sheet and the Eduard Zoom photo-etched metal set.
My first task was to do some research to see if Eagle Strike's markings were accurate, and what modifications might need to be made to Ocidental's kit in order to build a Korean War era Texan. Initial findings were not good. The Eagle Strike sheet did not inspire confidence by showing profiles of aircraft that clearly were not T-6Gs, all of them having the more heavily framed canopy of earlier models. I asked around on the Hyperscale Plane Talking Forum and got some very helpful responses. In short, although the decal sheet provides decals for five Texans, three of them are labelled as T-6Ds and one as a SNJ-5C, leaving me with option 2, an LT-6G. (As an aside, I wouldn't be surprised if option 4, described as an 'LT-6D' is in fact an LT-6G, at least going by the buzz code and the fact I couldn't find any info on such a variant.)
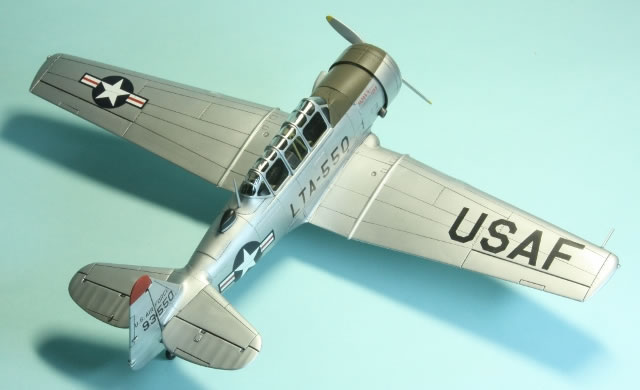
So an LT-6G it was to be. These were slightly modified from standard T-6Gs by being armed with underwing rockets and gun pods, along with corresponding gunsight and armament panel in the cockpit. Although the Ocidental kit includes gun pods, these were for T-6Gs operated by European air forces, and different from Korean era US weapons. Since I am lazy, I took the easy option and simply didn't add pylons or pods, having none suitable in my spares box. Someone else pointed me to an excellent website for T-6 resources, http://www.t6racer.com/t6modeling/homepage.html, but unfortunately, as I finished the build, it appeared to disappear. Maybe it exists somewhere under a different domain name. Fortunately I did download some great images of LT-6Gs in Korea before the website went offline.
Despite not being able to find a photo of LTA-550, I did get photos of LTA-539, 543, 567, 568, 571, 582, 583, 594 (possibly 584) in Korea. These allowed me to make some good guesses for my build. First, wheels could be either block tread or circumferential tread, allowing me to use the latter which came in the kit. Second, wheels had hubs, also provided in the kit. The aerial fit illustrated in the Eagle Strike profile is probably wrong; it most likely should have a mast antenna just behind the canopy (as provided in the kit), and also another in between the main undercarriage legs (not provided). The profile says it should have a spinner; photos showed some LT-6Gs with, others without.
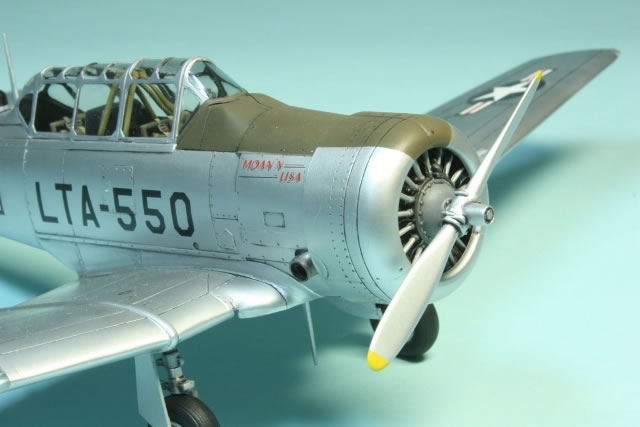
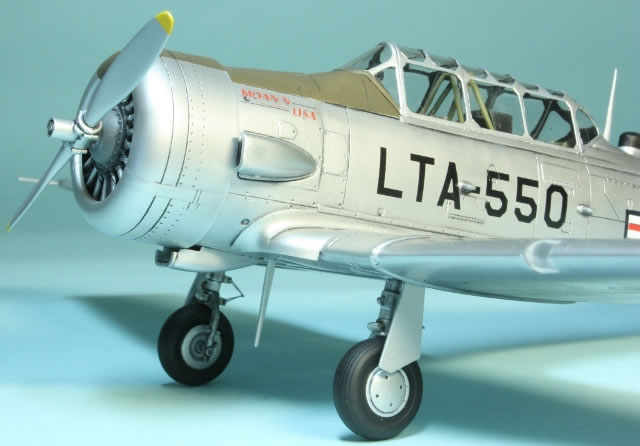
Although the Ocidental kit does have a spinner, unfortunately I discovered as I was putting the finishing touches to the model that it is completely the wrong shape. I therefore left it off; maybe I'll find a more suitable spinner in the future. Ocidental also provide some antenna stubs for whip aerials on the fuselage sides. These were not fitted to LT-6Gs, so I left them off. The correct dorsal antenna to use is part 47, not 47A. Kit part 16, which appears to be some kind of intake (the moulding is very crude, so it's hard to tell) just behind the cowling, should also be left off.
That completed research. On to building! The Ocidental kit is an average effort, somewhere between a limited run and mainstream kit. Recessed detail is nice, but details are generally fairly crude and some of the surface texture is pebbly. I hate sanding this out, so didn't bother. The cockpit is simple, and even with such a large canopy, very little is visible below the sills. Eduard's Zoom set only provided a few items of any real use, the main ones being the seatbelts. The instrument panels were nice, but set so far back under the shrouds that they are invisible. In any case, according to the above website and photos I looked at, the instrument panels are not accurate for a T-6G, although they were sufficiently similar for my purposes.
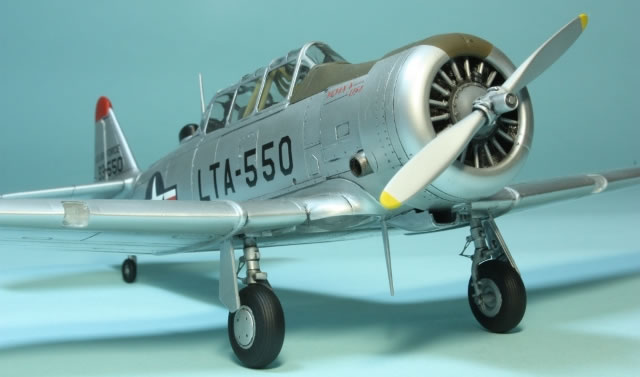
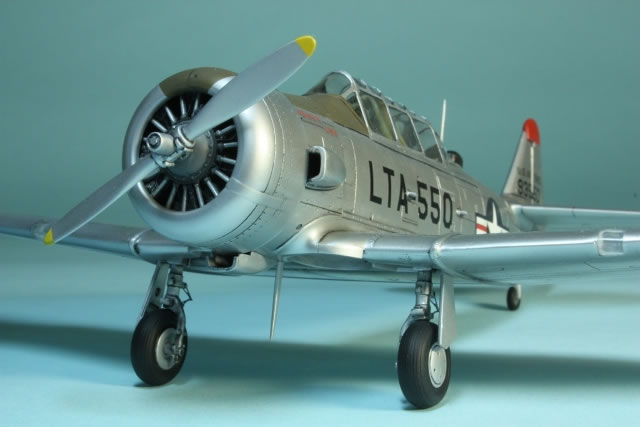
The fuselage goes together okay. There were gaps, filled with superglue and sanded down. The engine is adequate, once the exhaust has been drilled out, but when finally fitted in the cowling sat too far forward, pushing the propellor out to far. It should sit further back. Once in the cowling, the view from the front also looks suspect. I think maybe the crankcase is too large in diameter. The cowling was not added until after painting, which was probably a mistake as I couldn't get it to go over the fuselage as far as I'd have liked, leaving a gap between the cowling and the front upper fuselage. If I were to build this kit again (unlikely!) I'd probably attach the cowling before painting.
To give me the best fit possible between the wings and fuselage, I attached the upper wings to the fuselage first, followed by the lower wing. I also decided to fit the flaps closed, ostensibly to save time, but in the end they fitted so poorly, no time was saved. I fashioned the wing mounted pitot from brass tube, but it is oversimplified compared to the real thing. The tailplanes were also an adequate fit and added after the wings. The rudder actuating tab and aileron hinges were removed, later to be replaced by parts from the Eduard set (which, along with the oleo scissor links, were the only other really worthwhile parts that come with that set).
The first clear parts I tackled were the wing light covers. These were not a good fit, and for some reason went milky around the edges when attached with Tamiya's Extra Thin cement. I used superglue to fill the gaps, then sanded and polished using Tamiya polishing compounds. No lights are provided to fit behind the covers, but they are so opaque you can't see anyway. Finally, the canopy was masked and added, working rearwards from the windscreen. I did have to sand the rearmost sliding portion down lengthwise in order to get everything to fit.
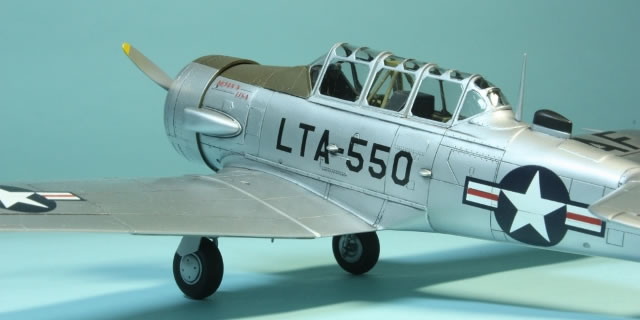
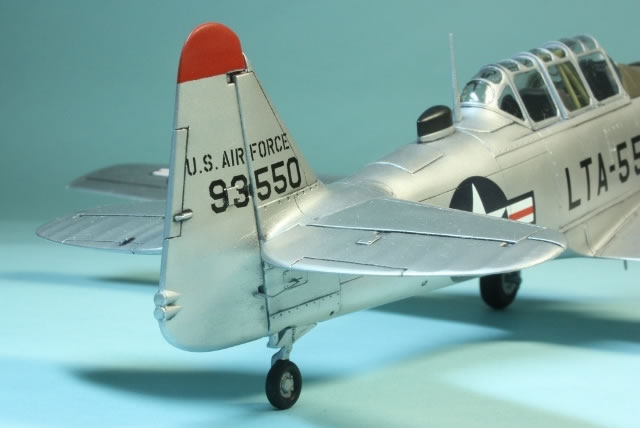
The model was then cleaned and the canopy was painted black. I primed the airframe using Mr Surfacer 1000. This doesn't do as good a job of filling minor scratches as I'd like, but does produce a nice surface for metallic paint. The minor colours were airbrushed on first, all being GSI Mr Color laquers: the red tail tip and the olive drab anti-glare panel, along with the yellow prop tips. The main airframe is Mr Color Silver (8). As usual, some scuffs in the plastic showed through and I struggled to keep bits of dust and fibre out of the paint. It's far from being a great finish, but I was feeling sufficiently lukewarm about this model that I didn't care. The whole lot was sealed under a coat of Johnson's Klear.

The oil wash was a new oil paint I picked up, Paynes Grey this time rather than pure black. As usual, I thinned it with Zippo lighter fluid. The decals were next, and were few. The black items, such as the buzz number and the USAF stencils went down fine. The coloured stars and bars seemed thicker and needed several applications of Mr Mark Softer. Having no reference photo, I simply followed the Eagle Strike instructions. My local model shop has recently begun to stock Lifecolor paints, which will make for a nice alternative to Mr Color, and I used Lifecolor Matt Varnish as the finishing coat over the anti-glare panel, prop and markings. It seemed pretty good.
The final stage was to remove the masking from the canopy (not that great) and add the antennae, undercarriage and etched hinges with superglue.
In summary, this was a kit that I found hard to get excited about, so cut corners. It still needs a spinner as well to be truly considered finished. I was underwhelmed by the Eduard set, and the uncertainties regarding the quality of the Eagle Strike decals are a little annoying. It's a nice addition to the shelf, but I can't see myself building another.
Many thanks to Bill Bailey and Graham Boak for providing additional reference material.
Model, Images and Text Copyright ©
2010 by Jon Bryon
Page Created 13 July, 2010
Last Updated
13 October, 2010
Back to
HyperScale Main Page |
 Home
| What's New | Features | Gallery | Reviews | Reference | Resource Guides | Forum |
Home
| What's New | Features | Gallery | Reviews | Reference | Resource Guides | Forum |