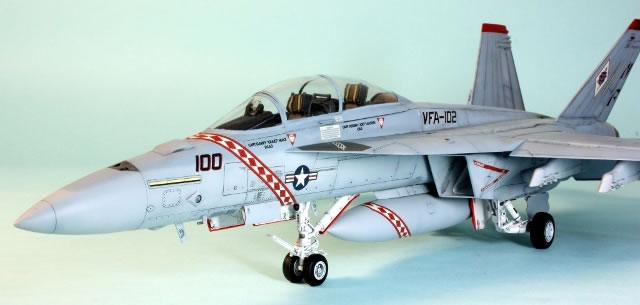
Hasegawa's 1/48 scale
F/A-18F Super Hornet
by Jon Bryon

Italeri's 1/48 scale T-6G Texan is available online from Squadron
I bought this kit shortly after it came out in 2005. At the time it cost £33, which I thought was pretty outrageous, but the kit looked good. Five years on, as I write this, and a Hasegawa 1/48 F/A-18C has a recommended retail of £72, it looks less outrageous. How times change...
Hasegawa's two-seat Super Hornet is nice. Very nice. When it was released, around the same time as Revell's single-seater, it was controversially regarded as the better of the two, with better shapes and the ability to drop the flaps and slats. But it's not perfect, and if you want the gory details you can pop over to Hyperscale forums and do a search for the history. It was certainly a subject that was passionately debated.
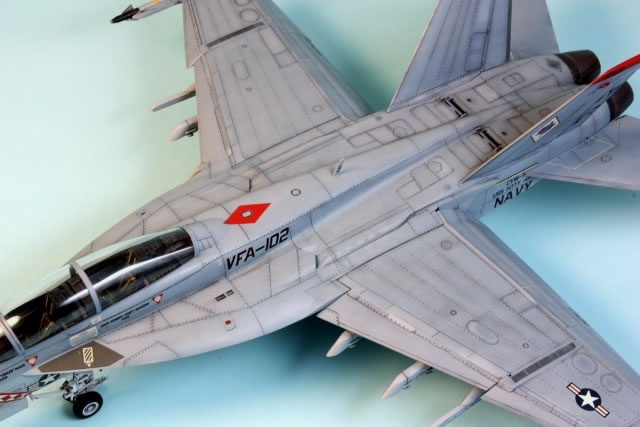
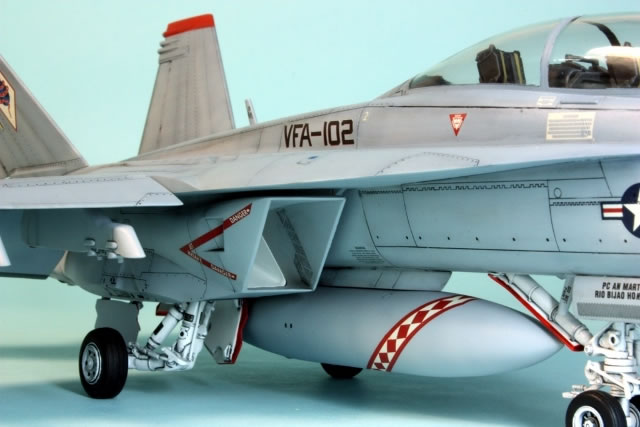
For my more humble purposes, what came in the box was fine. A little research seemed to suggest that the cockpit configuration was for an early block F/A-18F suited to the VFA-102 kit markings, whereas the VFA-103 would have required some modification, so the Diamondbacks it was to be. With that out of the way, construction commenced.
The only modification I made to this kit was in the cockpit, and that was the addition of seatbelts made from Tamiya masking tape and buckles from an old Reheat photo-etch set. The detail is nice and more than adequate for a closed canopy; once built little can be seen beyond the seats without a torch.
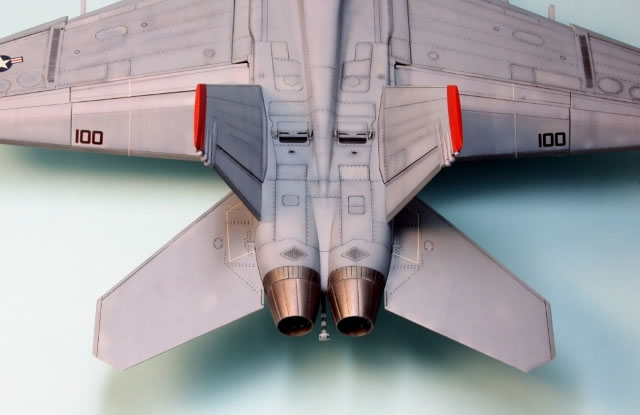
Hasegawa's engineering is nothing if complicated. In the end the fuselage is composed of eight major components. I tackled the intakes early on as these required some time to fill, sand and paint. The plastic for the full length intake trunking is thin, which means that one has to take care with the sanding. I did a satisfactory job of filling using Gunze Mr Dissolved Thinner and sanding with sandpaper blu-tacked to a needle file handle. Once done, I sealed up one end of the trunking (the round end) and filled the intake with Gunze Mr Base White 1000, the best white paint I've ever used. This was drained and the paint left to dry (holding the trunking vertical so the excess can run out cleanly) before repeating until the trunking was nice and white. The completed trunking was then attached to the external intake pieces. The fit here is the major weak point of the kit. In order to preserve the demarcation between the white trunking and the grey inner intake surfaces near the inlet, I prepainted parts A17/16 and C15/13 in Mr Color 308, and then joined the two assemblies. This leaves quite a noticable gap between the white inner trunking and the grey inlet. The only way around this would be to to assemble everything first, fill, sand and then paint, but the grey/white demarcation would be a nightmare to mask.
Elsewhere the fit was average, and Hasegawa's construction sequence was loosely followed. Dry-fitting is essential. The three nose pieces go together nicely, just needing a light sanding and judicious reinstatement of the panel lines. The intakes don't fit that well to the lower fuselage, and I had to consult some online Super Hornet plans to figure out which joins were panel lines and which needed to be removed. The fit of the forward intakes near the chaff dispensers is also not great and difficult to deal with around the delicate detail. The same is also true when fitting the nose assembly to the fuselage. I used a lot of masking tape to mask off the detail before filling (using thick superglue) and sanding; the gaps here are not insignificant.
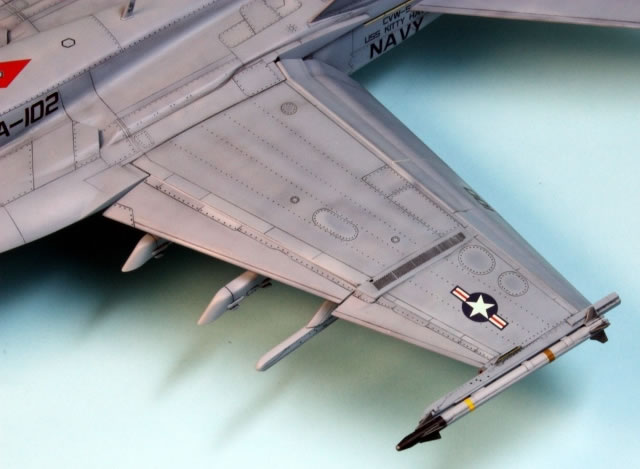
The wings were attached to the upper fuselage using the tabs, but the rest of the joint left loose. This is important because the upper fuselage needs to be bent slightly when fitting to the lower to get the best fit. Joing the lower and upper halves was rather like building an Airfix 1/48 Buccaneer (but not as extreme): joining a little bit at a time with liquid cement (I've started using Tamiya Extra Thin Cement) with the whole joint under tension. This really improves the fit under the leading edge extension (which was still not great and required a lot of superglue filler) and at the front and rear of the wing with the upper fuselage. The join at the rear fuselage was horrible and required a ton of superglue and complete obliteration of all surface detail before rescribing.
Because this is a Hasegawa kit pretty much everything that can be split in two is. That means lots of parts, lots of gluing and lots of cleaning up. Fortunately, with the exception of the large flap undersides (big gaps), everything else fitted well. I left off the fins, tailplanes, pylons, flaps and engines for painting; they all fit well enough later. It's easy to accidentally fit the fins on the wrong side, so pay attention.
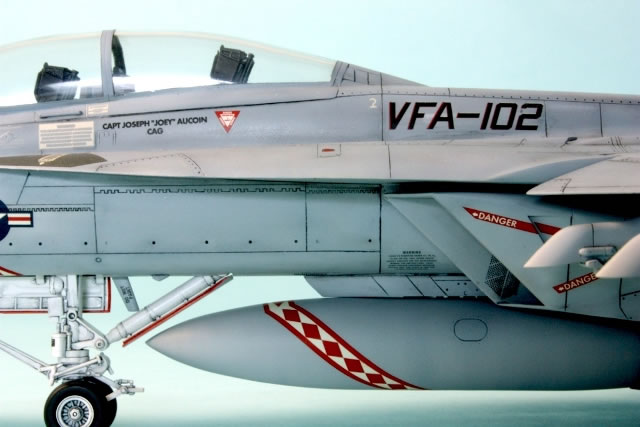
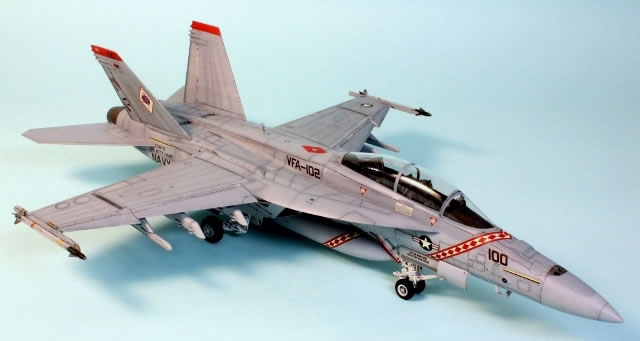
The undercarriage is complex but fits very well. The long nose gear door is inaccurate as what should be a transparent section is only represented by a decal. I left it; I wonder if anyone has made a resin replacement? I decided to add one drop tank, which went together fine, and also to add the Sidewinders and AMRAAMs. The instructions are twice wrong: part R11 fits on the end of the AIM-9X, not the AMRAAM (later boxings of this kit have corrected this mistake), and the painting instructions are, I think, fictional. All AIM-120s and AIM-9s I've seen on these aircraft are grey, not white. I made a classic mistake when building my AMRAAMs, reversing the mid and rear fins on one of them, so I had to leave these off. No great loss, since I'm not a fan of ordnance anyway. But empty wingtip pylons just look wrong, so the AIM-9Xs went on, painted Mr Color 308 with black noses and Alclad Steel fins. I left off the kit-supplied FLIR since the fit looked terrible, and I also left off parts R28 (which look like under-fuselage clasps for AMRAAMs) since I couldn't see them on any photos.
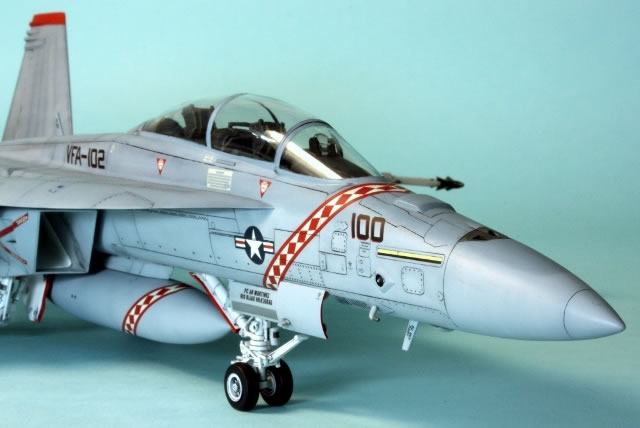
The last thing to fit before painting was the canopy. The canopy itself has a mould line down the middle and I sanded it out with fine sandpaper followed by polishing with Tamiya polishing compounds. I should have paid more attention here as I ended up with some big gaps where the canopy meets the windscreen, I suspect this was because I was sloppy in installing the internal frame. Micro Krystal Kleer was used as a filler, and the end result is not great. Once sanded down I masked using thin strips of Tamiya tape and Gunze Mr Masking Sol. Then it was off for paint.
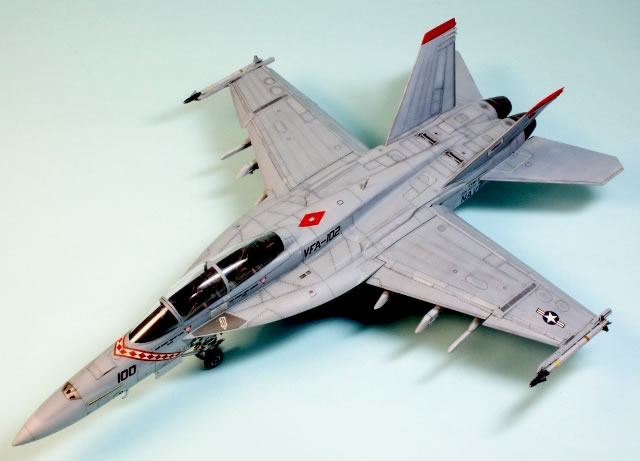
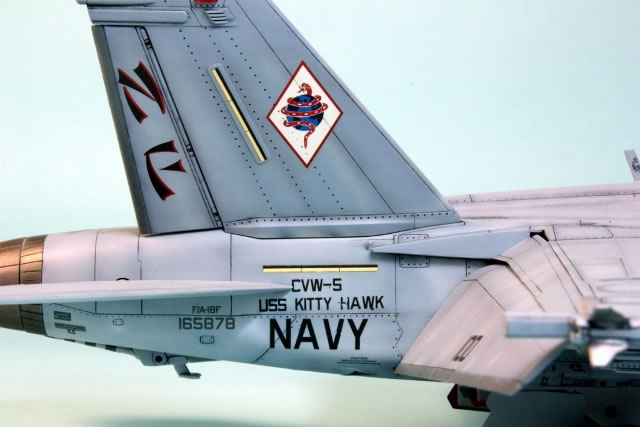
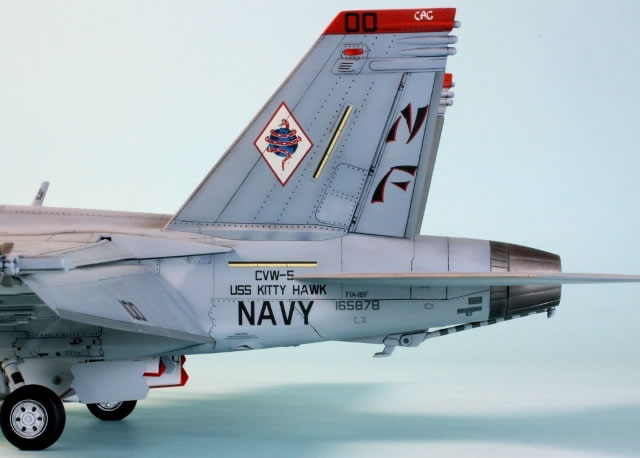
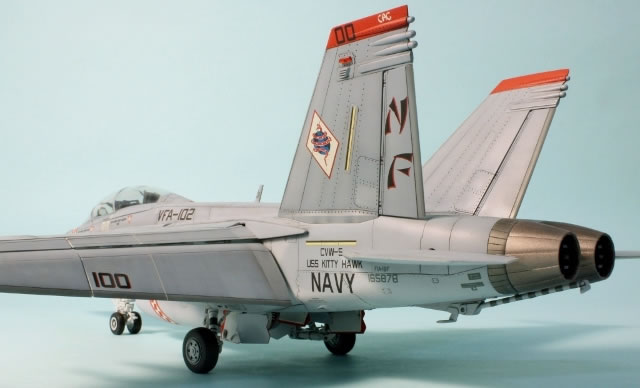
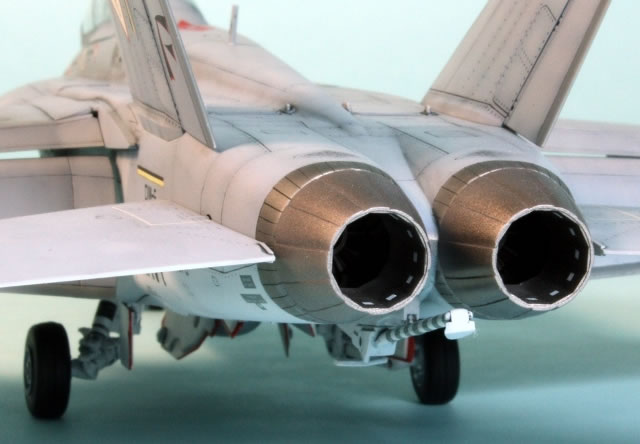
I washed the model using tap water with a little hand detergent and primed using Gunze Mr Surfacer 1000. All joins looked good, so I went ahead with pre-shading. I was after a blotchy finish with dark and light patches, and wanted to achieve this through preshading rather than postshading. Not the most accurate, but then I rarely aim for an accurate finish anyway, preferrring something more stylised. I used black and white for the preshading in a mixture of random squiggles and more intentional spot painting around access panels. The engines, gun and chaff dispensers were painted in Mr Color 61, with Alclad Steel providing contrast. The undercarriage bays were all Mr Base White. Some Mr Color 337 was used for the fin and flap trailing edges, but on reflection I think Hasegawa's recommendation is too dark. Hasegawa also tell the builder to paint the leading edge of the fins this colour, but I couldn't see this on the colour pictures of the aircraft I was modelling that were provided in the (very useful) kit-supplied booklet. Following Mr Color 327 Insignia Red for the tail tips, all these areas were masked for the main greys.
And then disaster struck. While masking and trimming the excess around places like the gun and chaff dispensers, I noticed that the tape (Tamiya) was pulling up the Mr Color, the preshade and the primer undercoat! I had never had this happen before and I was driven to the forums to seek advice. It turns out it could be one of a number of factors: detergent in the water when I washed the model; airbrushing in very low humidity (around 10-15%); something on the surface of the disposable gloves I use; or a dodgy bottle of Mr Surfacer (it was new, thinned with Mr Leveling Thinner, at around 50/50). Whatever it was, it wasn't good. Everything that was masked threated to expose bare plastic once unmasked. And if there's one thing I hate it's redoing stuff. So I pressed on.
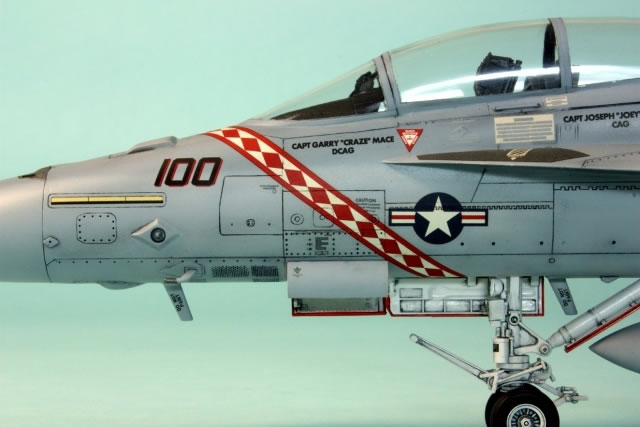
The main (negative) effect this would have on my usual method was that I couldn't mask the dark grey (Mr Color 307) to paint the lighter (Mr Color 308); I was going to have to freehand it. I almost never airbrush demarcations freehand. I like very tight demarcations, and my hand is not that steady. This was new. In the end it went okay, but the demarcation is still not as tight as I'd like. I also had much less control over where the demarcation was, and this airframe was not easy to hold and airbrush at the same time. I count the end result a partial success; the darker grey should extend further down the nose.
The good news was that upon unmasking, paint only lifted around the gun, chaff dispensers and some of the undercarriage bays. The former two I hand painted using Citadel Boltgun Metal (there was no way I was going to risk more masking in these areas), and I resprayed the relevant areas in the bays. At this point I reverted to my normal methods: Johnson's Klear was sprayed over everything, followed by a wash of Paynes Grey oil paint thinned with Zippo lighter fluid. Once dry I gloss coated using Mr Color 46 gloss, which I think is a better base for the Gunze decal solutions used in the subsequent decalling process.
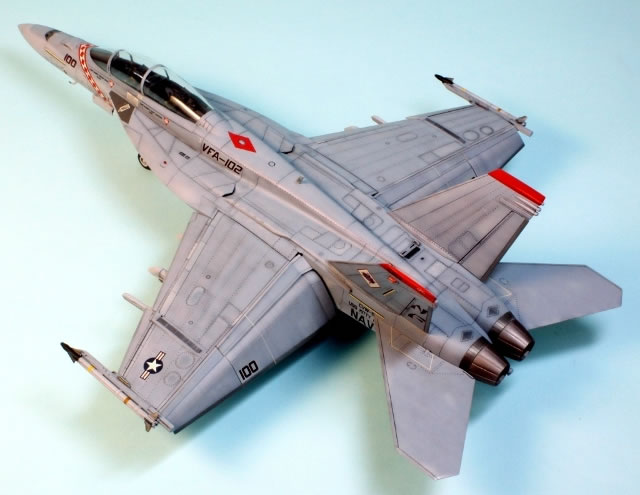
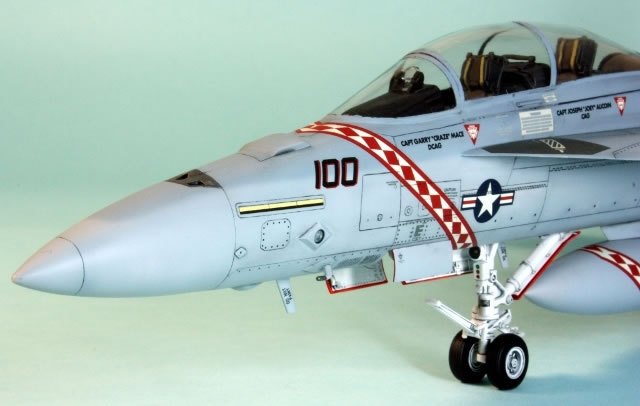
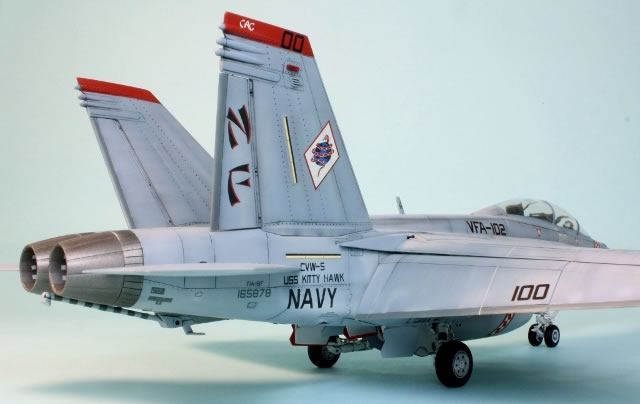
Some comments need to be made regarding decals. First, the decal quality is the lowest I have experienced with Hasegawa. Standard Hasegawa decals are thick and durable. These were thick and fragile. In many places the black print was easily damaged, and you can see this on the finished model around the port 'NAVY' and 'USS KITTY HAWK' lettering, as well as in other places. Secondly, there appear to be errors in the instructions compared to the photos Hasegawa supply. Most critical is that the instructions have the builder place name placards under the canopy on both sides of the fuselage. I was decalling the port side first and duly added them. It was only when I got to the starboard side I realised that Hasegawa don't supply two copies of these decals. Furthermore, the photos indicate they should only be on the starboard side. Doh! The instructions also don't mention the ground crew name that should be on the long nose gear door; a decal is provided and the correct marking is visible in the photos. I couldn't get the diamondback pattern around the nose to meet correctly and ended up patching it up with tiny slivers cut from the drop tank marking I didn't use; the end result is very good, so not a big problem. The engine exhaust interiors should have whitish squares, but are not supplied in the kit. I cut up some spare white decal into squares and applied one row inside the exhausts; there should be more, but I was satisfied with the effect of only one. All in all, not the best Hasegawa decalling experience I've had, and I'm sure there are more errors. I didn't use the grill decals, preferring to highlight the grills using an oil wash.
Once decalling is done I like to add everything else onto the model. I started with the undercarriage, which was time-consuming but straightforward; the engineering in this area is excellent. I had previously outlined the door edges in red using a Gunze Gundam paint marker, which was surprisingly good. When adding the undercarriage I did one of the main units first, getting it as square as I could. Then I added the nose leg (with wheels already attached) and the wings propped level to make sure both nose wheels touched the ground and the leg was vertical. Then, using paint pots and post-it notes as a support under the wings (post-it notes provide almost infinitely fine adjustments to be made to the height of the makeshift jig) I added the other main unit and ensured everything was square and touching the ground correctly; not that easy on a Hornet. The final step, which was a new experiment for me, was to tape coarse (180 grit) sandpaper to a table and slowly drag the plane repeatedly backwards and forwards across the paper to sand little flats in the tyres. This worked very well and I'll be using it again in the future. Once the legs are all on, all the doors and actuating rods can be added, working from the 'inside' out to avoid damaging stuff.

Next all the other bits were added: fins, tailplanes, flaps, pylons, engines, hook, antennae, sidewinders, etc. I did have trouble with the pylons (I always have trouble with pylons!) as I attached the main ones perpendicular to the wing, which looks wrong compared to the outer ones, which are perpendicular to the ground. At this point I noticed that Hasegawa had neglected to mould the navigation lights onto the outermost flap actuator housings, and I couldn't think of a neat way to correct it at this stage, so I left it. The lights on the fuselage were touched in (I wish they had been supplied as separate parts) and the clear lights on the fins added. Note that the flap covers (or whatever they are: parts B3/4/14/15) are visible from the underneath! I didn't, so mine are unpainted, which is no big deal since no one will ever see the underside of my model, but is something you might like to consider. I had assumed they wouldn't be visible, and I was wrong! A final mix of matte and semi-gloss acrylic varnish (Vallejo I think) was then airbrushed over the entire model. The last stage was to score around the canopy masking with a fresh scalpel blade and unmask. Not bad; all done!
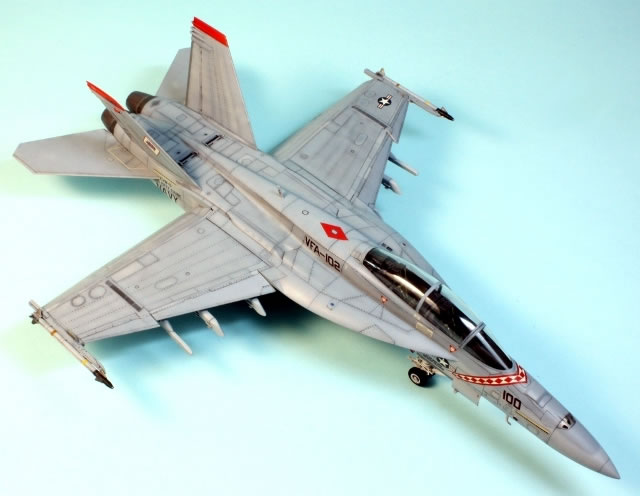
This was a deceptively complex build. The parts count is quite high and the engineering on the more complex side of things. But I thoroughly enjoyed it, warts and all, and would happily build another (maybe a Growler one day). The finished model has surprising presence - it's much bigger than I expected it to be - and I was pretty pleased with my blotchy, stylised finish.
Finally, a word on the photos. My lighting options are very limited at the moment and I ended up mixing light sources, with one light giving a yellower cast that the other. I've also started processing photos for white balance, and here are my first attempts, which has resulted in some modification to the colours (in particular, the red is brighter). I've been fiddling around, but it's all a learning process and I'm only dabbling. This is just to explain why some of the pictures look a little stark and the reds a little bright.
Model, Images and Text Copyright ©
2011 by Jon Bryon
Page Created 11 April, 2011
Last Updated
11 April, 2011
Back to
HyperScale Main Page

|
 Home
| What's New | Features | Gallery | Reviews | Reference | Resource Guides | Forum |
Home
| What's New | Features | Gallery | Reviews | Reference | Resource Guides | Forum |