|
Wingnut Wings' 1/32 scale
LVG C.VI
by Ron O’Neal
|

|
LVG C.VI |

Trumpeter's 1/48 scale F-100F Super Sabre is available online from Squadron
I have been modeling some 40 years now. My passion has always been the propeller driven planes of WWII, especially fighters. I never thought much about building something from WWI (maybe it was the rigging, my scant knowledge on the subjects, or just an overall lack of interest). Like a lot of modelers, before I can dive into a project I have to “feel it”; there has to be some attraction about the plane, the pilot, or the history to get the creative juices going.
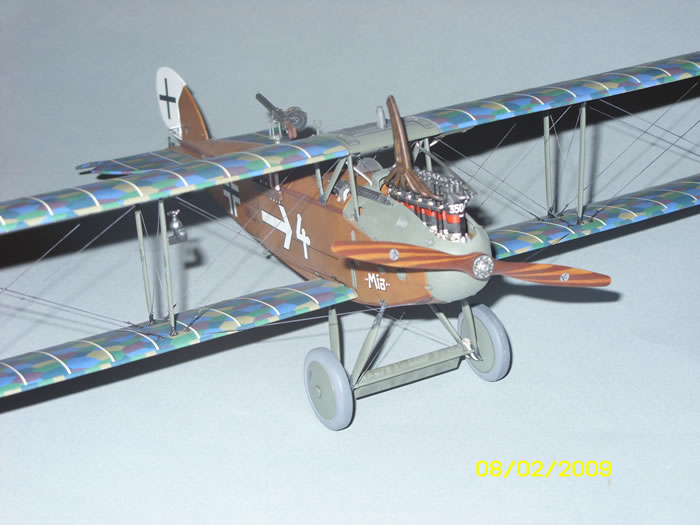
After reading all the excitement around the debut of Wingnuts Wings, I quickly checked out their site. Let me tell you folks, when I saw a picture of their completed LVG, I was hooked. The beauty of the multicolor lozenge fabric, natural wood, exposed engine, and rigging captivated me. What sealed the deal was the comment from my 12 year old daughter when she saw a picture of the model: “I don’t care too much about airplanes, but that one is cool.” I had to build it.
I won’t repeat previous kit reviews – all the praise is justified. The kit is outstanding in nearly every respect, and begs to be built. Wingnuts Wings have merged incredible detail, remarkable fit, and ease of assembly in a one beautifully presented package. The 1/32 Wingnuts Wings LVG is truly a remarkable kit.
Knowing next to nothing about the subject, I consulted with a knowledgeable friend who graciously provided LVG articles and notes he had collected over the years. Poring over the references and dialoguing with my friend via email opened a whole new world around construction techniques, lozenge patterns, and rigging in an area I was wholly unfamiliar with. Armed with a baseline understanding of the LVG, I felt ready to start on this impressive kit.
Although construction was trouble free, some notes might help when you build yours:
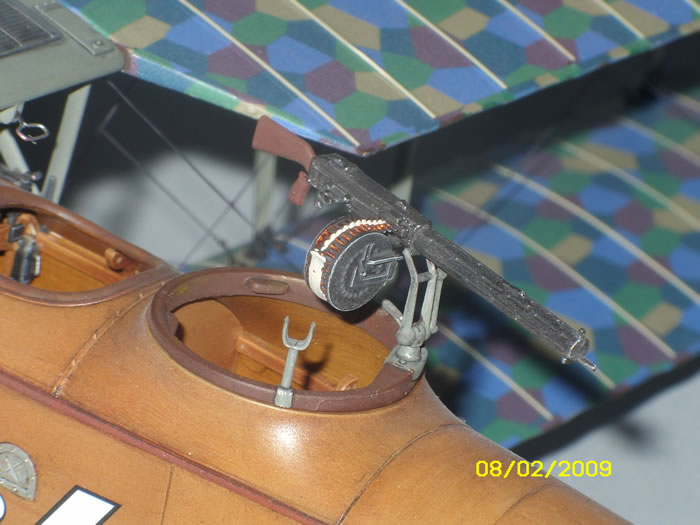
The molding quality is superb. Often with other manufacturers, detail parts like hoses and barrels have slight mold misalignment or flash along the molding edges. Not so with this kit. Everything was molded perfectly, with a high degree of detail.
The fit of the interior parts was precise. Double check fit and alignment when assembling the cockpit, and you’ll be rewarded with a satisfying “click” when joining the fuselage halves. To add additional visual interest, I varied the base color of some of the bulkheads before streaking on the raw umber. Vallejo and Rub-n-Buff metallics were used to pick out cockpit details. Rub-n-Buff silver is my favorite detail paint – mix it with black or raw umber oils to create different metallic tones.
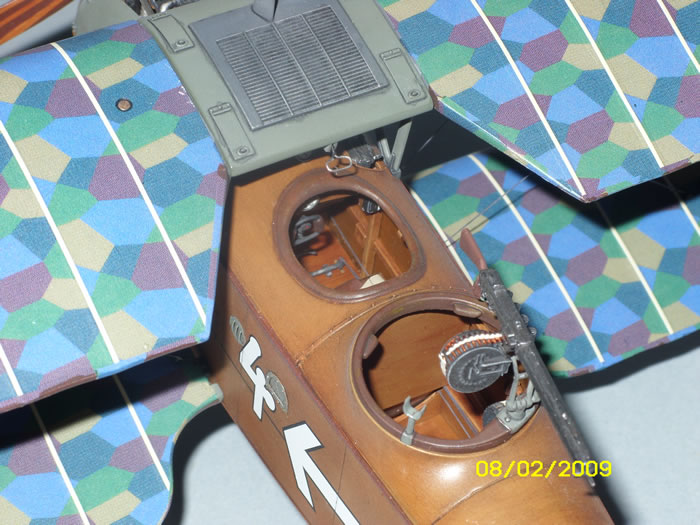
The gas tank under the seat was painted Tamiya flat black, and then heavily dry brushed with Rub-n-Buff Brass. The seat was painted Tamiya flat brown, and then detailed with red, yellow, and raw sienna oils.
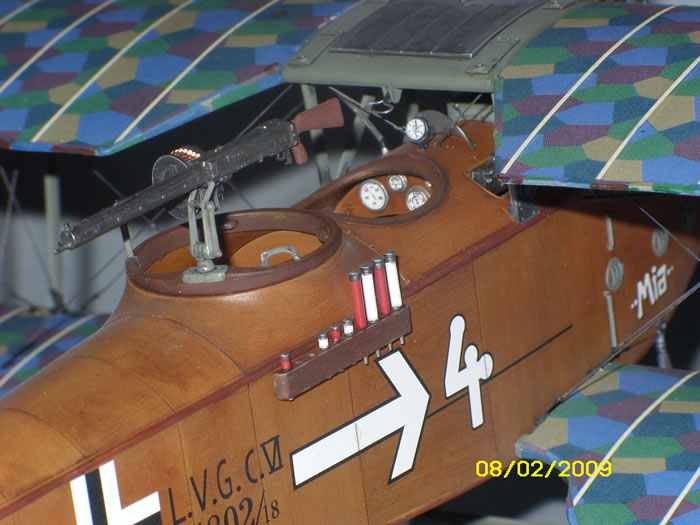
Cockpit rigging was accomplished with EZ line. EZ line responds quickly to superglue, and can be stretched for a tight finish.
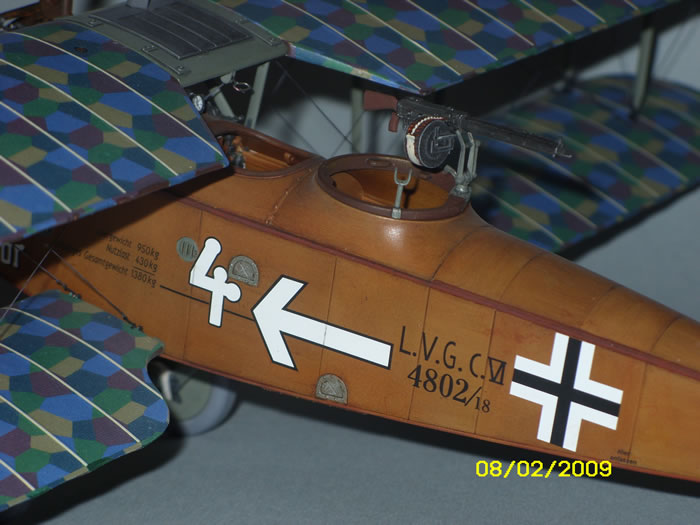
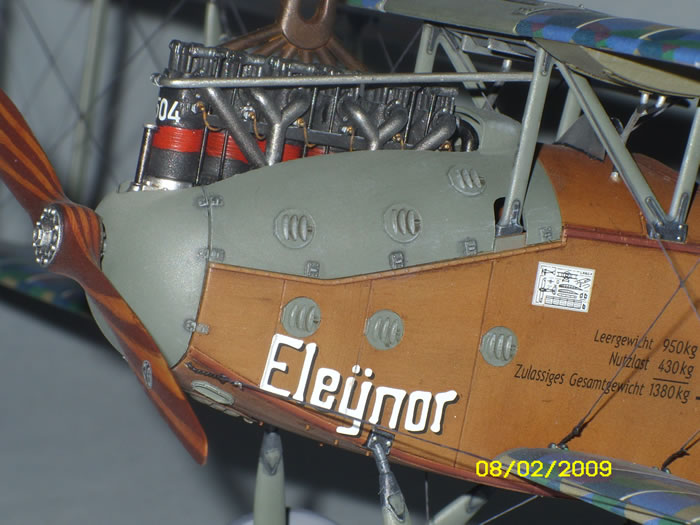
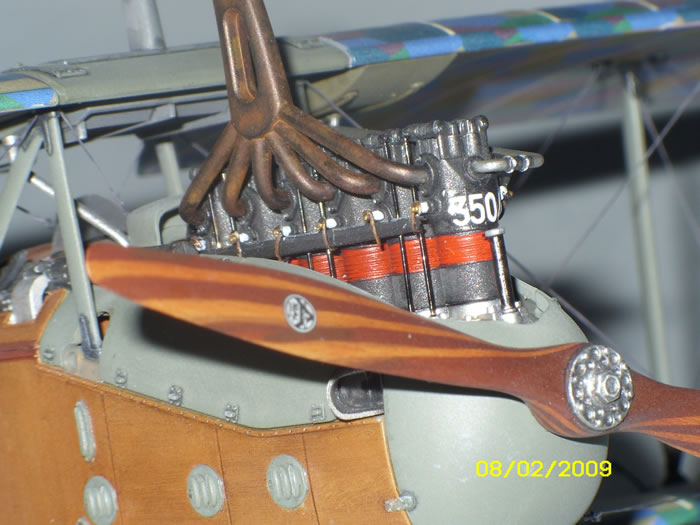
The engine is beautiful. I opted for adding my own push rods. Wingnuts Wings provides tubes in the crank case, and locating dimples in the rocker arms. I drilled holes through the crank case tubes, inserted brass wire, and attached them with a drop of super glue at the rocker arm. Spark plug wires were added from fine wire and loomed together behind a scratch built wiring shield. I added some wire and tube detail around the rear of the engine, and at the oil tank, but it wasn’t necessary. None of it is visible. The engine was painted with Tamiya silver (decanted from the spray can), various acrylic metallics, and oils. The red cylinder detail looks cool, but my understanding is that it was used only on high compression engines, and I’m not sure if this aircraft had that type of engine. The exhaust stack was sprayed with Testors Burnt Iron metallizer, and heavily washed with Gunze rust. For extra detail, Vallejo White and Oily Steel were touched on bolt heads with the end of a toothpick. Some select dry brushing was done for visual variety.
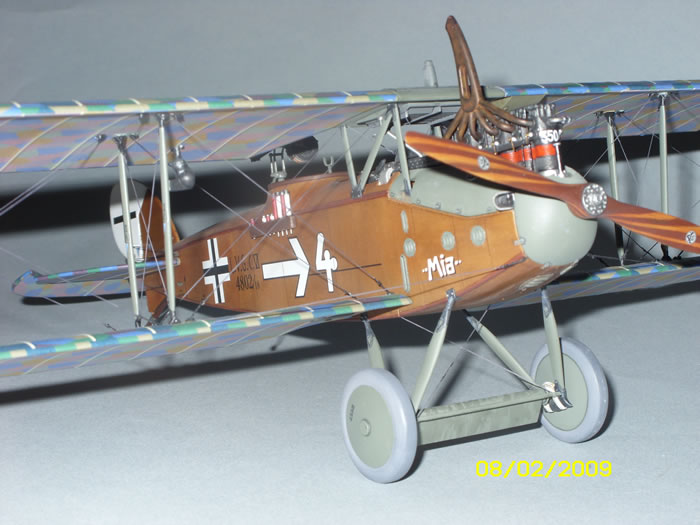
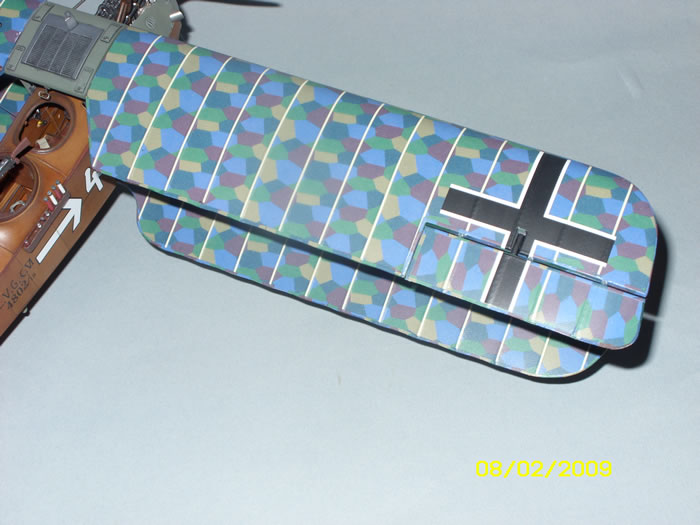
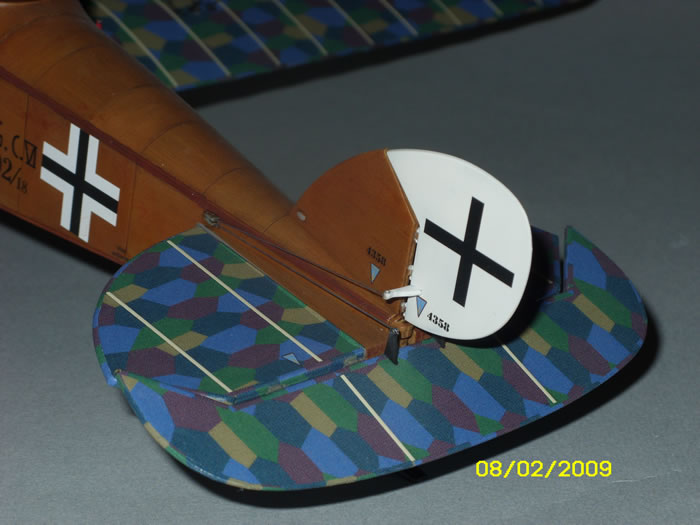
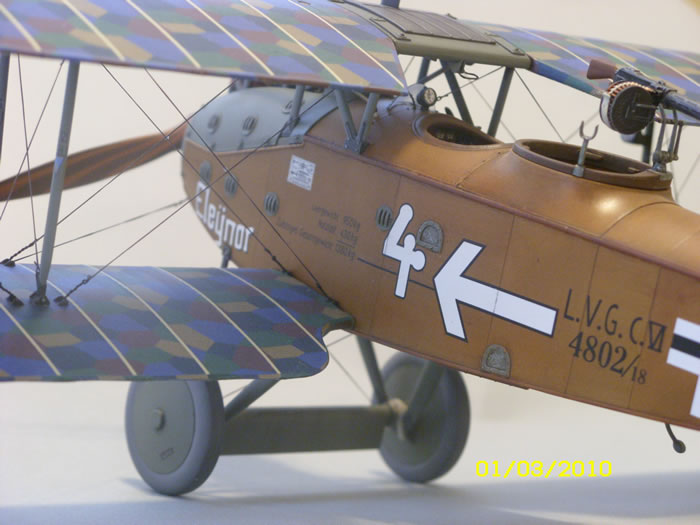
The wings were sprayed with a non-descript base coat of gloss light gray, using a mix of Tamiya White and Black. I was skeptical about the “no decal solvent required” in the instructions, however the lozenge decals performed beautifully on their own. But here’s an important note (write this one down): there’s just enough lozenge material to finish the wings, and no more. Cut the bolts as close as you can, leaving a little at the trailing edge to be trimmed later. I’d like to have seen a better explanation around how to apply the lozenge decals. There are some subtleties that are important, like the pattern orientation, and the application of lozenge tape along leading and trailing edges. I ended up following the description in the instructions, with photos of restored LVGs as backup.
I had a little scrap left over to do the edge taping. I used decal solvent to melt the edge tape decals down tight over the leading and trailing edges.
I followed the instructions for creating the wood finish, with some minor enhancements. After the base coat of Tamiya XF-59 Sand, I picked a few panels and airbrushed various wood colors in a streak pattern. The dark wood strips on the fuselage were masked off and sprayed with Tamiya Brown. Raw Umber oil paint was then applied per the instructions. Make sure you find a way to hold the model when applying the oils so you don’t leave fingerprints. After the initial wood grain pattern was laid on with the raw umber, and the grain pattern was brushed in, I went back with toothpick sized dots of raw sienna on various panels, and blended them in an up/down or left/right pattern to match the grain. I gave the oils a couple of days to dry, and then top coated the exterior wood parts with a thin coat of Gunze clear orange.
I skipped my usual gloss clear, and applied the decals directly over the gloss paint. The fuselage decals were slightly oversized compared to the painting guide – I recommend applying all the decals on one side, and adjusting them while wet to ensure proper spacing. After the decals were dry, and excess adhesive was wiped off with a damp t-shirt, I applied a final coat of Future mixed with Tamiya Flat base, thinned slightly with alcohol.
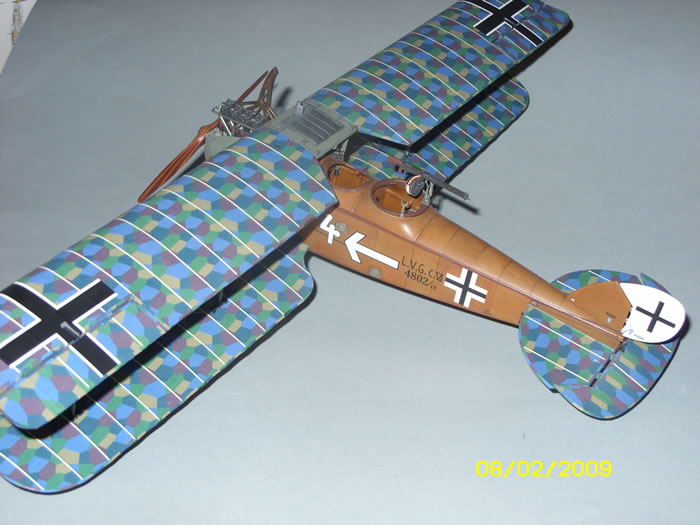
The complexity of the rigging and lozenge decals requires that the model be completed in subassemblies, with confidence that everything can be assembled as advertised. Wingnuts Wings does not disappoint. Alignment and fit was near perfect, and the struts clicked into place.
Rigging scares a lot of modelers – self included. After much discussion with a friend and highly competent WWI builder, I decided on EZ line, and scratch built turnbuckles. My decision point for EZ line centered on the fact that it’s highly responsive to superglue, it can be stretched tight, and won’t go slack. Wingnuts Wings provides starter holes in the wing surfaces. I drilled the holes slightly deeper to ensure positive attachment for the rigging to follow. Lengths of EZ line were cut, and the ends superglued into the upper wing holes. I scratch built turnbuckles from 32 gauge wire, twisted around a piece of .015 wire. With references close at hand, I trimmed the turnbuckles to length, and glued them in the holes in the lower wing. Once the wings were assembled, it was a simple matter to thread the EZ line through the eyelets, stretch it, and touch a dot of super glue to lock it in place. The instructions don’t mention the rigging that goes from the nose to the leading edge of the wing, but that was easy to add.
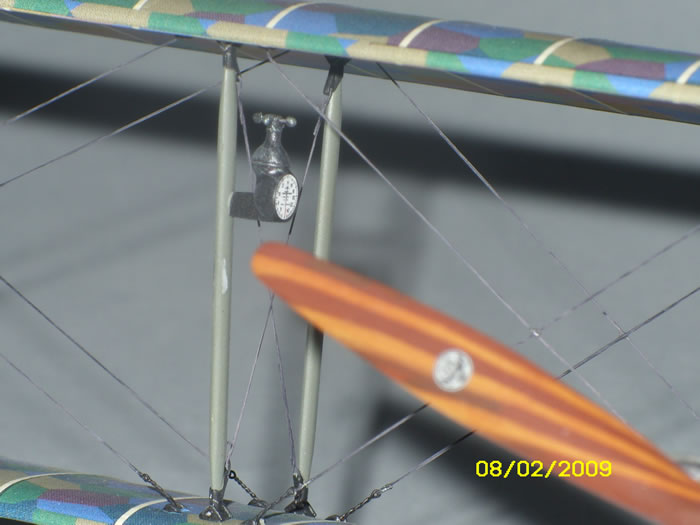
I noticed a small white stain (probably from decal solvent) in one of the close up photos of the strut – It has since been removed with a dab of paint.
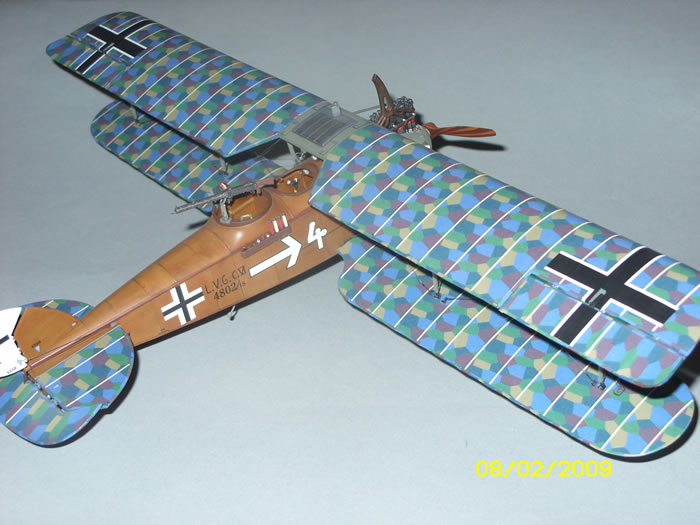
The veneer effect on the prop was done by masking over the wood color base coat with thin strips of tape, and then applying a lighter color. Some brush work was done to clean up the edges. Tamiya clear yellow was lightly sprayed to give a varnished look. The hub was brushed with Vallejo Oily Steel, with a black oil paint wash to sharpen the detail.
Weathering was restricted to oil streaks along the bottom of the fuselage and undercarriage wing using very thin brush streaks of Tamiya Smoke. Pin washes were applied around the engine cowling and strut detail.
I have built a lot of models, and this kit ranks at the top of enjoyable builds. I still look at it when I walk by my model case. I anxiously await my next Wingnuts Wings build…
Model, Images and Text Copyright ©
2011 by Ron O’Neal
Page Created 7 March, 2011
Last Updated
7 March, 2011
Back to
HyperScale Main Page

|
 Home
| What's New |
Features |
Gallery |
Reviews |
Reference |
Forum |
Search
Home
| What's New |
Features |
Gallery |
Reviews |
Reference |
Forum |
Search