Anigrand C-133A
Anigrand, 1/72 scale
S u m m a r y : |
Catalogue Number, Scale, Pricing and Availability: |
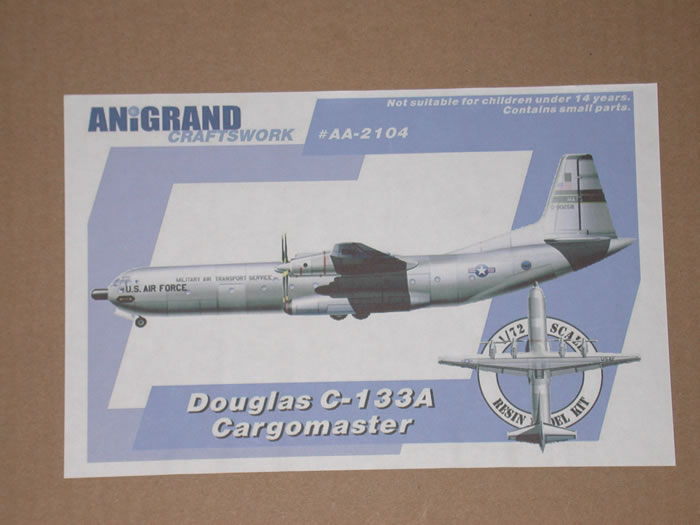
Anigrand 1/72 C-133A, Kit No. AA-2104,
USD $223, shipping included, Rare-Plane Detective,
or directly from Anigrand, USD $188 + $ 35 shipping. |
Contents & Media: |
See descriptions below |
Review Type: |
First Look |
Advantages: |
Smooth mouldings; better detailed and easier to build than previous vacform offering of this type. |
Disadvantages: |
Marred by annoying idiosyncrasies that seem to continually dog this firm’s eclectic offerings |
Conclusions: |
Worth having for the diehard modeler despite some embarrassing shortcuts. |
Reviewed by
"Bondo" Phil Brandt

MPM's 1/72 scale Douglas A-20G Havoc is available online from Squadron.com
The 39th Military Airlift Squadron (MAS) at Dover AFB, Delaware (one of the two
C-133A units stationed there) put out a help wanted notice for navigators in the summer of 1968, and relatively young (30) C-124C “naviguesser” Bondo thought this might be the time to widen his as yet limited (eighteen months) USAF flying experience, especially as it was general knowledge that the elderly C-124 fleet was not long for the regular Air Force.
The 39th MAS, just a couple of hundred yards away from my old Shakey Bird squadron digs, warmly welcomed this newbie volunteer, and Chief Navigator Lt. Col. “Iron Mike” Struhar took me under his wing. Because of his help and that of other experienced navs like Dick Quimby and across-the-street neighbor Fred Dietsch, I quickly became self-sufficient in the ways of the “Weenie Wagon.” No longer would I be flying in oil-spewing, recip-powered Douglas “all-weather interceptors”. That is, our giant turboprop A-model 133s were pressurized, air-conditioned and flew over the weather at 265 knots, eighty-five knots faster than 124s–the 133s were originally designed to cruise at even higher speeds, but powers-that-be imposed permanent speed restrictions. No longer would I have to sit in an oppressively hot cabin during Southeast Asia stops, sweat dripping into my eyes and soaking my charts. So far, so good.
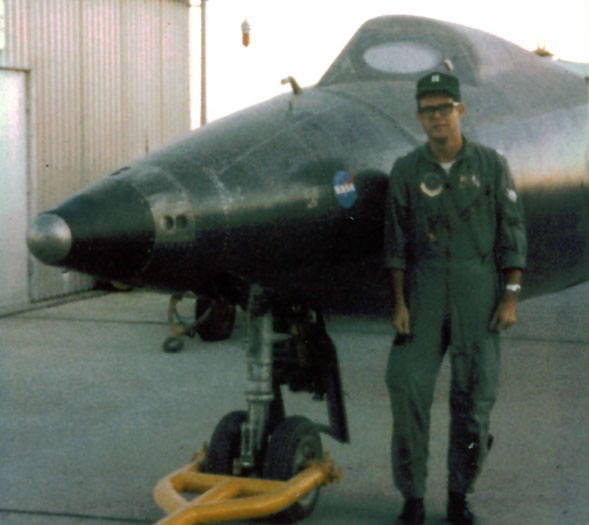
In the late Sixties, with the “hot” and “cold” wars in high gear, we flew so many hours throughout the world (including out-of-the-ordinary missions to carry the X-15 to the USAF Museum) that there wasn’t time to reflect on substantial C-133 losses–in later years some folks, upon learning that I had been a C-133 aircrew member, expressed surprise that I was still alive! One “old wives’ tale”: “To never be seen again, depart Dover on a Sunday, with a newbie aircraft commander and a bachelor navigator.” I was told that, after some seven birds had been lost out of an approximate fifty airplane build, well over 100 “fixes” were applied to the airframes and operational flight parameters during a fleet-wide 1965 grounding.
Over a year ago Anigrand mastered a nice, limited edition 1/144 C-133 for the good guys at Nostalgic Plastics. Now the Hong Kong crew has upped the big kit ante with a 1/72 all-resin “Weenie Wagon” companion for their huge C-124, C-17, KC-10 and C-5 offerings.
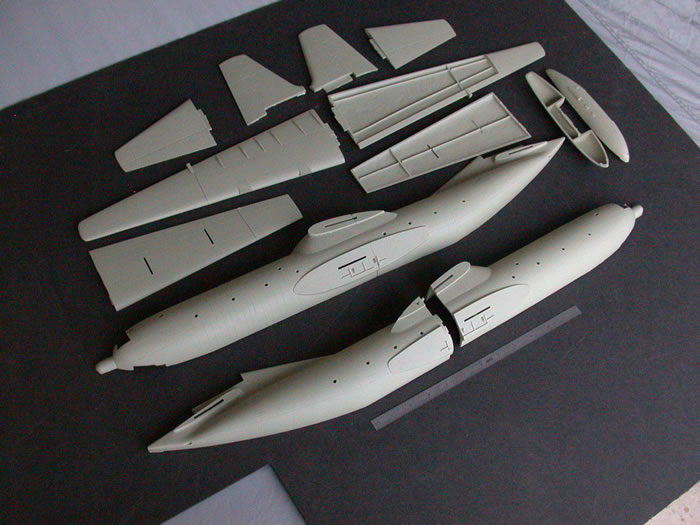
The just-released C-133 kit is comprised of a four-section fuselage; right and left sides are each further divided into forward and aft components. Long, graceful wings are each two-piece, as is the vertical fin. The individual stabilators are one-piece, and each engine nacelle is divided into an upper and lower half. Maingear pods are to be separately attached to the fuselage.
Molding
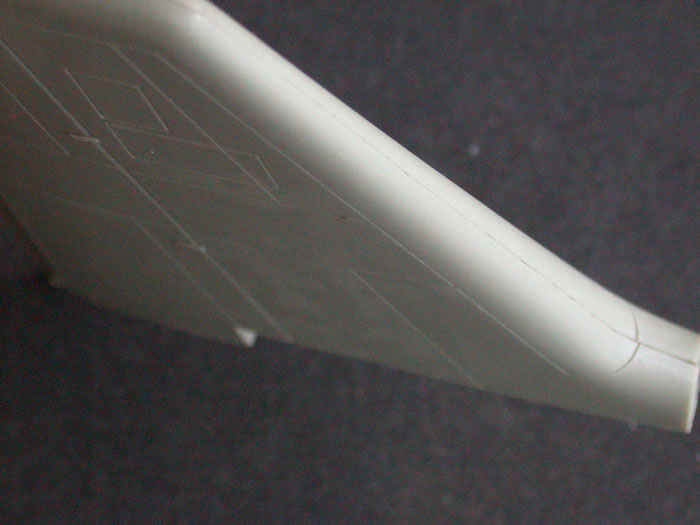
Molding is typically Anigrand and seems to get better and better with each release. That is, very smooth, not polished, surface texture (as if the master has been glass beaded), sharp details and clean edges of most parts. The engraving depth might be considered by Tamiyagawa devotees as overstated were this, say, a tiny 1/72 fighter kit, but for such a large model, I don’t consider it a negative.
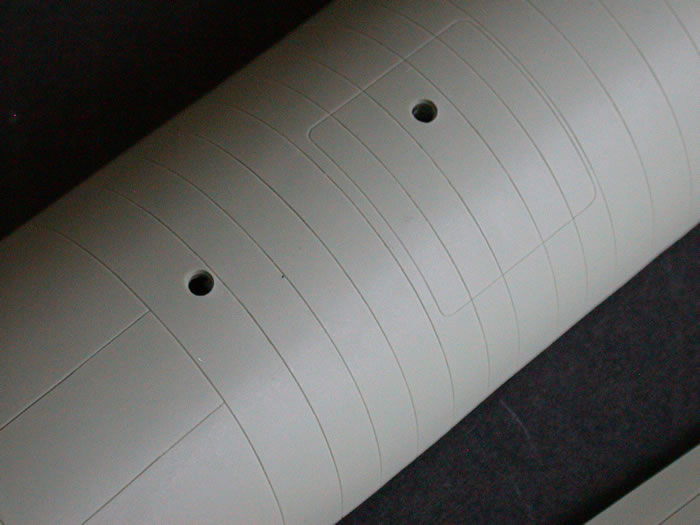
One engraving factor will be a construction problem, however. Somewhere in its earlier operational life (before your reviewer came aboard) numerous circumferential metal bands were added around the fuselage, in the area starting at the wing leading edge and going forward to just behind the flight deck, probably to strengthen the fuselage from the terrific sonic waves induced by the eighteen-foot diameter Hamilton Standard props (the Dover AFB hospital did an OSHA-type hearing damage evaluation of the C-133 and determined that standing in the prop plane while in flight for more than thirty seconds without proper ear protection would cause permanent hearing damage; I personally tried it one day for only about five seconds, and the noise was mind-numbing). Anigrand has faithfully engraved all these fuselage circles, so they’ll have to be carefully aligned in the glueing process, and then, after sanding the fuselage joint, will most probably have to be re-engraved in the join area; fun.........
There is little, if any, warpage, and I’ve so far found no bubbles. Some pieces may need minimal cleanup, eg. the fuselage mating area for the large clear resin “greenhouse”. As I’ve said before, for modelers who work in resin, it’s just another day at the office.
As mentioned above, each fuselage half is in two pieces which are joined in usual Anigrand style, that is with locating holes and lugs. The fit of these large components is excellent, very close to a “click” operation. I use fifteen-minute epoxy and lay the forward and aft sections of each half on a 1/4" thick aluminum sheet so they’ll be true when the epoxy cures.
Wing halves fit well except for each outer joint, where part of a cast-in strengthening member will have to be Dremeled away for clearance.
Details / Accuracy
Rare-Plane Detective honcho Jeff Garrity includes a very welcome CD of C-133 closeups for those who pre-ordered (and put down $100 to “reserve”) said kit, making it a no-brainer to be up to speed on what’s accurate, and what’s not. I had originally posted on HS that Anigrand had made the many prominent, top-of-wing flap hinges too long, and that it might be a fair amount of work to sand down the resin ones cast-in to the wing surface. Wrong-o!
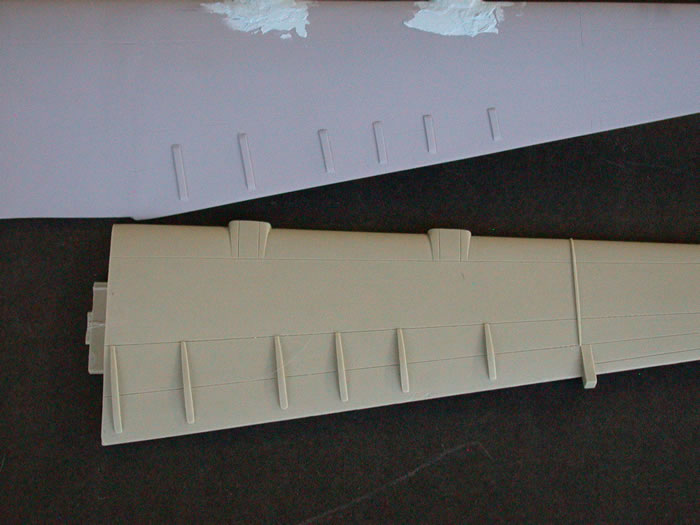
The pix on the CD plainly show that Anigrand was correct, and the drawings that came with the elderly Gene Hooker vac kit are incorrect. Readers have to remember: Bondo was nestled way down inside the fuselage, and had no opportunity to ever view the top of the (very) high-mounted wing. :)
Cockpit
In this scale not much crew area detailing is really necessary. The cockpit is minimally furnished (seats, no cast-in belts), instrument panels (pilots’, engineer, nav), but that’s really no big deal since the windscreen is relatively small, and you’re not going to be able to see much. The crew area aft of the navigator station (a bunk, two airline seats and food preparation console) is completely absent, and in any event can’t really be viewed (there’s only a 1/8"X1/4" window on each side).
Engine nacelles
Each of the large prop spinners in the real deal is surrounded by a narrow, but definitely noticeable, circular engine air intake slit, and I can tell you that the talented Jerry Rutman definitely represents said air intake slits (and finely rounded forward nacelle edges as well) in his resin aftermarket set for the Combat 1/72 C-133 vac . Not so in the Anigrand version.
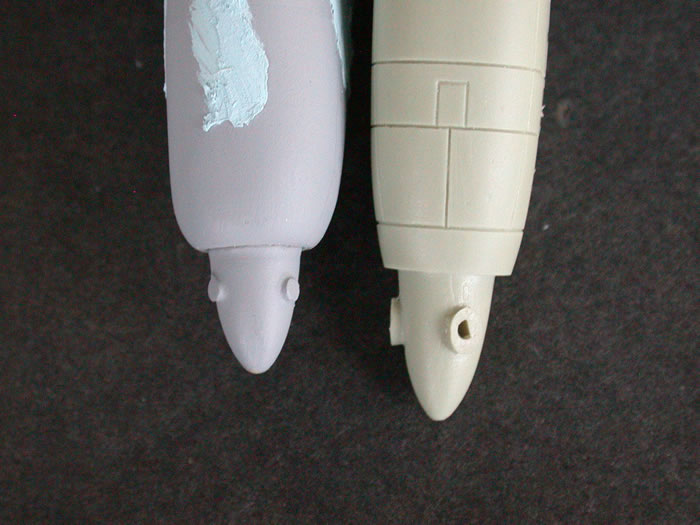
For some unexplained reason the Hong Kong master modelers cheaped out here and present the modeler with a totally flat, albeit narrow, nacelle face: no intake slit, no nacelle leading edge rounding whatsoever.
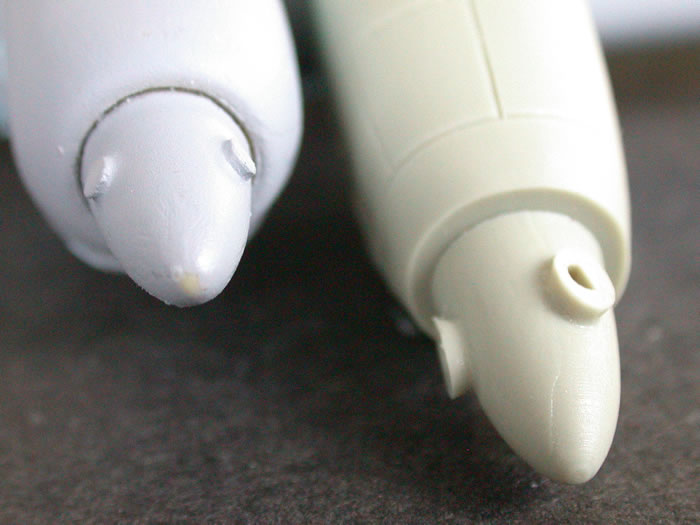
I will admit that, when FOD covers are mounted–I personally never saw these used in our Dover birds, but the B model currently in the Dover museum does have ‘em attached–the nacelle face does appear to be flat, but IMO that should be left up to the modeler. In any event, it should be easy to gently round said flat nacelle face edges, and the intake slit “could” be represented by an inked line around the spinner-nacelle face join area.
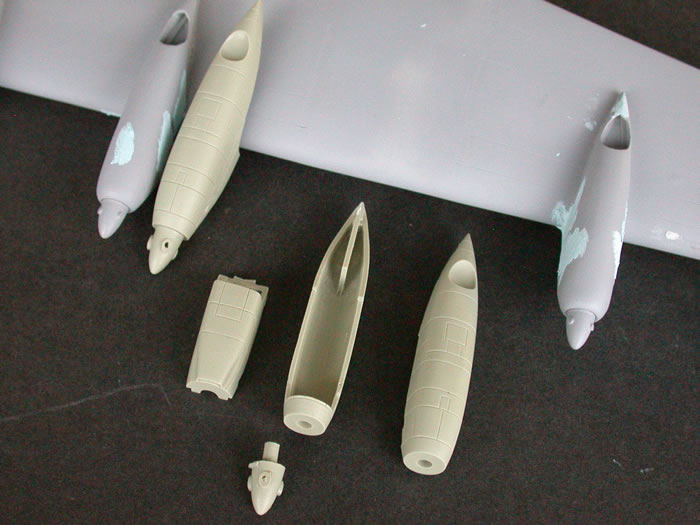
Cheap-out, part deux: Anigrand’s representation of the large turbine exhaust outlets is merely a slight oval-shaped depression in the bottom aft area of each nacelle. This lack of detail IMO isn’t acceptable in a model of this size. I don’t understand what is so difficult about having four oval exhaust cutouts and individual, angle-cut tubes to insert in said cutouts; it’s what I did in my Gene Hooker 1/72 C-133 vac now under construction; I’ll guaran-damn-tee it ain’t rocket science!
Vertical Fin
The leading edge of the Anigrand vertical fin is IMO much too blunt; the model’s leading edge cross section appears more like that of a C-124.
The real deal C-133 fin leading edge is noticeably “finer”. I plan to use my 1" vertical belt sander to delicately sand the fin’s leading edge closer to compliance.
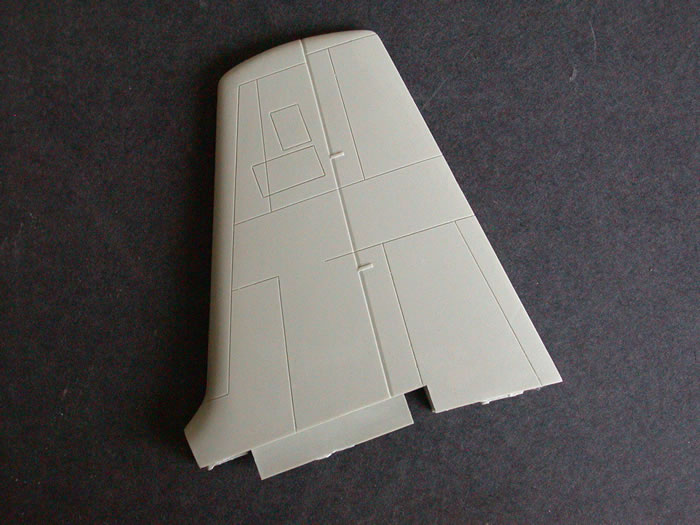
Additionally, the overall side profile of the fin is too fat; at least 1/4" of chord needs to be removed from the rudder’s entire trailing edge. Further, the leading and trailing “corners” of the fin tip need to be “sharpened”; the whole tip is too rounded. You don’t have to take my word for it; just glance at Anigrand’s own artwork, which more closely portrays the actual fin.
Wheels
I don’t know where the Anigrand modelers obtained the masters for the eight maingear tires, but IMO the tires are much too thin; they appear more like something one might see on a light bomber or heavy fighter, not a two hundred and seventy-thousand pound heavy cargo-carrying airframe.
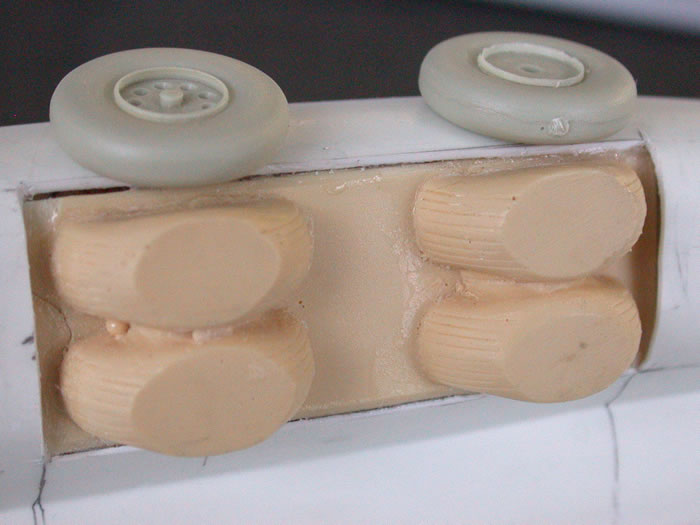
Both the original Hooker vac and Rutman resin representations of the main tires are adequately thick.
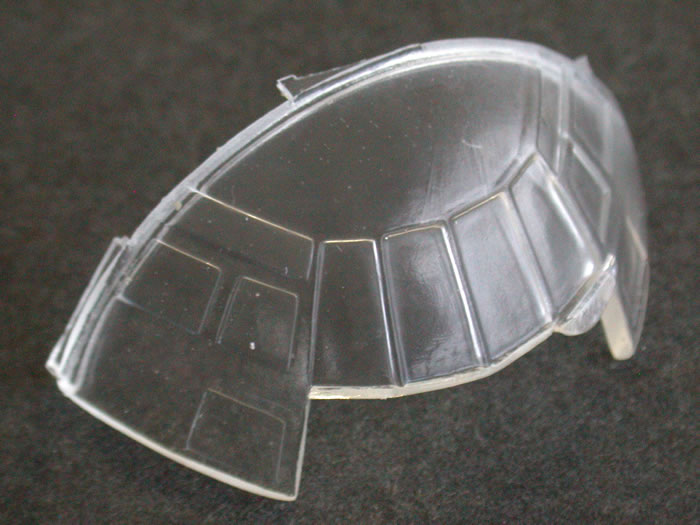
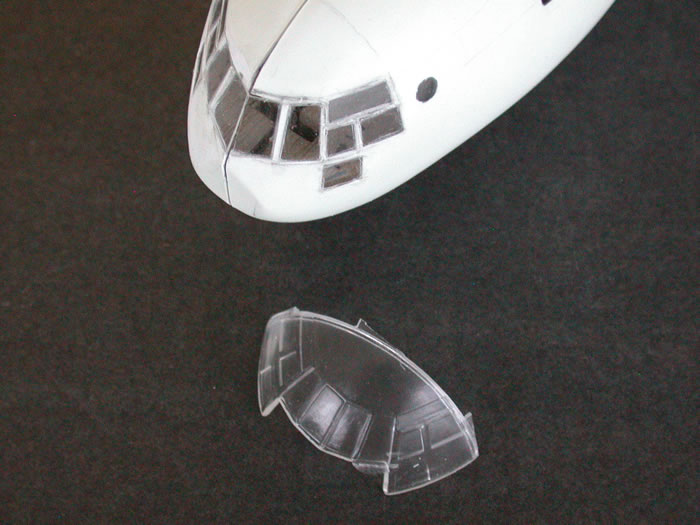
Clear Parts
The large, cast resin greenhouse is relatively–we’re not talking Tamiyagawa here-- clear and certainly acceptable, especially in this scale.
Tiny resin porthole windows (say, 1/8" diameter) throughout the long fuselage, and a few small rectangular windows in the aircrew “relaxation” compartment are furnished, but the thick resin fuselage walls (at least 1/8") create a “tunnel” effect.
In light of trying to avoid glue marks on such small windows, the modeler might want to consider deep-sixing the whole deal, either filling in the windows and using handcut, black window decals, or doing as I plan to do (and have already done in building the Hooker vac): Dremel the fuselage wall thickness surrounding each window interior opening down to, say, 1/32" and, after taping over each outside window opening with Scotch brand clear packaging tape, simply pour in a drop or two of 1:1 Clear-Cast epoxy (Hobby Lobby), and let ‘er cure for a day. I’ve used this method on numerous 1/72 airframes (including the many-windowed Anigrand C-124) with excellent results.
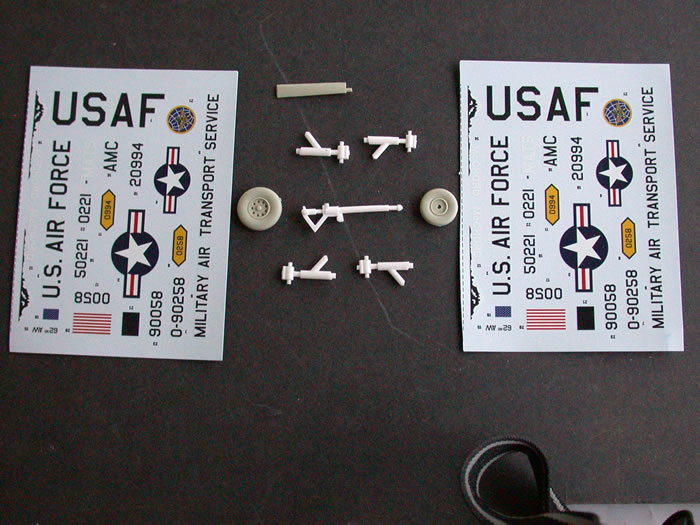
Markings
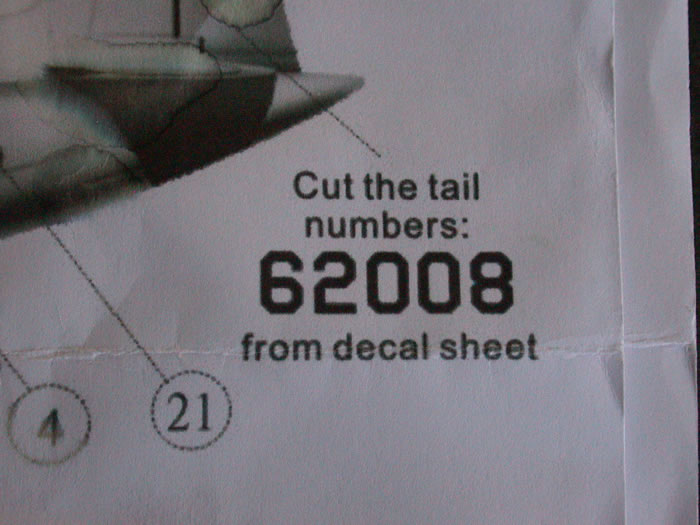
The “Major” has major heartburn here. We’ve got a $200+ kit in our hands, with reasonable expectations of accurate, decent decals, and instead the Anigrand instruction sheet simply says, “Cut the tail numbers: 62008 from decal sheet.”
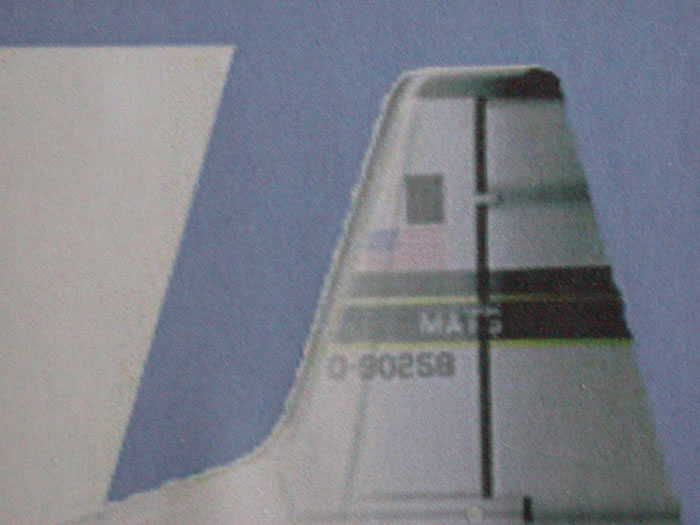
In other words, a complete decal for the tail number shown in Anigrand’s own two-view B&W illustration on the instruction sheet (the well known C-133A, “Balls Eight”, now in the USAF Museum, and in which your reviewer has logged time) is not offered, and the modeler is on his/her own to piece together, align and apply individual numbers. Did I mention that this is a $200 kit? It should be noted here that the instruction sheet is labeled “Douglas C-133A Cargomaster 1/144 scale resin model kit”: this is not the way to save production costs!
Things get worse: none of the jumble of tail numbers on the sheets–there appear to be four separate number combinations--correspond to any actual C-133A or B, and Cal Taylor’s authoritative “Remembering an Unsung Giant” book lists ‘em all! The decal sheets are duplicates because each contains only two national insignias. Further, the sheets provide “Military Air Transport Service” (MATS) designation, totally ignoring the fact that MATS was renamed “MAC” (Military Airlift Command) in 1965, and aircraft retained “MAC” lettering well beyond the demise of the C-133 force circa 1971. Strangely, there are even two black “AMC” (Air Mobility Command) decals, although AMC is a much more recent command designation, decades after C-124s/C-133s went to the junkyard.
And further yet....two white “McChord” decals appear on the sheets, accompanied by B&W mountain logos; C-133s were never stationed at McChord...only Dover and Travis. Also, the distinctive chrome yellow-background-outlined-in-blue MAC horizontal “diamonds” do not contain any actual C-133 tail number and will require decal “scratchbuilding” to fix. It’s not that this senior modeler doesn’t know how–or can’t–jury rig the needed decals; in such a high-dollar kit, one shouldn’t have to....
Anigrand, in an apparent effort to save production costs by cannibalizing decals from other sheets (C-141?), has made a complete mess of the relatively simple, straightforward markings for this bigbuck kit. When a firm such as Japan’s Zoukei-Mura can put out a highly detailed, large scale, injected kit with a large, accurate, multicolored decal sheet (the recently released A-1H) for less than $150, the least that Anigrand owes its loyal, “big-spender”, customer base is a complete re-do of this sheet...gratis. The numbers are not hard to get right; read Cal Taylor’s book, and look at the pix.......
Each nosegear door of Dover C-133s in the mid-to-late Sixties and early Seventies was painted half black and half white, the colors divided along a lengthwise diagonal line between two door corners. The wing designation, “436 MAW”was painted in the center of each gear door, white letter portions against the black background; vice versa for black letter portions. Anigrand does not furnish this information and/or appropriate decals, either.
Instructions
Two typically minimalist Anigrand B&W sheets (one-sided printing) with a two-view artist rendition for marking locations and color callouts.
Measured against the well-designed-and-documented-but-labor-intensive 1/72 Hooker vacuform kit of the mid-Eighties, Anigrand’s much more expensive latterday resin release features significantly easier assembly, but the welcome ease of construction is unfortunately marred by annoying idiosyncrasies that seem to continually dog this firm’s eclectic offerings. I’ll still keep buying Anigrand kits, but ”cheaping out” in the face of higher quality, lower-priced competition by taking embarrassing shortcuts cannot endear this firm’s products to many discerning modelers.
Review Text and Images Copyright © 2011 by "Bondo" Phil Brandt
Page Created 12 December, 2011
Last updated
12 December, 2011
Back to HyperScale Main Page
Back to Reviews Page

|
 Home
| What's New |
Features |
Gallery |
Reviews |
Reference |
Forum |
Home
| What's New |
Features |
Gallery |
Reviews |
Reference |
Forum |