1/72 Eduard vs. Cyberhobby F6F
Catfight!
by Val Bueno
|
|
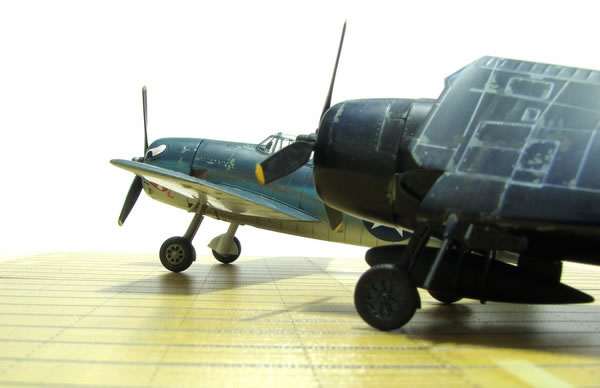
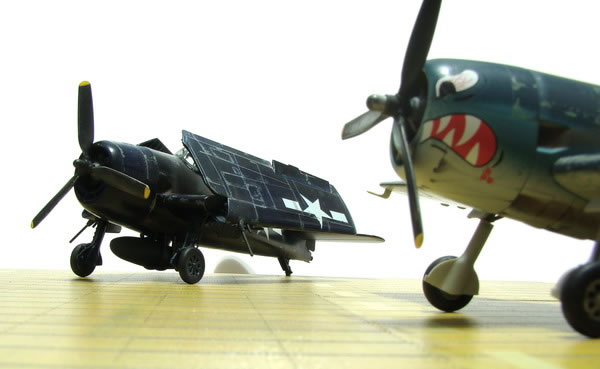
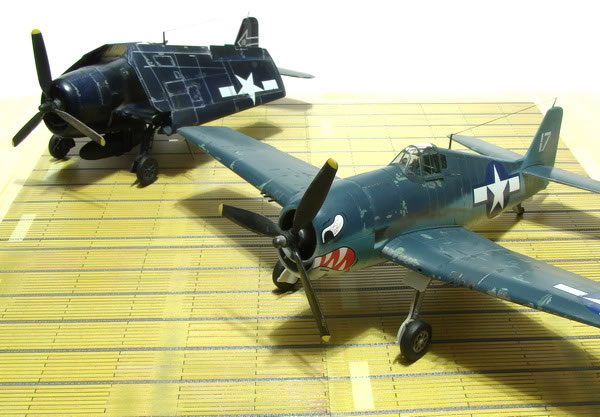
Cyberhobby (left) and Eduard F6F Hellcats |

Eduard's 1/72 scale F6F-5 ProfiPACK is available online from Squadron.com
I honestly don’t get it. I read online how one kit is better than another and I cannot see how that could be true. How can so many people say the Eduard Hellcat is better than the Cyberhobby kit? I have both kits and in my humble opinion, the CH kit looks better in the box. But then again so did the Italeri Bf-109F. Goodness what a monster of an unbuildable kit that turned out to be (for me at least). So to take the mystery out of the differences between the Eduard and Cyberhobby kits, I thought I’d build them side by side.
Points in a kit that I am looking for are 1) Fit, 2) Detail, and 3) Precision. Notice that Accuracy is not among these points. Accuracy is hard to verify. I don’t trust scale drawings (being a 20 year veteran of scale drawings in the design industry) and photos have their own parallax problems. For me, if it looks like a Duck, it must be a Hellcat.
References for this project will include, but are not limited to: the Squadron-Signal Hellcat In-Action and Walk around books as well as Aero Detail Vol. 17: F6F Hellcat.
The ‘Pit
As with all models, we start construction with the interior. The cockpit parts of both kits were painted with Polly S Interior green and RLM 66 Scale Black. The detail was highlighted with a Berol Silver Pencil and given a wash of dirty thinner. There are Photoetched parts supplied for the Eduard (E) kit, but I chose to go with painting the plastic part to match the effect of the Cyberhobby (CH) kit. Both cockpits look pretty good. Much better than the old Lindberg Hellcat or the newer Hobby Boss (HB) kit.
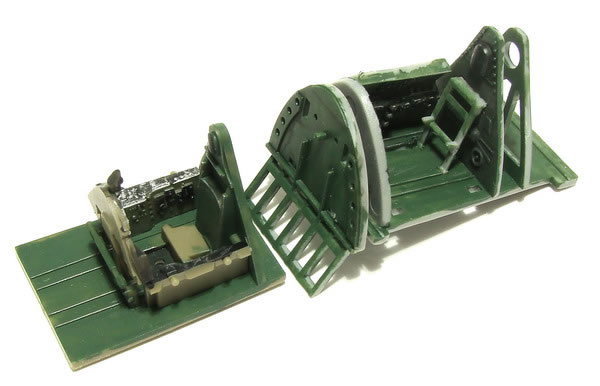
Comparison: Interestingly enough, the cockpit of the CH kit seems to be a bit bigger than the E kit. The instrument panel is larger, the floor is larger and the side consoles are larger. Test fitting the assembled cockpits into the respective fuselages, the cockpit opening of the CH kit was also a bit larger than the E kit.
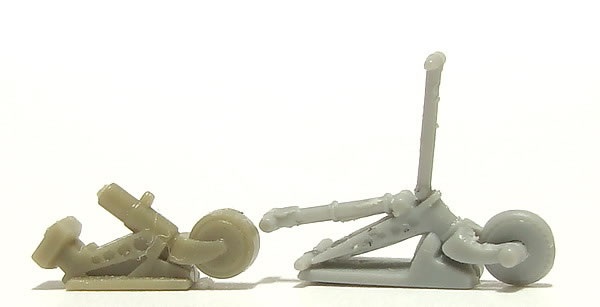
The tailwheel parts were built up next. The CH kit has a two part tailwheel strut and a separate wheel. The E kit has a single part tailwheel strut and wheel. The CH kit looks better than the E kit because there is a separation between the strut and the gear door. The E kit has this area filled in.
The fuselages were assembled after all the interior parts were added. I liked assembling the CH fuselage better because I could access the inside of the fuselage to apply the liquid glue. Both fuselages fit like a dream and had no gaps.
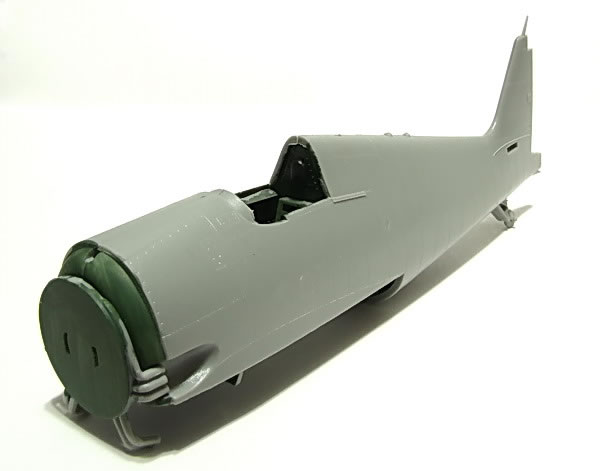
So far both kits fulfill the easy assembly requirement.
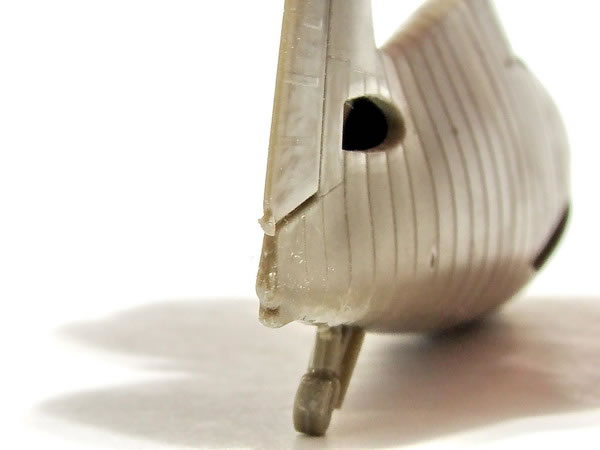
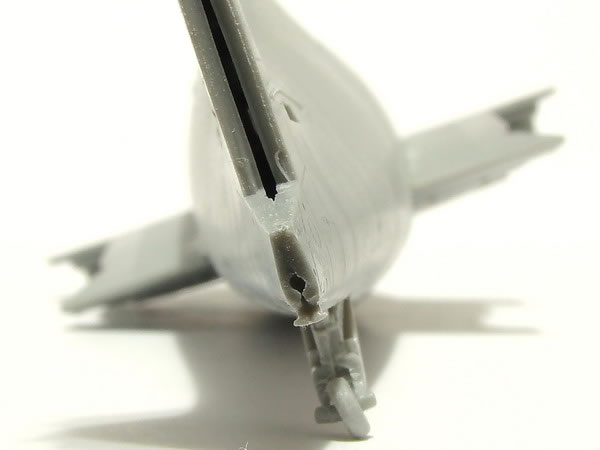
Comparison: As I was sanding the seams, I noticed that the tail end of the fuselage looked different between the two kits. Comparing the parts to photos of the real aircraft, the CH kit looks closer to the real thing. The E kit has a manini tail hook bump versus the hole on the CH kit that allows the hook to be extended.
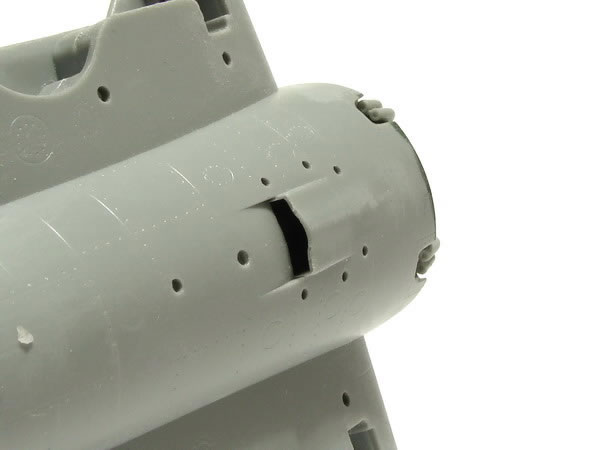

Another thing I noticed while sanding the seams was the difference between the CH and E kit of the central vent under the fuselage. Compared to photos of the real aircraft, the CH kit looks more accurate. Or should I say, the CH has the vent open versus closed flush on the E kit. There is nothing above the vent, but since it is under the model, I won’t worry about it.
Take Wing
Next up were the wings. The E kit has the non-folding wings as top and bottom pieces, port and starboard sides. The CH kit has a bottom non-folding section with non-folding section tops as well as folding sections top and bottom. The E wings were easy and quick to assemble and glue. I had to shave down some pesky ejection pin marks to allow the wing tips to meet, but nothing a good scalpel cannot handle. I also left out the machine gun inserts. I didn’t want the guns sticking out when I sanded the edge seam. I’ll cut some of my 20 gauge hypodermic needles for the guns later.
Test fitting the assembled wings to the fuselage revealed a very tight fit. With paint on these parts, it will be impossible to get the wings properly seated in the wing recess in the fuselage sides. I rounded all the edges along the wing insert and shaved the wings down as much as I dared. Though easier, I can fettle this further. Careful masking of the wings later on helped this tight fit to be retained. I also drilled some holes in the wings to accommodate a bamboo skewer stick to allow me to paint the wing with a rattle can and not touch the wing or get paint all over my hands.
I left the wings completely off of the model until after painting to ease the masking, painting and sanding/polishing.

The folded wings of the CH kit were a bit more involved, naturally. These wings come with separate ailerons to allow positioned control surfaces. Great stuff! A test fit of the upper and lower wings revealed a slight gap at the wing tips and the along the flaps. I sanded/scraped down the ejector pin marks and shortened the height of the alignment pins. The pins were the main culprit keeping the wingtips apart. I tried scraping, sanding, bending the flaps to meet but to no avail. I still have a slight gap along the edge of the flaps. I ran a bead of CA glue along the edge and sanded it into a single edge.
Power Egg
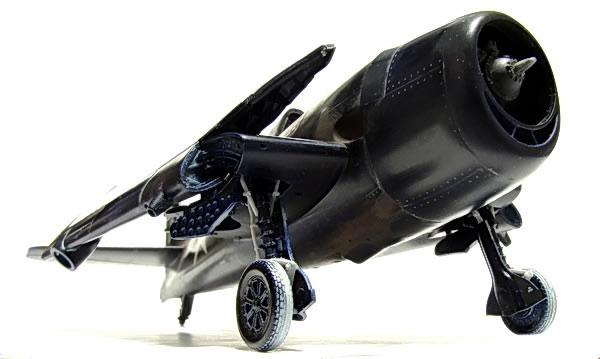
Next up is the cowl for the engine and the engine itself. The cowls for the CH and E kits are superficially the same. The CH kit gives you the option of open or closed cowl flaps. The fit of the Ch cowl was improved by removing the alignment pins and moving the parts around until they line up and apply liquid glue.
The cowling for the E kit had better alignment pins for the left and right halves, but not so good for the front of the cowl.
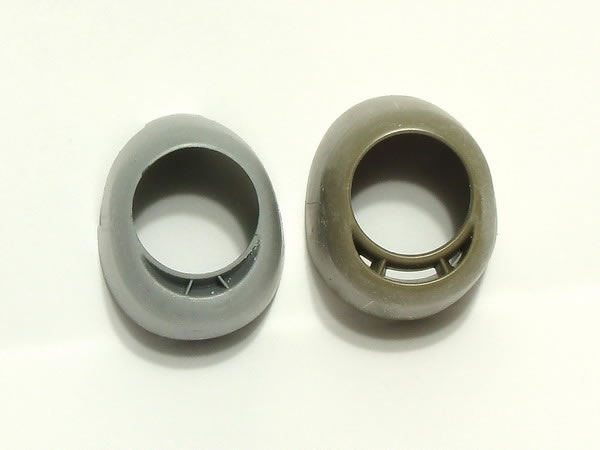
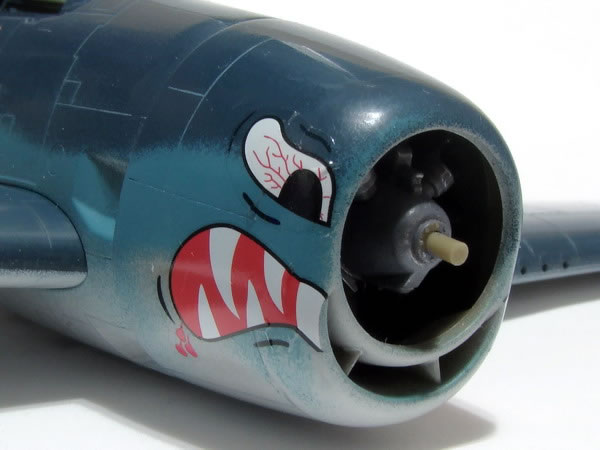
Comparison: The infamous smile of the Hellcat looks like it was better captured by the E kit versus the CH kit. The E kit has the proper Dizzy Gillespie jowls next to the smile.
The PW R2800-10 is an 18 cylinder radial engine used by several fighter planes during WWII. The Hellcat was one of them and the approach that CH and E used to depict the same engine are similar and yet different. Both kits have each bank of cylinders as a single piece to be glued to each other. The CH kit doesn’t have a positive location tab to keep the cylinders staggered correctly. In order to keep the magnetos on the crankcase in the correct orientation and have the rear bank of cylinders located correctly to the fire wall, they end up incorrectly staggered. That is really odd.

The R2800 by E had very good locators, so no problem there. Additionally, the magnetos on the E kit are cylindrical whereas the magnetos on the CH kit are rounded. Both are correct according to photos in Aero Detail. The shape of the crankcase is also different between the two kits. CH has a short barrel and a hemispherical section whereas the E kit has tapered bowl. And BOTH are correct! I guess you really need to check which crankcase your particular aircraft used; you then grab the corresponding part from the corresponding kit! I also decided not to use the PE wire harness included in the E kit. Just to speed assembly along. At 11:30 at night, I don’t want to get too involved in the building using PE parts.
What??
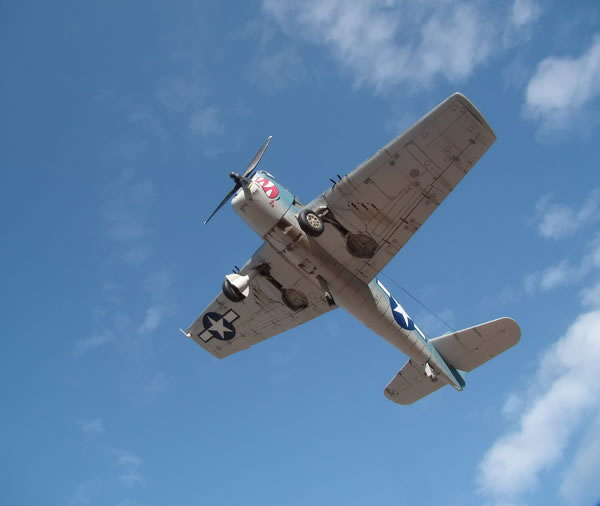
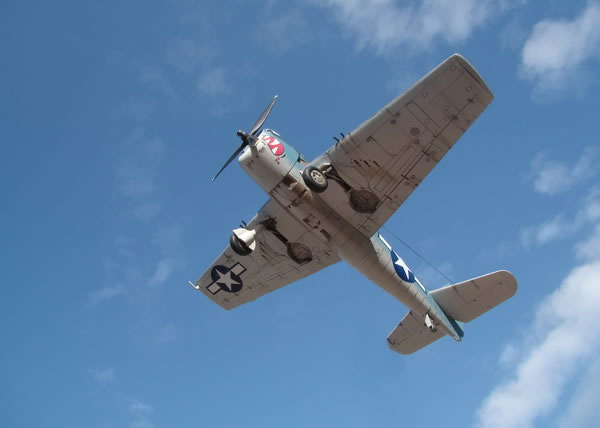
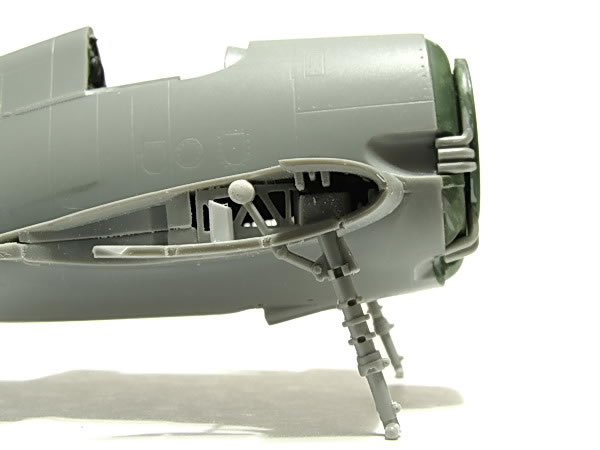
In preparation for painting, I added the landing gear to the CH kit. It was at this point I had to yell, what the heck! The CH kit landing gear only had one attachment point. The drag link that pulled the landing gear up into the well is attached to nothing! In addition to this, there is a portion of the lower wing that is outboard of the wheel well. The part is supplied as a single part that attaches at a single point. On the real aircraft, a stub of the wing spar holds this part in place. This is another weak point in the kit.
I fixed these problems by adding the triangular shaped stub spar and a bit of rod to represent the servo attached to the drag link on the landing gear. I had to trim the drag link to fit snug against the rod/servo motor.
I added the landing gear legs and made sure they were angled correctly according to the drawings in the Aero Detail book. After installation, I added the detail parts of the landing gear.
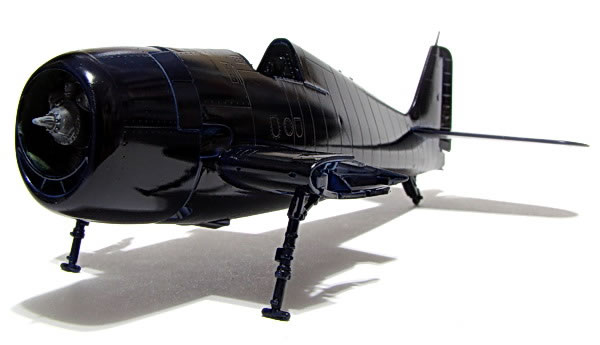
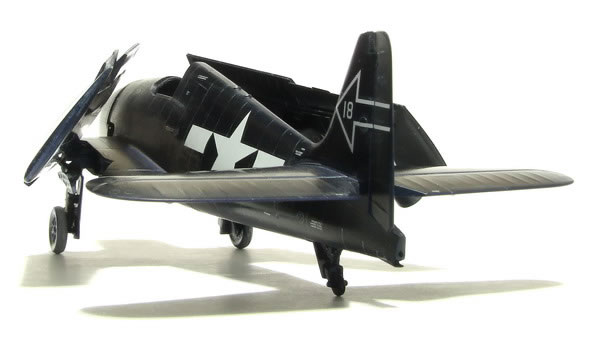
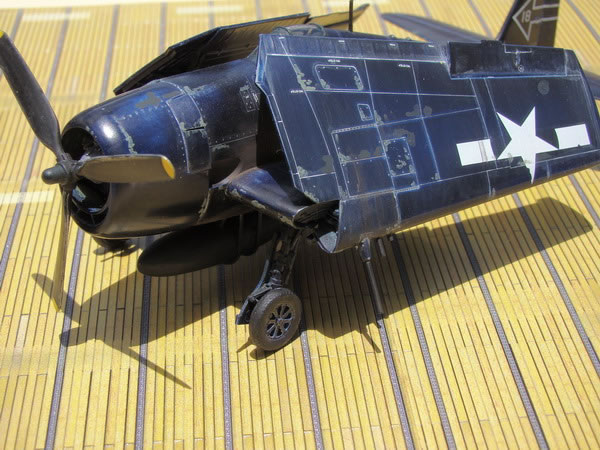
The CH kit is a -5N version so everything (landing gear, wheel wells, wing fold and so on) is going to be painted Glossy Sea Blue (GSB), so I could add these parts now and paint them all the same color later.
I See Blue Planes…
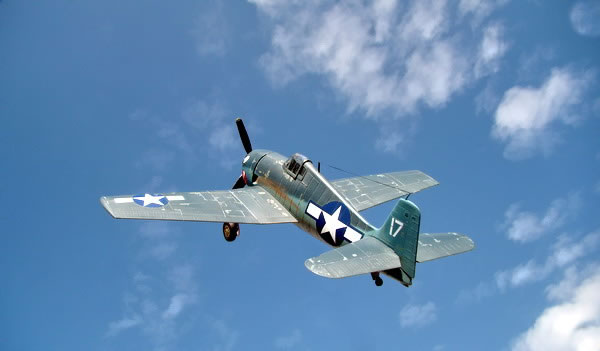
Since the E kit is being built as a -3 model, it will have the usual tri-color paint scheme, sea blue, intermediate blue over white (I’ll use Insignia White which is really a light gray instead). The CH kit will be GSB as stated earlier. Easy-peasy, right? Well it was.
I used Tamiya’s TS-5 Dark Blue and sprayed the whole thing blue. Naturally since I was doing these things at 10:00 at night with limited light and tired eyes, I got a few paint runs and pools. These actually shrank a lot after the paint flashed off and I took off the worst of it when I gave the entire model a good rubbing down with 4000 grit sanding pads.
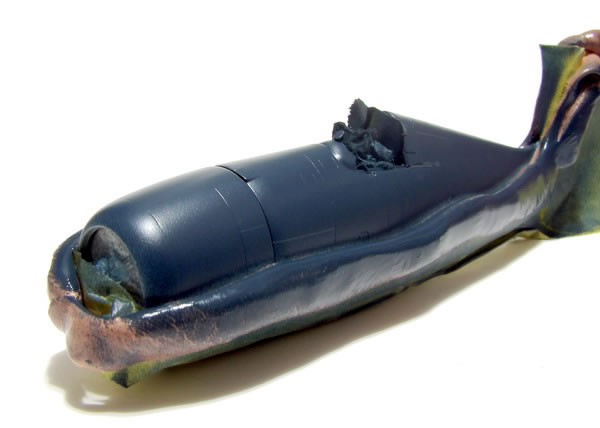
I kept the E Hellcat in several pieces, separate wings, fuselage and horizontal stabilizers. The wings and horizontal stabilizers were painted first with Dark Sea Blue tops and Insignia White undersides. The fuselage was also painted Insignia White underside with Intermediate Blue sides and vertical fin. After these had set overnight, I masked off the white underside with a wide Tamiya tape and Silly Putty sausages to mask off the medium blue sections in preparation for the dark sea blue.
After the masking was removed, the fuselage looked pretty good.
Rub a Dub-Dub, Three Grits on My…
Now it’s time to get the finish nice and smooth. First up to bat is a new 4000 grit sanding pad that I picked up from Micro Mark. I use these wet and sand the dust particles and orange peel out of the paint. This gives what I consider a more scale like appearance to my paint finishes. After getting rid of the orange peel and dust, I use 6000 grit pads to polish out the scratches from the 4000 grit and the 8000 grit pads to get the surfaces decal ready. In one of the photos in the Gallery, the wings have been sanded and polished, but not the fuselage. Big difference, eh?
Naturally during the heavy handling required during sanding, I broke a few things, like that damned antenna post at the top of the vertical fin and the stubs sticking out of the wing stubs. Tamiya Extra thin liquid glue to the rescue! But after I finish man handling the bleeding thing!
DeeCALS, Dekels, Dacalomania!
Since these models are to be built straight out of the box (mostly), kit decals all the way baby! I have always wanted a Hellcat with the growling face on the cowl. This is one of the markings included in the E kit. Cool!
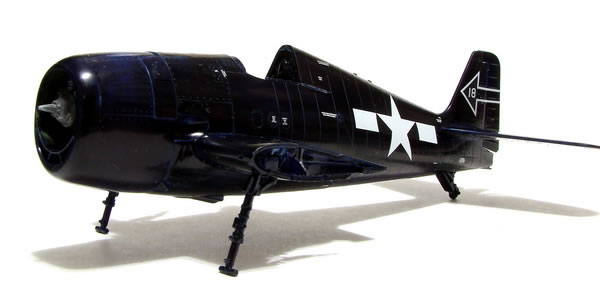
First up to bat was the CH kit’s tiny decals sheet. Tiny and white on pale blue paper making these rather difficult to read. These decals are very thin and conform well to the surface detail. Oddly enough, for a GSB finish, the decals had a flat finish! What the Hell CH! Ahhh..that’s OK, I was planning to give the model a clear flat coat anyway. The CH kit had lots of stencil details to add. This makes the model look all official like.
The E kit had no stencils at all. Only the insignias, growling face and fin markings for five aircraft. I could have used some stencils Mr. Eduard! The decals for the mouth and eyes had trouble conforming to the compound curves of the cowl. Even after several applications of Solvaset, the decals had wrinkles in them. I guess I should have used a blow dryer to heat up the decals a little.
Weather Where Art Thou?
After the decals and clear flat coat and set hard it was time to beat the living crap out of these two little kittens. Since the blue sanding dust from the polishing had gotten into the recessed panel lines of both aircraft, the panel line accents were taken care of. I still added a sludge wash over everything and the decals to blend it all together.
The slight scratches imparted into the paint by the sanding process were helpful in allowing a white wash to stick to the polished flat coat. This was allowed to sit for a few seconds and then wiped off with a clean napkin.
I used Polly S Deck Blue to paint in a few panels to make them look like they were replaced by panels from other aircraft. Some were painted intermediate Blue as well. Chromate green was used to impart a few chips and scratches here and there followed by silver and black. This weathering was applied to both the GSB CH kit and the Tricolor E kit. I added more Zinc Chromate chips and scratches to the Tricolor aircraft than the GSB aircraft as I figured the tricolor paints would wear out faster. But then as a carrier based aircraft, it probably shouldn’t get this beat up.
MiG Production’s Russian Mud and Dark Earth pigments were used to replicate the exhaust staining on the sides of the aircraft. Dirty thinner was streaked along the underside of the fuselage to represent oil spills and streaks from the engine bay.
The engine accessories bay behind the cowl is often removed to service this area, thus the screw heads are often silver and the panels themselves scratched up. This wear and tear was added using silver and Zinc Chromate green paint.
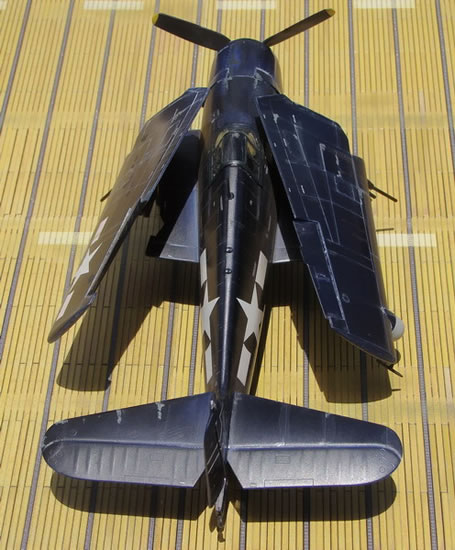
All Together Now
After all the weathering was done, the wings were finally added to the two fuselages. Adding the wings to the E kit was a simple affair. It took a bit more effort to get the horizontal stabilizers inserted evenly since there are no positive locators for the stabs.
It seems I pooched the dog on the CH kits wings. Somewhere along the way, I had glued in the wing fold parts incorrectly. When I added the folded wings to the stub wing, the port wing ended up too high. It was well away from the stub wing where it should at least touch. On the real aircraft, there is a pin on the stub wing that inserts into a hole in the folded wing. CH doesn’t supply this, so I decided to pin the wing at this point and have a stronger model. But with the port wing well away from the stub wing, I cannot pin the folded wing to the stub wing! Drats! But then the folding wing part is sturdy enough to handle the weight of the folded wing. Hopefully, I don’t bang it to many times before I finish these bad boys.
The remaining cockpit parts were added (not an easy task through the folded wings, when will I ever learn patience? The drop tank of the CH kit was hand painted with Tamiya Dark Sea Blue. After sanding smooth after it had dried, it was added to the model along with the E kit’s landing gear, landing gear doors, pitot tubes, propellers, antenna, and guns and so on and so forth. Lots of stuff to break off now!
Because I am an idiot, I had not added the guns to the wings when they were assembled the first time around. As such, I could not add then after assembly. I ended up using brass tubes to replicate the offset gun tubes. Oddly enough, the hole for the pitot tube on the CH kit is flashed over and there is no mention of opening this hole in the instructions! I had to use a brass rod to pin the pitot tube to the wing.
I also ended up replacing the antenna mast on the spine with a long piece of brass rod. I flattened one end of the rod to mimic the flat profile section of the mast and cut the rest of the rod long so that once inserted into the hole in the spine, the rod touched the bottom of the hole. This helps add strength to the mast when I add the wire antenna from wire. I guess this build is not 100% Out-of-the-Box!
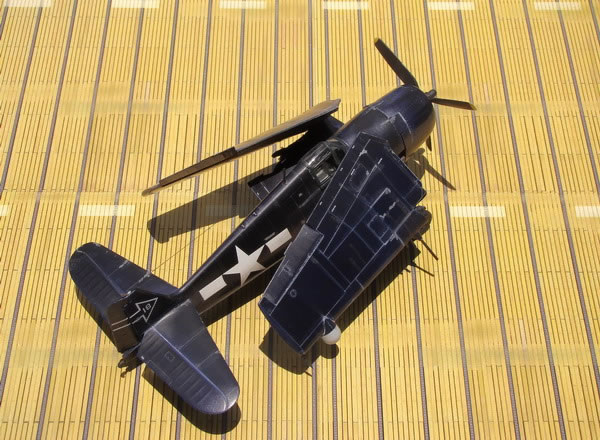
All Hands on Deck!
I wanted to put these bad boys on a display base worthy of the effort that I put into them. So I picked up four of those Eduard Preprinted carrier deck panels. These are tiny little deck sections only about 5”x5”. Way too small to properly display a WWII single engine fighter, hence I had to purchase four. At $30 each that’s $120! I keep hearing a little voice in my head that sounds like Neal proselytizing about a fool and his money parting ways…..
I stopped by Don Quixote and picked up a square of bamboo cutting board. The PE deck sections were glued with CA to this. The underside was covered with non-scratching felt.
The main reason for buying and building this carrier deck out of such a heavy stiff material is so that I can take it to Kakaako Park and take photos of the models on the wall with the sunset (or at least ocean and sky) in the background. Natural light makes for a more realistic photo. I can also use this base for photographing other models like the new SB2C Helldiver from CH, or a Tamiya F4U-1D Corsair or an X-Wing that had crashed…
So Which Kit is Better?
Neither. Each kit has its strengths and weakness.
If I were to build the absolutely most accurate F6F Hellcat in 1/72 scale, I would have to use both kits. The CH kit’s landing gear, cockpit, folding wings, and tail hook more closely match photo of these parts in the Aero Detail book.
The E kit has a more prototypical cowl, extended wing and fuselage overlapped panels. If I wanted a quick fun easy build, the Eduard kit.
If I wanted an enjoyable longer lasting build with great detail and folded wings, the Cyberhobby kit. I will build another Cyberhobby kit with the wings extended in Blue Angels colors. My next 1/72 scale kit will be another Cyberhobby kit, the Aichi D3A1 “Val” dive bomber, but I will also build a Yellow Texan as a Beetle Bomb aircraft to be a companion to the Blue Angel F6F.
If you are considering a Hellcat to build, don’t shortchange either kit. Both are great and highly recommended.
Model and Text Copyright ©
2012 by Val Bueno
Page Created 5 September, 2012
Last Updated
5 September, 2012
Back to
HyperScale Main Page

|
 Home
| What's New |
Features |
Gallery |
Reviews |
Reference |
Forum |
Search
Home
| What's New |
Features |
Gallery |
Reviews |
Reference |
Forum |
Search