De Havilland
Venom NF.2/2A
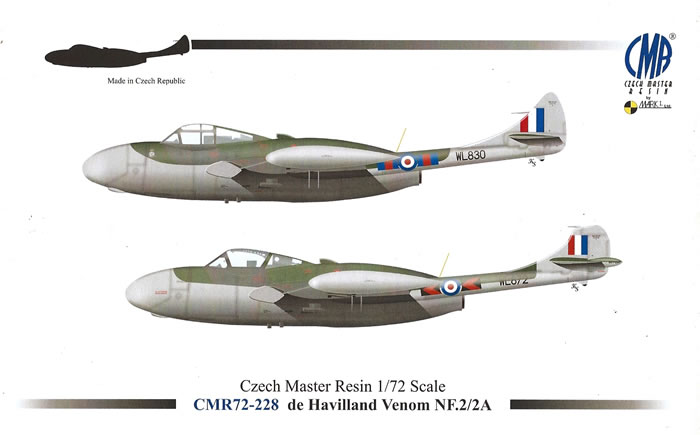
Czech Master Resin, 1/72 scale
S u m m a r y : |
Catalogue Number: |
Czech Master Resin Kit No. CMR-228 - De Havilland Venom NF.2/2A |
Scale: |
1/72 |
Contents & Media |
Fifty-six green and five black resin parts, 1 pre-coloured PE Fret of thirty-seven parts, four vac-form canopies, two pre-cut canopy & wheel masks, and a decal sheet covering four options. |
Price: |
Available online from these on-line stockists: |
Hannants |
West Coast Hobbys |
Aviation Megastore |
£ 33.33 |
Can$ 47.50 |
€ 41.13 |
Click here for currency conversion and here for other CMR stockists. |
Review Type: |
First Look. |
Advantages: |
Thoroughly researched, highly detailed, produced to very high standards, superb instructions, good blend of different media, includes canopy and wheel masks. |
Disadvantages: |
None apparent. |
Conclusions: |
It is pleasing to have what I think is the first kit of the Venom NF.2 and NF.2A. Like all recent CMR high-tech kits, this one is just an extremely complete package in every way. I highly recommend it. |
Reviewed
by Mark Davies

HyperScale is proudly supported by Squadron.com
Background
De Havilland’s Venom was a logical development of their Vampire, albeit a rather conservative one. It was originally to be known as the Vampire 8; but the use of a different engine and a thinner wing with its slightly swept leading edge led to a new product number and name of DH.112 Venom. All but the earliest Venom FB.1’s had ejection seats; this gave a Venom pilot a much better chance of survival if baling out than a Vampire pilot had. The single-seat Venom entered service with the RAF in 1952.
Development of the two-seat nightfighter Venom was a private venture, which was quite typical of De Havilland. The cockpit design was based on the Mosquito nightfighter’s, which was then integrated with the Venom’s airframe. The same approach had been used to create the two-seat Vampire NF.10 only a year earlier. The Venom nightfighter did not have ejection seats, which was to remain a weakness throughout its service life. The first flight of the prototype nightfighter was in August 1950.
The RAF expressed its interest in the type soon after the prototype’s early flights. It then became the Venom NF.2, and was tested at Boscombe Down in April 1951.The NF.2 had a number of weak points; but De Havilland fixed most of them to the satisfaction of the RAF. The issue of safe crew evacuation remained however, as ejection seats were not one of the fixes. Nevertheless, the RAF ordered ninety NF.2’s and their squadron service commenced in May 1953. The Swedish air force also operated a license-built version of the NF.2 known as the Venom NF.51 by De Havilland, and J.33 by the Swedes.
In 1954, De Havilland began to fit the same canopy as used by the Vampire T.11 to the NF.2’s. This clear-view design was an easier to jettison than the NF.2’s framed canopy, and so it became easier for the crew to abandon the aircraft. They also fitted Venom FB.4 style fins at the same time as the new canopies. Venom NF.2’s modified in this manner became NF.2A’s. The NF.2 was an obsolescent design when first introduced, and its service life was short, ending in mid-1957. The Venom NF.3 had a slightly more powerful engine, powered ailerons and US radar. It began to enter service from March 1955, but its performance was not much of an advance over that of the NF.2A.
The Royal Navy showed interest in the Venom NF.2 for use as an all-weather fighter. This was to be on an interim basis until the Sea Vixen entered service. The first Sea Venoms were in effect navalised NF.2’s; they were initially designated as Sea Venom NF.20’s, and then FAW.20’s. The next version was the Sea Venom FAW.21; it paralleled the changes made to the RAF’s NF.3, but unlike the landplane, this naval version finally had ejection seats. However, the Sea Venom’s is really another story… (See my review of CMR’s Sea Venom here on HyperScale).
Previous 1/72-Scale Venom NF.2 & NF.2A Kits
I do not know of any previous nightfighter Venom kits in 1/72-scale. Of course, there have been various Sea Venom offerings, but these do not count here.
Overview
The kit reviewed here is typical of CMR’s products released over the last few years. It has a highly detailed resin airframe, clear vac-form canopies, and includes pre-coloured PE parts and pre-cut masks by Eduard. CMR supplies these parts, two sheets of decals and several pages of instructions in a sturdy top-opening box.
The instructions acknowledge several Venom experts who helped with the research for the kit. In fact, CMR’s global network of experts and enthusiasts is a major strength that underpins much of their quest for accuracy and high levels of detail.
Contents
CMR’s instructions have a parts map and use an easy to follow diagrammatic format. What is immediately apparent is just how crisp and well drawn the graphics are. I rate the constructional diagrams as some of the best I have seen, mainstream kit brands included; in fact Tamiya is the only company that I can think of that would rival them.
All text is in English, with instructions used where diagrams alone will not suffice. Notes also identify any features specific to the four colour schemes. The colour scheme guides are four pages of monochrome shaded diagrams, and there is a four-page stencil placement guide as well. Paint colours have at least a generic name, whilst some have their military name plus a BSc381C and/or FS-595 number. Several images of the aircraft in service are included on two more pages.
The kit is packed in CMR’s usual heat-sealed plastic pouches that separate the resin parts broadly by size and fragility. PE parts, paint masks and canopies are further sealed and protected, as are the decals. A final outer bag then encloses everything, so there is little chance of parts going missing until all unpacked. However, I do advise care opening the pouches, just in case some small parts have broken off their casting blocks or been damaged.
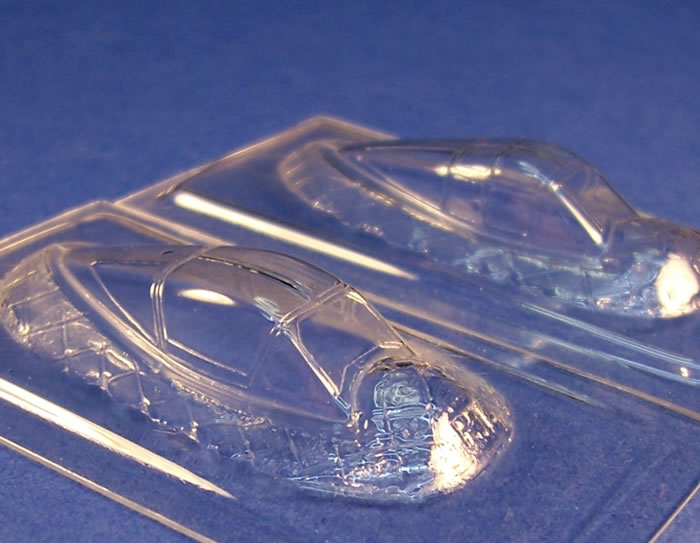
The resin parts are green, with the exception of the undercarriage legs that are black. The parts are joined to easily removed casting blocks that have thin attachment points. This is leaves only minimal cleanup to be done after their removal. Detail levels are superb, with some incredibly fine and small resin pieces. Stronger black resin forms the undercarriage, as is common to most weight bearing parts in CMR kits. The trade-off is that this resin sometimes has a little flash that needs cleaning away. The colour PE fret is produced to Eduard’s usual high standards, as are the paint masks. The kit includes two of each style of vac-form canopy, meaning you get to practice cutting it out or have an insurance copy depending on how you look at it. The canopies are very clear and well formed.
The Airframe
I know that it is obvious, but it is worth checking the various parts options that go to make either the NF.2 or NF.2A. A few small items also need to be scratch-built, but this amounts to little more than cutting short length of plastic rod or stretching some sprue.
Coloured PE harnesses garnish the two bucket seats. They sit surrounded by a combination of fine resin and coloured PE detail. The coloured PE instrument panel should be a standout feature of the finished cockpit. The fuselage halves are ready for joining once fitted out with the cockpit, exhaust ducting, and nose wheel-well. Adding some ballast to the nose is advisable too.

It seems fair to say that most of the constructional work is with the wings and the twin booms. There is obviously a choice of booms with their different fins and rudders to cover the NF.2 and 2A options. The air-intakes are separate items with PE braces to fit in their mouths before joining to the wings. The inlet ducting looks convincing and ends in a hollow with the fuselage. These hollows should provide a convincing degree of shadow within the intakes’ depths if they are painted matt black.
The intake hollow acts as wing tab, and this, as well as the outline of the wing root, guides the wing to fuselage fit. Some regard twin boom aircraft as a bit of challenge to build correctly aligned. However, CMR’s combination of tab and hollow, plus crisply cast faces where the booms join the wings should ease this aspect as far as is practicable; and of course the square fit of the tail-plane also aids alignment.
The wings have highly detailed wheel and flap bays, both with authentic and delicate undercuts. The interior faces of the wheel doors have a most convincing appearance. The black undercarriage legs and green resin wheels will look good as well, with PE scissor-links that add to the scale refinement in this area. There is a choice of main wheel styles that linked to the NF.2 and 2A options. Closed or deployed airbrakes are also an option, as are drooped or closed flaps. My experience of resin kits is that it is often easier to model these open, as their closed fit can vary slightly due to the nature of resin part production. Besides, there is some very nice resin and PE detail in these areas, so why hide it?
There is a choice of vac-form canopies to cover both variants. The one for the NF.2A has an interior strengthening rib made of resin and a PE windscreen wiper. As mentioned earlier, CMR provides an Eduard pre-cut mask for the canopy (and wheels) which is a nice feature of their kits.
A few final additions to the airframe are needed at the end of assembly or after painting. These include some under-wing antennae provided as PE parts, and two nose door braces, a gun-sight glass, and whip aerials, all of which need to be scratch-built.
Colours & Markings
Each of the four paint and markings guide consists of one A-4 page of shaded six-view drawings. All options have the same paint scheme of dark green and dark sea grey over medium sea grey undersurfaces that also sweep up to encompass the entire nose. The instructions indicate that a gloss finish is applicable in all cases; but I suggest that a semi-gloss finish be used for scale effect. A two-page guide covers stencil placement for the two versions. The markings options provided are:
-
NF. 2, WL830, No 23 Sqn RAF, Cottishall, 1955,
-
NF2A, WL872, No 219 Sqn RAF, Driffield, 1956,
-
NF2A, WR783, No 33 Sqn RAF, Driffield, 1956, and
-
NF2A, WR973, No 253 Sqn RAF, Waterbesach, 1956.
The decals look to be very good quality with sharp registration.
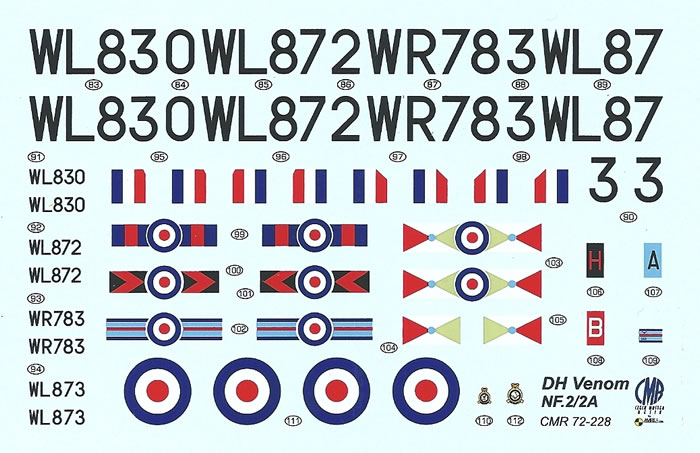
They are by Eduard, which from my experience would suggest that they have good colour density as well.
It is pleasing to have what I think is the first kit of the Venom NF.2 and NF.2A. It fills an important gap in 1950’s cold war subjects. CMR is doing a great job of kitting the Vampire and Venom family, so look out for their Venom NF.51/J.33 and NF.3 kits in the future.
This kit is a fine example of just how good resin multimedia kits can be. It has superb detail, a logical parts breakdown, and all components are very good quality. The use of various media types and inclusion of paint masks make this kit a very complete package.
This is a simple kit compared to some of CMR’s recent releases. I think that it should build quite quickly and easily as far as multi-media resin kits go. It has the potential to build into a stunning model. I highly recommend it.
Thanks to CMR by Mark 1 Ltd for the review samples.

Review Text and Blue Background Images Copyright © 2012 by Mark Davies
Page Created 25 September, 2012
Last updated
25 September, 2012
Back to HyperScale Main Page
Back to Reviews Page
|
 Home
| What's New |
Features |
Gallery |
Reviews |
Reference |
Forum |
Search
Home
| What's New |
Features |
Gallery |
Reviews |
Reference |
Forum |
Search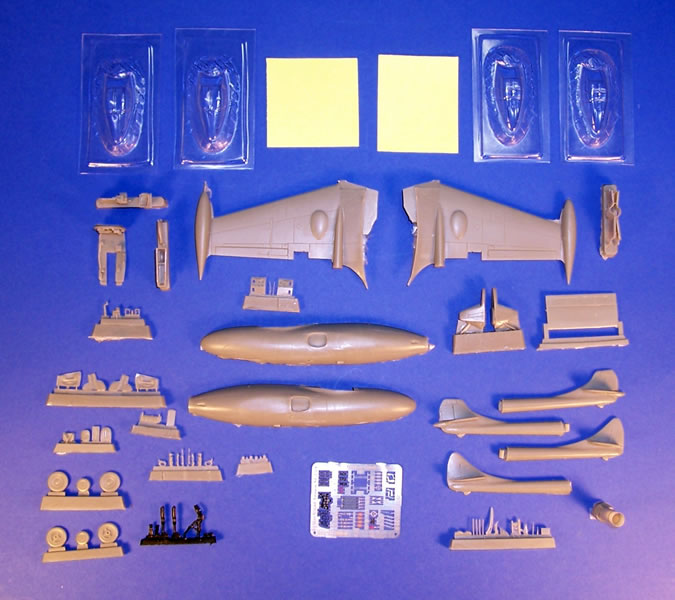
_fs.jpg)
_fs.jpg)
_fs.jpg)
_fs.jpg)
_fs.jpg)
_fs.jpg)
_fs.jpg)
_fs.jpg)
_fs.jpg)
_fs.jpg)
_fs.jpg)
_fs.jpg)
_fs.jpg)
_fs.jpg)
_fs.jpg)
_fs.jpg)