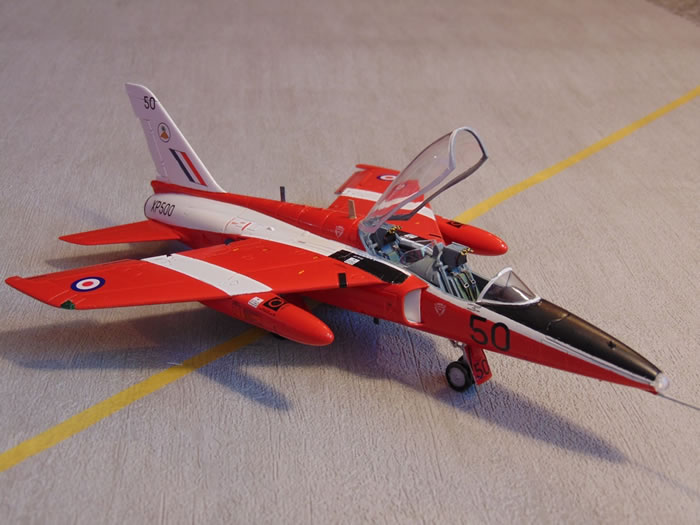
Airfix 1/48 scale
Folland Gnat T.1
by Roger Hardy
 |
Folland Gnat T.1 |

Airfix's 1/48 scale Folland Gnat T.1 will be available online from Squadron
S
u m m a r y |
| Catalogue Number: |
Airfix Kit No. A05123 - Folland Gnat T.1 |
| Scale: |
1/48 |
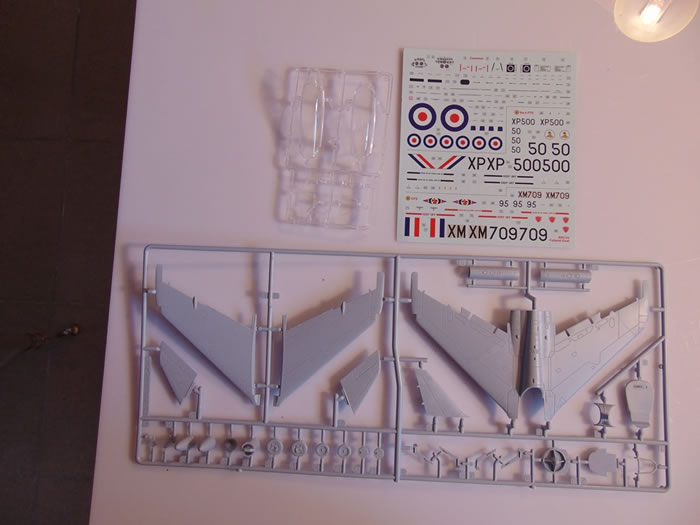
| Contents and Media: |
3 sprues light grey plastic parts; one clear; markings for two aircraft. 96 parts. |
| Price: |
£16.99 available online from Hannants
|
| Review Type: |
Build Review |
| Advantages: |
Accurate. Crisp mouldings. Brilliant fit. Well engineered. Positionable flaps, ailerons, rudder, nose avionics bay and canopy. No filler needed anywhere. |
| Disadvantages: |
It’s difficult to find anything to criticise except that the decals are matt. Only one crew member. Some will say that the engraved panels are too prominent. Picky, picky, picky. |
| Conclusion: |
A rare pleasure to build with a zero frustration rating. Recommended without reservation. Build a squadron! |
 Background Background
For a full history, have a look at: http://en.wikipedia.org/wiki/Folland_Gnat
The Folland Gnat was developed as a reaction to the growing size, weight and cost of post WWII jet fighters. The Gnat was the creation of W.E.W. "Teddy" Petter, a British aircraft designer formerly of Westland Aircraft and English Electric; he was also the Chief Engineer of the Canberra and was instrumental in the conception of the massive (and expensive) Lightning fighter.
In a previous life I was in flying training in the RAF myself and arranged a detachment from my University Air Squadron to RAF Valley in the summer of 1972. I managed to cadge 6 flights in one of these pocket rockets and note from my logbook that the pilot of one of them was a Flying Officer Jock Stirrup, who eventually became RAF head honcho, the Chief of the Air Staff!
The Gnat is clearly a small aircraft but you don’t realize how small until you look down on it; they say you don’t get into it, you strap it onto your back! I recall that there was barely room in the cockpit for a man with a g-suit but the experience of flashing around Welsh valleys at 50 feet and 400 knots was one I’ll never forget, or the demonstrations of Mach tuck. Anyway, enough of this meandering. What about the kit?
The Kit
This is Airfix’s third Gnat but the first in 1/48 scale and this follows hot on the heels of their lovely little 1/72 model but this model is not based on the smaller one; it is completely original. Previously, there was only the limited run offering in 1/48 from Aeroclub (see http://www.britmodeller.com/forums/index.php?/topic/24815-folland-gnat-t1-148-aeroclub/) but this Airfix kit is state-of-the-art and far more comprehensive and makes the Aeroclub kit obsolete.
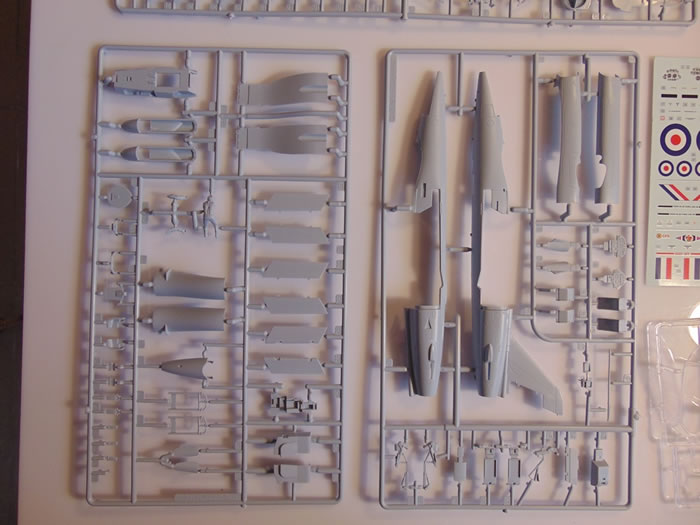
It features all the details you could require straight from the box plus positionable control surfaces and the canopy can be posed open (unlike the 1/72 kit) plus the avionics bay in the nose can be positioned open and this is quite useful as you often saw this on the ground. The quality of the moulding is first class and the cockpit detail is very fine and well-defined; an improvement over some earlier Airfix standards where some of the detail is a little soft. Some will criticize the depth of the panel lines and I have to admit that they are deep enough to allow paint bleed under kabuki masking tape, even when precautions are taken to avoid this. This model comes with two training schemes, one raspberry ripple and the other silver and fluorescent red.
The Red Arrows version will be available soon as AO 5124.
Okay, let’s get building!
Right, first gripe: I know that Airfix is basically paint-maker Humbrol and they want to sell their paints but I can’t get them in Portugal where I live, don’t like enamels and prefer to use Tamiya or Gunze Sangyo if I can get them. So it’s necessary to refer to paint-equivalent charts. Here’s one: http://www.ipmsstockholm.org/colorcharts/stuff_eng_colorcharts_humbrol.htm.
I’d prefer it if Airfix told us the name of the colours along with their Humbrol paint number.
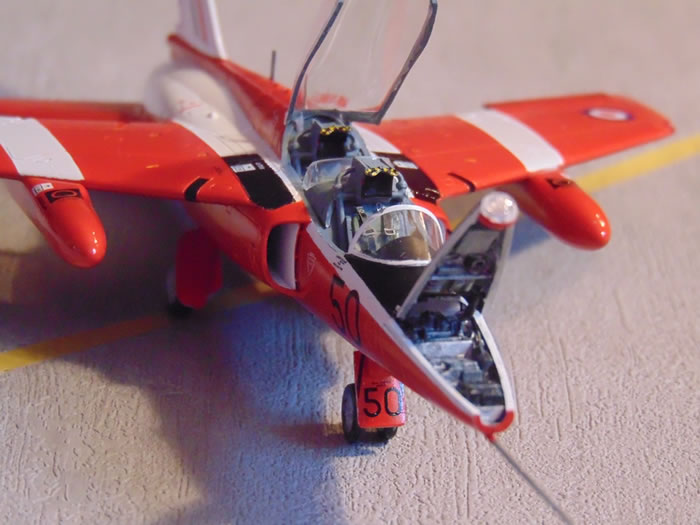
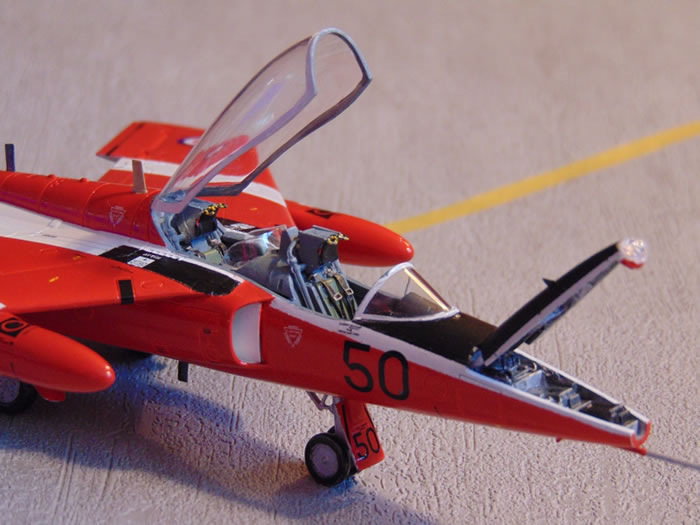
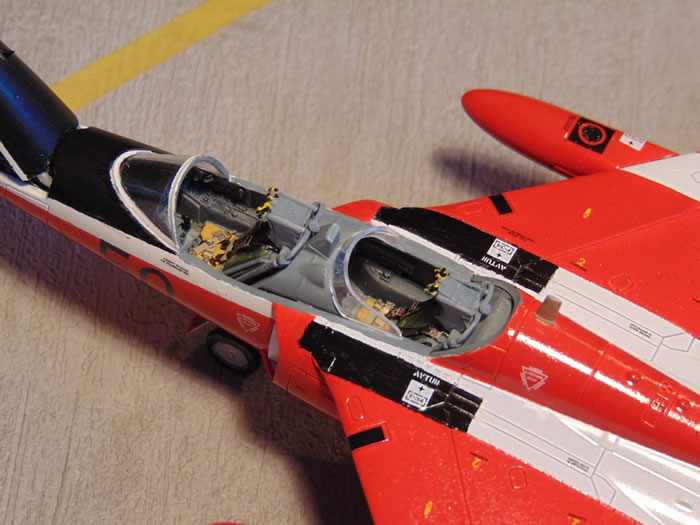
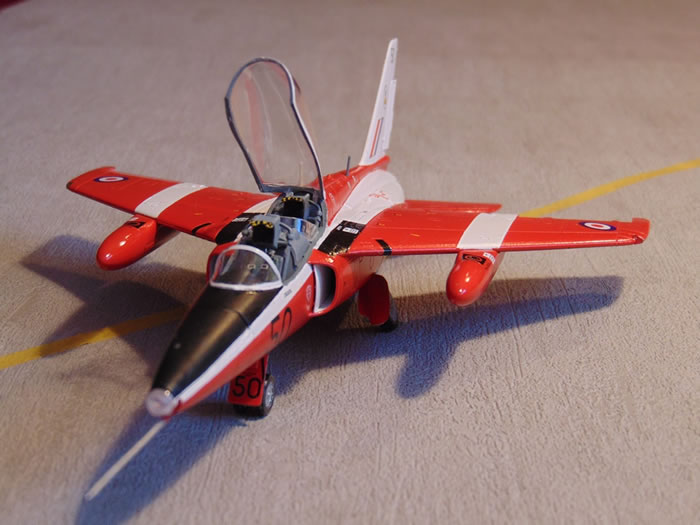
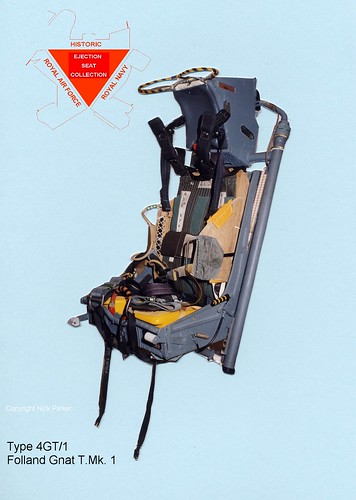
Construction starts with the cockpit of the Gnat which was so small that normal Martin-Baker seats would not fit so MB designed some special baby ones and Airfix reproduce these nicely (in seven pieces each!) although one of my seats was not completely moulded and I had to add one part of the headrest from scrap – more moulding pressure please! The cockpit, including the sidewalls is really well-detailed and looks very three-dimensional and busy. I’m sure the aftermarket guys will come up with something even better but I don’t feel that it would be that easy to improve on this except by adding some p/e pre-coloured instrument panels. The rest of the cockpit is medium grey (I used Tamiya XF-66) with a few details in silver and black plus seat back cushion in green (I used RLM 82 not Grass Green H80), base cushion yellow and some tan details. A clever touch here is that you can choose the nicely detailed crew member in the front seat (no belts or cushions moulded into the seats) or empty seats with harnesses and cushions moulded into the seat. I’m surprised that there is only one crew member as the trainers often had two although this is probably a reflection of the next issue, the Red Arrow Gnat, which was normally single crew. This is what a real 4GT/1 seat looked like: https://c1.staticflickr.com/3/2343/1785718685_34ff8f09ef.jpg and I added a few generic Eduard belts to augment what was there. On the photograph you can see harnesses hanging from the seat top; these were hung there on little hooks to keep them out of the way.
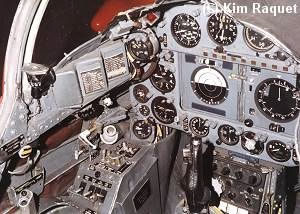
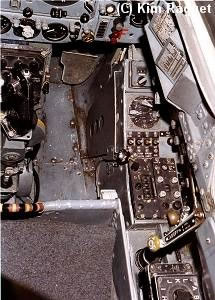
The instrument panels are provided as decals which fit well with no trimming around the edges, although you may want to remove the raised detail on the moulded parts although I did not and just pressed the decal firmly over the raised detail with a tissue. I’ve added a couple of photos from a Hyperscale forum to show a real Gnat cockpit (both images copyright ©Kim Raquet). Here are lots of pictures of a Red Arrow:
http://www.aircraftwalkarounds.be/Images/HawkerSiddeleyGnatT1/index.html.
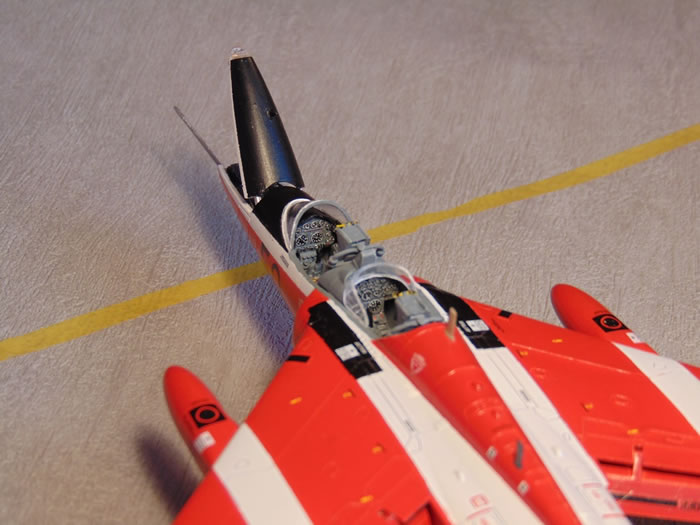
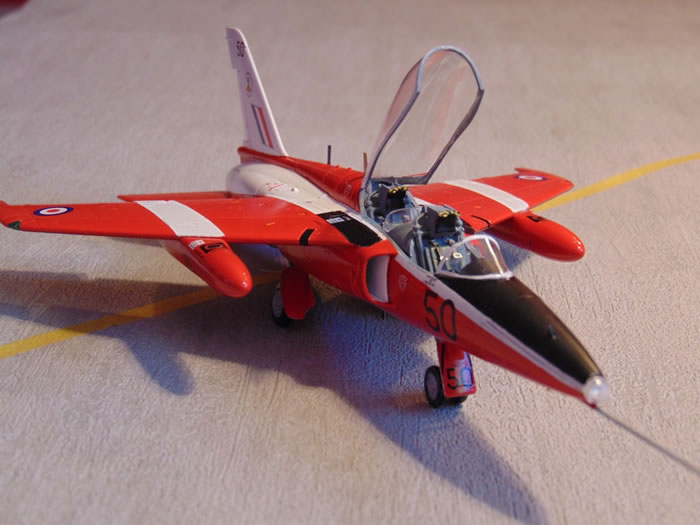
The intake arrangement is unusual but works well with full internal trunking and some really nice subtle detail for the boundary layer diverters. When you first match up the intake to the fuselage you’re not too sure where the front should go but it all becomes very apparent and the entire assembly, internal and external, is a very snug fit. The intake trunking should be white (some references say silver, probably for the silver scheme) with a red rim around the intake front for XP500.
The remainder of the fuselage construction is straight-forward and the fit of all the parts is perfect. Oops. Almost forgot. The instructions do not tell you to add a nose weight. Do. I have never known a jet aircraft that didn’t need one. I added a couple of lead pellets under the avionics bay insert (I can still get lead fishing weights in Portugal) and will wait to see whether they’re enough, by which time it will be too late to add more, of course. I taped up the fuselage with kabuki tape and applied the liquid poly, then left it to set. At this point, I trial-fitted the wings to check that the fuselage was correctly assembled and would mate with the wing. The joint looks to be perfect.
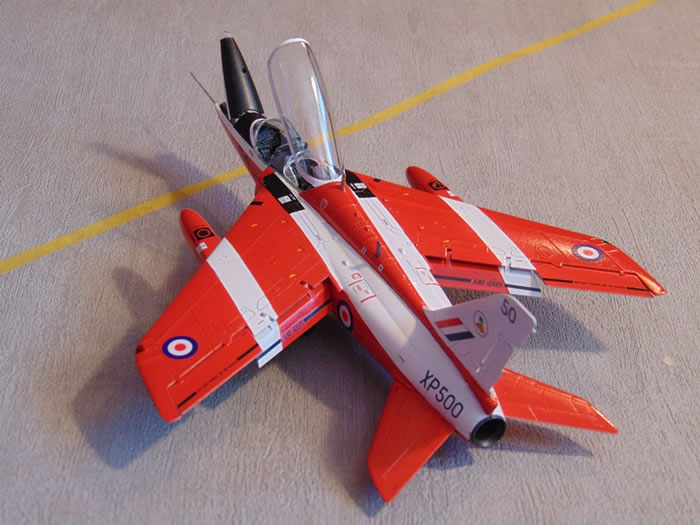
Don’t forget to drill the holes for the slipper tanks – I did! Actually, they are easy to position accurately if you forget. Note that the trainers were almost always fitted with them whereas the Red Arrows were not. The ailerons are moveable but the flaps are not. Check your references for flap deflection (if you decide to deploy them) as full flap was quite dramatic on these aircraft – more like airbrakes than flaps – about 50 degrees. I am a little suspicious of moving parts but in the case of the ailerons, they simply look authentic, so no problems there. The moveable rudder has a prominent raised panel line running from top to bottom that I’m pretty sure wasn’t there on the original but it’s easy enough to reduce.
Airfix provide two complete canopies, one closed, one open with mounting tags that hold the big canopy at the correct angle, both are very thin and clear. I decided to fix the windscreen and cut up the ‘closed’ canopy to mask the cockpit and secured it with blu-tack but I decided to leave the undercarriage, tailplanes, flaps and slipper tanks off until after spraying. Incidentally, the slipper tanks need a little fettling to remove the seams. A nice touch is that Airfix have included the small windscreen for the rear cockpit. No filler was required anywhere and it’s looking rather sweet, even now. Ready for painting.
Painting, Markings and Finishing Touches |
Paint was applied with my Testor Aztek A470 airbrush.
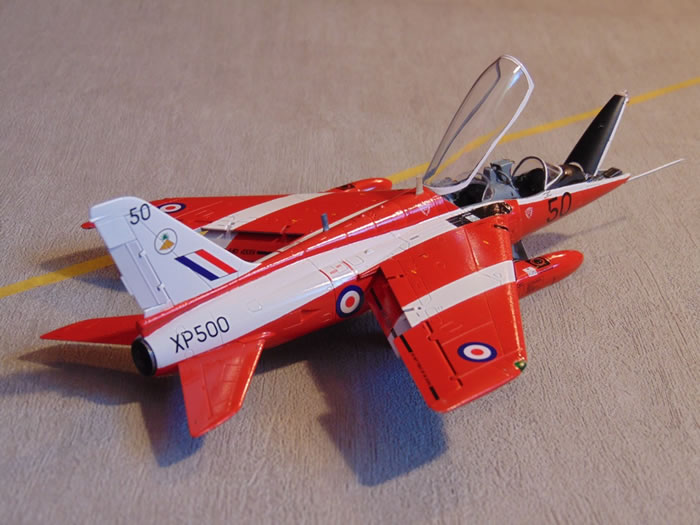
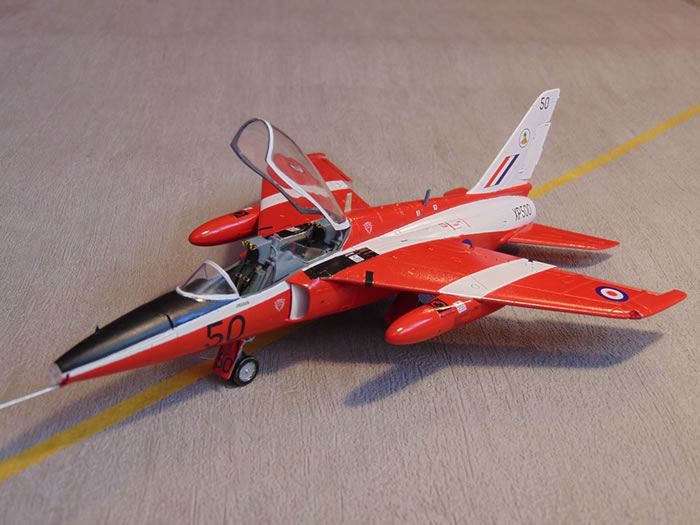
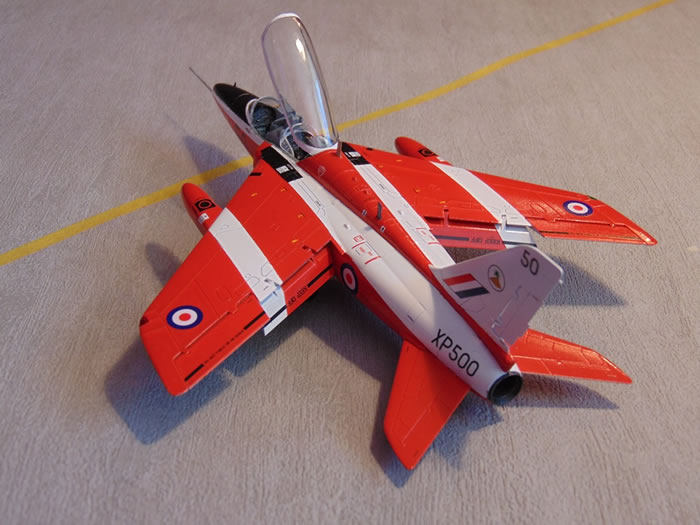
Two versions are provided: XP500 of No 4 FTS RAF Valley and XM709 of the Central Flying School 1973, Little Rissington 1964. The decal sheet looks good and is in perfect register but is matt, rather than gloss or satin. S&M Models produce a big decal sheet to cover pretty well every Gnat colour scheme: http://www.hannants.co.uk/product/SSM48001.
There are plenty of photos to show that the colour schemes offered by Airfix are accurate: http://www.fotolibra.com/gallery/646407/folland-gnat-t1-xm705/ and here’s another picture that shows a Valley aircraft (scroll down): http://derbosoft.proboards.com/thread/4900/raf-valley-years-
I sprayed the entire aircraft in Tamiya white primer then did the gloss white followed by the light aircraft grey wing undersurface, then the gloss red. Masking was done with Kabuki tape and I mostly used Tamiya paints and an Aztek A470 airbrush with turquoise tip which doesn’t clog so easily as I’m useless at airbrush care. Be forewarned - masking for both of these schemes is a pain and if you want a simpler scheme, wait until the Red Arrow comes along or do a Yellow Jack from the S&M aftermarket decal sheet. I brushed a little satin varnish along the seams of the masking before spraying the red to stop any bleed along the panel lines; one of the disadvantages of engraved lines and difficult to tidy up later with red and white paint. Even with this precaution I still got some bleed-through. I thought that Tamiya’s X-7 gloss red was a little too dull so tried Revell’s 31 Feuerrot thinned with some Tamiya acrylic thinner and it worked just fine. I’ve never tried to spray these colours before as I normally regard them mainly as good for brush-painting but this red went on really well and dried to a nice satin gloss, something that I have difficulty getting with thinned Tamiya paints. I masked and brush-painted the black walkways on top of the intakes and the anti-dazzle panel on the nose.
Final Assembly
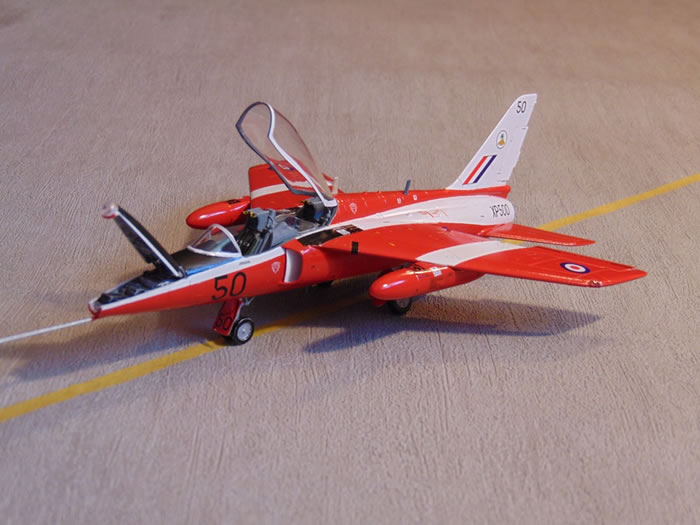
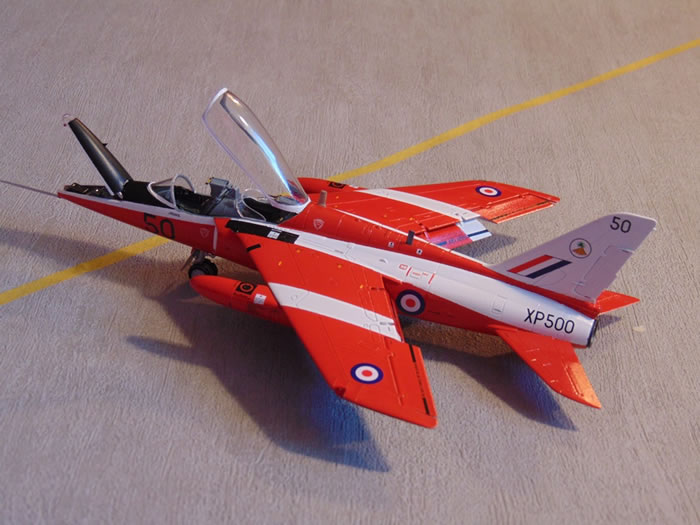
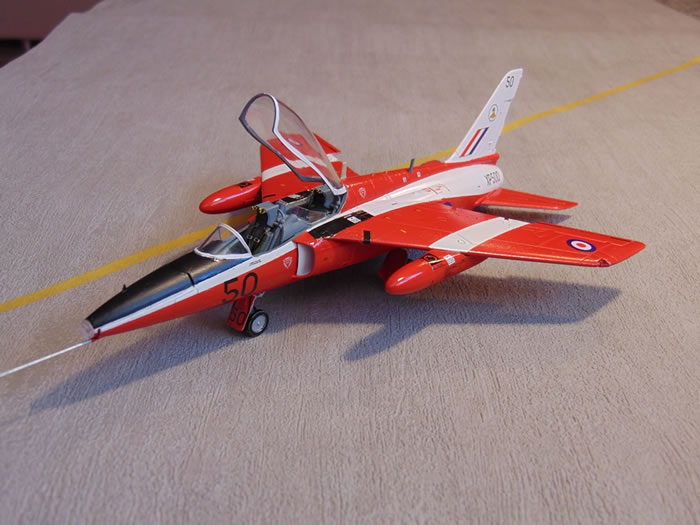
Having let the paint harden I removed the masking (except from the glazing) and touched up here and there then added the tailplanes, slipper tanks, flaps and undercarriage. You need to be quite precise with the location of the main undercarriage as the track is very narrow and a whisker out of place will result in wings not being level. I recommend a little superglue at the legs with the aircraft resting on its wheels, checking that the wings are level before the superglue sets. The open avionics bay cover has a couple of parts as well, including the landing light and I managed to find a little MV lens to make this look better. Looking at the painted model, I think my white stripe at the nose is a little too wide and I’m not sure where the black walkway starts over the intake as photo evidence is mixed.
Decals
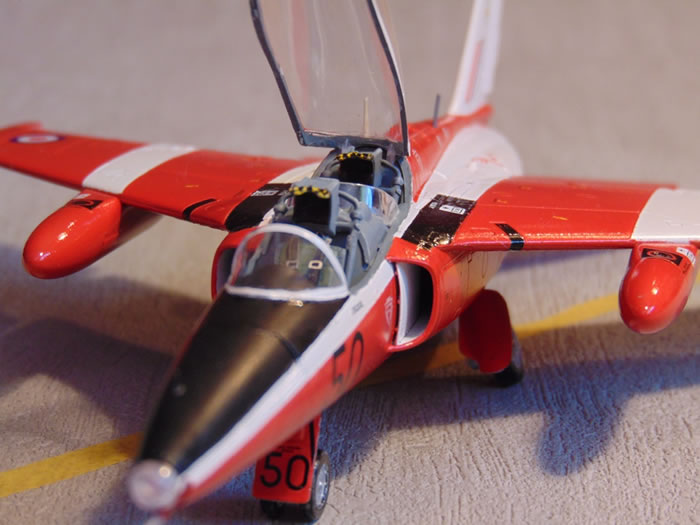
The decals are comprehensive but are matt which is not appropriate for aircraft that were gloss. However, that’s not a problem if you spray an overall coat of varnish at the end which is what I generally do. I looked at my Airfix 1/72 Gnat which also has matt decals but was done in the silver scheme and, in fact, they are not that obvious. However, satin would have been better. The decals went on fine with a little Micro Set, although I got the position of a couple slightly wrong. Be careful with the ejection seat warning triangles; they are red for the silver aircraft but white for the raspberry ripple and you can barely see them on the sheet. When they were dry, I sprayed the model with Tamiya rattle-can gloss varnish and removed the masking from the glazing. Finally I added the aerials and shaped wingtip navigation lights. How nice to see these provided! The last touch was to pose the canopy and avionics bay open, both have hooks moulded into them and sit at the correct angle naturally.
During photography, I decided that I preferred the nose panel closed so removed the mounting lugs and closed it. Note that you need to remove some internal detail to do this and the panel is not hinged, you have it open or closed, you can’t have both!
When I build a kit, I often feel that I’m smarter than the people who designed it but there are times when I find myself taken by surprise by some thoughtful or clever treatment (territory normally reserved for Tamiya kits) and it’s not often that I build a kit which was pleasure from beginning to end but this is one of those. Cleverly engineered…accurate…precise fit of parts…no filler required…goes together perfectly…I could run out of superlatives; it is almost faultless. I felt that I was cheating!
My congratulations and thanks to New Airfix who are showing that this high quality is to become the norm and that it should ensure that they can resume their position at the top of the hobby model business where they belong. I am also pleased that Airfix are again producing high quality kits at reasonable prices which might encourage more youngsters to take up the hobby.
Model, Images and Text
Copyright ©
2014 by Roger Hardy
Page Created 18 November, 2014
Last Updated
18 November, 2014
Back to HyperScale Main Page
|
 Home
| What's New | Features | Gallery | Reviews | Reference | Resource Guides | Forum |
Home
| What's New | Features | Gallery | Reviews | Reference | Resource Guides | Forum | 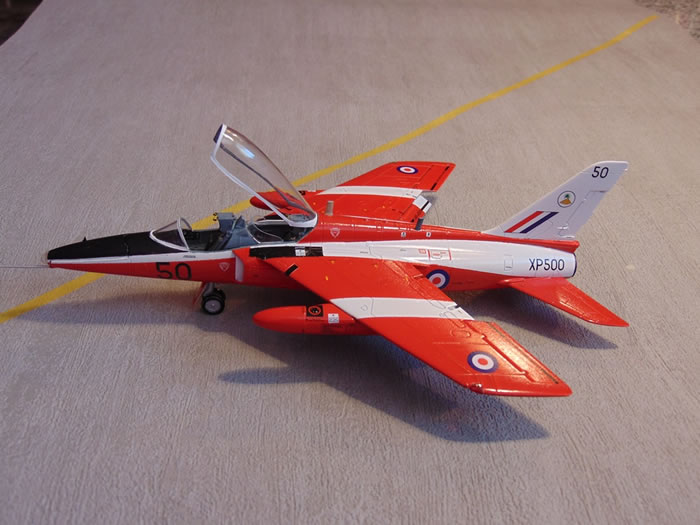