Airfix 1/72 scale
EE Lightning F.2A
by Mark Davies
 |
EE Lightning F.2A |

Airfix's 1/72 scale EE Lightning F.2A is available online from Squadron
 I gave Airfix’s new-tool Lightning a “First Look” here on HyperScale in January this year. At the time I concluded that: I gave Airfix’s new-tool Lightning a “First Look” here on HyperScale in January this year. At the time I concluded that:
Airfix's new-tool Lightning is accurate, has nice surface detail, simple engineering that should build well; it comes with excellent decals, uses clear instructions, and is well-priced. It is undoubtedly the best 1/72-csale EE Lightning kit to date.
This is an excellent effort by Airfix, and I rate it as their equal-best so far 1/72 release, along with their new-tool Fairey Swordfish.
I recommend it highly.
Brett Green finished his copy of the same kit a couple of weeks later and published images and brief comments here on HyperScale. He mentioned that “This is a really nice kit with genuinely fine crisp surface detail, good fit, and a high level of accuracy.”
Having now built the kit, I can say that I stand by my assessment; although I’ll be a bit wiser when I get around to building the essentially similar F.6 boxing recently released by Airfix. One point to watch however is the quality of the kit canopy. My one had a really prominent flow-mark I previously missed seeing.

I checked with two mates who also had the same kit and found that they had the same flaw in theirs, one even with windscreen issues too. I requested a replacement from Airfix on-line and made do with my mate’s canopy as his was a little better than mine. I know Airfix has had similar issues with their 1/24 Typhoon, so if you own a new-tool Lightning it will pay to check yours.
F.2A Armament
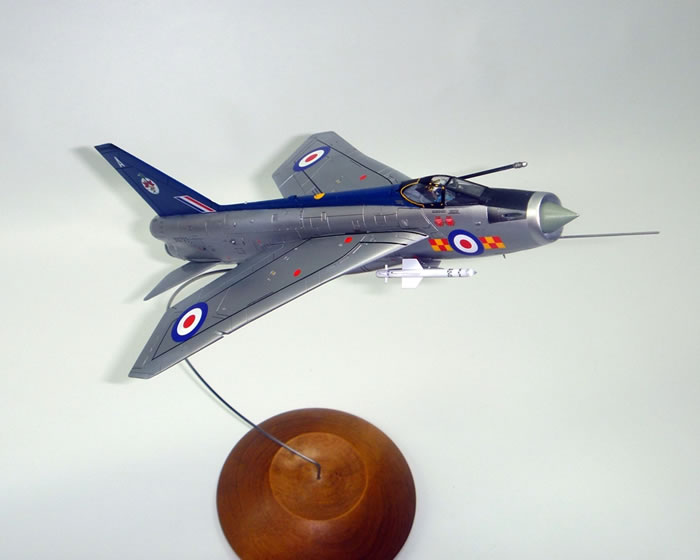
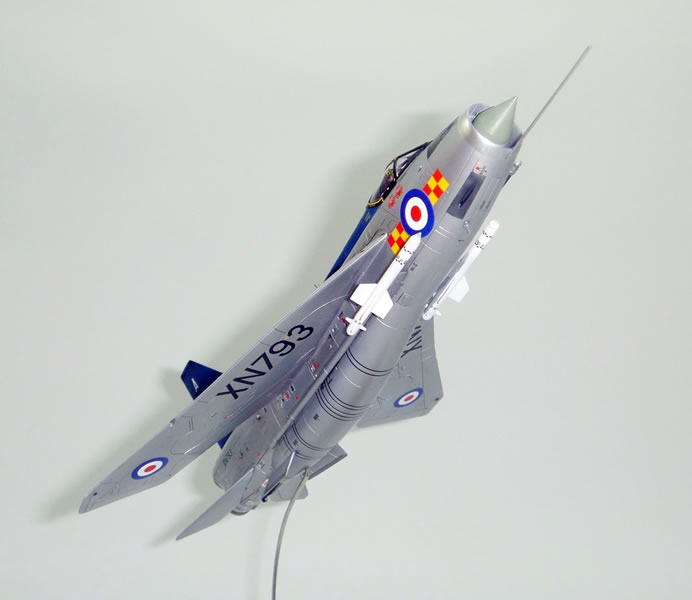
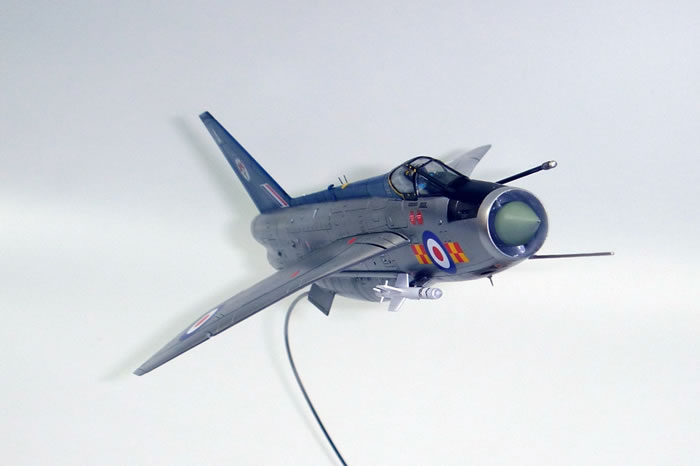
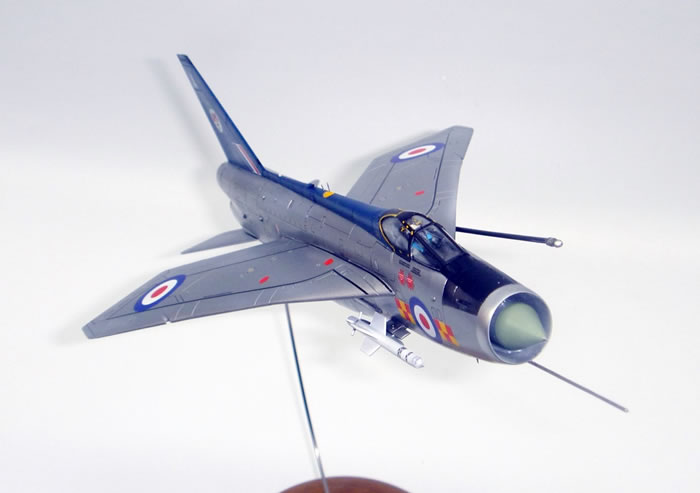
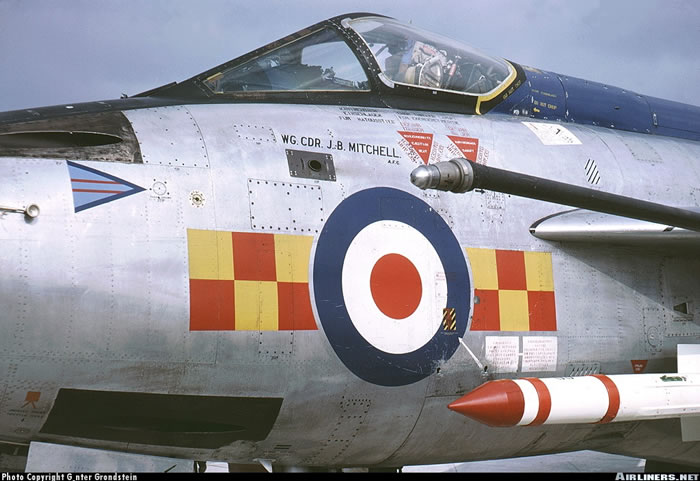
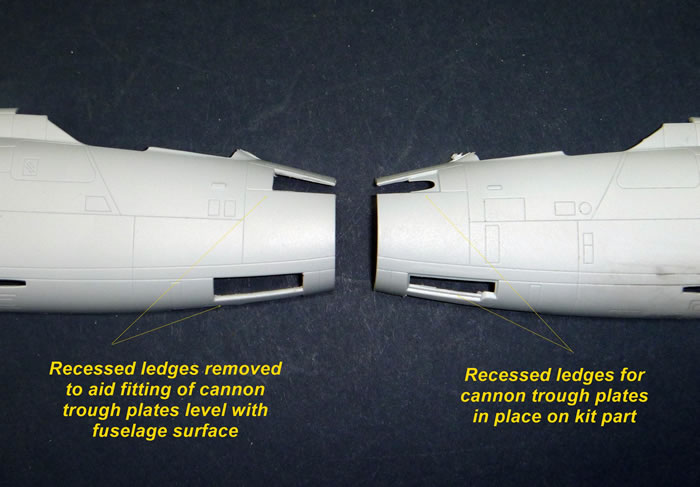
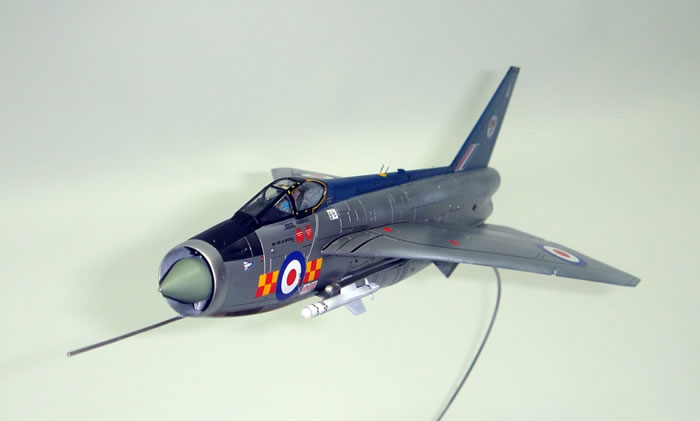
The F.2A was capable of being armed with four 30-mm Aden cannons, although when the lower pair was installed it could not carry its pair of Firestreak missiles, as the missile pack and cannon breeches occupied the same space (another alternative was a pack of free-flight rockets mounted in the same space, but rarely used by the RAF). I wanted my F.2A to show that four cannons could be carried by fitting all four cannon troughs rather than blanking the lower ones off (options the kit provides for). I thought at first that I would have to forgo fitting Firestreaks as a result. However, numerous photos of F.2A’s show aircraft carrying Firestreaks and all four cannon troughs in place; despite the fact only the upper pair of cannon could have been installed. I even found a photo of the aircraft the kit markings represent in this configuration (regrettably, I am unable to attribute the image below).
My plan was to build this kit as a relaxing OOB exercise, after having just completed Airfix’s new-tool Tiger Moth; a build that proved more demanding than expected. I used only one after-market item in the build, this being a tiny clear resin position light mounted on the spine; everything else was from Airfix, including the markings.
This was my third Airfix build under Hornby’s ownership (the others being their Hurricane Mk.I & DH.82A). I have noticed from these builds that Airfix’s styrene is rather soft and vulnerable to accidental scratches and cement damage, and is easily over-sanded or over-filed. This vulnerability was an important consideration for a bare metal finish, yet it still caught me out through my own ineptitude.
Airfix engineer the engine air intake lip as part of the two-piece intake ducting. Before the ducting can be joined you must insert the fairing for the nose-wheel well that also supports the radar/shock-cone. I was concerned that very little room would be left to fix any seams in the intake lip and forward ducting once this fairing was in place; so I tried a way to join the duct halves without the fairing inserted, in order to address the seams. And so I sawed a slot extending backwards from the hole in the ducting for the nose-wheel well, which also cut through the area where the ducting becomes paired vertically.
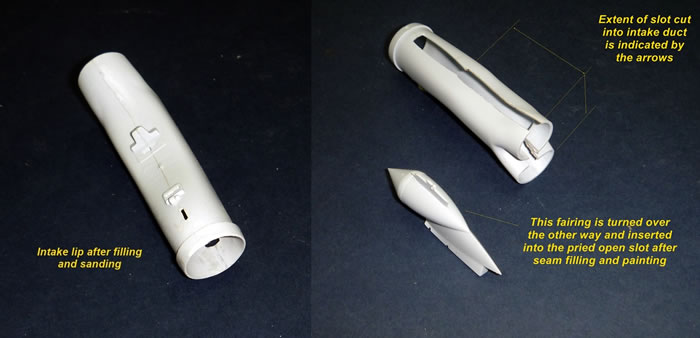
I joined the wheel well fairing halves and radar/shock-cone, and painted these. I sanded and blended the join seams in the lip and ducting and painted this too. I then wrapped tape around the ducting behind the intake ring to temporarily strengthen the join whilst I pried the slot open to slide the fairing into place. I figured that it would not be possible to see the slot I had cut as it was obscured by the fairing. (I did consider re-skinning the ducting where I had cut it away, but it wasn’t necessary). Despite my cunning, I was caught out by the soft plastic and found I had over-sanded the intake lip. Consequently, I had to rebuild some of the lip using 0.010”plasticard.
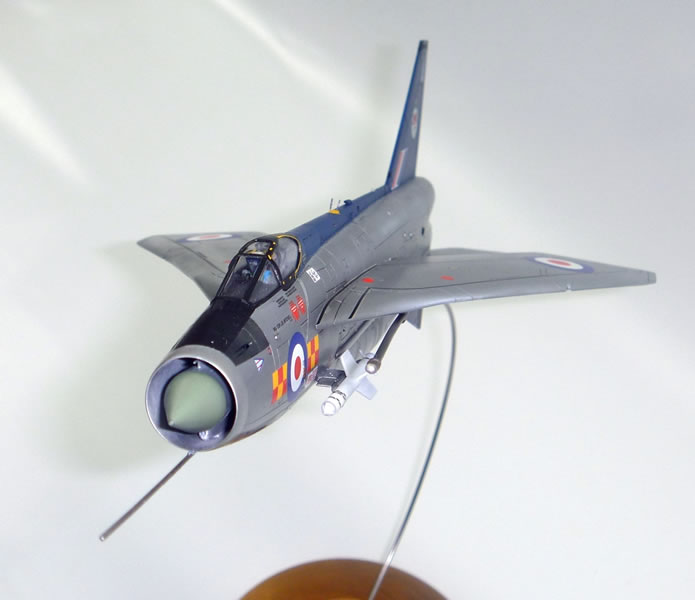
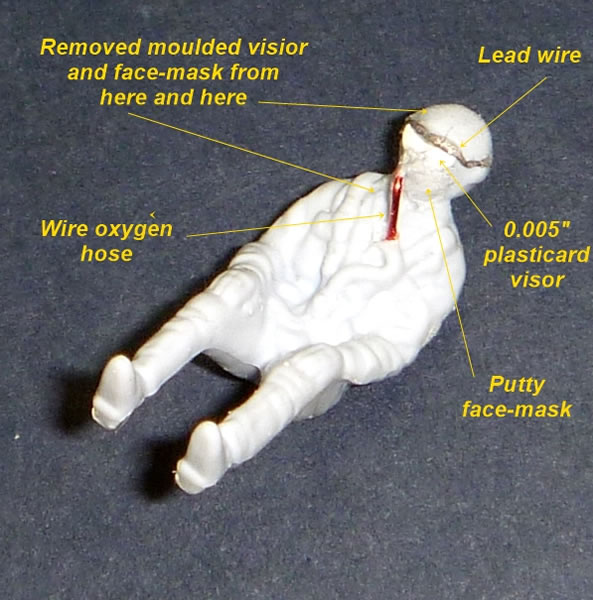
I decided to run with the kit cockpit as very little would be seen, and chose to use the pilot figure as this was to be an in-flight model. However, the pilot as supplied has his face-mask dangling on his chest and helmet visor raised. I felt the pilot would look better wearing his mask and having his visor down. This meant I had to file these items off the figure and scratch-build them on his face using 0.005”plasticard, wire, and plastic putty. The added benefit of doing so was that hadno pilot’s face to paint. Once seated, I added to strips of lead foil to simulate the harness running from the seat to the pilot’s shoulders.
My only other change to the kit cockpit was to remove the moulded seat firing handles and replace these with lead wire. I like to paint two-strands of lead wire, one yellow and the other black, twist these together to form a platted strand of alternating black & yellow, then curve two lengths into loops and attach to the ejection seat. This is easier than trying to paint the kit parts and has a finer scale appearance.
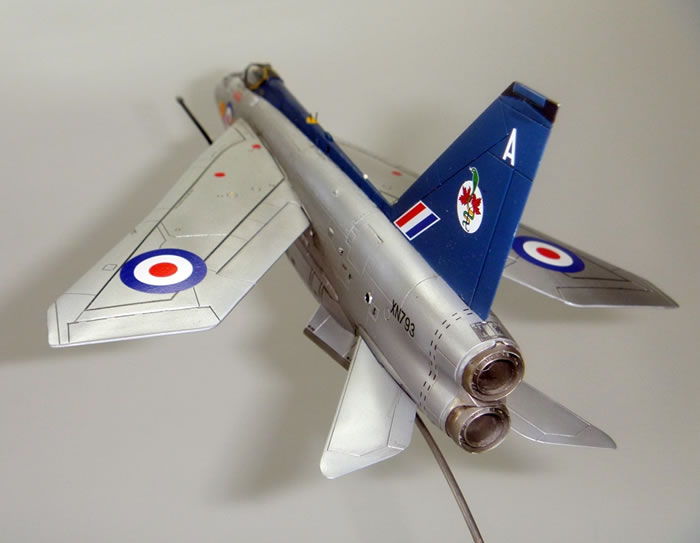
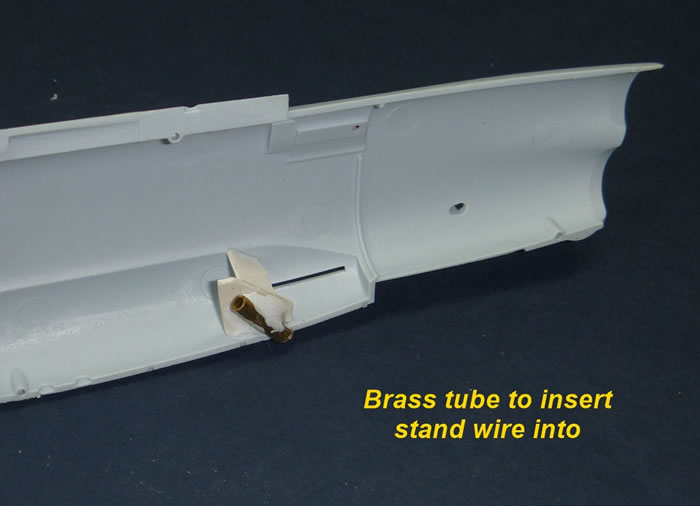
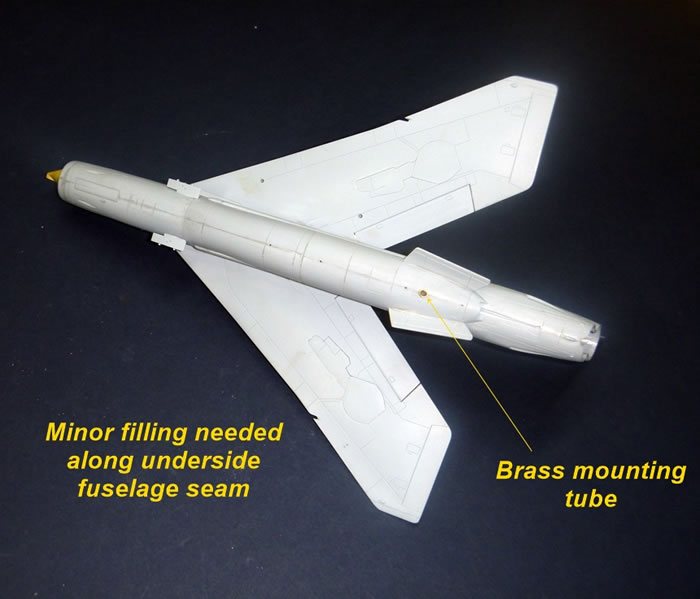
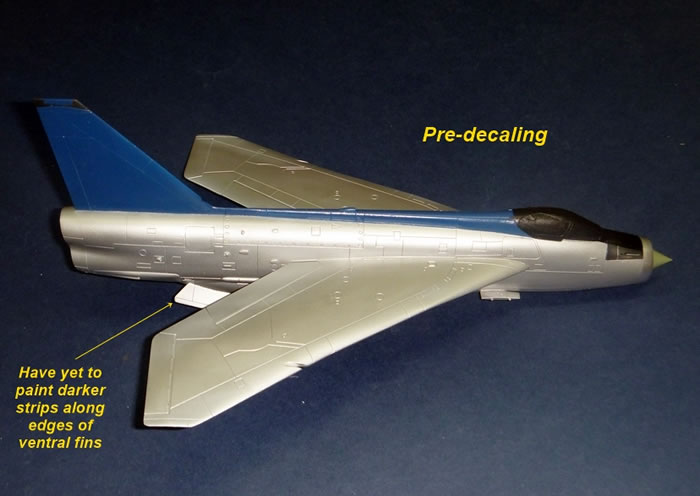
I use a standard style of stand for flying models in my display cabinet consisting of a turned wooden base and curved steel wire support. So no Perspex up the jacksy for my Lightning! Besides which, I wanted to be able to see the exhaust nozzles. This meant I needed to add a brass tube receptacle for the wire mount, and the best place seemed to be between the ventral fins. Accordingly, I drilled a hole and supported the brass tube with some .030”plasticard.
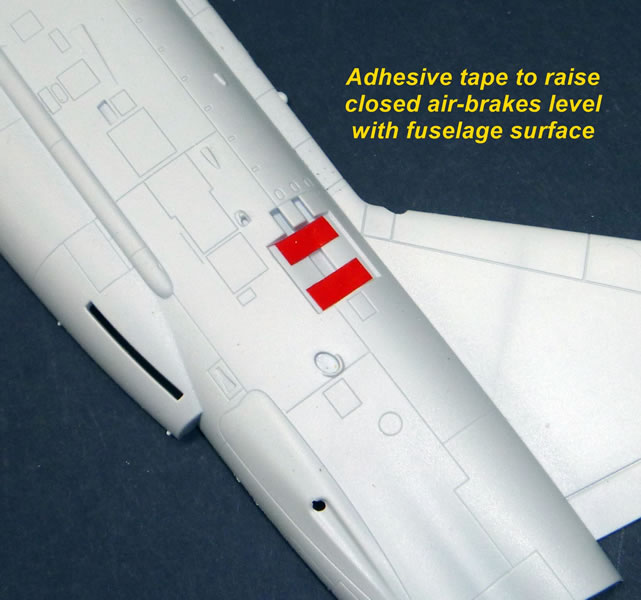
It is worth mentioning how much I appreciate the way Airfix caters for an in-flight option with most of its kits by supplying separate parts for closed undercarriage doors. In the case of this build the main doors just dropped into place, whilst the seating of the nose door required some trimming. But one-piece enclosures are certainly preferable to trying to “stitch” together several separate door parts intended for wheels down display.
Airframe assembly was generally very straight forward with good fit for most components. I did find that a few things needed adjustment for a good fit however:
-
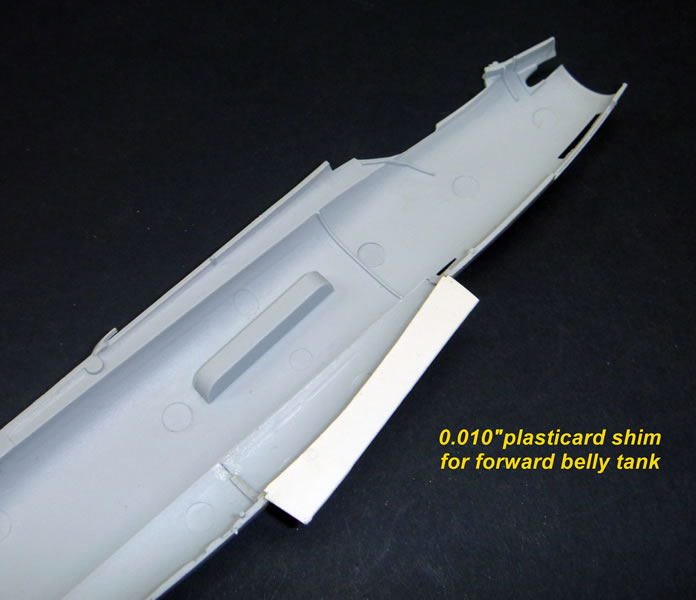
The forward section of the belly tank consists of two separate parts that fit to the fuselage halves (enabling a F.6 to be offered from the same tooling). It may have been my construction at fault, but I was left with a slight gap to shim with 0.010” plasticard where the fuselage halves joined in this area.
-
I drilled out the cannon troughs through their rear on the inside of the plates they are set in. This ensured I did not damage the elliptical openings in the outside face of the troughs.
-
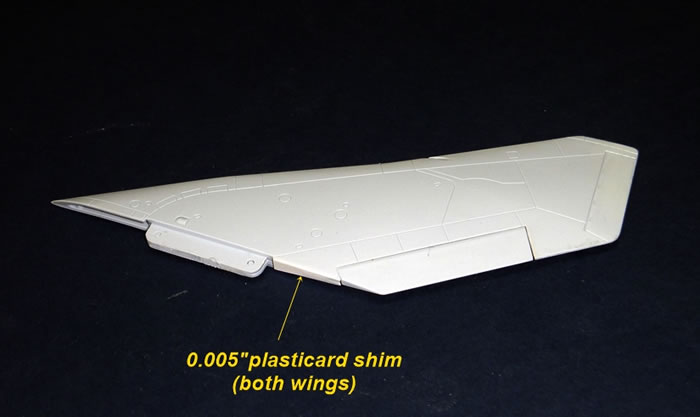
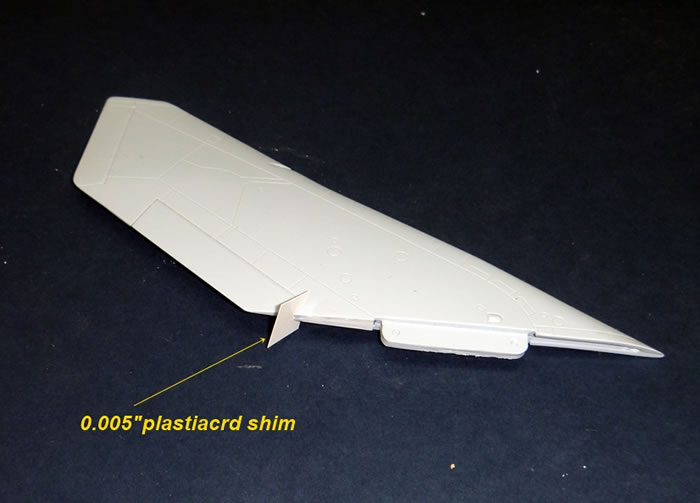
There was a slight gap in between the wing and fuselage at the roots in the rear quarter-chord. This was most noticeable with the starboard wing. Rather than use filler I shimmed the wing-root in the affected area with 0.005”plasticard. I also fixed a slight gap between the port wing and the end of its flap using the same method.
-
I found that the clear seeker-heads of the Firestreak missiles to be larger in diameter than their missile fuselages. I don’t think that this was due to over sanding of the join seams in the missiles, but I fixed the problem by gently sanding the seeker--heads down to size after fitting them to the missiles.
-
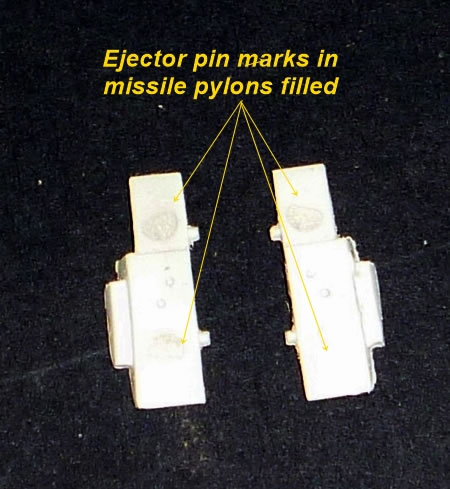
The missile rail mounting holes need to be drilled a little deeper to fit the mounting lugs on the pylons, or you could shorten the lugs.
-
Just a little filler was needed along almost the entire lower fuselage join, but this may be down to my sloppy construction.
-
The canopy clamshell needed a kiss of sandpaper on its forward edge to drop into place between the fuselage spine and windscreen.
-
If you plan to fit the refuelling probe you need to drill two holes in the lower port wing to accept it. Obviously, the drilled holes are round, but the lugs on the boom mounting points are moulded almost rectangular, and so need to be rounded for a good fit.
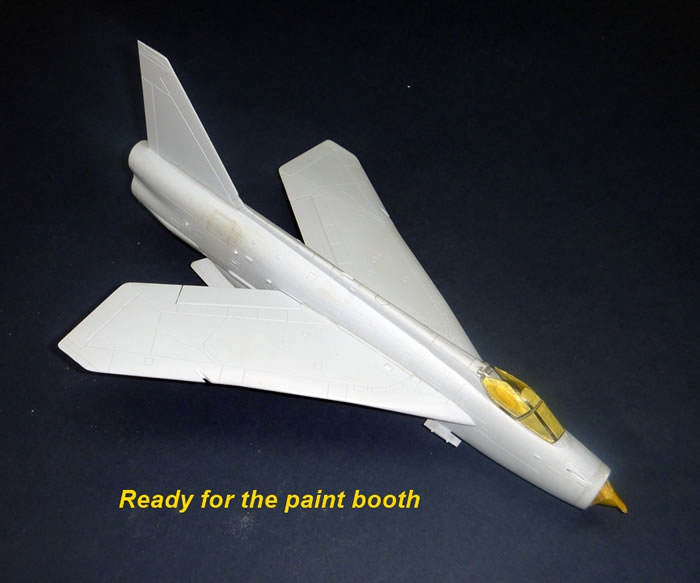
I gave the entire model a polish with sanding cloths ranging from 2,400 to 12,000 grit. This was to remove the very slight pebbly texture of Airfix’s plastic, and to match all surfaces with those previously sanded and polished as part of seam cleanup. I only did so as a bare metal finish was planned using the kit markings.
Quite a bit of masking was needed despite the apparently simple scheme. Paints and colours used were:
-
Canopy, Anti-glare Shield & Refuelling Boom – Tamiya Semi-Gloss Black (X-18 acrylic).
-
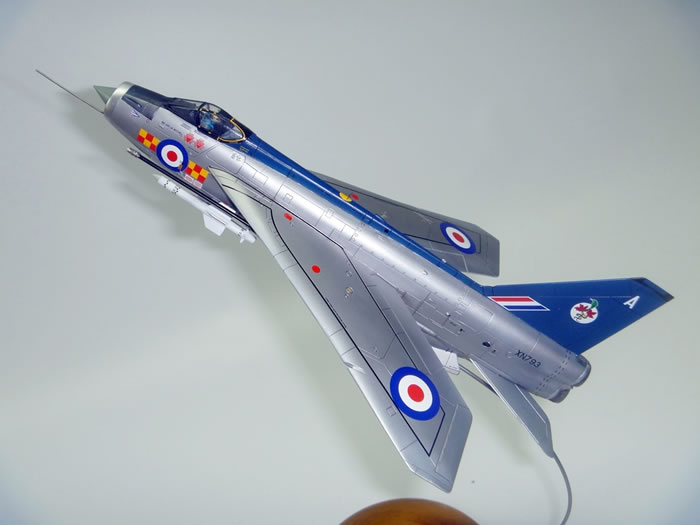
Spine & Tailfin – Gunze Blue FS15050 (H-328 acrylic).
-
Radar/Shock-Cone – Mr. Color IJN Gray Green (C-56 lacquer).
-
Main Airframe - Alclad II Aluminium (ALC-101 lacquer).
-
Intake Ring, Fuselage Panels (below wing-roots) & Exhaust Surround - Alclad II Polished Aluminium (ALC-105 lacquer).
-
Cannon Troughs – Mix of Alclad II Dark Aluminium & Gun Metal (ALC-103 & ALC-120 lacquer).
-
Engine Nozzles – Variations of Alclad II Jet Exhaust & Pale Burnt Metal (ALC-113 & ALC-114 lacquer).
-
Lower Edges of Ventral Fin – Alclad II Dark Aluminium (ALC-103 lacquer).
-
Arrestor Hook – Mix of Mr. Color Steel (C-28 lacquer) & Alclad II Dark Aluminium (ALC-103 lacquer).
-
Firestreak Missiles – Mr. Color Gloss White (C-1 lacquer).
-
Clear-coat for Blue Areas – Alclad II Klear Kote Light Sheen (ALC-311 lacquer).
-
Clear-coat for Bare Metal Areas – Modelmaster Sealer for Metalizer (lacquer).
-
Wash – Tamiya Black Panel Line Accent Color (Oil-based).
The kit decals were simply superb and performed flawlessly. Printed by Cartograf, these are the best decals, kit or after-market, that I can recall using. With all of the stencilling there were about 100 to apply over four decaling sessions. No doubt the Alclad II finish helped, but I found I had no noticeable silvering. The decals were thin but tough, and could be re-floated and moved, even after being tamped down. I only used Microsol on the little red patches that cover raised horseshoe-shaped lumps at the wing roots, where the decals had to settle around compound curves. I even found the decals to generally be located on the sheet in the sequence I used them.
This kit really captures the subtleties of the Lightning’s outline, and is beats all of its predecessors in The One True Scale hands down. (Fortunately, it seems Airfix’s long-run kit has probably strongly “influenced” the recently released Sword T.4 & T.5 kits, as will no doubt be the case with their forthcoming F.1 & F.3).
The kit is enjoyable to and very easy to build, although some minor trimming and shimming was required for my build at least. The soft plastic is vulnerable to surface damage by cement, over-sanding, or slips when filing.
The flow mark that flawed the clear canopy in mine and at least three other Lightning kits I know of is a concern, and this may be a wider problem for Airfix (going by the posts I have read concerning similar problems with their 1/24-scale Typhoon). Let’s hope Airfix remedies things soon. Meanwhile, I await my replacement canopy with interest.
The kit’s Cartograf printed decals are the best I can recall using, and are the icing on the cake where this kit is concerned. They only serve to reinforce what great value it is.
Despite the canopy flaw, I still highly recommend this kit as a most enjoyable and rewarding build. Forewarned is forearmed, so hopefully my constructional observations will help those who have yet to sample this excellent kit; or Airfix’s very similar Lightning F.6.
This Airfix kit was purchased online from Hannants,
Model, Images and Text
Copyright ©
2014 by Mark Davies
Page Created 24 September, 2014
Last Updated
24 September, 2014
Back to HyperScale Main Page
|
 Home
| What's New | Features | Gallery | Reviews | Reference | Resource Guides | Forum |
Home
| What's New | Features | Gallery | Reviews | Reference | Resource Guides | Forum |