|
Messerschmitt Bf 109 G-6
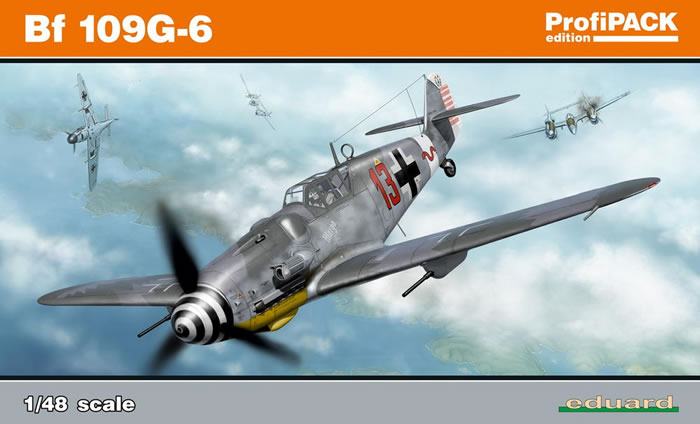
Eduard ProfiPACK, 1/48 scale
S
u m m a r y |
| Catalogue Number: |
Eduard Kit No. 8268 - Messerschmitt Bf 109 G-6 |
| Scale: |
1/48 |
| Contents and Media: |
166 parts in grey coloured plastic; nine parts in clear; colour photo-etched fret; self-adhesive die-cut masking sheet; markings for five aircraft |
| Price: |
USD$42.46 plus shipping,
available online now from Eduard |
| Review Type: |
FirstLook and FirstBuild |
| Advantages: |
High level of detail; outstanding surface features including crisply recessed panels and subtle rivet lines where appropriate; includes colour photo-etched parts; separate control surfaces; many useful options including framed and Erla canopies, standard and tall tail, long and short tail wheel, battery-box cover, under wing cannon gondola, alterative propeller blades, tyres, hubs and oil cooler housings, aerial masts, bomb racks, trop filter and supercharger intakes (some parts not applicable for this kit); high quality Cartograf decals; includes die-cut canopy masks. |
| Disadvantages: |
Dimensional and detail accuracy issues. See detailed discussion below |
| Conclusion: |
Regardless of the detail and dimensional concerns mentioned here, I think that Eduard’s 1:48 scale Messerschmitt Bf 109 G-6 is still a very nice kit. It simply blows the opposition away in terms of surface textures, level of detail and included options. The Cartograf decals are also a cut above the rest of the pack. Engineering is sensible, and I can confirm that the model is a fast build with excellent fit. In these respects, Eduard’s Gustav is every bit as good as their recent Spitfires. Yes, there are a number of detail accuracy issues and the kit is oversized, especially the wing span. These issues will be a game-breaker for some, and irrelevant to others. It really is up to the individual modeller to make up his or her own mind. I only know that I will be building a bunch of them! |
Reviewed by Brett Green

Eduard's 1/48 scale Messerschmitt Bf 109 G-6 will be available online from Squadron.com
Previous 1:48 Messerschmitt Bf 109 G kits
As one of the most famous fighter aircraft in history, it is not surprising that the Messerschmitt Bf 109 has been well represented in plastic.
Even so, we have not seen a newly tooled Messerschmitt Bf 109 G-6 for two decades. Modellers expectations about surface textures, level of detail and options have risen significantly over this period, so a state-of-the-art Gustav is certainly due.
Over the years, there have been a number of Bf 109 G releases in 1:48 scale. Some of these are no longer readily available, such as the Fujimi family of Bf 109 Gs and the ARII/Otaki G-6, while others soldier on after decades.
In 1991, Hasegawa released their first 1:48 scale Messerschmitt Bf 109 F kit, with the G series following. Well over 20 years later, we continue to see Bf 109 F and G releases derived from these original sprues.
Hobbycraft released a large variety of 1:48 scale Bf 109 F and G kits in the 1990s, which have been re-released by Academy. These more recent boxings offered superior decals to Hobbycraft, but otherwise displayed the shortcomings of the original releases including poorly shaped detail parts, small canopy and windscreen, staggered horizontal tailplanes, indifferently detailed cockpits and more.
Earlier Bf 109 G-6 releases, including ARII/Otaki and Fujimi, suffered from inaccurate shapes and details too. The Fujimi kits were additionally saddled with overly complex engineering resulting from the need to cover the Bf 109 G-2 to K-4 using a single set of sprues.
Hasegawa’s 1:48 Bf 109 G-6
When Hasegawa’s Bf 109 G-6 entered the market in the early 1990s, it was the best of the type to that date.
The kit featured simple but crisp surface detail, including engraved panel lines, generally accurate outline and some a few really useful options including positionable canopy, separate flaps and slats. Accuracy problems were mostly confined to a bulbous spinner, slightly-off propeller blades and incorrectly shaped drop-tank and mount. Cockpit detail was sparse. The most discussed accuracy issue, however, was around 2 millimetres (four scale inches) missing from the fuselage between the front of the windscreen and the rear of the engine cowling.
There were a few small ejector pin marks on the gear doors, the tail wheel and the main wheel hubs. Any other ejector marks are on the unseen inner surface of parts.
Cowl bulges were separate pieces. Options for both main styles of starboard bulges were provided (i.e. with and without the small scoop and bulge). We were also offered the option of a tropical air filter.
The bulges on top of the wings to accommodate the wider wheels of the late G series were also separate pieces. These required locating holes in the wings that are visible through the open wheel wells, and of course the wheel well is not recessed as it should be on the real aircraft.
Ordnance in the initial release was limited to a centreline drop tank and underwing MG151 20mm gun packs, but other specialised options became available in later releases.
Hasegawa's 1:48 scale Bf 109 G-14
Hasegawa's 1:48 scale Bf 109 G-14 was every bit as nice as the initial G-6 release. The main differences were a new sprue for a G-14 fuselage featuring the tall tail, an alternative pressed gun trough for the forward cowl (although the insert version issued with the G-6 is still included as an option - G-14s were seen with either), and an Erla Haube clear vision canopy. The framed canopy is also included as some G-14s still used this style.
Over the decades, Hasegawa has released more than 20 variations on the Bf 109 G-6/14 theme, with an impressive selection of Luftwaffe and foreign air force markings.
The Burden of the Modern Modelling Company
Really, who would want to be a model company? The road to creating a scale model aircraft is paved with peril at every step.
The research must be thorough but, even before that, the source of the research must be authentic. Even if the overall dimensions are 100% correct, the interpretation of subtle shapes, complex curves and cross sections must always be a challenge to kit designers. Expert advice is undoubtedly helpful, but does the company use its own staff alone or draw on outside experts with its inevitable confidentiality risks?
Then there is the choice of surface texture – to rivet or not to rivet? – and the level of detail. Should an engine be included? Structural detail that will never be seen?
And of course, there are many options for the Bf 109 G series. Gun bulges, tails, rudder styles, supercharger intakes, oil cooler housings, canopies, and armament – what should go into the mix and how to break down the construction?
Once the ingredients are decided and the polystyrene cake is out of the oven, the model has to run the gauntlet of public opinion. Some of this opinion is well informed. Some is not. How does the model company decide which opinions to act on and, even if criticism is justified, is it too late for the model company to do anything about it?
These quandaries apply to any release, but they are enormously magnified for any famous aircraft type, especially the Mustang, Spitfire and Messerschmitt Bf 109.
Eduard deftly skipped down this dangerous path with their recent Spitfire Mk.IX family; delivering a kit that was universally praised for its accuracy, subtle surface textures and high level of detail.
Considering we have not seen a new 1:48 scale Messerschmitt Bf 109 G-6 kit for more than two decades, a new Eduard model was an exciting prospect. Let’s see how they’ve done.
Eduard’s 1:48 Bf 109 G-6 In the Box
Eduard’s new 1:48 scale Messerschmitt Bf 109 G-6 kit comprises 166 parts in grey plastic, nine parts in clear, a coloured photo-etch fret, self-adhesive canopy masks and markings for five aircraft. Nearly 60 of the parts are marked “not for use”, and there are a few optional parts too, so the actual number of parts used is quite modest; hinting at a fast, trouble-free build.
Surface Features
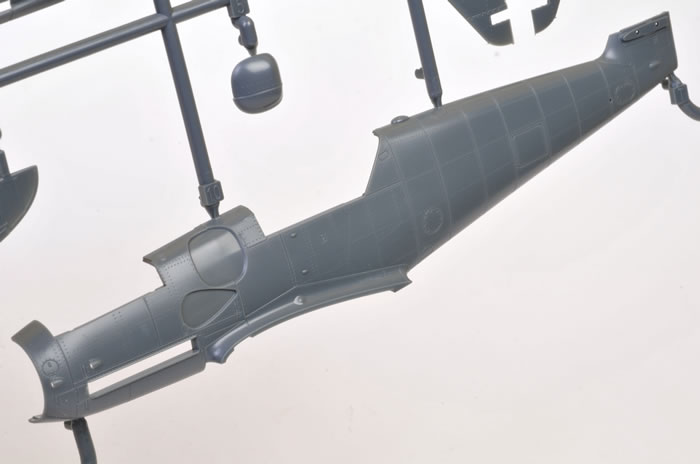
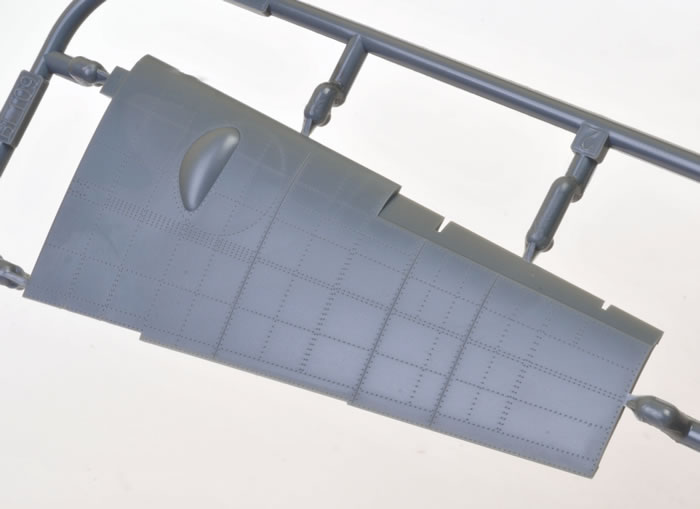
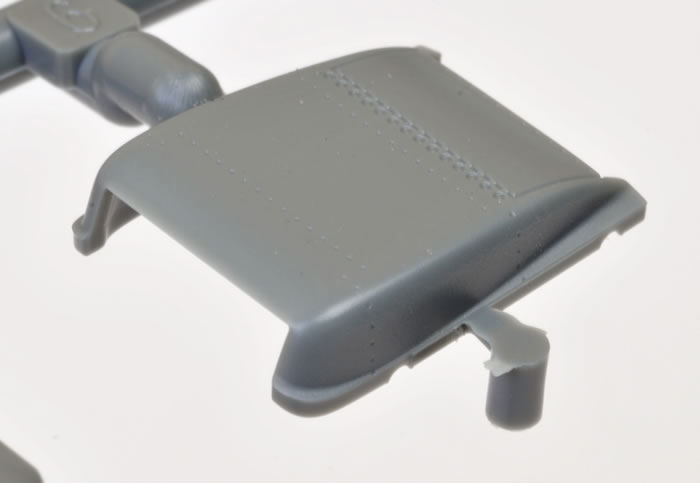
Eduard’s Spitfire family set a new benchmark for 1:48 scale surface detail, and this new Gustav is equally impressive in this regard. Panel lines are very crisp, fine and even. Lines of rivets are present, but they are incredibly subtle. The rivet lines seem to accurately follow the pattern applied to the full-sized aircraft too.
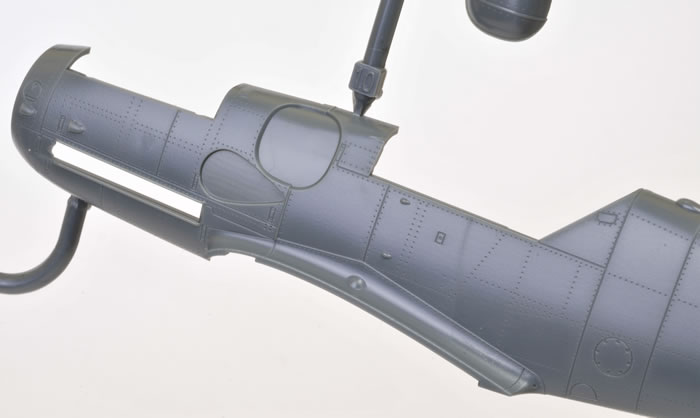
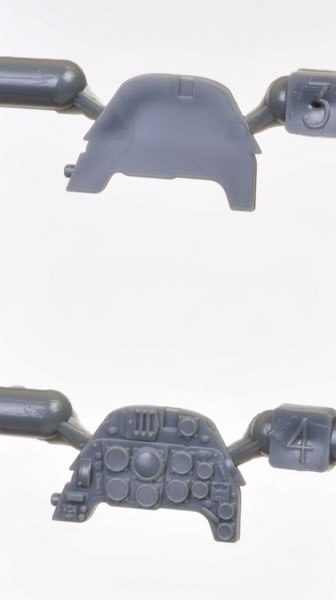
I was very impressed to see that the small scoops on the nose are actually hollowed out - nice! Other raised surface features include the sealing strip between the mid-fuselage and the rear of the engine cowling.
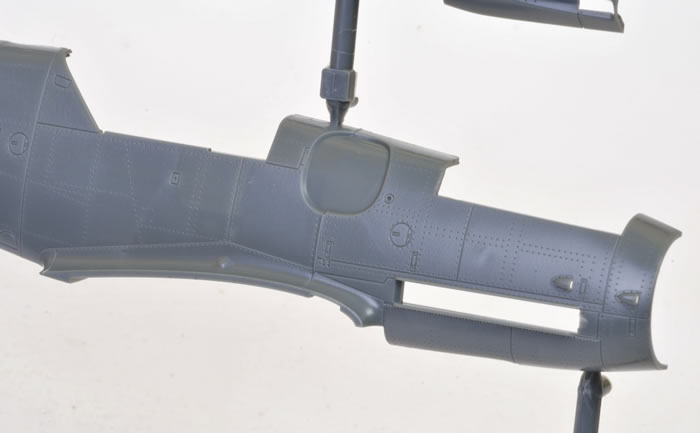
The raised umbrella mounts are moulded under the port side of the cockpit. These should be sliced off if your subject is not a tropical version.
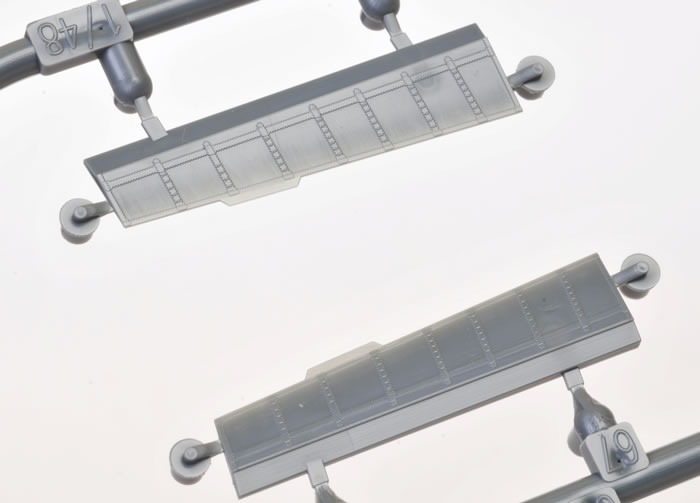
Fabric matches this high standard, with strip and stitching texture beautifully presented on the control surfaces. If you look closely enough, you will even see the zig-zag pinking edges on the fabric strips – quite incredible.
Detail
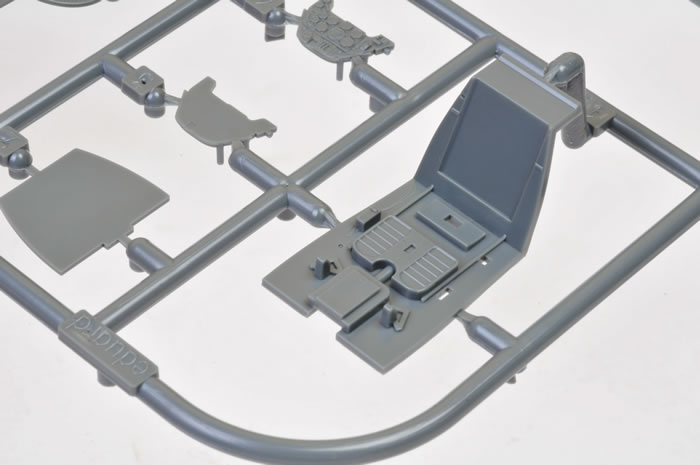
Eduard combines plastic and colour photo-etched parts in their ProfiPACK, delivering a very high level of detail straight from the box. The cockpit benefits most from the photo-etch with a nice multi-layered instrument panel, coloured harness straps and other coloured details.

The inclusion of the clear fuel line is a nice touch too. The inspection tube may be masked so that it remains clear after painting.
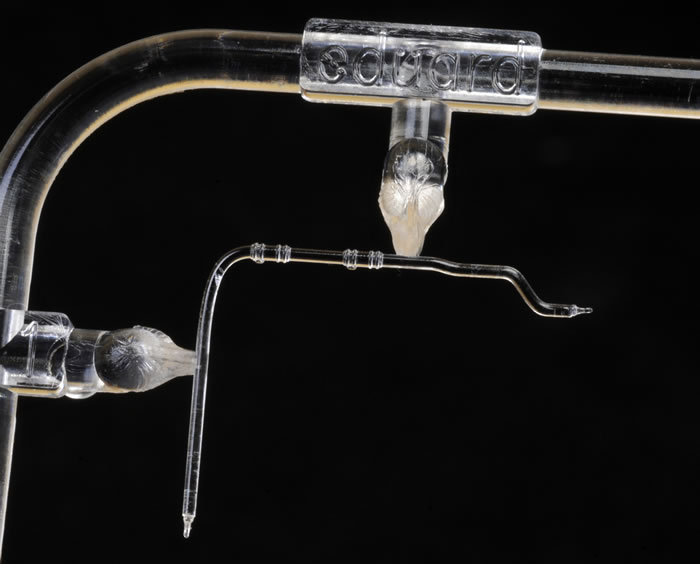
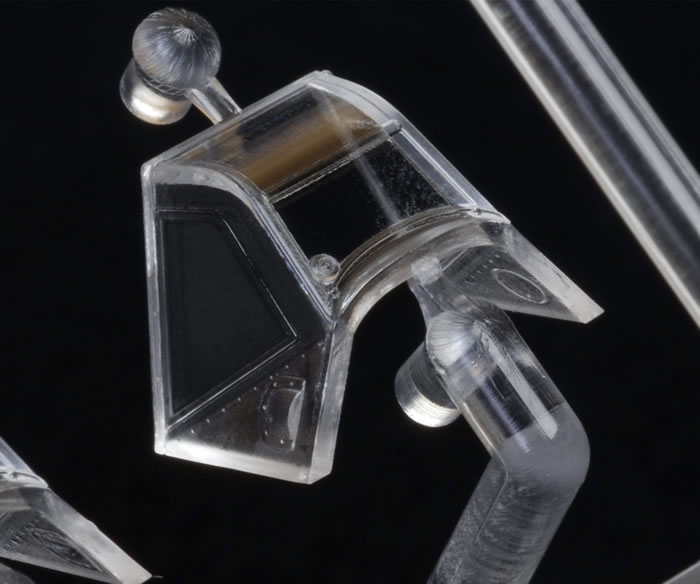
The standard steel pilot’s head armour and the armoured glass “Galland Panzer” are provided as options for the canopy. Another nice detail touch is the inclusion of handholds on the inside corners of the windscreen.
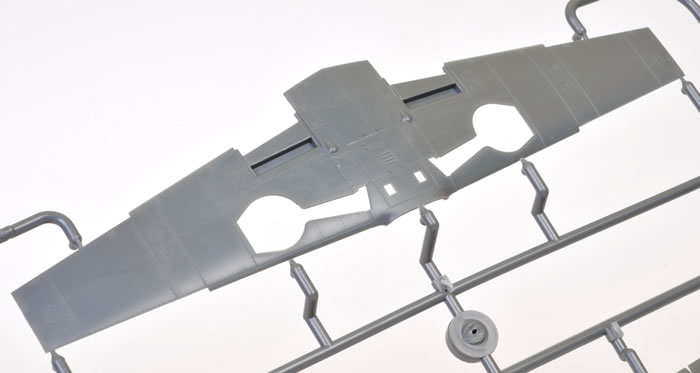
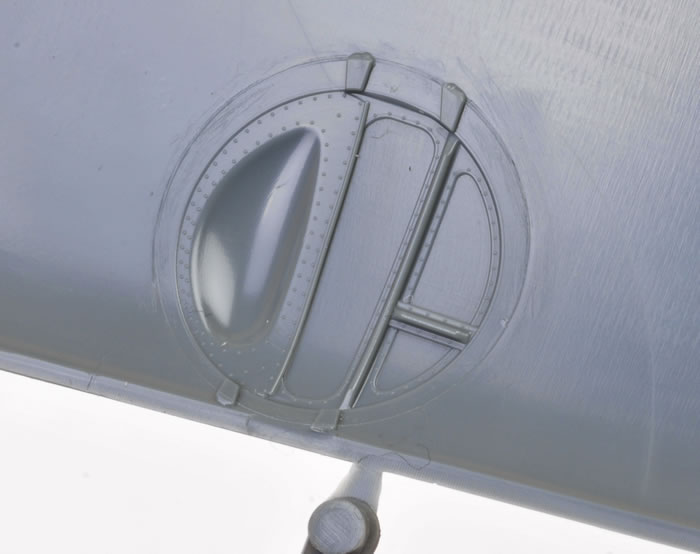
The wheel wells are nicely detailed and are correctly concave thanks to the bulges moulded to the top of the wings.
Eduard depicts the wheel well sidewalls with the zippered canvas covers all the way around. The fabric texture looks good, and the zipper is represented by a raised line.
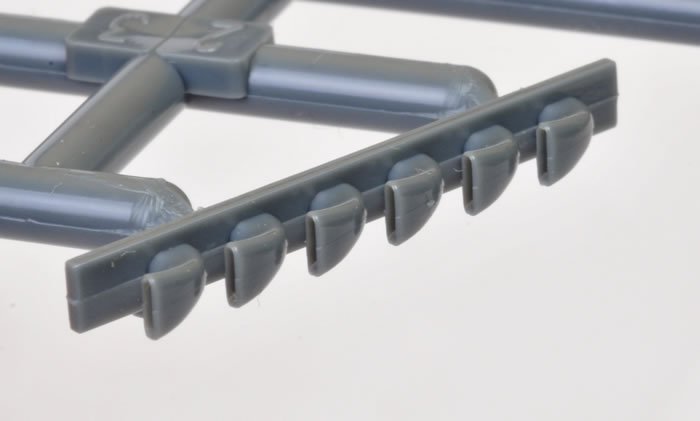
The exhausts are supplied in one piece for each side. The centreline weld beads are present, and each of the stacks are hollowed out at the end.
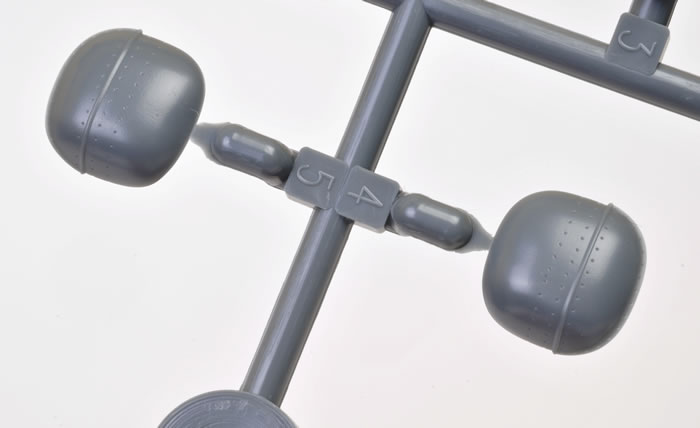
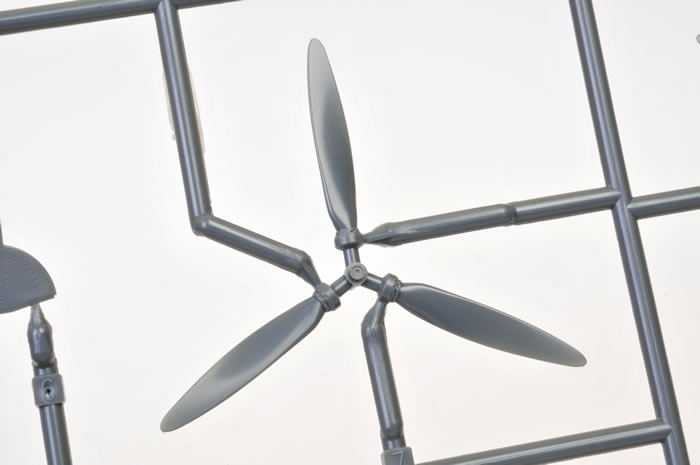
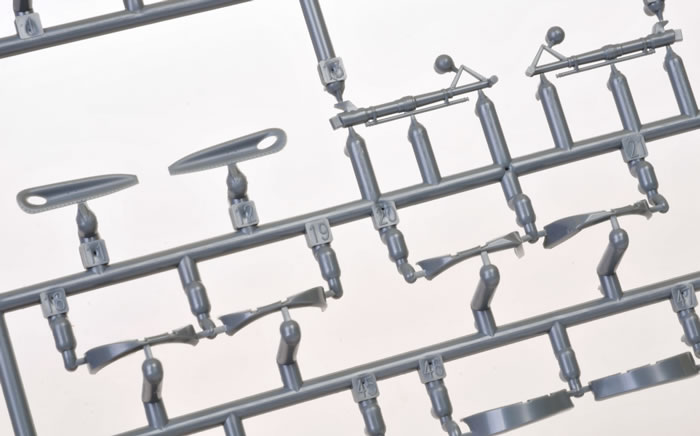
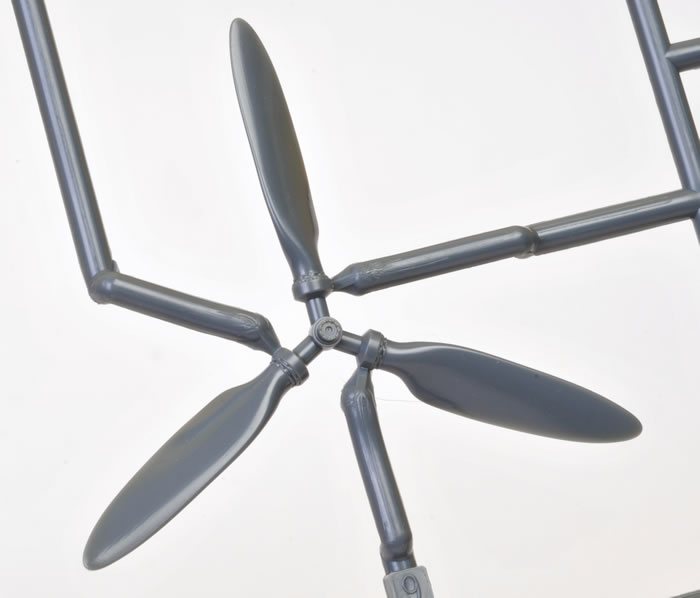
Propeller blades look to be a good shape, with nice pitch collar and hub detail.
Engineering and Options
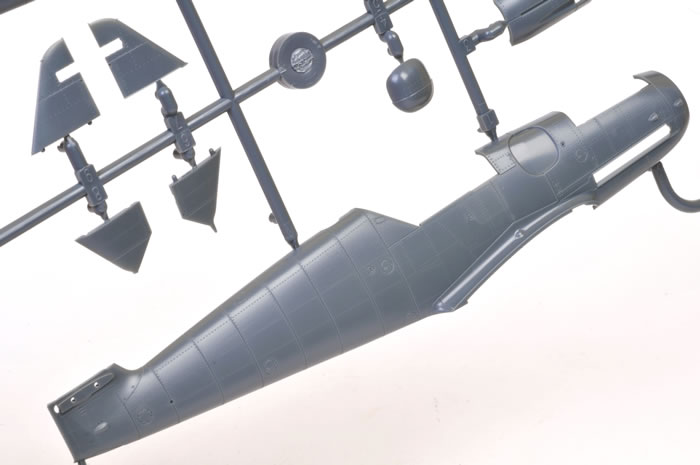
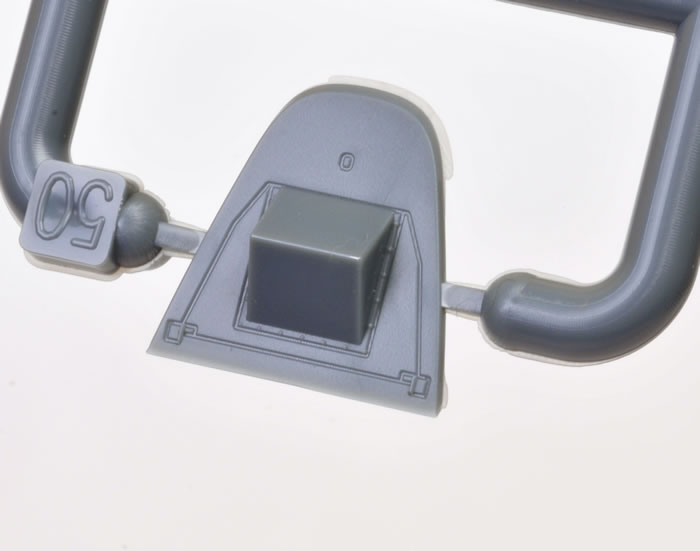
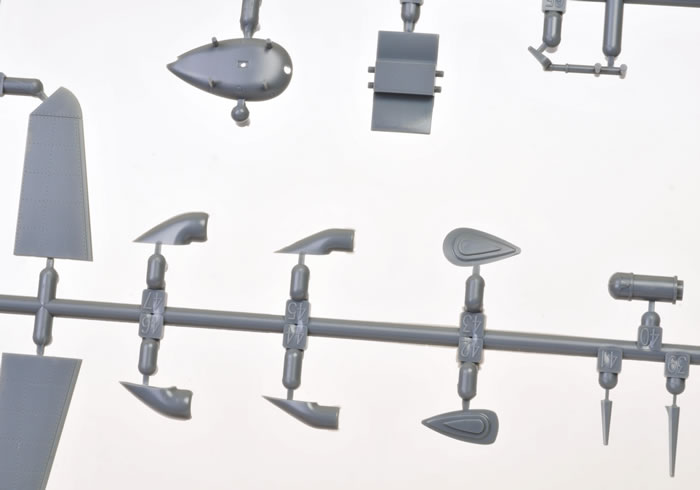
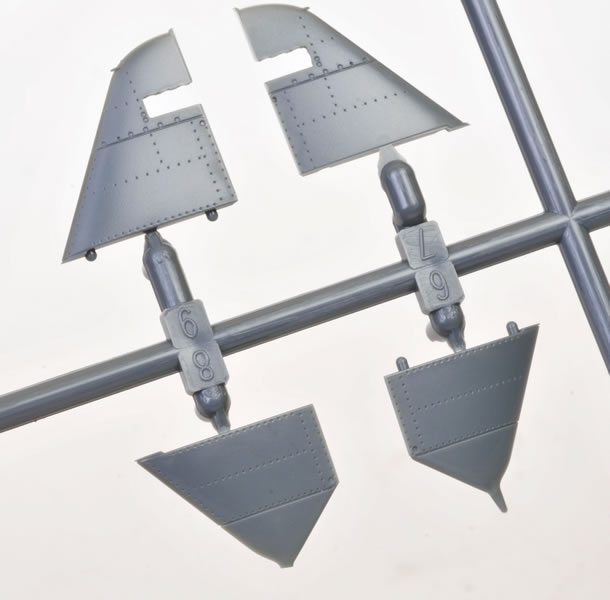
The kit is broken down conventionally. The fuselage is full-length with the only inserts being the gun cowl deck and the top of the tail, allowing either the standard or the tall fin to be fitted. The lower cowl is moulded as part of the fuselage sides.
The cowling gun bulges and the supercharger intake fit into precisely recessed areas on the nose.
The mount for the DF loop (on the fuselage spine behind the canopy) is moulded to the port fuselage half. This should be cut off if you are depicting an early G-6 (the instructions advice which of the kit subjects had this item fitted).
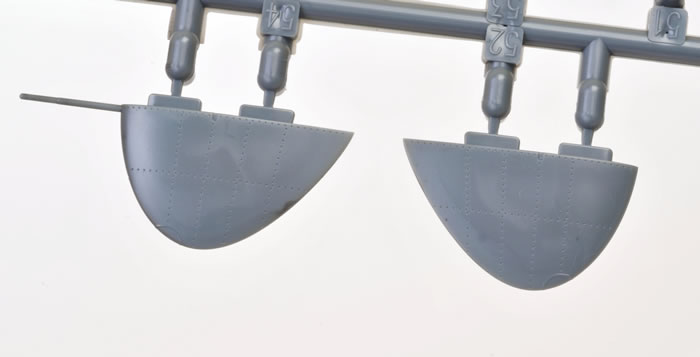
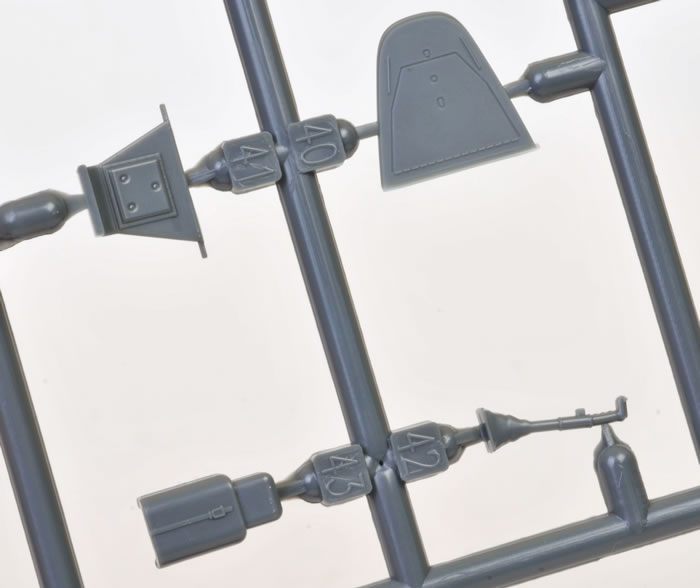
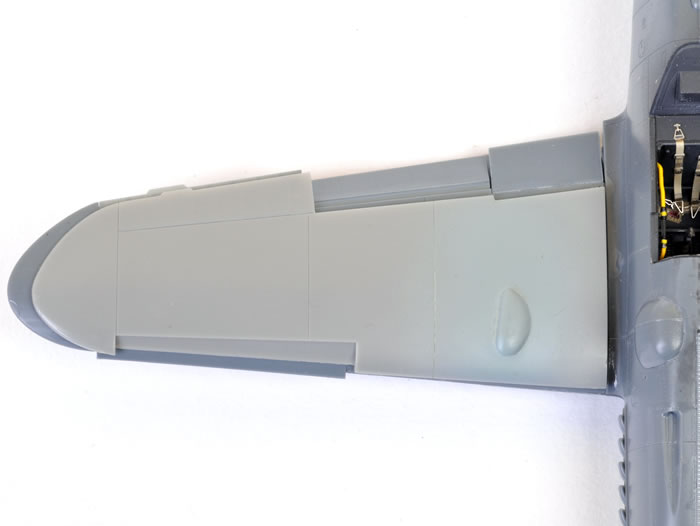
The wings have been designed with the wheel bulges moulded in place, and correctly angled away from the chord (see reference photo below). The wing tips are separate parts with solid navigation lights and the pitot tube moulded in place. Lower fuselage ejector chutes are moulded open on the bottom wing.
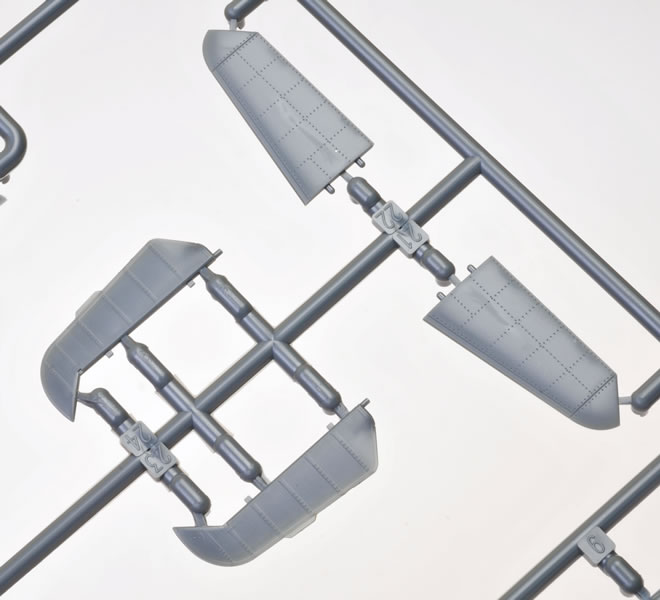
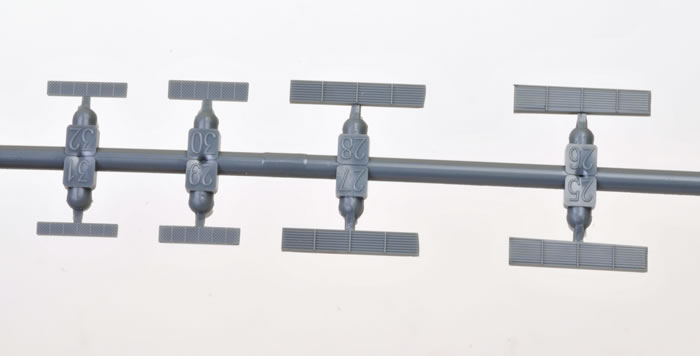
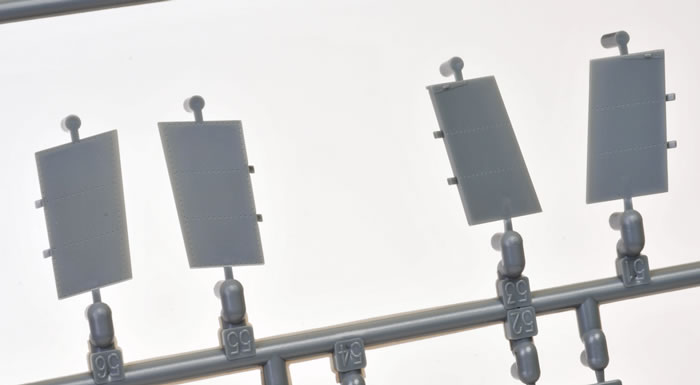
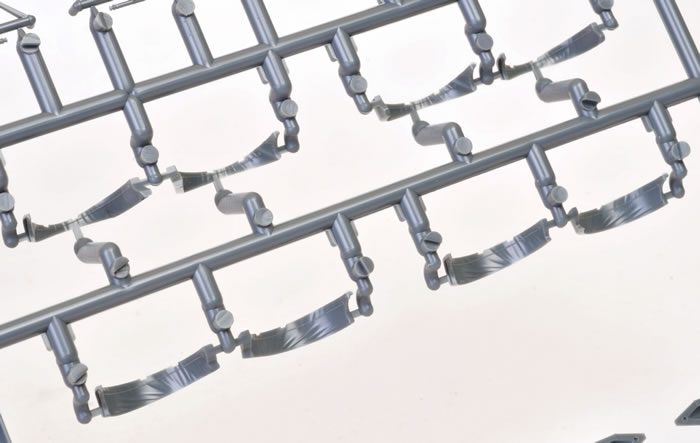
All control surfaces are separate, including leading edge slats, ailerons, flaps, elevators and rudder. The ramps at the leading edges of the radiator housings and the cooling flap at the back of the oil cooler are moulded shut. All the radiator faces are supplied as photo-etched parts.
Many options are offered on the sprues. Some of these relate to earlier Bf 109 G or F versions and do not apply, but others – even though they are marked “not for use” – might come in handy for the enterprising modeller.
As a bonus, almost everything you need to build a late Bf 109 G-6 with the tall tail or a Bf 109 G-14, is included in the box. The tall tail and rudder, Erla canopy, long tail wheel strut and the rear canopy bulkhead with the battery box housing are all there.
Check your references to see which of these features is present on your preferred subject – many different combinations are possible! Just about the only G-14 element missing is the small compressor bump under the starboard side gun bulge that was present on all Erla built G-5s, G-6s and G-14s, and also on some aircraft with replacement cowlings. Once again, check your references carefully.
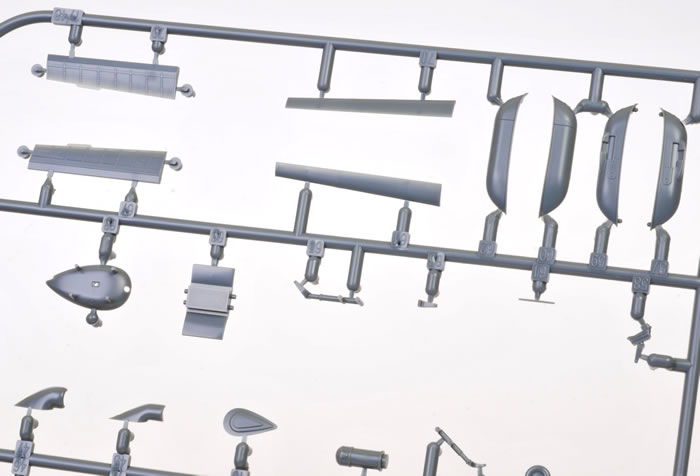
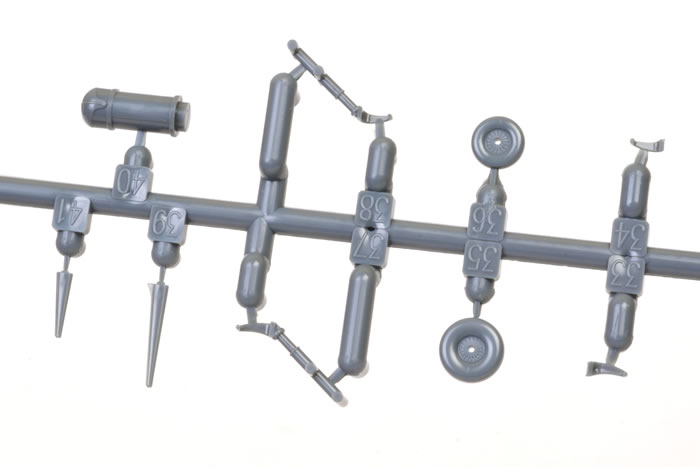
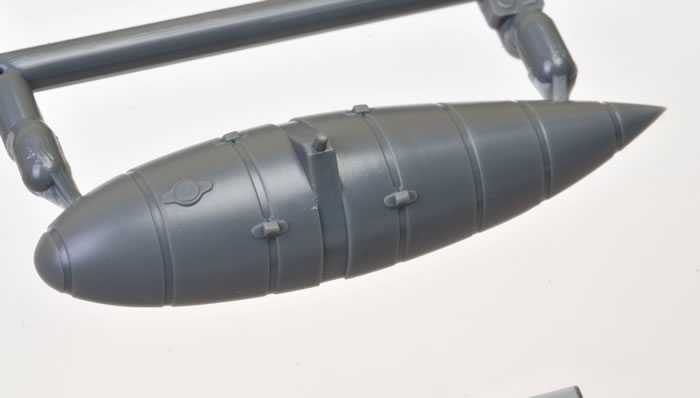
Other options include an ETC rack and 300 litre drop tank, under wing cannon gondola, various antennae and bomb racks.
The alternative propeller blades, oil cooler housing and wheels are for earlier versions.
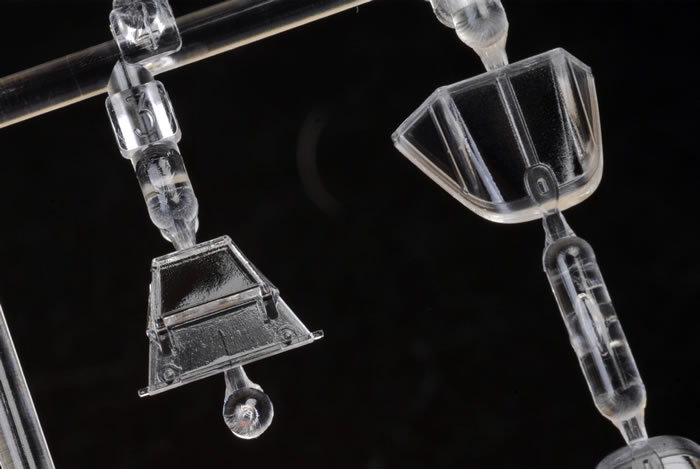
Clear Parts
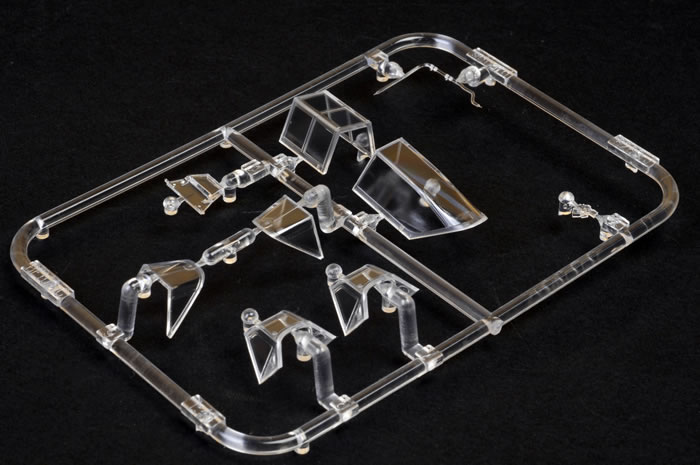
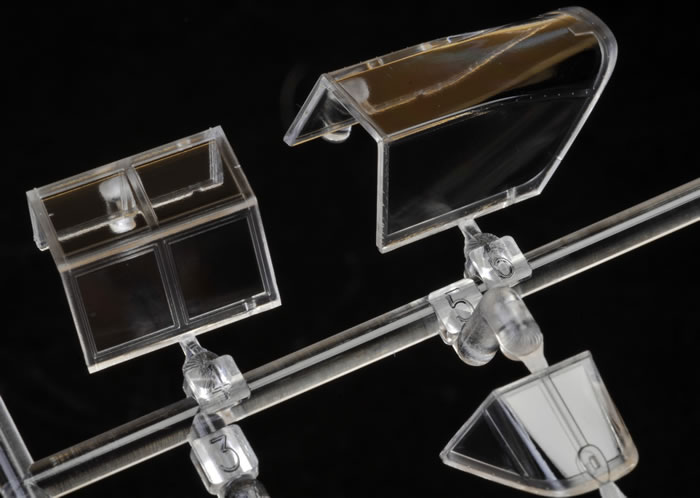
Nine clear parts are included on a single sprue.
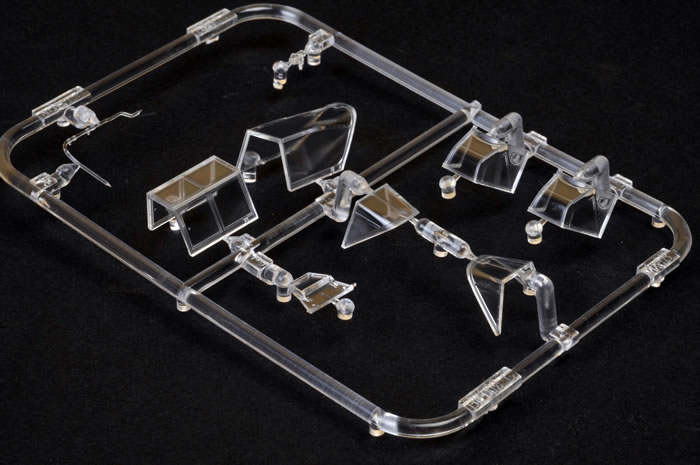
These include two windscreens (one with two intake scoops and the second with one scoop and one doped flare hole), a standard framed canopy, a clear-vision Erla canopy, Galland Panzer head armour (moulded with the clear section as one piece - definitely the best solution as far as I am concerned), two rear canopy sections for the standard framed option, a one-piece gunsight/reflector and the cockpit fuel line that sits on the starboard sidewall.
Moulding quality of the clear parts is excellent, with crisp frame detail and surface textures such as rivet lines where appropriate. I like the depiction of the desiccant capsule on the lower front corner of the windscreen too.

The framed and Erla canopy options are both included in this initial ProfiPACK release, although the Erla is marked as "parts not for use" in the instructions.
Die-cut self-adhesive canopy masks are supplied for the framed canopy (i.e. masks are not provided for the Erla clear vision canopy).
Markings
Markings are supplied for five aircraft:
-
W.Nr. 27169, Flown by Fw. Heinrich Bartels, 11./JG 27, Kalamaki Airfield, November, 1943
-
W.Nr. 440141, Flown by Oblt. Wilhelm Schilling, CO of 9./JG 54, Ludwigslust Air Base, February , 1944
-
W.Nr. 18807, Flown by Ofw. Alfred Surau, 9./JG 3, Bad Wörishofen, September, 1943
-
Flown by Oblt. Alfred Grislawski, CO of 1./JGr.50, Wiesbaden – Erbenheim Air Base, September, 1943
-
Flown by Maj. Ludwig Franzisket, CO of I./JG 27, Early 1944
All five subjects are finished in RLM 74/75 Grey upper surfaces with RLM 76 Light Blue below. A nice selection of different RV Bands, theatre markings and coloured numbers are offered.

The two decal sheets are perfectly printed by Cartograf. One sheet carries he national markings and unique numbers, chevrons, Gruppe markings, unit insignia and kill markings; while the other has a wide selection of generic stencil markings that will be suitable for mid-war to late-war subjects.
Printing, colours and registration is perfect on my sample.
Accuracy Issues / Questions |
Eduard has been displaying the sprues online as the kit entered the final stages of design and production, so it has already been subjected to the blowtorch of public opinion for some weeks.
A number of the Forum observations seem to be valid. The first and most frequently discussed of these are the small pronounced bumps on the wing roots:
Wing Root Bumps
The Messerschmitt Bf 109 wing spar is topped with a locking bolt. This high point was covered by a distinct bump on the early Bf 109s (A, B, C, D and E), but the wing root was redesigned on the Bf 109 F to clear this point with a new streamlined and wider design. It is possible that the bump still appeared on very early Bf 109 Fs, but it is likely that the Bf 109 G never featured this bump.
Eduard has moulded a bump on its wing root. It would appear that Eduard’s primary reference was a museum aircraft that had been fitted with some post-war fabrications, including the wing roots. These post-war replacements certainly have the bulges, but I can’t find any evidence that they appeared on operational aircraft.
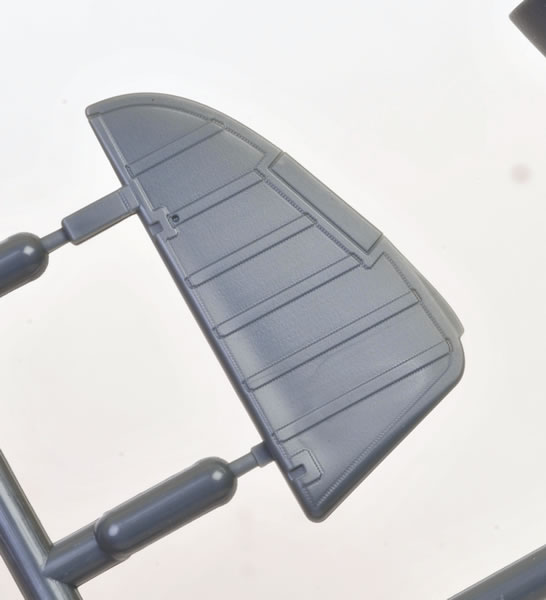
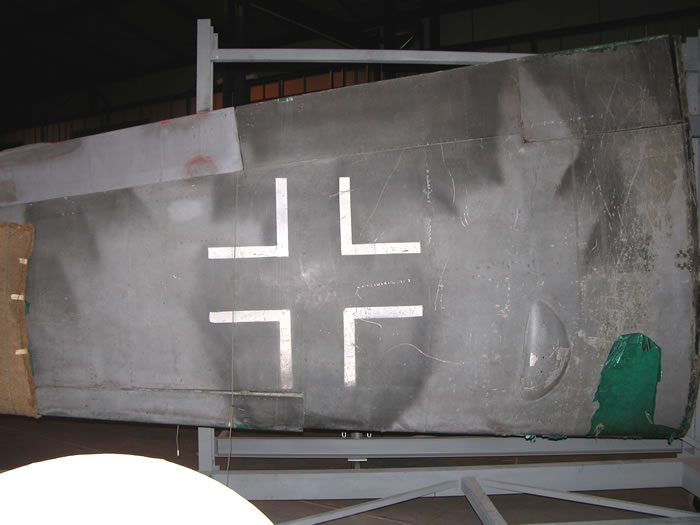
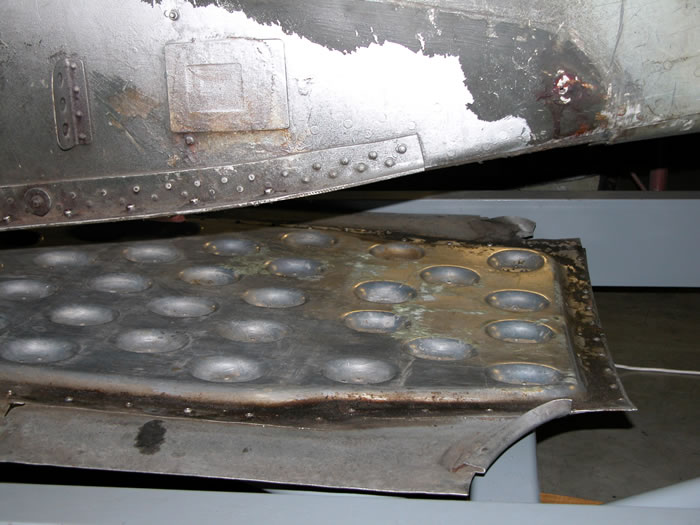
I have included a photo showing the wing roots from the Bf 109 G-6 in the Australian War Memorial before they were reattached to the airframe. Note the absence of bumps, and the plywood construction of these late-war parts.
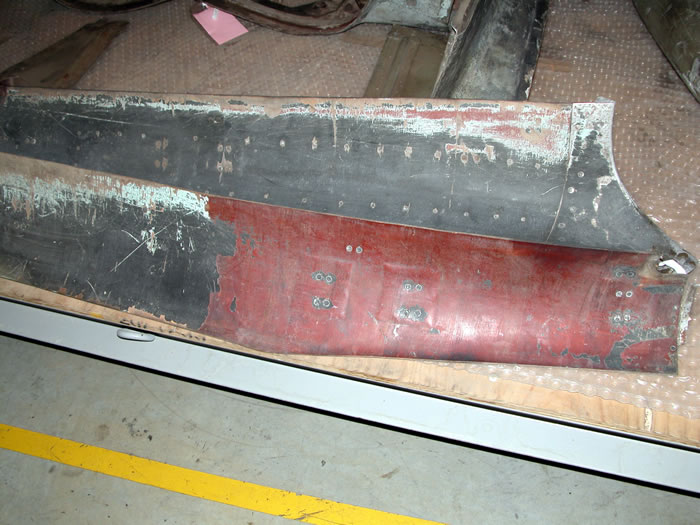
You have three choices here – ignore the problem, sand off the bumps or build up the area around the bumps with your favourite filler.
Supercharger Intake Mount Cutout and Exhausts
The supercharger base plate on most Bf 109 G-6s should have a cutout to clear the port side cowl bulge, but the kit part is a clean teardrop shape. This is a very easy fix – just sand or trim to match the photograph here.
Check your references carefully though, as there does seem to be a batch of Bf 109 G-6s that featured the supercharger base plate as depicted in the kit.
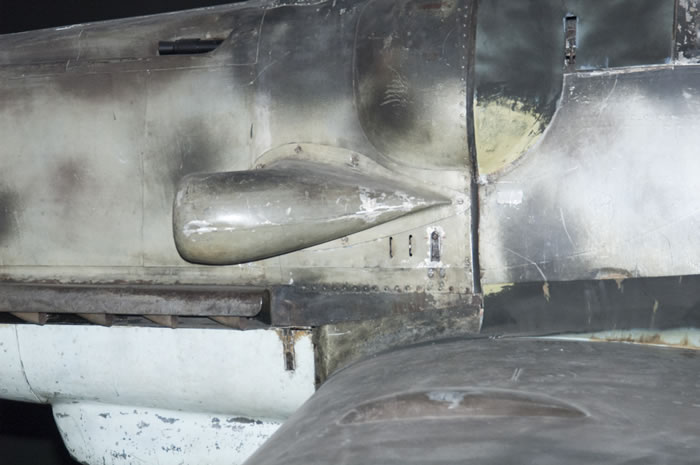
The exhaust stacks are also too tall and too flared, giving a toothy look to the nose. A few minutes attention with a sanding stick should improve this situation.
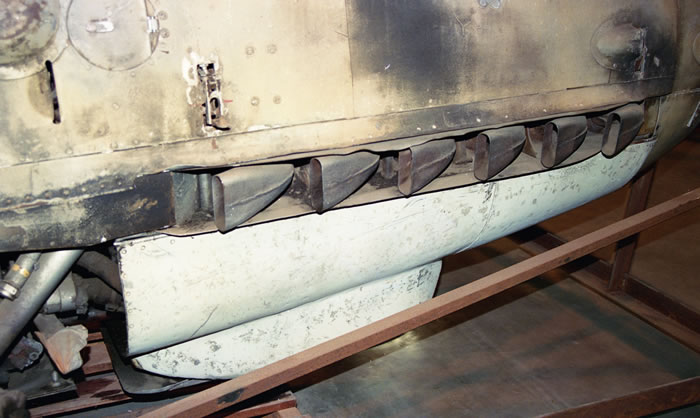
Wheel Wells
According to expert sources, the canvas cover was usually only fitted to the front half of the wheel well on the Bf 109 G-6.
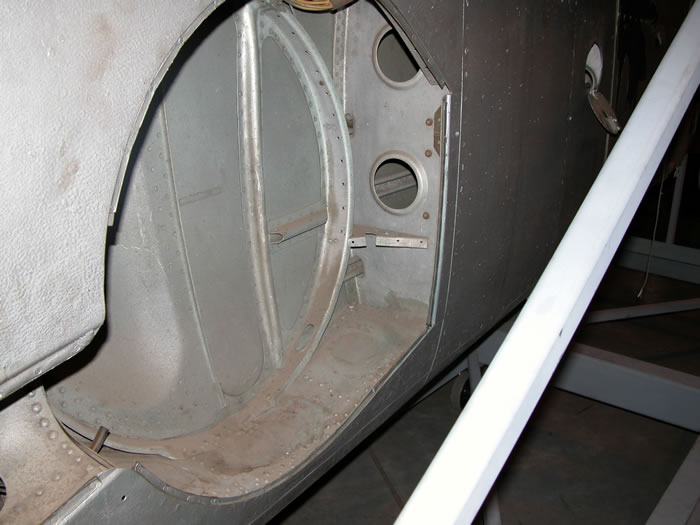
I have included a photograph of a Bf 109 G-6 wheel well so that you can see the structural detail in this area.
V-Shaped Lower Centre Wing Join
This is not so much an error as an odd engineering feature. Instead of a straight join between the bottom rear centre of the wing with the lower fuselage, Eduard has moulded this area as a shallow “V” – i.e. each side in line with the angle of the trailing edge of the wing. This is another fast and easy fix – just fill and sand the join. You don’t even need to rescribe a line!
There have been other issues raised online, including the contours of the oil cooler housing, but I either haven’t really seen the problem or thought that they were too small to worry about.
Dimensional Accuracy
Comparing model kits to published plans and other brands is fraught with danger. Despite definitive statements on various online Forums and published sources, who know what plans and kits are really accurate? This seems to be especially the case with the Messerschmitt Bf 109, where there are some noticeable dimensional differences between published drawings.
Having said that, there is a lot of compelling evidence to show that the Eduard Bf 109 G-6 is oversized. This is particularly clear when comparing the wingspan of the Eduard kit to the Hasegawa G-6. Although it is acknowledged that the Hasegawa fuselage is too short, the wingspan is generally considered to be about right. Each Eduard wing is approximately 4mm longer than the Hasegawa wings – a total of 8mm across the entire span. This is a significant difference.
Tom Cleaver has built this kit and suggested a method to improve the wing span. You can see Tom's build article by following this link.
The fuselage would appear to be a few millimetres too long as well.
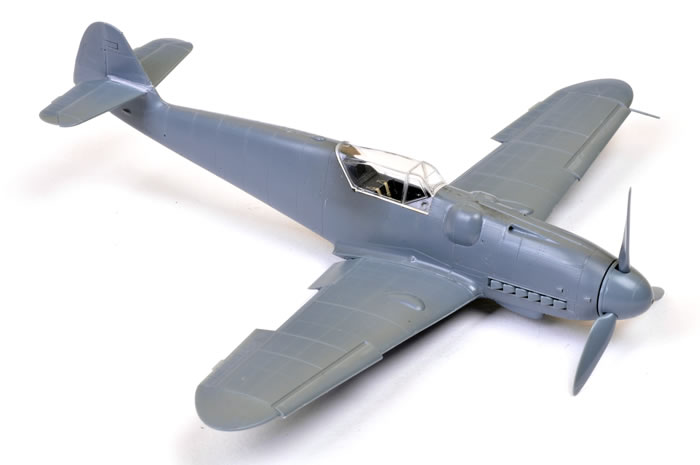
I built one of the test shot kits straight from the box with no additions, corrections or modifications. I did, however, use alternative kit parts including the tall tail and rudder, and the battery box cover.
I can report that construction was fast, and fit was excellent. In fact, I would rate the build as even simpler than the recent Eduard Spitfire kits. The cockpit was particularly impressive, with the photo-etched parts working perfectly alongside the kit plastic.
The kit is not completely idiot proof however, as this idiot proved. I managed to glue the seat backrest upside down on the rear cockpit wall. No excuses – just in too much of a hurry I suppose!

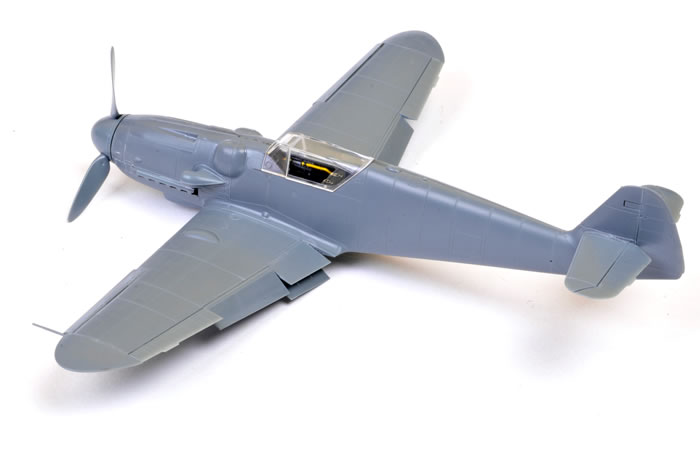
I really liked the use of the clear plastic part for the cockpit fuel line. I masked off the clear inspection panel at the top of the line, and it is really quite prominent in the completed cockpit.
I used the optional shrouded exhaust stack on the port side of the nose (Part No. I 72), which eliminates the tall toothy exhaust problem on that side. Something really does need to be done to slim down the starboard exhausts though.
The only minor trouble spot was a narrow gap between the fuselage and the tall fin on the starboard side. This was quickly filled with Tamiya Surfacer.
At first it looked as if there might be a slight gap at the upper wing root, but a generous brushing of Tamiya Extra Thin Liquid Cement sealed the join nicely.
The only other area where I deviated from the instructions was leaving off the photo-etched grilles on the wing radiator faces. The plastic parts have raised grille patterns moulded in place, and I thought that they looked good enough without the PE parts.
Assessing Eduard’s 1:48 Bf 109 G-6 |
We may think of scale modelling as a single hobby, but in reality it has as many versions as there are modellers themselves.
Different modellers will have different priorities. Some may only want a kit that is easy to build; or crave as much detail as possible; while accuracy will be the most important factor to others.
It is possible to slice and dice the qualities of a model in many different ways, but I tend to assess any kit using the following criteria (in no particular order):
Level of Detail, Moulding Quality, Surface Texture, Kit Engineering (Ease of Construction), Options and Accuracy.
Breaking down my opinion into these categories, here is my assessment of the Eduard 1:48 scale Messerschmitt Bf 109 G-6:
Level of Detail:
4.5 out of 5
The level of detail is excellent straight from the box. The combination of plastic and colour photo-etched parts in the cockpit look great (plastic parts or a BRASSIN after market resin cockpit are also available as alternatives). The wheel well looks great too, with its “pressed” roof integrated into the upper wing half.
Moulding Quality:
4 out of 5
Moulding quality is right up there with the steel-mould mainstream manufacturers. Sprue attachment points are fine, moulding imperfections are rare, and the plastic is pleasant to work with, being neither too soft nor too brittle. Just about the only problem that I found was a single sink mark behind the base of each propeller blade. Some of the sprue attachments are a little bit tricky to clean up without marring the surrounding plastic too (especially the fuselage spine), but the overall moulding quality is excellent.
Surface Texture:
4.5 out of 5
Simply superb. This kit’s surface textures are just as good as the Eduard Spitfire, comprising crisply recessed panel lines, gorgeous subtle rows of rivets and raised detail where appropriate.
Kit Engineering:
4 out of 5
Parts breakdown is clever and fit is generally excellent throughout. There does appear to be a slight gap on the starboard side of the fin, and the rake of the undercarriage is slightly too extreme, but apart from these small issues the kit is a delight to build.
Options:
4 out of 5
The kit provides plenty of handy options, some mentioned in the instructions and others not. Cannon gondola, ETC rack and the 300 litre drop tank are all covered in the instructions, but the inclusion of the tall tail and rudder, tall tail wheel strut and large tail wheel, Erla hood and battery box cover all greatly increase the flexibility of this kit.
Accuracy:
2.5 out of 5
As mentioned above, there are a number of strange detail errors and probable misinterpretations, and it seems certain that the kit is oversized too. Having said that, there is no doubting that this model looks like a Messerschmitt Bf 109 G-6, but those who want a 100% accurate kit will be disappointed by these issues.
Total: 23.5 out of 30 (78.3%)
Of course, any marks and ratings are purely subjective on my part; and furthermore do not reflect the unconscious weightings that individual modellers will apply to certain categories.
We have seen long and sometimes bitter disagreements on the various modelling Forums about the importance or otherwise of the accuracy issues, especially the kit dimensions. However, the simple fact is, these issues are only important if you think they are important. If someone holds a different opinion, they are not wrong. It is simply their interpretation of priorities, and it defines their individual hobby.
For me, the dimensional issues are surprising, especially considering Eduard’s recent track record, but they are not a deal breaker. When I build a model, my hope is that people will forget about the scale and actually think that it is full sized. My models are generally photographed in isolation against either a plain background or a simulated landscape for that very reason.
However, your view may be entirely different, and you are perfectly entitled to it.
I am still not really sure that I can pick the dimensional discrepancies with the naked eye when the completed model is viewed in isolation (with so much online chatter it is hard to know if we are really seeing something or just expecting to see it), but I will be doing a comparative build of the Eduard and Hasegawa Bf 109 G-6 kits in a future issue of Military Illustrated Modeller magazine.
Regardless of the detail and dimensional concerns mentioned here, I think that Eduard’s 1:48 scale Messerschmitt Bf 109 G-6 is still a very nice kit.
It simply blows the opposition away in terms of surface textures, level of detail and included options. The Cartograf decals are also a cut above the rest of the pack. Engineering is sensible, and I can confirm that the model is a fast build with excellent fit. In these respects, Eduard’s Gustav is every bit as good as their recent Spitfires.
Yes, there are a number of detail accuracy issues and the kit is oversized, especially the wing span. These issues will be a game-breaker for some, and irrelevant to others. It really is up to the individual modeller to make up his or her own mind.
I only know that I will be building a bunch of them!
Thanks to Eduard for the sample
Review Text Copyright © 2014 by
Brett Green
Page Created 11 May, 2014
Last updated
27 May, 2014
Back to HyperScale Main Page
Back to Reviews Page |
 Home
| What's New |
Features |
Gallery |
Reviews |
Reference |
Forum |
Home
| What's New |
Features |
Gallery |
Reviews |
Reference |
Forum |