TF-9J (F9F-8T) Cougar
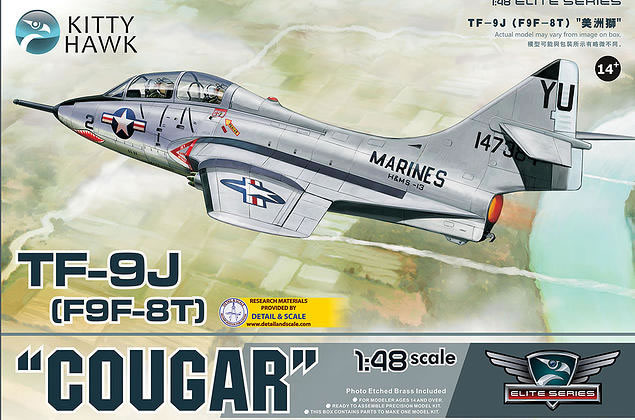
Kitty Hawk Models, 1/48 scale
S u m m a r y |
| Item No. |
Kitty Hawk Models Item No. KH80129 - TF-9J (F9F-8T) Cougar |
| Contents and Media: |
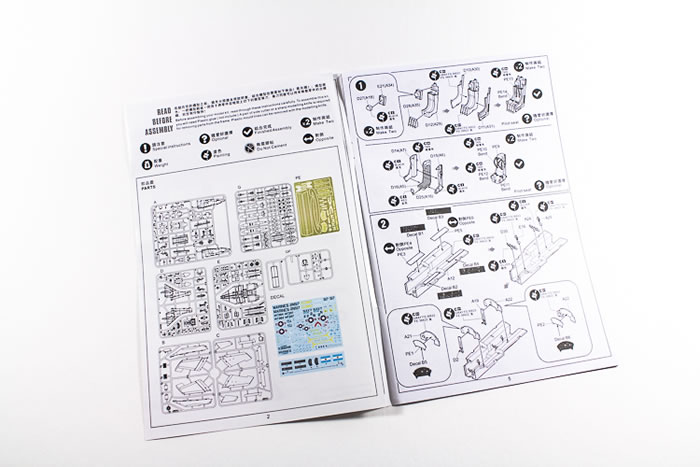
6 sprues, 1 clear sprues, 1 photo etch, 2 decal sheets, nose weight. |
| Scale |
1/48 |
| Price: |
USD$45.95 available online from Pacific Coast Models |
| Review Type: |
FirstLook |
| Advantages: |
Excellent surface detail and fidelity of kit components. Excellent choice of markings. |
| Disadvantages: |
Improvements still to be made by KH particularly in cockpit detail. Flat, dimensionless etch doesn’t quite cut it. |
| Recommendation: |
Great detail for a kit that has not been available previously in this medium. |
Reviewed
by Mick Drover

HyperScale is proudly supported by Squadron.com
Aircraft History
The Grumman F9F/F-9 Cougar was an aircraft carrier-based fighter aircraf for the United States Navy. Based on Grumman's earlier F9F Panther, the Cougar replaced the Panther's straight wing with a more modern swept wing. The Navy considered the Cougar an updated version of the Panther, despite having a different official name, and thus Cougars started off from F9F-6 upward.
The Navy acquired 377 two-seat F9F-8T trainers between 1956 and 1960. They were used for advanced training, weapons training and carrier training, and served until 1974. They were armed with twin 20 mm (.79 in) cannon and could carry a full bombs or missiles load. In the 1962 redesignation, these were called TF-9J.*
Previous Kits
Kittyhawk is a relatively new comer to the modelling scene and in the short time they’ve been around they have delivered some interesting subject matter since the debut of their Starfire. The latest addition to their 1/48 aircraft lineup is the TF-9J Cougar. Collect Aire resin is the only manufacturer to previously release a two seat 1/48 Cougar onto the market albeit in resin and Kittyhawk has now delivered us one in injected plastic to the relief of many. We’ll have a good look at what comes in the kit here.
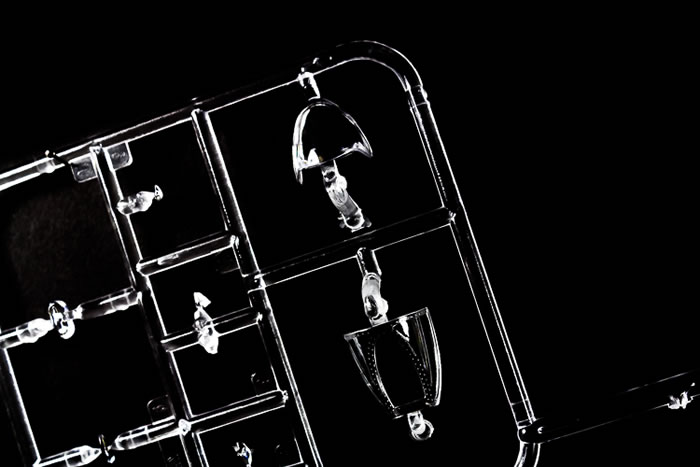
I’ve not had the chance to look at any of Kittyhawk’s previous releases but the first thing that struck me was the extremely fine surface detail adorning the kit plastic. Surface detail I would put on par with late model Tamiya and Hasegawa releases with rivet detail and panel lines crisp and neat with no loss of detail in any areas. Clear parts are free of flaws and appropriately thin for scale while decals are very well printed with excellent colour density. I don’t know how the yellow and white decals will perform over the dark blue options but the decals certainly don’t have any watered down, opaque appearance to them.
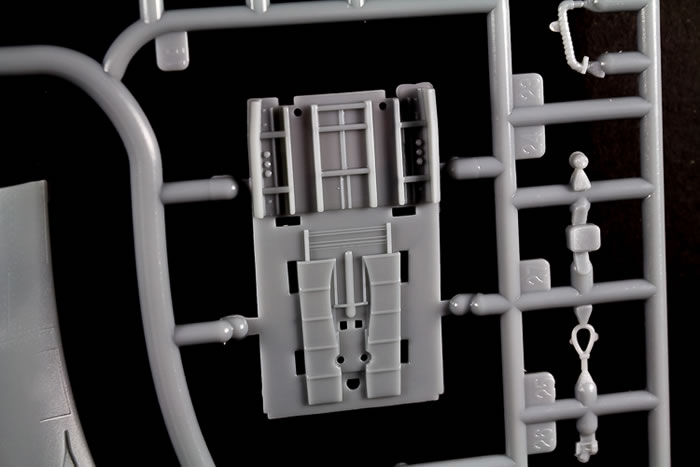
As with all of their previous kits, Kittyhawk continues the tradition of providing a mixed media cockpit with the use of etch and injected plastic to build up the cockpit interior. Both the early Grumman ejection seat and the later Martin - Baker seat are supplied however you’ll need to check references to decide which version to use. The fidelity of the detail on the ejection seats is very nice and the etch belts add some volume to the seat cushions.
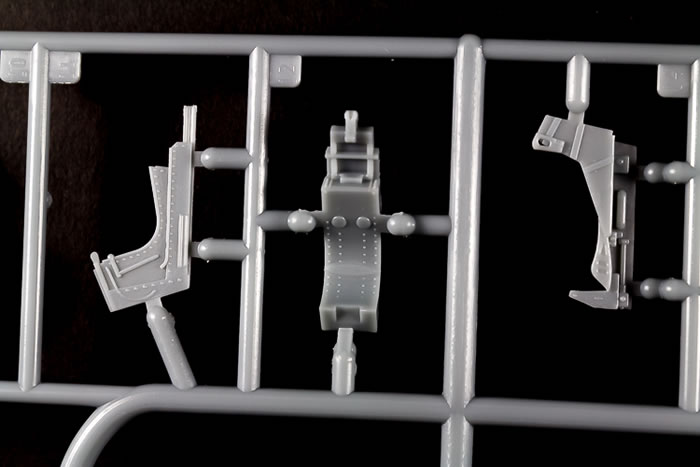
The single piece cockpit tub accommodates the two ejection seats along with the standard flight controls. The side consoles consist of photo etch panels applied to the kit plastic and then overlaid with a decal once painted. Oddly enough the interior fuselage side walls have moulded relief though this will be difficult to see due to the curvature of the fuselage. I find this a contradiction compared to the photo etch side consoles. Why bother providing moulded relief detail on the side walls when it’s really needed on the side instrument consoles? The instrument panel for both the front and rear tubs follows the same photo etch panel and decal overlay construction method. Additional detail including pipework on the rear bulkheads of each cockpit is provided as separate items to be glued in place. The prominent ballistic windscreen separating the fore and aft tubs is supplied.
Once the cockpit and nose wheel sub assemblies are complete they are then sandwiched (don’t forget the nose weight) between the left and right forward fuselage halves. Kittyhawk currently have a single seat option on their ‘soon to be released list’ so this method of construction makes perfect sense. It will allow Kittyhawk to replace the two seat sprue with the components for the singles version. The air-to-air refuelling probe is added at this point though I’ll hold off until the painting stage before adding it.
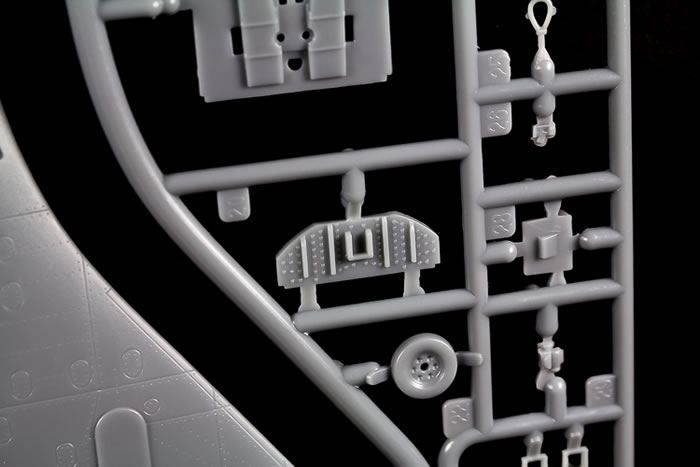
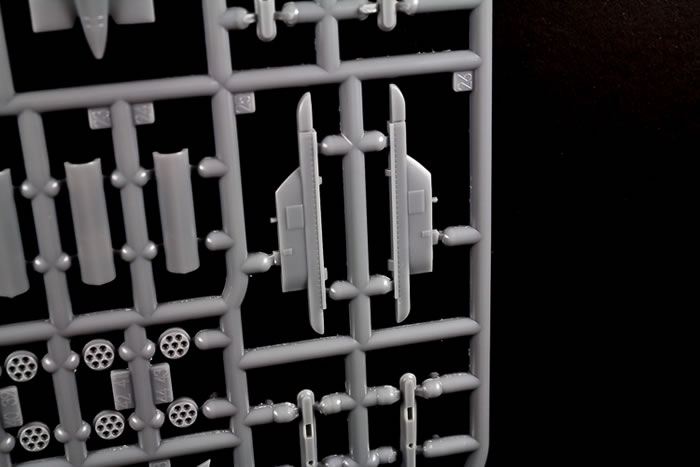
Construction proceeds to a well detailed integral nose undercarriage bay and speed brake well. Detail in this area looks excellent and the perforated air brakes themselves are well rendered in the kit plastic. One noticeable item that builders may wish to modify is the nose wheel leg. The kit appears to provide a compressed only version of the leg. A quick look around the web and it it quickly becomes apparent that a Cougar at rest has a significantly extended nose wheel compared to what is supplied. Perhaps Kittyhawk used this image of the same jet in a graveyard as a reference? It’s also interesting to see this as this jet is one of the kit marking options. The amount of compression for the nose wheel (that isn’t ready for a catapult shot) should look something like this this. Main wheel legs are nicely moulded with solid mounting points. The only thing missing here are the brake lines. If you prefer the detail, some fine solder wire should make quick work of this.
The nose wheel is provided as a two part item though I find this odd as the main wheels have been cast as single piece items. Compounding the issue is the tread pattern that will be lost the from the nose wheel when gluing and cleaning up the seam.
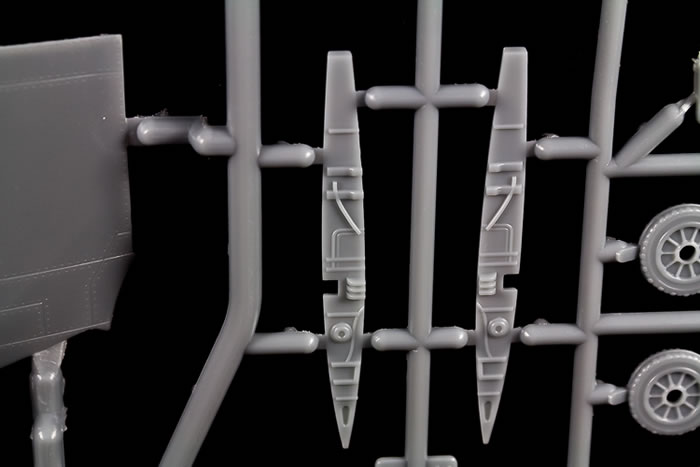
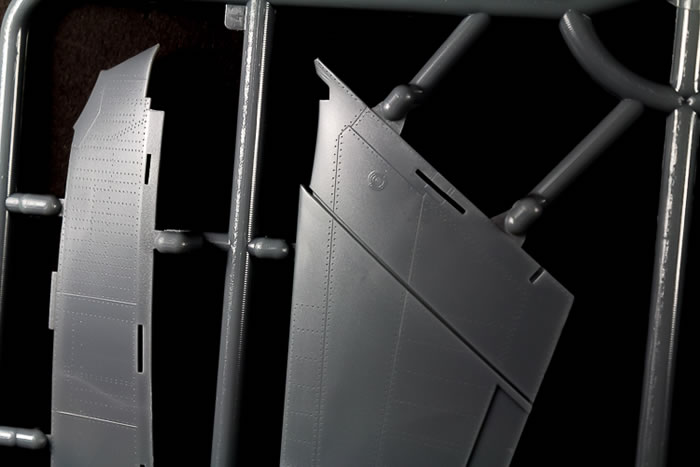
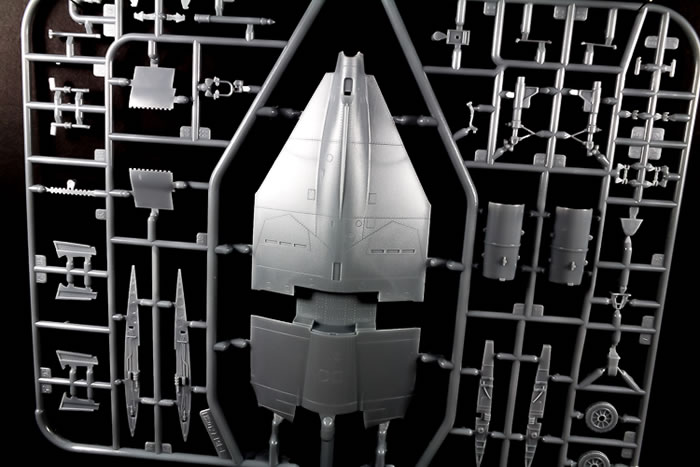
Progression of construction is fairly straight forward from here. Detailed main wheel wells are captured between top and bottom upper wing shoulders. The vertical fin sub assembly then sits over the upper rear fuselage which then leaves the turtle deck area behind the canopy to be filled with a single piece panel.
Wings are the usual top and bottom construction with separate flaps. The exposed wing spars for the wing fold will need to be installed for both the folded and unfold positions. If attaching the wings as folded, I’d probably paint and weather them first before attaching them to the hinge points due to the small gluing area.
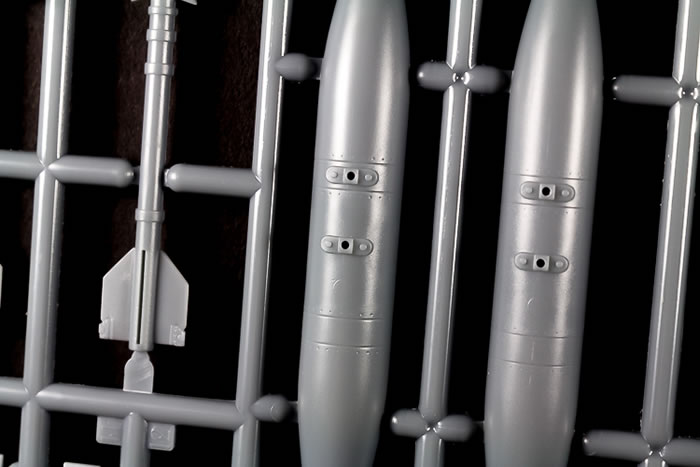
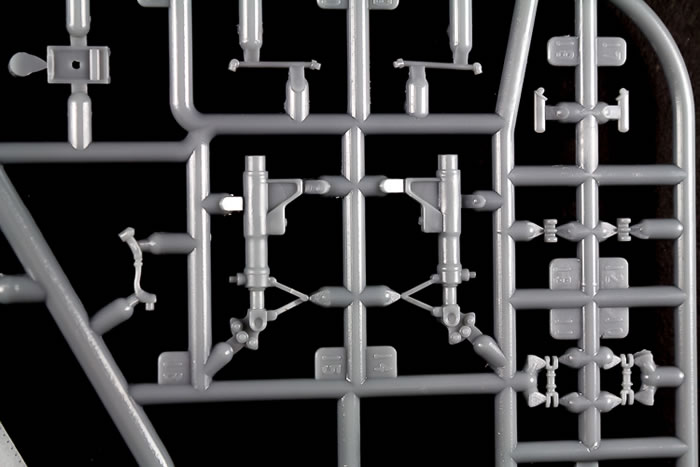
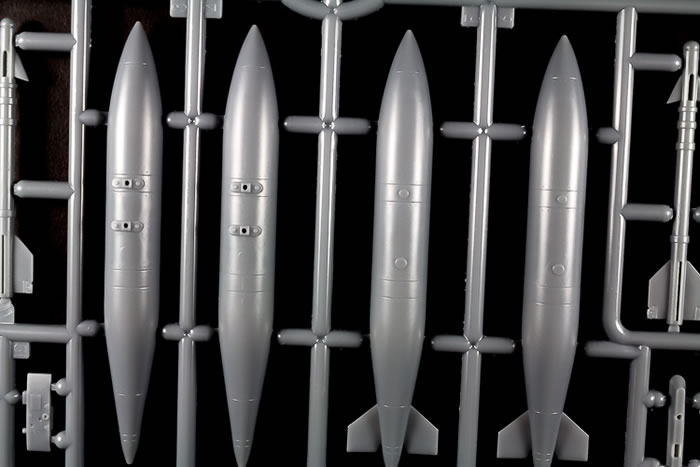
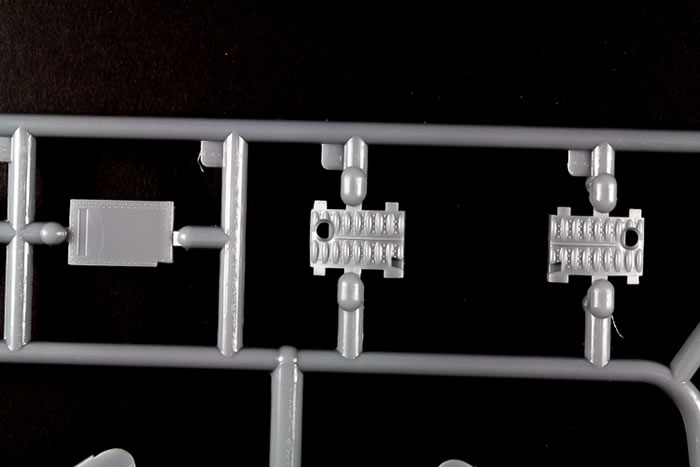
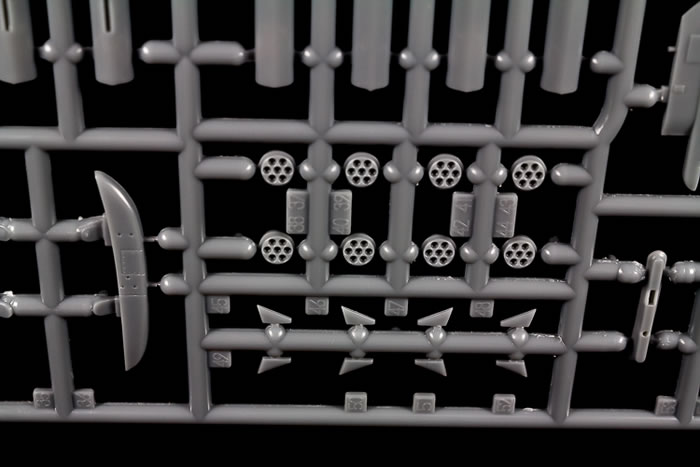
The final major sub assembly to complete is the mating of the nose section to the rear fuselage. Once done, the remainder of the constructions proceeds quickly with items including the underwing pylons, clear parts and undercarriage components added. The final choice of ordinance selection completes the build with options being fuel tanks, AIM-9B Sidewinders and 2.75 inch rockets in 7 shot rocket pods.
Marking Options
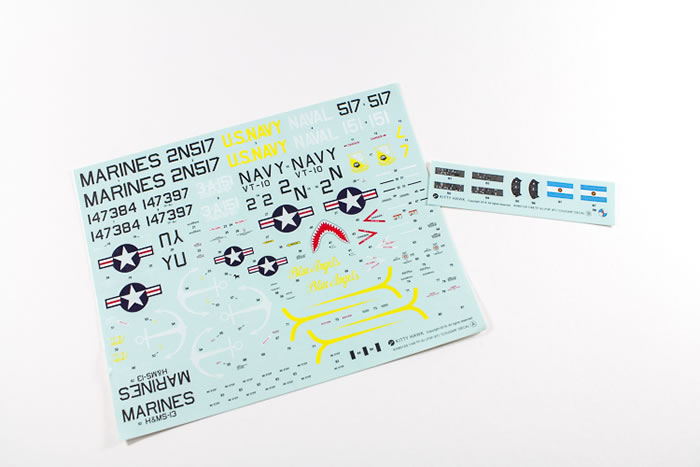
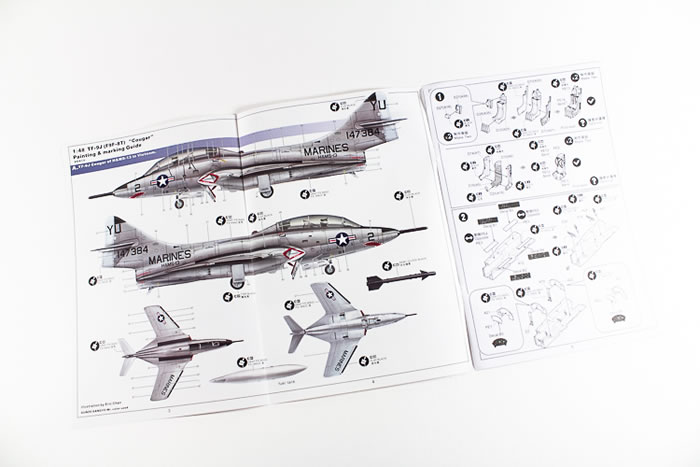
A. #2 with Shark mouth H&MS-13, Vietnam (grey/white scheme)
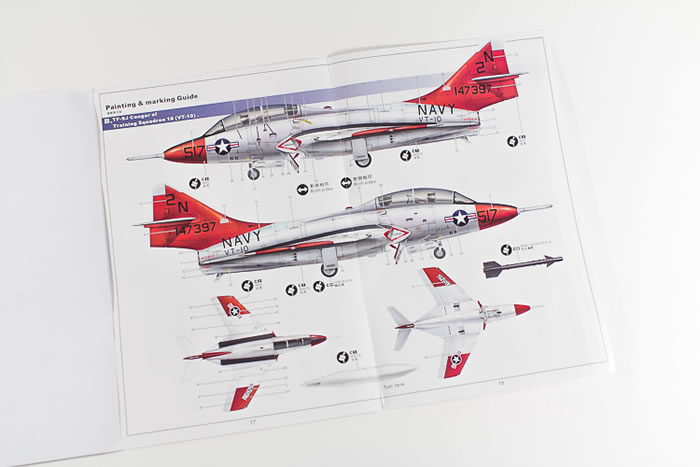
B. #517 Training Squadron 10 (VT-10) (white/red scheme)
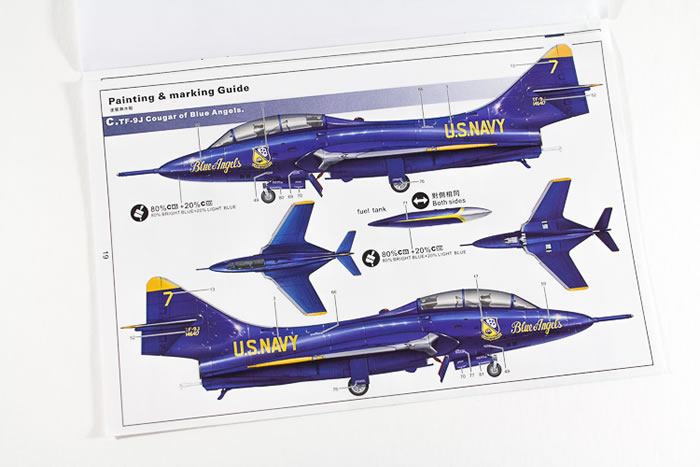
C. #7 Blue Angels (Gloss Sea Blue scheme)
D. #151 Argentine Navy (Gloss Sea Blue scheme)
Considering that there’s not been a previously released injection moulded plastic kit of the two seat previously, this will be a welcomed addition to the Grumman lineup in any modeller’s collection. Care will need to be taken when building and aligning the sub assemblies but that aside, I think Kitthyhawk certainly have come up with a winner. With it’s ‘Tamiyaesque’ surface detail and colourful marking options I can only recommend Kittyhawk’s 1/48 TF-9J Cougar.
* Aircraft history sourced from Wikipedia
Review Text and Images Copyright © 2014 by Mick Drover
Page Created 2 September, 2014
Last updated
4 September, 2014
Back to HyperScale Main Page
Back to Reviews Page

|
 Home
| What's New |
Features |
Gallery |
Reviews |
Reference |
Forum |
Search
Home
| What's New |
Features |
Gallery |
Reviews |
Reference |
Forum |
Search