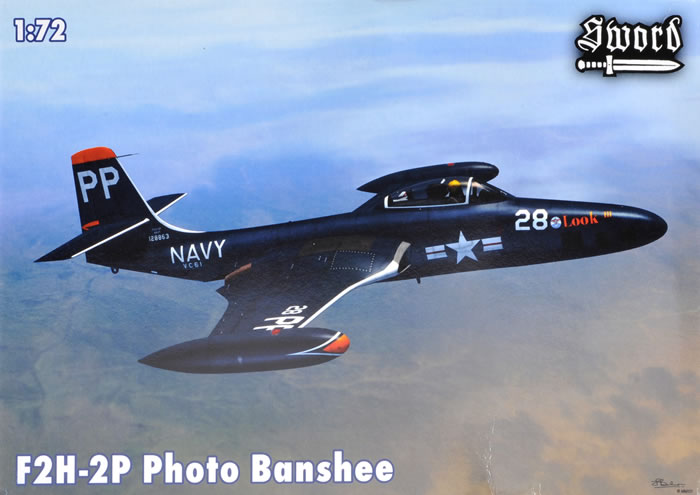
F2H-2P Photo Banshee
Sword, 1/72 scale
S u m m a r y : |
Catalogue Number: |
Sword Kit No. SW72078 - F2H-2P Photo Banshee |
Scale: |
1/72 |
Contents & Media |
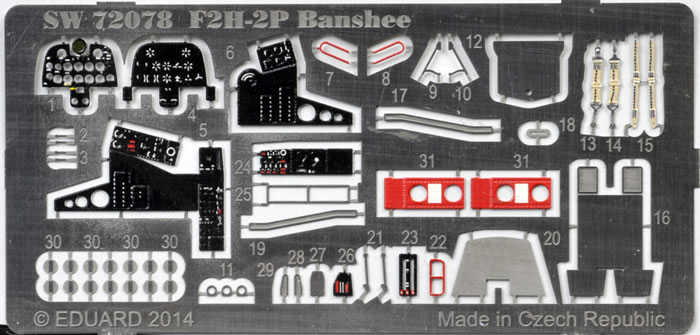
51 grey and 5 clear styrene parts, seven 7 parts, a coloured PE fret of 36 parts, and decals for 2 colour scheme options. |
Price: |
Available on-line from these stockists: |
Box #
Version |
Hannants |
Squadron |
Modelimex |
West Coast
Hobbys |
Hobbylink Japan |
F2H-2P |
£12.49 |
US$29.24 |
€14.58 |
Can$23.50 |
TBA |
F2H-2 |
£12.49 |
US$29.24 |
€14.58 |
Can$23.50 |
TBA |
Click here for currency conversion. |
Review Type: |
First Look. |
Advantages: |
Good production quality, very nice surface and cockpit detail. Good value too, from the right supplier. |
Disadvantages: |
The internal camera detail is slightly compromised with a simulated camera lens for every camera port, rather than just three or four; but this is easily remedied. Paint call-outs are limited to generic colour names. |
Conclusions: |
This limited-run kit has very nice surface and cockpit detail. It is well engineered, all components are produced to high standards, and it looks to be straightforward to build. I think it represents excellent value from the right supplier.
Sword’s Banshee kit has the potential to produce most attractive and interesting model. It is a real advance over the Airfix kit, and equals or even surpasses the much more expensive Pro Resin kit. (Pro Resin do not actually kit a F2H-2P, but I suspect this assessment holds true for their F2H-2 fighter kit).
I definitely recommend this and the F2H-2 fighter boxing. |
Reviewed by
Mark Davies

Sword's 1/72 F2H-2P Photo Banshee and F2H-2 Banshee
are available online from Squadron.com
The Banshee was a development of the FH Phantom, with design planning under way before the Phantom even went into production. It had been planned to incorporate as many Phantom components as possible in the Banshee’s design, but operational demands for heavier armament, more fuel, and other improvements all dictated a design increasingly removed from the Phantom.
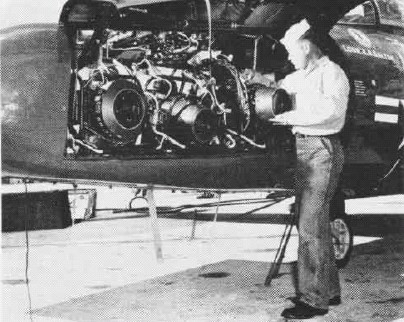
More powerful engines and 20-mm cannons in place of .50”machine guns led to a larger airframe. Unlike the Phantom, the Banshee was equipped with an ejection-seat and cockpit pressurization, and replaced pneumatic systems with electrical ones. However, the Banshee retained sufficient similarities to the Phantom to help McDonnell complete the first F2H-1 in August 1948; only three months after the last FH-1 left the production line.
The more capable F2H-2 soon followed with more powerful engines and improved performance. This variant had a strengthened wing with provision for 200 gal (760 l) detachable wingtip fuel tanks. Four weapon pylons were added to each wing to carry 250-lb bombs and 5” unguided rockets, whilst the F2H-2B was modified to carry a tactical nuclear weapon. The F2H-2N was a night-fighter variant with a 2’10”longer nose enclosing radar, and with the cannons relocated further back behind the radome.
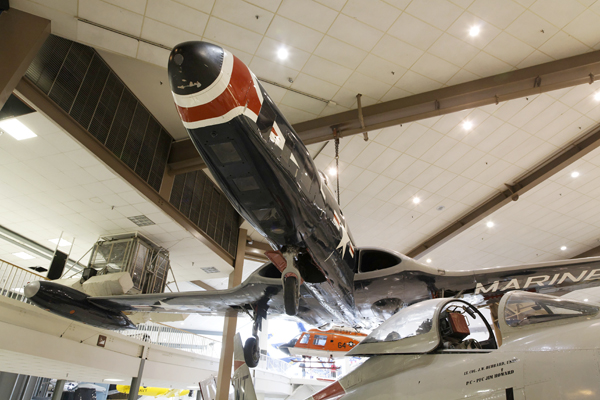
The F2H-2P photoreconnaissance version had with six cameras housed in an extended nose in place of the fighter’s cannons; making it 2’5” longer. It was the USN’s first jet-powered reconnaissance aircraft. The F2H-2Pproved to be a most useful photo-reconnaissance platform due to its relatively long range for a jet aircraft, a maximum operational altitude of 48,500 feet, and good speed. All were factors that made it difficult for other combat aircraft the early 1950s era to intercept it.
The last major development was the F2H-3 & 4, radar-equipped all-weather variants with an 8’longer fuselage than the F2H-2 to carry more fuel, a relocated tailplane moved down from the tailfin to the fuselage with added dihedral. In the F2H-3 & 4, the cannons were mounted further aft and they had an increased weapons payload with eight pylons in total.
A far more detailed background to the F2H Banshee and its history can be found at Wikipedia.
Previous 1/72 Scale F2H Banshee Kits
I am aware of three previous F2H kits in The One True Scale. The Airfix/MPC offered alternative noses for the F2H-2 and F2H-2P, although the latter’s camera ports were solid rather than glazed. Pro Resin offered a F2H-2/2B in one boxing and a F2H-2N night-fighter in another. Modelcraft/Academy offers the later and larger F2H-3. Falcon also offered a vac-form conversion to convert the Airfix F2H-2 to a F2H-3.
The Airfix kit was a reasonable kit for its day, with raised detail and first released in 1980. The Pro resin kits are well detailed with fine recessed panel lines, and are good quality castings. They date from late 2011/early 2012. The Hobbycraft kit has limited and simplified detail (although Obscureco make a nice resin cockpit/nose wheel-well set for it), and has reasonable recessed panel lines. It dates from around the mid-1980s.
Whilst the Pro Resin kits remain very viable as modern resin kits, there remains a clear opportunity for modern injected kits of the F2H-2 (and for an F2H-3/4 as well). Thankfully, Sword has stepped up to cover off the earlier F2H-2 and F2H-2P at least. It is the photoreconnaissance version that this “First Look” addresses, but noses and decals aside, it seems fair to assume that the F-2 H-2 fighter boxing too will share most of the same airframe parts.
Contents
The kit comes in a typically Czech end-opening box with digital artwork on the front. The plastic parts and decals come in a zip-lock bag, with the clear, resin, and coloured PE parts further enclosed in small bags of their own.
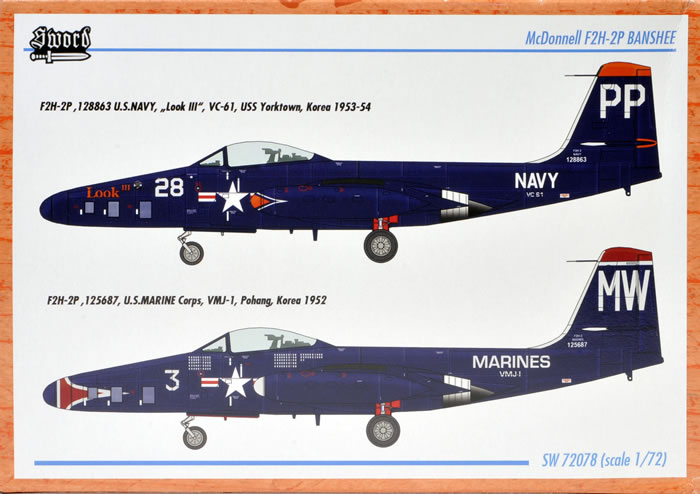
The instructions provide a parts map and easy to follow diagrammatic assembly format. The diagrams are well drawn, and in fact are far better than some mainstream brands. There is also a brief history of the aircraft. Generic paint colours are given in Czech and English, with all other text in English. The painting and decal guides use adequate black & white four-view shaded drawings in the instructions and colour profiles on the rear of the box. I feel that Sword could do better here, and describe the correct colours using USN names, FS-595 equivalents, and/or model paint range cross-references.
The Kit
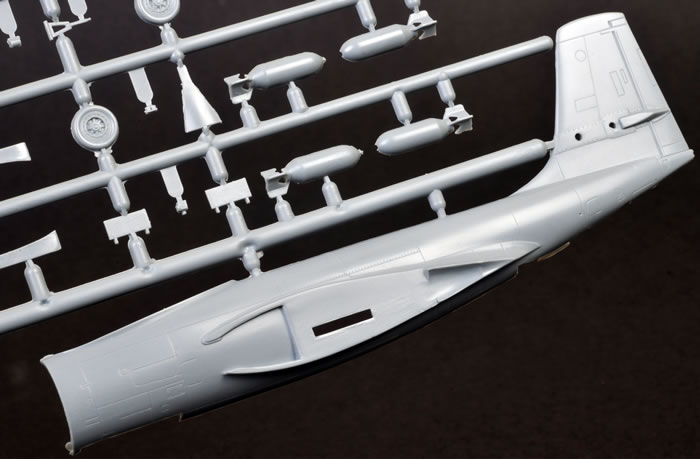
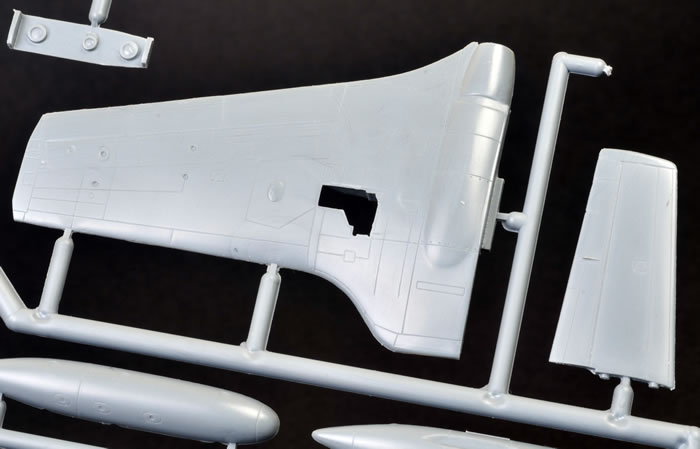
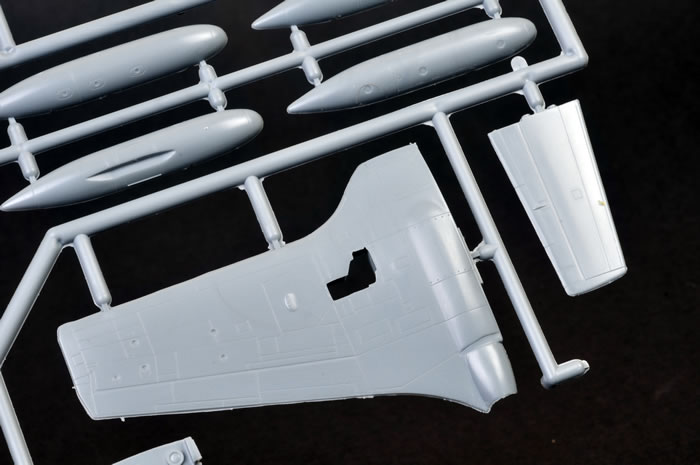
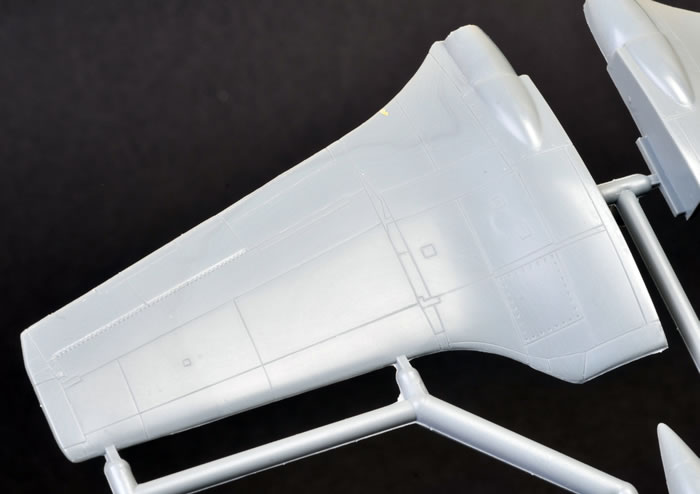
This is a typical Sword kit with cleanly moulded parts, very fine surface detail, and narrow sprue gates. There is just a little flash in places, but this is easy to deal with. Parts break down is largely conventional for the type.
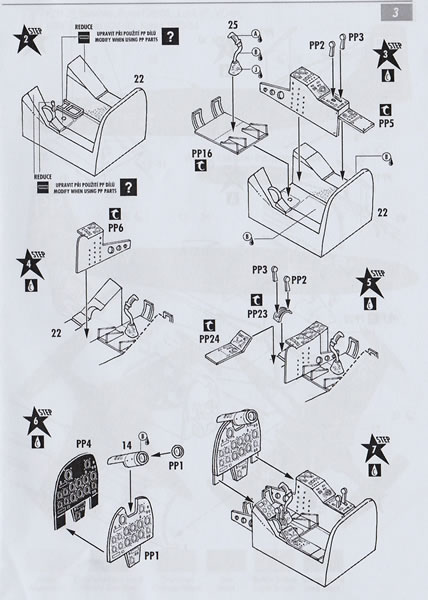
There is a styrene control column and cockpit tub, the consoles of which are decorated with coloured PE, whilst the floor is covered by a PE floor incorporating rudder pedals and footholds. The styrene tub needs to have some raised moulded detail removed in order to receive these PE items. PE also provides the upper portion of the rear cockpit bulkhead.
The instrument panel is coloured PE and topped by a styrene housing for the camera viewing lens. Coloured PE belts, placards, and firing handles garnish the resin ejection-seat, which also has PE leg restraints. There is a choice of styrene or PE cockpit coaming (the latter needs rolling into shape). There are two PE rails that fit to the inside of the fuselage walls at the top-rear of the cockpit opening. I think that the real canopy rides in these, enabling it to slide up and towards the rear when opened.
Cockpit detail is a huge advance on the old Airfix kit; and I feel that whilst Pro Resin’s cockpit may actually have slightly more detail, the effect of Sword’s coloured PE results in a better looking cockpit overall.
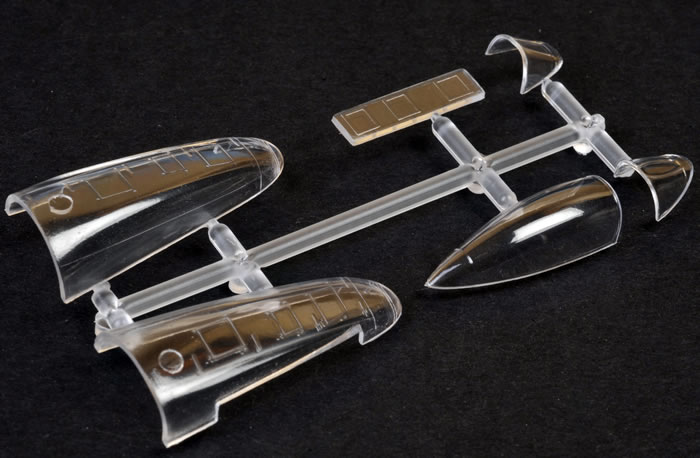
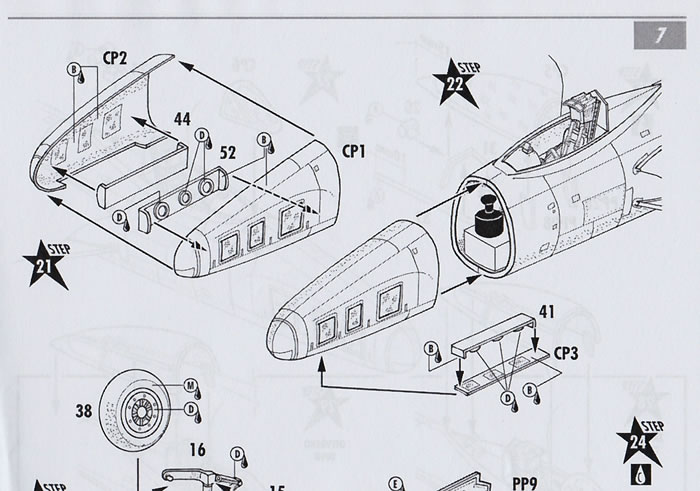
Unlike the F2H-2 fighter boxing, the fuselage halves are sectioned just ahead of the cockpit. The clear recon-nose halves each have a cut-out to receive the recessed bottom panel incorporating three downward facing camera ports. There are three very simple backing plates with simulated camera lenses to fill the interior of this clear nose. These, each fit behind the downward and two side-facing camera ports and blank them off entirely. This detail is a compromise and somewhat inaccurate, as it suggests that there is a camera behind ever port. The focal lengths, and therefore sizes, of the cameras used meant that generally only three or four cameras would be fitted, using either a downward or sideways oblique mounting. The real cameras mounted on a tubular framework, but all that is really needed is to make three basic camera-shaped parts to position one behind the other, allowing for some see-through effect (although some installations blocked this out completely). I have read that each camera window had a cover-plate that was stored in a canvas pocket holder the forward-nose of the aircraft. I am unclear however if these fitted on the interior or exterior face of the ports, or whether or not they were always placed over those not in use.
A simple solution in this scale is to retain the simulated camera lenses of one blanking strip and highlight them with dry-brushing, then remove the lens detail from the other two, painting these matt black to suggest a camera bay filled with equipment.
The instructions would have you add the camera nose to the remainder of the fuselage as a sub-component. However, unless you are very sure of a perfect fit with no step in the join, I would suggest adding each clear nose section to its fuselage half separately before joining the fuselage and nose halves (having first checked the fit of the recessed clear bottom panel). The instructions do advise to add ballast between the camera nose and cockpit to avoid a tail-sitter, but not how much. The fuselage halves enclose the arrestor hook bay, resin nose-wheel bay, and cockpit subassembly. The arrestor hook is nicely done, and can be modelled lowered if whished.
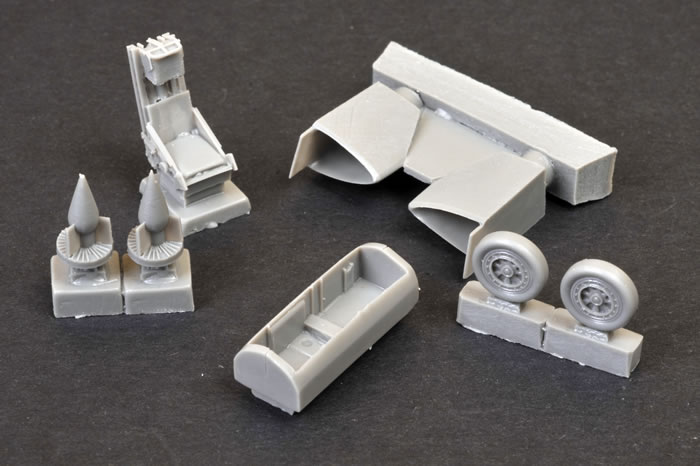
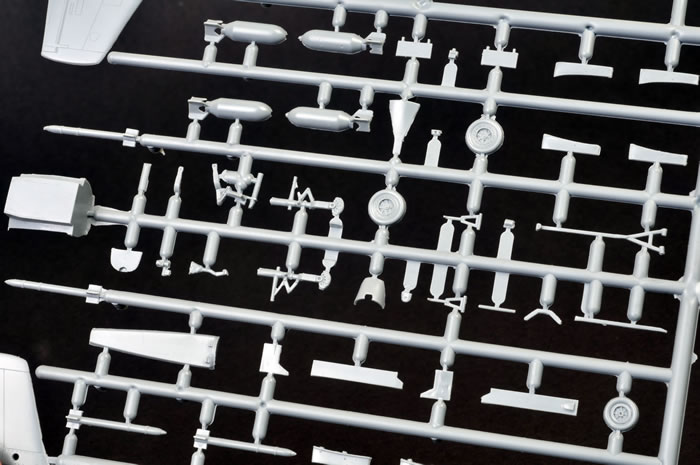
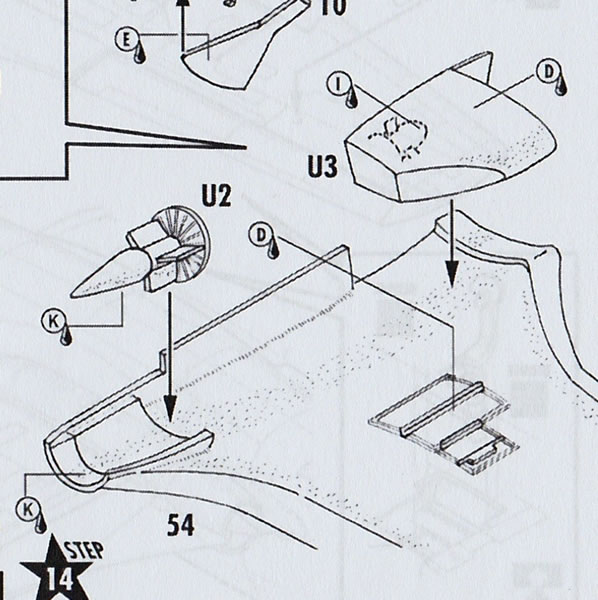
The inner lining of the engine intakes are cast separately from the wing halves. This ensures that internal intake ducts are seamless, plus they have a nice compressor face cast in their rear. The exhaust ducts are moulded with the wings, into which resin turbine sections fit. The wingtip tanks are separate items and include four small PE inspection plates to fit to each. Two payload pylons are also included, but not the night-photography photo-flare pods that they carried, which is a small pity.
The main wheel-wells are very small openings, as the larger doors over the wheels outboard of the wing-fold are moulded closed (per the original, in general). The small open portions include some detail and cleverly moulded sidewalls that achieve an undercut effect. The undercarriage legs are nicely done and quite adequate for the scale, with resin main-wheels replacing the slightly off-centre items included on the sprues. There are coloured PE faces for the inside of two of the styrene undercarriage doors, and PE tie-down hooks for the main-legs.
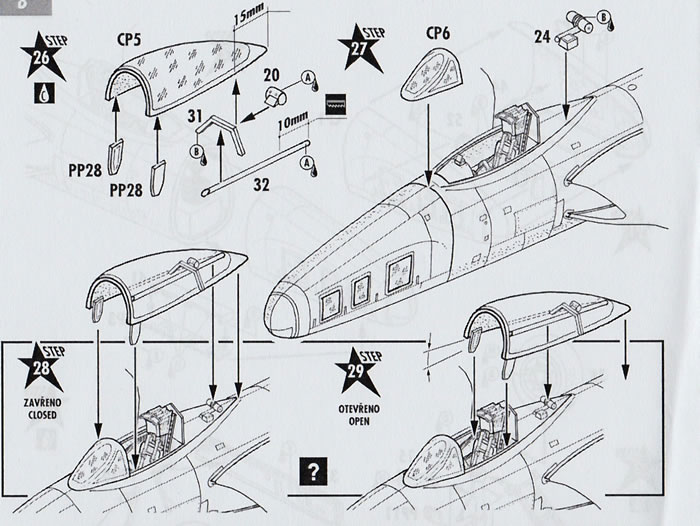
Not much remains to mention; obviously, there is the tailplane, a pitot and nose undercarriage, all of which look fine. Finally, there is the two-piece canopy. This item is clear and thin, and can be modelled open or closed. The kit includes PE parts that ride in the internal canopy slide tracks mentioned earlier. These raise the front of the canopy to the level of the fuselage rear decking as it slides backwards. Some additional parts form the internal framing of the canopy, and what I think is the seat catapult safety pin cable reel. Finally, there is what I think is a small motor and associated gearbox to open the canopy that sits on the fuselage rear decking just under the back part of the canopy.
Overall, I should think that this kit should be a simple and enjoyable one to build.
Marking Options
Eduard prints the decals, and these are well registered with what appears to be good opacity. I am sure they will prove to be excellent to apply based on my experience of this brand.
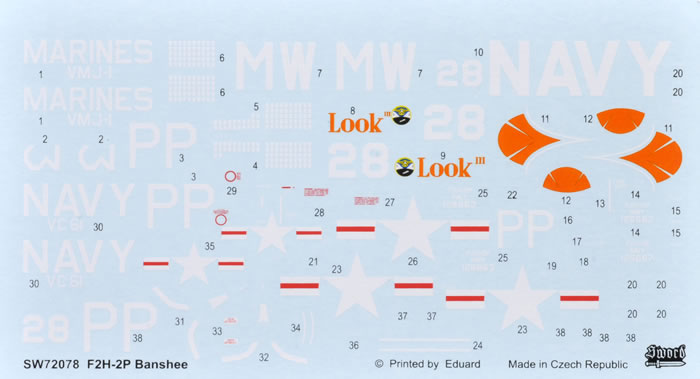
The subjects covered are:
-
128863, USN, “Look III”, VC-61, USS Yorktown, Korea, 1953/54.
-
125687, USMC, VMJ-1, Pohang, Korea, 1952.
This limited-run kit has very nice surface and cockpit detail. It is well engineered, all components are produced to high standards, and it looks to be straightforward to build. I think that it also represents excellent value from the right supplier.
The internal camera detail is slightly compromised with a simulated camera lens for every camera port, rather than just three or four; but this is easily remedied.
Sword’s Banshee kit has the potential to produce most attractive and interesting model. It is a real advance over the Airfix kit, and equals or even surpasses the much more expensive Pro Resin kit. (Pro Resin do not actually kit a F2H-2P, but I suspect this assessment holds true for their F2H-2 fighter kit).
I definitely recommend this and the F2H-2 fighter boxing.
Thanks to Sword Models for this review sample.
Review Text Copyright © 2014 by Mark Davies
Review Images Copyright © 2014 by Brett Green
Page Created 28 February, 2014
Last updated
28 February, 2014
Back to HyperScale Main Page

|
 Home
| What's New | Features | Gallery | Reviews | Reference | Resource Guides | Forum |
Home
| What's New | Features | Gallery | Reviews | Reference | Resource Guides | Forum | 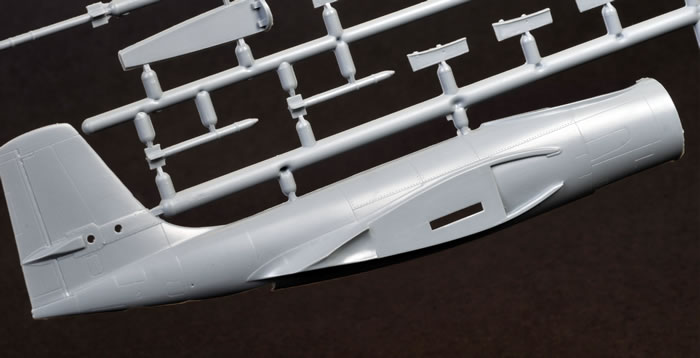
